User Guide
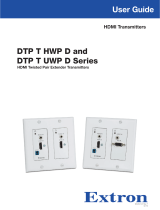
DTPTHWPD and
DTPTUWPD Series
HDMI Transmitters
HDMI Twisted Pair Extender Transmitters
68-2547-01 Rev. G
09 23

Safety Instructions
Safety Instructions • English
WARNING: This symbol, , when used on the product, is intended to
alert the user of the presence of uninsulated dangerous voltage within
the product’s enclosure that may present a risk of electric shock.
ATTENTION: This symbol, , when used on the product, is intended
to alert the user of important operating and maintenance (servicing)
instructions in the literature provided with the equipment.
For information on safety guidelines, regulatory compliances, EMI/EMF
compatibility, accessibility, and related topics, see the Extron Safety and
Regulatory Compliance Guide, part number 68-290-01, on the Extron website,
www.extron.com.
www.extron.com
.
.
I
www.extron.com.

.
Copyright
© 2017-2023 Extron. All rights reserved. www.extron.com
Trademarks
All trademarks mentioned in this guide are the properties of their respective owners.
The following registered trademarks (®), registered service marks (SM), and trademarks (TM) are the property of RGBSystems, Inc. or Extron (see the
current list of trademarks on the Terms of Use page at www.extron.com):
Registered Trademarks (®)
Extron, Cable Cubby, ControlScript, CrossPoint, DTP, eBUS, EDID Manager, EDID Minder, eLink, Flat Field, FlexOS, Glitch Free, GlobalConfigurator,
GlobalScripter, GlobalViewer, Hideaway, HyperLane, IPIntercom, IPLink, KeyMinder, LinkLicense, LockIt, MediaLink, MediaPort, NAV,
NetPA, PlenumVault, PoleVault, PowerCage, PURE3, Quantum, ShareLink, Show Me, SoundField, SpeedMount, SpeedSwitch, StudioStation,
SystemINTEGRATOR, TeamWork, TouchLink, V-Lock, VN-Matrix, VoiceLift, WallVault, WindoWall, XPA, XTP, XTPSystems, and ZipClip
Registered Service Mark(SM) : S3 Service Support Solutions
Trademarks (™)
AAP, AFL (Accu-RATEFrameLock), ADSP(Advanced Digital Sync Processing), AVEdge, CableCover, CDRS(ClassD Ripple Suppression),
CodecConnect, DDSP(Digital Display Sync Processing), DMI (DynamicMotionInterpolation), DriverConfigurator, DSPConfigurator, DSVP(Digital
Sync Validation Processing), EQIP, Everlast, FastBite, Flex55, FOX, FOXBOX, IP Intercom HelpDesk, MAAP, MicroDigital, Opti-Torque,
PendantConnect, ProDSP, QS-FPC(QuickSwitch Front Panel Controller), RoomAgent, Scope-Trigger, SIS, SimpleInstructionSet, Skew-Free,
SpeedNav, Triple-Action Switching, True4K, True8K, Vector™ 4K, WebShare, XTRA, and ZipCaddy

FCC Class A Notice
This equipment has been tested and found to comply with the limits for a Class A digital
device, pursuant to part15 of the FCC rules. The ClassA limits provide reasonable
protection against harmful interference when the equipment is operated in a commercial
environment. This equipment generates, uses, and can radiate radio frequency energy and,
if not installed and used in accordance with the instruction manual, may cause harmful
interference to radio communications. Operation of this equipment in a residential area is
likely to cause interference. This interference must be corrected at the expense of the user.
ATTENTION: The Twisted Pair Extension technology works with shielded twisted
pair (STP) cables only. To ensure FCC Class A and CE compliance, STP cables and
STP Connectors are also required.
For more information on safety guidelines, regulatory compliances, EMI/EMF
compatibility, accessibility, and related topics, see the Extron Safety and
Regulatory Compliance Guide on the Extron website.

Conventions Used in this Guide
Notifications
The following notifications are used in this guide:
CAUTION: Risk of minor personal injury.
ATTENTION : Risque de blessuremineure.
ATTENTION:
• Risk of property damage.
• Risque de dommages matériels.
NOTE: A note draws attention to important information.
Software Commands
Commands are written in the fonts shown here:
^AR Merge Scene,,Op1 scene 1,1 ^B 51 ^W^C
[01] R 0004 00300 00400 00800 00600 [02] 35 [17] [03]
E X! *X1&* X2)* X2#* X2! CE}
NOTE: For commands and examples of computer or device responses mentioned
in this guide, the character “0” is used for the number zero and “O” is the capital
letter “o.”
Computer responses and directory paths that do not have variables are written in the font
shown here:
Reply from 208.132.180.48: bytes=32 times=2ms TTL=32
C:\Program Files\Extron
Variables are written in slanted form as shown here:
ping xxx.xxx.xxx.xxx —t
SOH R Data STX Command ETB ETX
Selectable items, such as menu names, menu options, buttons, tabs, and field names are
written in the font shown here:
From the File menu, select New.
Click the OK button.
Specifications Availability
Product specifications are available on the Extron website, www.extron.com.
Extron Glossary of Terms
A glossary of terms is available at https://www.extron.com/technology/glossary.aspx.


viiExtron DTP T HWP D and DTP T UWP D Series • Contents
Contents
Introduction ................................................1
About this Guide .................................................. 1
Terms Used in this Guide ................................. 1
About the DTPTHWPD and
DTPTUWPD Extenders .................................... 1
Twisted Pair Cable Advantages ........................ 2
Control Communications ................................. 2
Transmission Distance ..................................... 2
Features .............................................................. 2
Installation and Operation............................ 3
Mounting the Transmitter ..................................... 3
UL and Safety Guidelines ................................. 3
Site Preparation and Wall Box Installation ........ 4
Mud Ring Installation ....................................... 5
Final Installation ............................................... 6
DTPTHWPD Connections ................................. 6
Front Panel ...................................................... 6
Rear Panel ....................................................... 7
DTPTUWPD Connections ................................. 8
Front Panel ...................................................... 8
Rear Panel ....................................................... 9
Twisted Pair Recommendations for
DTP Communication ........................................ 10
Supported Cables ......................................... 10
Cable Recommendations .............................. 10
Power Supply Wiring ......................................... 11
RS-232 and IR Connector Wiring ...................... 12
Remote RS-232 and Contact Closure
Connectors................................................... 12
IR Control Connector ..................................... 12
Over DTP RS-232 Connector ........................ 13
Operation .......................................................... 13
Transmitter LEDs ........................................... 13
System Operation .......................................... 14
Audio Configuration ....................................... 14
Remote Control .........................................15
Contact Closure Control .................................... 15
Simple Instruction Set Control ........................... 15
Host-to-Extender Communications ................ 15
Extender-Initiated Messages .......................... 16
Error Responses ............................................ 16
Timeout ......................................................... 16
Using the Command and Response Table ..... 16
Symbol Definitions ......................................... 17
Command and Response Table for
SIS Commands ................................................ 18
Reference Information ...............................21
Decorator-Style Wallplate Template
Dimensions ...................................................... 21
Safety Instructions ................................................ ii
FCC Class A Notice .............................................iv
Conventions Used in this Guide ............................v
Notifications ...................................................... v
Software Commands ............................................v
Specifications Availability ......................................v
Extron Glossary of Terms ......................................v


Extron DTP T HWP D and DTP T UWP D Series • Introduction 1
Introduction
• About this Guide
• About the DTPTHWPD and DTPTUWPD Extenders
• Features
About this Guide
This guide provides instructions for experienced, professional installers to install, operate,
and configure the Extron DTPTHWPD and DTPTUWPD family of High-Definition
Multimedia Interface (HDMI®) and VGA Extenders.
Terms Used in this Guide
The terms “extender” and “transmitter” are used interchangeably in this guide to refer to all
of the DTPTHWPD and DTPTUWPD models.
About the DTPTHWPD and DTPTUWPD Extenders
The Extron DTPTHWPD and DTPTUWPD extenders are a family of HDMI and
VGA transmitters (see figure 1) that are housed in enclosures that can be mounted in
Underwriters Laboratories (UL) standard wall boxes with decorator-style faceplates. Paired
with a compatible DTP 230 or 330 receiver, they extend the usable distance of HDMI digital
video, VGA analog video (UWP models only), and RS-232, IR, or both control signals over
one shielded twisted pair (STP) cable. The extenders also route and embed audio.
AUTO SW
CONFIG
IR OUT
HDMI IN
AUDIO IN
S
G
HDCP
1
HDMI IN
AUDIO IN
HDCP
1
2
AUTO SW
CONFIG
IR OUT
HDMI IN
AUDIO IN
S
G
HDCP
1
AUDIO IN
VGA IN
TLP 1000TV
IPCP 505
IN1608
DTP HDMI 230 Rx
Projector
100-240V ~ -- A MAX
1
2
CONFIGURABLE
HDMI HDMI
5
6
78
C
RS-232 IR
RS-232 IR
Tx Rx Tx RxG
Tx Rx Tx RxG Tx Rx Tx RxG
HDMI
A
B
3
4
INPUTS OUTPUTS
Tx Rx
RS-232
G
LAN
2x25W(8Ω)/2x50W(4Ω)
RESET
AUDIO INPUTS OUTPUTS
REMOTE
LL1R R
L2 R
L
3
R
CLASS 2 WIRING
L4R
L5R
+48V
+48V
12
LR
VARIABLE
IN1608 SA
2
MIC/LINE
L6R
SIG LINK
DTP IN
SIG LINK
DTP IN
SIG LINK
DTP OUT
50/60 Hz
RS-232 IR
OVER DTP
OVER DTP
OVER DTP
AMPLIFIED OUTPUT
VOLUME
SCALING PRESENTATION SWITCHER
IN1608
INPUTS
1
HDCP
SIGNAL
OUTPUTS
ENTER
MENU
Extron
2 3 4 5 6 7 8 A B C
INPUTS
1 2 3 4 5 6 7 8
CONFIG
Extron
DTP T UWP 232 D Tx
Transmitter
Extron
DTP T HWP 232 D Tx
Transmitter
Ethernet
A Typical DTP T HWP 232 D and DTP T UWP 232 D Application
Network
LR
POWER
12V
0.7A MAX
AUDIO
SIG LINK
DTP IN
OUTPUTS
XTP DTP 24 Cable
230' (70m)
XTP DTP 24 Cable
230' (70m)
XTP DTP 24 Cable
230' (70m)
HDMI
12345678
100
LINK
ACT
COM
IR/S
TX
RX
TX
RX
RTS
CTS
R
5
1
6
2
7
3
8
4
RELAY FLEX
I/O
5
1
6
2
3
1
4
2
eBUS
ACT LIMIT
OVER
SWITCHED
12VDC
3
1
4
OVER
2
LIMIT
IR
7
3
8
4
IPCP 505
Figure 1. A Typical Transmitter and Receiver Application
1

Extron DTP T HWP D and DTP T UWP D Series • Introduction 2
DTPTHWPD and DTPTUWPD systems consist of a transmitter (Tx) and a receiver
(Rx). The transmitters and corresponding compatible receivers are sold separately. Each
purchased transmitter is shipped with a single external desktop 12 VDC power supply that
accepts 100 to 240 VAC, 50-60 Hz input. A single power supply connected to either the
transmitter or a compatible receiver can power both units through the twisted pair cable that
links the units.
Twisted Pair Cable Advantages
Twisted pair cable is much smaller, lighter, more flexible, and less expensive than coaxial
or HDMI cable. These transmitter and receiver twisted pair (TP) products make cable runs
simpler and less cumbersome. Termination of the cable with RJ-45 connectors is simple,
quick, and economical (see Twisted Pair Recommendations for DTP Communication
on page10 for more information).
NOTE: Do not use Extron UTP23SF-4 Enhanced Skew-Free AV UTP cable or STP201
cable to link the transmitter and receiver. The DTP T HWP and UWP 232 and 332 do
not work properly with these cables.
Control Communications
The RS-232 or infrared (IR) communications are pass-through only. The transmitter and
receiver do not generate or respond to these signals.
Transmission Distance
The maximum transmission distance is determined by the resolution of the signal and the
twisted pair cable, graphics card, and display used in the system.
• DTP T HWP and UWP 232 D transmitters can transmit 720p, 1080i or 1080p HDTV
video signals up to 230 feet (70 meters) over STP cable.
• DTP T HWP and UWP 332 D transmitters can transmit 720p, 1080i or 1080p HDTV
video signals up to 330 feet (100 meters) over STP cable.
Features
• Transmits HDMI signals over one STP cable (HWP models) — Twisted pair cables
provide an economical, easily installed cable solution.
• Transmits HDMI or VGA signals over one STP cable (UWP models) — Twisted
pair cables provide an economical, easily installed cable solution.
• Supports DDC and HDCP transmission — The transmitters fully support long
distance transmission of the DDC and HDCP signals.
• Control communications pass-through — Bidirectional RS-232, IR, or both control
signals can be transmitted alongside the HDMI signal, so that the remote display can be
controlled without the need for additional cabling.
• Analog stereo audio embedding — Analog stereo audio signals can be selectively
embedded onto the digital video output signal and transported over DTP. The HDMI
inputs can be set to pass the embedded digital audio, embed the analog audio, or to
automatically embed the analog audio when no digital audio is detected.
• External 100 VAC to 240 VAC, 50-60 Hz, international power supply — Included
with transmitters.
• Remote powering of the transmitter or receiver — Only one power supply is
necessary to power both devices.

Extron DTP T HWP D and DTP T UWP D Series • Installation and Operation 3
Installation and
Operation
This section describes the installation and the operation of the extenders, including:
• Mounting the Transmitter
• DTPTHWPD Connections
• DTPTUWPD Connections
• Twisted Pair Recommendations for DTP Communication
• Power Supply Wiring
• RS-232 and IR Connector Wiring
• Operation
Mounting the Transmitter
ATTENTION:
• Installation and service must be performed by authorized personnel.
• L’installation et l’entretien doivent être effectués par le personnel autorisé
uniquement.
• The unit must be installed in accordance with the National Electrical Code and
with local electrical and safety codes.
• L’unité doit être installée conformément au National Electric Code et aux normes
électriques et de sécurité locales.
The transmitters can be installed in a two-gang electrical wall box, or with a mud ring with a
decorator-style wallplate cover (supplied).
UL and Safety Guidelines
The following UL guidelines pertain to the installation of the decorator-style wallplate
transmitters into a wall or furniture.
• These units are not to be connected to a centralized DC power source or used beyond
their rated voltage range.
• These units must be installed in UL-listed wall boxes.
• These units must be installed in a UL-listed junction box with a UL-listed faceplate.
• This product is intended to be supplied by a power source marked “Class 2” or “LPS”
rated 12 VDC, minimum 1.0 A

Extron DTP T HWP D and DTP T UWP D Series • Installation and Operation 4
Site Preparation and Wall Box Installation
Choose a location that allows cable runs without interference. Allow enough depth for both
the wall box and the cables. Install the cables into the wall, furniture, or conduits before
installing the wallplate.
NOTE: The extender units are very deep and have connectors on the back side. Extron
recommends a 2-gang wall box that has a depth of at least 3.0 inches (7.6 cm) to
accommodate the connectors and cables.
To install a new wall box, perform steps 1 through 9. If a suitable wall box is already
installed, perform steps 6 through 9 on the next page. UL Listed wall boxes are required.
1. If a wall box is not available to use for a template, use the Decorator-Style Wallplate
Template Dimensions on page21 to create a template. If installing directly into
furniture, cut out the center portion of the template.
2. Place the wall box (or the full size template) against the installation surface, and mark
the opening guidelines.
3. Cut out the material from the marked area.
4. Insert the wall box into the opening. The rear connectors on the box or wallplate should
fit easily into the opening. Enlarge or smooth the edges of the opening if needed.
5. Secure the wall box with nails or screws, leaving the front edge flush with the outer wall
or furniture surface (see figure2).
NOTES:
• If attaching the wall box to wood, use four #8 or #10 screws or 10-penny
nails. A minimum of 0.5 inch (1.3 cm) of screw thread must penetrate the
wood.
• If attaching the wall box to metal studs or furniture, use four #8 or #10
self-tapping sheet metal screws or machine bolts with matching nuts.
Signal Output
Cable
Cable
Clamp
Decorator-Style Faceplate
Extron
DTP UWP 232 D
Extron
DTP HWP 232 D
Screws or
Nails
W
all opening is
flush with edge of box.
Wall Stud
Signal Output
Cable
Cable
Clamp
Decorator-Style Faceplate
Screws or
Nails
Wall opening is
flush with edge of box.
Wall Stud
AUTO SW
CONFIG
IR OUT
HDMI IN
AUDIO IN
S
G
HDMI IN
AUDIO IN
HDCP
1
AUTO SW
CONFIG
IR OUT
HDMI IN
AUDIO IN
S
G
HDCP
1
AUDIO IN
VGA IN
Figure 2. Installing the Wall Box and Mounting the Unit
2

Extron DTP T HWP D and DTP T UWP D Series • Installation and Operation 5
6. Feed the twisted pair cables and, if applicable, the power cables through the opening
and through the wall box punch-out holes, securing them with cable clamps to provide
strain relief.
NOTES:
• In order to fit in the wall box, the twisted pair cables and RJ-45 connectors
should not have a boot installed.
• One power supply can power both the transmitter and the receiver, so only
one unit needs a power supply (see Power Supply Wiring on page11).
7. Trim back and insulate exposed cable shields with heat shrink to reduce the chance of
short circuits.
To prevent short circuits, the outer foil shield can be cut back to the point where the
cable exits the cable clamp.
8. Connect the cables to the rear of the unit (see figure6 on page7 for details).
9. Connect front panel devices (see Front Panel starting on page6 for details), restore
the power supply, and test the transmitter and receiver system. Make any cabling
adjustments before final installation, as the cables will be inaccessible afterwards.
Mud Ring Installation
1. Using the mud ring as a guide, mark the edges and cut out the material within the
marked area.
2. Insert the mud ring into the opening, rotate and secure the locking arms with the
supplied screws shown in figure3.
3. Follow steps 6 through 9 of Site Preparation and Wall Box Installation starting on
page4 and Final Installation on page6.
Wall Mounting
Mudring
Wall
Figure 3. Installing the Mud Ring
3

Extron DTP T HWP D and DTP T UWP D Series • Installation and Operation 6
Final Installation
After testing and making any adjustments, do the following:
1. At the power outlet, unplug the power supply.
NOTE: One power supply can power both the transmitter and the receiver (see
Power Supply Wiring on page11).
2. Mount the transmitter into the wall box or mud ring and attach the supplied decorator-
style faceplate to the unit (see figure2 on page4).
3. At the power outlet, reconnect the power supply. This powers up both units.
DTPTHWPD Connections
Front Panel
AUTO SW
CONFIG
IR OUT
HDMI IN
AUDIO IN
G
S
HDCP
1
AUDIO IN
VGA IN
Extron
AUTO SW
CONFIG
IR OUT
HDMI IN
AUDIO IN
G
S
HDCP
1
2HDMI IN
AUDIO IN
Extron
DTP T HWP 232/332 D
Front Panel
DTP T UWP 232/332 D
Front Panel
A
B
D
A
B
C
E
B
AA
C
D
Figure 4. DTPTHWPD Front Panel Ports
A Audio input port — Connect an unbalanced stereo
audio source to this 3.5 mm mini stereo jack. Figure 5
shows how to wire the audio plug.
B HDMI input port — Connect an HDMI cable between
this port and the HDMI output port of the digital video
source.
C Mini USB port — Connect a male USB Mini-B cable
to this port for SIS configuration and firmware updates.
Sleeve ( )
Ring
Right (
-
)
Tip
Left (+)
Figure 5. Audio Wiring
D IR output port — Connect an IR device to this 2-pole, 3.5 mm captive screw
pass-through port for IR control (see IR Control Connector on page12 for IR
connector wiring instructions).
4
5

Extron DTP T HWP D and DTP T UWP D Series • Installation and Operation 7
Rear Panel
R
DTP OUTREMOTEOVER
DTP SIGLINK
RS-232
CONTACT
Tx Rx
Tx Rx G
POWER
12V
A MAX
0.9
+–
G1 2
A/S
DTP T HWP/UWP 232/332 D
Rear Panel
E
A
B
C
D
Figure 6. DTPTHWPD Rear Panel Ports
A DC power input port — Plug the included external 12 VDC power supply into either
this 2-pole port (see Power Supply Wiring on page11 to wire the power connector)
or the power input port on the receiver (see the user guide of your receiver for more
information).
B Over DTP control port — Connect an RS-232 device to this 3-pole, 3.5 mm captive
screw port for pass-through RS-232 control (see Over DTP RS-232 Connector on
page13 to properly wire the RS-232 connector).
C Remote (RS-232 and contact closure) control port — Connect an RS-232 device,
contact closure device, or both to this 5-pole, 3.5 mm captive screw port to control
switching on the unit (see Remote RS-232 and Contact Closure Connectors on
page12 to properly wire the Remote connector).
• RS-232 — To control the unit through this port, connect an RS-232 device and
configure it as follows: 9600 baud rate, 8 data bits, 1 stop bit, no parity.
• Contact — Momentarily short pins 1 or 2 to ground (G) to select the corresponding
input. Connect pins 1 and 2 to ground (G) to set the unit to auto switch mode. The
device selects the highest active input.
D DTP Out port — Connect one end of the twisted pair cable to the RJ-45 port on the
transmitter (see Twisted Pair Recommendations for DTP Communication on
page10 to properly wire the RJ-45 connectors). Connect the opposite end of the
cable to the appropriate receiver.
ATTENTION:
• Do not connect these outputs to a telecommunications or computer data
network.
• Ne connectez pas ces appareils à des données informatiques ou à un
réseau de télécommunications.
E Reset button — Use a small screwdriver to press and hold the recessed button for
6seconds while the extender is running to perform a factory reset.
6

Extron DTP T HWP D and DTP T UWP D Series • Installation and Operation 8
DTPTUWPD Connections
Front Panel
AUTO SW
CONFIG
IR OUT
HDMI IN
AUDIO IN
G
S
HDCP
1
AUDIO IN
VGA IN
Extron
AUTO SW
CONFIG
IR OUT
HDMI IN
AUDIO IN
G
S
HDCP
1
2HDMI IN
AUDIO IN
Extron
DTP T HWP 232/332 D
Front Panel
DTP T UWP 232/332 D
Front Panel
A
B
D
A
B
C
E
B
AA
C
D
Figure 7. DTPTUWPD Front Panel Connectors
A Audio input port — Connect an unbalanced stereo audio source to this 3.5 mm mini
stereo jack (see figure5 on page6 for wiring details and Audio Configuration on
page14 for embedded audio details).
B HDMI input port — Connect an HDMI cable between this port and the HDMI output
port of the digital video source.
C VGA input port — Connect a VGA cable between this port and the output port of the
video source.
D USB mini-B port — Connect a male USB Mini-B cable to this port for SIS
configuration and firmware updates.
NOTE: The USB mini-B port is not available when the faceplate is installed.
E IR output port — Connect an IR device to this 2-pole, 3.5 mm captive screw
pass-through port for IR control (see IR Control Connector on page12 to properly
wire the IR connector).
7

Extron DTP T HWP D and DTP T UWP D Series • Installation and Operation 9
Rear Panel
R
DTP OUTREMOTEOVER
DTP SIGLINK
RS-232
CONTACT
Tx Rx
Tx Rx G
POWER
12V
A MAX
0.9
+–
G1 2
A/S
DTP T HWP/UWP 232/332 D
Rear Panel
E
A
B
C
D
Figure 8. DTPTUWPD Rear Panel Connectors
A DC power input port — Plug the included external 12 VDC power supply into either
this 2-pole port (see Power Supply Wiring on page11 to wire the power connector)
or the power input port on the receiver (see the user guide of your receiver for more
information).
B Over DTP control port — Connect an RS-232 device to this 3-pole, 3.5 mm captive
screw port for pass-through RS-232 control (see Over DTP RS-232 Connector on
page13 to properly wire the RS-232 connector).
C Remote (RS-232 and contact closure) control port — Connect an RS-232 device,
contact closure device, or both to this 5-pole, 3.5 mm captive screw port to control
switching on the unit (see Remote RS-232 and Contact Closure Connectors on
page12 to properly wire the Remote connector).
• RS-232 — To control the unit through this port, connect an RS-232 device and
configure it as follows: 9600 baud rate, 8 data bits, 1 stop bit, no parity.
• Contact — Momentarily short pin 1 or 2 to ground (G) to select the corresponding
input. Connect pins 1 and 2 to ground to set the unit to auto switch mode. The
device selects the highest active input.
D DTP Out port — Connect one end of the twisted pair cable to the RJ-45 port on the
transmitter (see Twisted Pair Recommendations for DTP Communication on
page10 to properly wire the RJ-45 connectors). Connect the opposite end of the
cable to the appropriate receiver.
ATTENTION:
• Do not connect these outputs to a telecommunications or computer data
network.
• Ne connectez pas ces appareils à des données informatiques ou à un
réseau de télécommunications.
E Reset button — To perform a factory reset, use a small screwdriver to press and hold
the recessed button for 6 seconds while the extender is running.
8

Extron DTP T HWP D and DTP T UWP D Series • Installation and Operation 10
Twisted Pair Recommendations for DTP Communication
Use the pin configurations in figure9 for both ends of the shielded twisted pair cables.
5
Pin
1
2
3
6
7
8
4
Wire color
White-green
Green
White-orange
White-blue
Orange
White-brown
Brown
Blue
TIA/EIA
T568-B
TP Wires
12345678
Pins:
Figure 9. Twisted Pair Cable Configuration
Supported Cables
The distribution amplifiers are compatible with shielded twisted pair cable (F/UTP, SF/UTP,
and S/FTP).
ATTENTION:
• Do not use Extron UTP23SF-4 Enhanced Skew-Free AV UTP cable or STP201
cable to link the device with DTP transmitters or receivers.
• N’utilisez pas le câble AV Skew-FreeUTP version améliorée UTP23SF d’Extron
ou le câble STP201 pour relier le appareil avec les émetteurs ou les récepteurs
DTP.
Cable Recommendations
Extron recommends using the following practices to achieve full transmission distances and
reduce transmission errors.
• Use the following Extron XTP DTP 24 SF/UTP cables and connectors for the best
performance:
• XTP DTP 24/1000 Non-Plenum 1000’ (305 m) spool 22-236-03
• XTP DTP 24P/1000 Plenum 1000’ (305 m) spool 22-235-03
• XTP DTP 24 Plug Package of 10 101-005-02
• If not using XTP DTP 24 cable, at a minimum, Extron recommends 24 AWG, solid
conductor, STP cable with a minimum bandwidth of 400 MHz.
• Terminate cables with shielded connectors to the TIA/EIA-T568B standard.
• Limit the use of more than two pass-through points, which may include patch points,
punch down connectors, couplers, and power injectors. If these pass-through points
are required, use shielded couplers and punch down connectors.
NOTE: When using shielded twisted pair cable in bundles or conduits, consider the
following:
• Do not exceed 40% fill capacity in conduits.
• Do not comb the cable for the first 20 meters, where cables are straightened,
aligned, and secured in tight bundles.
• Loosely place cables and limit the use of tie wraps or hook-and-loop fasteners.
• Separate twisted pair cables from AC power cables.
9

Extron DTP T HWP D and DTP T UWP D Series • Installation and Operation 11
Power Supply Wiring
Figure 10 shows how to wire the connector.
SECTION A–A
AA
Power Supply
Captive Screw
Ridges
Smooth
3/16"
(5 mm) Max.
Connector
Output Cord
Figure 10. Power Connector Wiring
NOTES:
• Only one power supply is required
for both the transmitter and receiver.
A single power supply connected to
either unit in the pair powers both
units.
• A power supply is included with each
individually-packaged transmitter.
• Do not tin the power supply leads
before installing them in the direct
insertion connector. Tinned wires are
not as secure in the connectors and
could be pulled out.
CAUTION: The wires must be kept separate while the power supply is plugged in.
Remove power before wiring.
ATTENTION : Les deux cordons d’alimentation doivent être tenus à l’écart l’un
de l’autre quand l’alimentation est branchée. Couper l’alimentation avant de faire
l’installation électrique.
ATTENTION:
• Always use a power supply supplied and or specified by Extron. Use of an
unauthorized power supply voids all regulatory compliance certification and may
cause damage to the supply and the end product.
• Utilisez toujours une source d’alimentation fournie ou recommandée par Extron.
L’utilisation d’une source d’alimentation non autorisée annule toute conformité
réglementaire et peut endommager la source d’alimentation ainsi que le produit
final.
• The installation must always be in accordance with the applicable provisions of
National Electrical Code ANSI/NFPA 70, article 725 and the Canadian Electrical
Code part 1, section 16. The power supply shall not be permanently fixed to
building structure or similar structure.
• Cette installation doit toujours être en accord avec les mesures qui s’applique
au National Electrical Code ANSI/NFPA70, article725, et au Canadian Electrical
Code, partie1, section16. La source d’alimentation ne devra pas être fixée de
façon permanente à une structure de bâtiment ou à une structure similaire.
• Power supply voltage polarity is critical. Incorrect voltage polarity can damage
the power supply and the unit. The ridges on the side of the cord (see figure10)
identify the power cord negative lead.
• La polarité de la source d’alimentation est primordiale. Une polarité incorrecte
pourrait endommager la source d’alimentation et l’unité. Les stries sur le côté
du cordon permettent de repérer le pôle négatif du cordon d’alimentation (voir
figure10).
10

Extron DTP T HWP D and DTP T UWP D Series • Installation and Operation 12
ATTENTION:
• To verify the polarity before connection, plug in the power supply with no load
and check the output with a voltmeter.
• Pour vérifier la polarité avant la connexion, brancher l’alimentation hors charge et
mesurer sa sortie avec un voltmètre.
• The length of the exposed (stripped) copper wires is important.
The ideal length is 3/16 inch (5 mm). Longer bare wires can short together.
Shorter wires are not as secure in the connectors and could be pulled out.
• La longueur des câbles exposés est primordiale lorsque l’on entreprend de
les dénuder. La longueur idéale est de 5mm (3/16inches). S’ils sont un
peu plus longs, les câbles exposés pourraient se toucher et provoquer un
court circuit. S’ils sont un peu plus courts, ils pourraient sortir, même s’ils sont
attachés par les vis captives.
• Unless otherwise stated, the AC/DC adapters are not suitable for use in air
handling spaces or in wall cavities.
• Sauf mention contraire, les adaptateurs AC/DC ne sont pas appropriés pour une
utilisation dans les espaces d’aération ou dans les cavités murales.
RS-232 and IR Connector Wiring
NOTE: Do not tin the wires before installing them in the direct insertion connector.
Tinned wires are not as secure in the connectors and could be pulled out.
Remote RS-232 and Contact Closure Connectors
Wire the rear Remote RS-232 and contact closure connector as shown in figure11.
Ground
Receive pin on connected unit
Transmit pin on connected unit
Connected RS-232 and
Contact Closure Device Pins
Tx/Rx
Pins
Pin 1 for contact closure control
Pin 2 for contact closure control
RxTx
RS-232 Contact
21
G
REMOTE
Figure 11. RS-232 and Contact Closure Connector Wiring
IR Control Connector
Wire the front panel IR control connector as shown in figure12.
S
Groun
d
G
Signal
Figure 12. IR Out Connector Wiring
11
12
Page is loading ...
Page is loading ...
Page is loading ...
Page is loading ...
Page is loading ...
Page is loading ...
Page is loading ...
Page is loading ...
Page is loading ...
Page is loading ...
/
