Page is loading ...

INSTRUCTION MANUAL
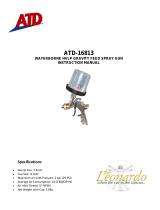
HVLP Spray Gun
Be sure to observe warning s and cautions in this instruction manual.
If not, it can cause paint ejection and serious bodily injury by drawing organic solvent.
Be sure to observe following marked items which are especially important
Indicates a potentially hazardous situation which, if not avoided, may result in serious injury or loss of life.
Indicates a potentially hazardous situation which, if not avoided, may result in minor or moderate injury or
property damage.
Indicates notes which we ask you to observe. The safety precautions in this instruction manual are the
minimum necessary conditions. Follow national and local regulations regarding fire prevention,
electricity and safety as well as your own company regulations.
Symbol Marking on the Spray Gun:
II 2 G Ex h X
This ANEST IWATA spray gun
complies with 2014/34/EU Directive
relating to equipment and protective
systems intended for use in explosive
potentially atmospheres.
II 2 G Ex h IIB T6 Gb X
T
Amb
+5°C +40°C
Complies
with
European
Directive
Specific
Marking for
Explosion
Protective
Group II
(Surface)
Category
(Zone 1&2)
Type of
Atmosphere
(GAS)
Ignition
Protection
(not applied)
Explosion
Group
(Ethylene)
Temperature
Class
( 85°C)
Explosion
Protection
level
(EPL)
Additional
conditions:
Any static
Electricity
should be
discharged
and needs to
be diverted to
the ground via
a conductive
air hose not
included.
Ambient
Temperature
Important specifications
Max. Pressure 0.70MPa / 7.0bar / 100psi
Noise level 79dB(A)
Spray condition Recommended
Measuring point 1m backwards from spray gun, 1.6m height
Max. temperature Atmosphere: 5°C ~40°C (41°F~104°F) Air and Fluid: 5°C ~43°C (41°F~109°F)
Important
Never connect pressure feeding paint except pressure feed type spray gun.
*1. Atomizing air pressure means air pressure at spray gun inlet when trigger is pulled and air flows.
*2. Tested with 16 s/Ford cup #4 automotive repair paint.
Nozzle needle assy combination
Model Fluid nozzle Fluid needle
Orifice mm (in) Mark Mark
WIDER1L-12G2P 1.2 (0.047) / W1L / 12
08H WIDER1
WIDER1L-2-12J2S/G 1.2 (0.047) / W1L-2 / V4-12
WIDER1L-2-14J2S/G 1.4 (0.055) / W1L-2 / V4-14 13 WIDER1
WIDER1L-2-16J2S/G 1.6 (0.063) / W1L-2 / V4-16 18 WIDER1
Main specifications
Model
Type of
feed
Fluid nozzle
Air cap assy Mark
Recommended condition
Air
consumption
l/min (cfm)
Pattern width
mm (in)
Air & fluid
connection
Mass
g (lbs.)
Nozzle orifice
mm (in)
Mark
*1
Atomizing air
pressure
MPa (bar/PSI)
Air pressure
inside air cap
MPa (bar/PSI)
Fluid output
ml/min
WIDER1
L
-
12G2P
Pressure 1.2 (0.047) W1L WIDER1L-G2
0.34
(3.4 / 49.3)
0
.07
(0.7 / 10)
350 530 (18.7) 270 (10.6)
Air
G1/4
(NPS1/4)
Fluid
G1/4
(NPS1/4)
290
(0.64)
WIDER1L
-
2
-
12J2S
Suction
1.2 (0.047
)
W1L-2 WIDER1L-2-J2
0.10
(1.0 / 14.5)
0.05
(0.5 / 7.1)
*
2
60
200 (7.1)
*
2
170
(
6.7
)
-
14J2S
1.4 (0.055
)
*
2
80
*
2
180 (7.1
)
-
16J2S
1
.6 (0.063)
*
2
9
5
*
2
190 (7.5
)
WIDER1L
-
2
-
12J2G
Gravity
1.2 (0.047
)
*
2
80
*
2
200
(
7.9
)
-
14J2G
1.4 (0.055
)
*
2
1
30
*
2
220 (8.7
)
-
16J2G
1.6 (0.063)
0
.13
(1.3 / 18.9)
0
.07
(0.7 / 10)
100 240 (8.5) 220 (8.7)
This manual contains IMPORTANT
WARNINGS and INSTRUCTIONS.
Equipment in this manual is exclusively for
painting purposes.
Do not use for other purposes.
The operator shall be fully conversant with
the requirements stated in this instruction
manual including important warnings,
cautions and operation and correct handling.
Read and understand the instruction
manual, before use and retain for reference.
IMPORTANT WARNING: Our spray guns, airbrushes, and other products are made to conform by our local group companies with local
laws and regulations
that may differ from place to place. Improper trade of products outside of designated domestic territories (unauthorized reselling) can result in legal violations,
local fines, and penalties. ANEST IWATA CORPORATION assumes no liability for products acquired through unauthorized reselling and in such cases and due
to quality control protocols, unauthorized reselling renders the warranty null and void.

Marked parts are wearable parts.
When ordering parts, specify spray gun’s model, part name with ref. No. and marked No. of air cap assy, fluid nozzle and fluid needle.
When replacing fluid nozzle or/and fluid needle, please replace both fluid nozzle and fluid needle assy together.
When receiving the spray gun, make sure that it has not been damaged during transport or storage and also check that all the
above contents are inside the box.
Safety precautions
Fire and explosion
1.
Spark and open flames are strictly prohibited.
Paints can be highly flammable and can cause fire.
Avoid any ignition sources such as smoking, open flames, electrical goods, etc.
2. Never use the following HALOGENATED HYDROCARBON SOLVENTS
which can cause cracks or dissolution on spray gun body (aluminum) by chemical reaction.
unsuitable solvents methyl chloride, dichloromethane, 1.2-dichloroethane,carbon tetrachloride, trichloroethylene, 1.1.1-trichloroethane
(Be sure that all fluids and solvents are compatible with spray gun parts. We are ready to supply a material list used in the product)
3. Securely ground spray gun by using air hose with built-in ground wire.
Ground wire should have less than 1M resistant. Periodically check the ground for continuity.
Insufficient grounding can cause fire or explosion due to static electric sparking.
Improper use of equipment
1.
Never point
spray gun
toward people or animal.
If done, it can cause inflammation of eyes and skin or bodily injury.
2. Never exceed maximum operating pressure or temperature.
3. Be sure to release air and fluid pressures before cleaning, disassembling or servicing.
If not, remaining pressure can cause bodily injury or property damage.
To release pressure, first shut off the supply of compressed air and fluid to the spray gun.
Then squeeze trigger, while the spray is pointed in a safe direction.
4. Tip of fluid needle and tip of fluid nozzle has a sharp point.
Avoid touching the tip of the fluid needle or fluid nozzle during maintenance to prevent injury.
Protection of human body
1
Use only in a well
-
ventilated area (such as in a
spray booth).
If not, poor ventilation can cause organic solvent poisoning and fire hazard.
2
Always wear protective gear safety glasses, mask, gloves .
If not, paint, solvents, etc., can cause irritation of eyes and skin.
If you feel something wrong with eyes or skin, immediately see a doctor.
3 Wear earplugs if necessary.
Noise level can exceed 80dB(A), depending on operating conditions and painting site
4 If operators pull the trigger many times during use, it may cause carpal tunnel syndrome.
Be sure to take a rest if you feel tired.
Other precautions
1.
Never alter this spray gun.
If done, it can cause insufficient performance and failure.
2. Only enter the working areas of other equipment (robots, reciprocators, etc.) after machines have safely been shut down.
If not, contact with them can cause injury.
3. Never spray foods or chemicals through this spray gun.
If done, it can cause accident by corrosion of fluid passages or adversely affect health by mixed foreign matter.
4. If something goes wrong, immediately stop operation and find the cause. Do not use again until you have solved the problem.
No.
Description
Q’ty
No.
Description
Q’ty
1
A
ir cap
assy
1
9
Fluid needle spring assy
1
2
N
ozzle
needle ass
y
1
10
F
luid Adj. knob
1
F
luid nozzle
11
A
ir valve shaft
1
F
luid
needle
12
A
ir Adj. assy
1
3
N
eedle packing set
1
13
T
rigger assy
1
4
P
attern Adj. assy
1
14
T
rigger stud
assy
1
5
A
ir valve seat assy
1
15
B
rush
1
a
ccessories
6
A
ir valve
1
7
A
ir valve spring
1
8
F
luid Adj. guide assy
1

How to connect
Use clean air filtered through air dryer and air filter.
If not, dirty air can cause painting failure.
Before using the spray gun for the first time, clean fluid passages with thinner to remove rust preventive oil.
If not cleaned, the rust preventive oil can cause paint failure, such as fish eyes.
Firmly connect hose or cup to spray gun.
If not, disconnection of hose or drop of cup can cause bodily injury
.
Step1. Connect an air hose to air nipple tightly.
Step2. Connect a fluid hose or a container to fluid nipple tightly.
Step3. Flush the spray gun fluid passage with a compatible solvent.
Step4. Pour paint into container, test spray and adjust fluid output as well as pattern width.
Maintenance and inspection
First release air and pressure fully according to item No. 3 of “Improper use of equipment” of WARNING on page 2.
Only an experienced person who is fully knowledgeable of the equipment should perform maintenance and inspection.
U
se neutral cleaner:
pH
value shall be 6 to 8, otherwise could cause corrosion.
Only use genuine ANEST IWATA parts for any maintenance or repairs.
Step-by-step procedure
1.
Pour remaining paint to another container. Clean fluid passages and
air cap assy
.
Spray a small amount of thinner into fluid passages to clean them.
1.
Incomplete cleaning can result in poor spray pattern and contaminated paint.
It is especially important clean the gun fully and promptly after using two-component paint.
2.
Clean each section with brush so
aked with thinner and wipe out with waste cloth.
2.
Soaking whole spray gun in solvent may cause spray gun malfunction.
Also soaking air
cap assy. itself for extended period may cause a defective spray pattern.
When cleaning, never scratch the air cap assy., fluid nozzle, or fluid needle.
Avoid touching or damaging the tip of the fluid nozzle or needle.
3. Before disassembly, fully clean fluid passages.
Remove fluid nozzle, using a ring spanner, box wrench or optional accessory spanner
(code 93538601)
3. During disassembly, avoid scratching the needle seating surface.
Either first remove the fluid needle or hold the trigger back while removing the fluid nozzle,
to protect the seating surface.
4.
If you need to adjust fluid needle packing set, first tighten it by hand (with fluid needle in
place). Then tighten it further about 1/6 turn (60-degree) by spanner.
When you remove needle packing set, do not leave the plastic tip of the packing in the
spray gun body.
4.
If you tighten the fluid needle packing set too much, fluid needle will not move smoothly,
resulting in paint leakage from tip of the fluid nozzle. Try to adjust it carefully while pulling
the trigger and confirming smooth movement of the fluid needle.
If you tighten it too much, first fully loosen it and then retighten again carefully.
5. To assemble the air valve, first assemble the air valve, air valve spring, and fluid adj. guide
assy. together. Next, insert fluid needle into fluid adj. guide assy., then fit it to spray gun
body and screw fluid adj. guide assy. in.
5.
If you try to fit air valve spring and air valve to the spray gun body without the fluid
needle, the air valve may not be fitted correctly and the packing inside fluid adj. guide
assy. can be damaged.
6. Before assembling the pattern adj. assy. or air adj. assy. back on to the gun body, fully turn
the adjustment knobs counterclockwise to open. Once in the gun body the pattern adj.
knob and air adj. knob can be tightened.
6. If pattern adj. knob or air adj. knob is not fully opened when tightening into gun body, the tip
of it can contact and damage the seating surface.
7. When you assemble the needle spring on the fluid needle, the plastic tip should be on the
opposite side as the fluid needle tip.
7. If plastic tip is on the wrong side, it may not operate normally. Incorrect installation of the
needle spring may cause a heavy trigger pull.
Where to inspect
Parts replacement standard
1. Each hole passage of air cap assy and fluid nozzle Replace if it is crushed or deformed.
2. Packing and O ring Replace if it is deformed or worn out.
3. Leakage from seating surface between fluid nozzle and fluid needle
Replace them if leakage does not stop after fully cleaning the fluid nozzle and needle.
If you replace the fluid nozzle or fluid needle only, ensure they fully match and confirm that
there is no leakage.
Fluid (Gravity)
Fluid nipple
Fluid
(Suction / Pressure)
Air
Air nipple

Troubleshooting
Spray Pattern
Problems
Remedies
Fluttering
1. Air enters between fluid nozzle and tapered seat of spray gun body.
2.
Air is drawn from fluid needle packing set.
3. Air enters at fluid container fitting nut or fluid hose joint.
1. Remove fluid nozzle to clean seat. If it is damaged, replace nozzle.
2.
Tighten fluid needle packing.
3. Fully tighten joint section.
Crescent
1. Paint buildup on air cap assy. partially clogs horn holes.
Air pressure from both horns differs.
1. Remove obstructions from horn holes with attached brush.
But do not use metal objects to clean horn holes.
Inclined
1. Paint buildup or damage on fluid nozzle circumference and air cap
assy. center.
2. Fluid nozzle is not properly fitted.
1. Remove obstructions.
Replace if damaged.
2. Remove fluid nozzle and clean seat section.
Split
1. Paint viscosity too low.
2. Fluid output too high.
3. Pattern air pressure is too high.
1. Add paint to increase viscosity.
2. Turn fluid adj. knob clockwise to reduce fluid output.
3. Turn pattern adj. assy. clockwise to reduce pattern air pressure.
Heavy Center
1. Paint viscosity is too high.
2. Fluid output is too low.
1. Add thinner to reduce viscosity.
2. Turn fluid adj. knob counter-clockwise to increase fluid output.
Spit
1. Fluid nozzle and fluid needle are not seated properly.
2. The first-stage travel of trigger (when only air discharges) decreases.
3. Paint buildup inside air cap assy.
1. Clean or replace fluid nozzle and fluid needle assy..
2. Replace fluid nozzle and fluid needle assy.
3. Clean air cap assy.
R1: retighten R2: adjust R3: clean R4: replace parts
Problem
W
here it
occurred
Parts to be checked Cause
R
emedy
R
1
R
2
R
3
R
4
Paint leaks
Fluid nozzle
Fluid nozzle ~ Fluid needle
Dirt, damage, wear on seat
Loose fluid needle adj. knob
Wear on needle spring
Fluid nozzle ~ Spray gun body
Insufficient tightening
Dirt or damage on seat
Needle packing set
Fluid needle does not return due to packing set too tight
Fluid needle does not return due to paint buildup on fluid needle
Needle packing set
Needle packing set
~ Fluid needle
Wear
Needle packing set Insufficient tightening
Paint does not
come out
Tip of spray gun
Fluid adj. knob Insufficient opening
Tip hole of fluid nozzle
Clogged
Needle packing set
~ Fluid needle
Clogged
Insufficient tightening
Air leaks
(from tip of air cap
assy)
Air valve &
Air valve seat assy
Air valve Dirt or damage on seat
Air valve seat assy
Dirt or damage on seat
Wear on air valve spring
How to operate
To achieve the recommended 10 PSI air pressure inside the air cap, first fully open the pattern adjustment.
Then while pulling the trigger, set the air pressure at the gun inlet to that shown in the previous specifications table.
Recommended paint viscosity differs according to paint property and painting conditions.
14 to 25 s / Ford cup#4 is recommendable.
Keep fluid output as small as possible to the extent that the job will not be hindered.
It will lead to better finishing with fine atomization.
Set the spray distance from the spray gun to the work piece as near as possible within the range of 100~250 mm (3.9~9.8 in).
The spray gun should be held so that it is perpendicular to the surface of the work piece at all times.
Then, the spray gun should move in a straight and horizontal line. Arcing the spray gun causes uneven painting.
Manual No. T940-02
Code No. 03012690
100~250 mm
(3.9~9.8 in)
3176, Shinyoshida-cho, Kohoku-ku, Yokohama, 223-8501, Japan

Residual Risk Map Requiring Protective Measures by Machine Users
(Abbreviated Name: Residual Risk Map)
Product model: "Spray gun :WIDER1L / WIDER2L"
2019/11/28 Create
ANEST IWATA Corporation
Be sure to read and understand the instruction manual before using the product. This document is a reference material in the instruction manual and must
not be used with only an understanding of the contents of this document.
Residual risk is classified and described according to the following definitions
DANGER
Contents that are likely to cause death or serious injury if protection measures are not implemented.
WARNING
Contents that may cause death or serious injury if protection measures are not implemented.
CAUTION
Contents that may cause minor injury if protection measures are not implemented
Symbols and numbers shown in the figure correspond to those described in the "List of Residual Risks" of the Product. Refer to the List of Residual Risks for
details of each residual risk.
Residual risk that is not identified on the machine
DANGER
WARNING No.3 , No.5 , No.6 , No.7 , No.8 , No.9
CAUTION
Location
A
DANGER
WARNING No.1,No.10
CAUTION
Location
B
DANGER
WARNING No.2
CAUTION
Location
C
DANGER
WARNING No.4
CAUTION
Location
D
DANGER
WARNING
CAUTION No.11
Residual risk

List of residual risks requiring protection measures by machine users
(Abbreviated Name: List of Residual Risks)
Product model: " Spray gun :WIDER1L / WIDER2L"
2019/11/28 Create
ANEST IWATA Corporation
Be sure to read and understand the instruction manual before using the product. This document is a reference material in the instruction manual and must
not be used with only an understanding of the contents of this document.
1 "degree of hazard" is classified and described according to the following definitions
DANGER
Contents that are likely to cause death or serious injury if protection measures are not implemented.
WARNING
Contents that may cause death or serious injury if protection measures are not implemented.
CAUTION
Contents that may cause minor injury if protection measures are not implemented
2 The symbol shown as "Location on machinery" is the number of the machine section on the Residual Risk Map of the Product. See Residual Risk Map
for specific points on the machinery.
No.
Operatio
nal
Phase
Works
Qualifications
and Training
required for
the work
Location on
the
machinery
*2
Harm
Degree
*1
Type of Harm
Protective measure protective
measure performed by the
machinery user
Instruction
Manual
Referenced
page
1
Use
Preparation
work
During work
A
Warning
A wrong connection between the air joint
and the paint joint may cause paint to
spout from an unexpected place and hit
the operator.
To provide personal protective
equipment
P2
2
Use All
B
Warning
Ignition and fire caused by static electricity
Use of a hose with a ground and
confirmation of ground
P2
3
Use and
mainten
ance
During work,
decompositi
on and rinse
Default
Warning
Organic solvents, etc., may come into
contact with the eyes and skin, causing
irritation.
To provide personal protective
equipment
P2
4
Use During work
C
Warning
Tenosynovitis due to repeated pulling of
the trigger
Moderate rest P2
5
Use All
Default
Warning
Fire, electrical appliances, etc. ignite, and
fire generatings.
Strict ban on the use of fire P2
6
Use
Preparation
work
During work
Default
Warning
Supply at specified pressure or higher,
paint spouts from unexpected places,
hitting human body or eyes, blindness
To provide personal protective
equipment
P2
7
Use and
mainten
ance
Preparation
work
During work
Default
Warning
The product is modified, parts other than
genuine parts are used, and an
unexpected failure or accident
generatings.
No modification
Use of genuine parts
P2
8
Use
Preparation
work
During work
Default
Warning
The patient stayed in a location where
noise such as blowing air was generated
for a long time, resulting in hearing loss.
Use of earplugs is recommended. P2
9
Use and
mainten
ance
During work,
decompositi
on and rinse
Default
Warning
Organic solvent poisoning Due to inhale
of solvent and paint mist
To provide personal protective
equipment
Work in painting booths, etc.
P2
10
Use and
mainten
ance
Preparation
work
During work
A
Warning
If the hoses
are
triad to be disconnected
under pressurized condition, paint,
cleaning liquid, air, etc. are spouted out
and injured.
To provide personal protective
equipment
Remove residual pressure
P2
11
Mainten
ance
Preparation
work
D
Caution
Needle valve piercing with sharp corners
To provide personal protective
equipment
P2
Residual risk
No.R010-00
Code No.03015160
/