Installation Sheet
www.ronbow.com
Ronbow Corporation, All Rights Reserved.
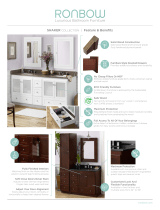
SHAKER
24”/30”/36”/48”
Model:
080824
080830
081930
081936
081948
Modular Collection
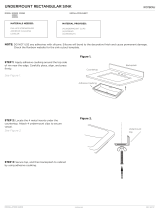
Step 1 :
Note :
Step 2 :
Step 3 :
Apply adhesive caulking around the
topside of rim near the edge, Carefully
raise sink in place, align, and press firmly
See Figure 1.
For installing under counter sink with
counter top
Attach 4 undermount-clips to hold
lavatory in place
See Figure 2.
Secure top & back splash to cabinet by
using adhesive caulk
See Figure 3.
Figure 1.
Figure 2.
Figure 3.
Counter top
Back Splash
adhesive caulking
Undermount Clip
adhesive caulking

Installation Sheet
www.ronbow.com
Ronbow Corporation, All Rights Reserved.
Note :
For installing under counter sink with
WideAppeal Top
Step 2 :
Step 1 :
Step 3 :
Step 4 :
• For best results, clean the mounting
surfaces with a dry cleaning cloth
• To prevent over flow of adhesive, use
masking tape to tape o the edges
of the cabinet and the counter top
DO NOT DISCARD WOODEN
INSTALLATION BRACKET!
• Make sure wooden installation
bracket is safely secure
• Install under counter sink by
following specific sink installation
See Figure 1.
Apply adhesive on wood bracket and
mounting surfaces of the cabinet
See Figure 2.
Carefully place countertop on to the
cabinet, align, and press firmly
See Figure 3.
Figure 1.
Figure 2.
Figure 3.
adhesive caulking
1. Wooden
installation
bracket
2. Undercounter sink
!
SHAKER
24”/30”/36”/48”
Model:
080824
080830
081930
081936
081948
Modular Collection
/