SLFLED10(W)/30(W)/50(W) Instructions Rev02
INSTALLATION INSTRUCTION
MODELS: SLFLED10; SLFLED10W; SLFLED30; SLFLED30W; SLFLED50; SLFLED50W
IMPORTANT NOTE: Installation must be performed by a skilled/competent electrician who is familiar with the appropriate standards and
technical requirements of the appliance and its proper installation.
Never modify the unit as there are no user serviceable parts inside. Not suitable for use with dimmer switches.
Install in accordance with IEC Wiring Regulations.
●
Read these instructions carefully before attempting to install fitting. Retain instruction for future reference.
●
Disconnect the mains supply before installing or servicing.
●
All wiring should be performed by a qualified electrician. This fixture is for outdoor use and should not be used in
areas with limited ventilation or high ambient temperatures.
POSITIONING THE UNIT
When selecting the mounting position, take the following points into account:
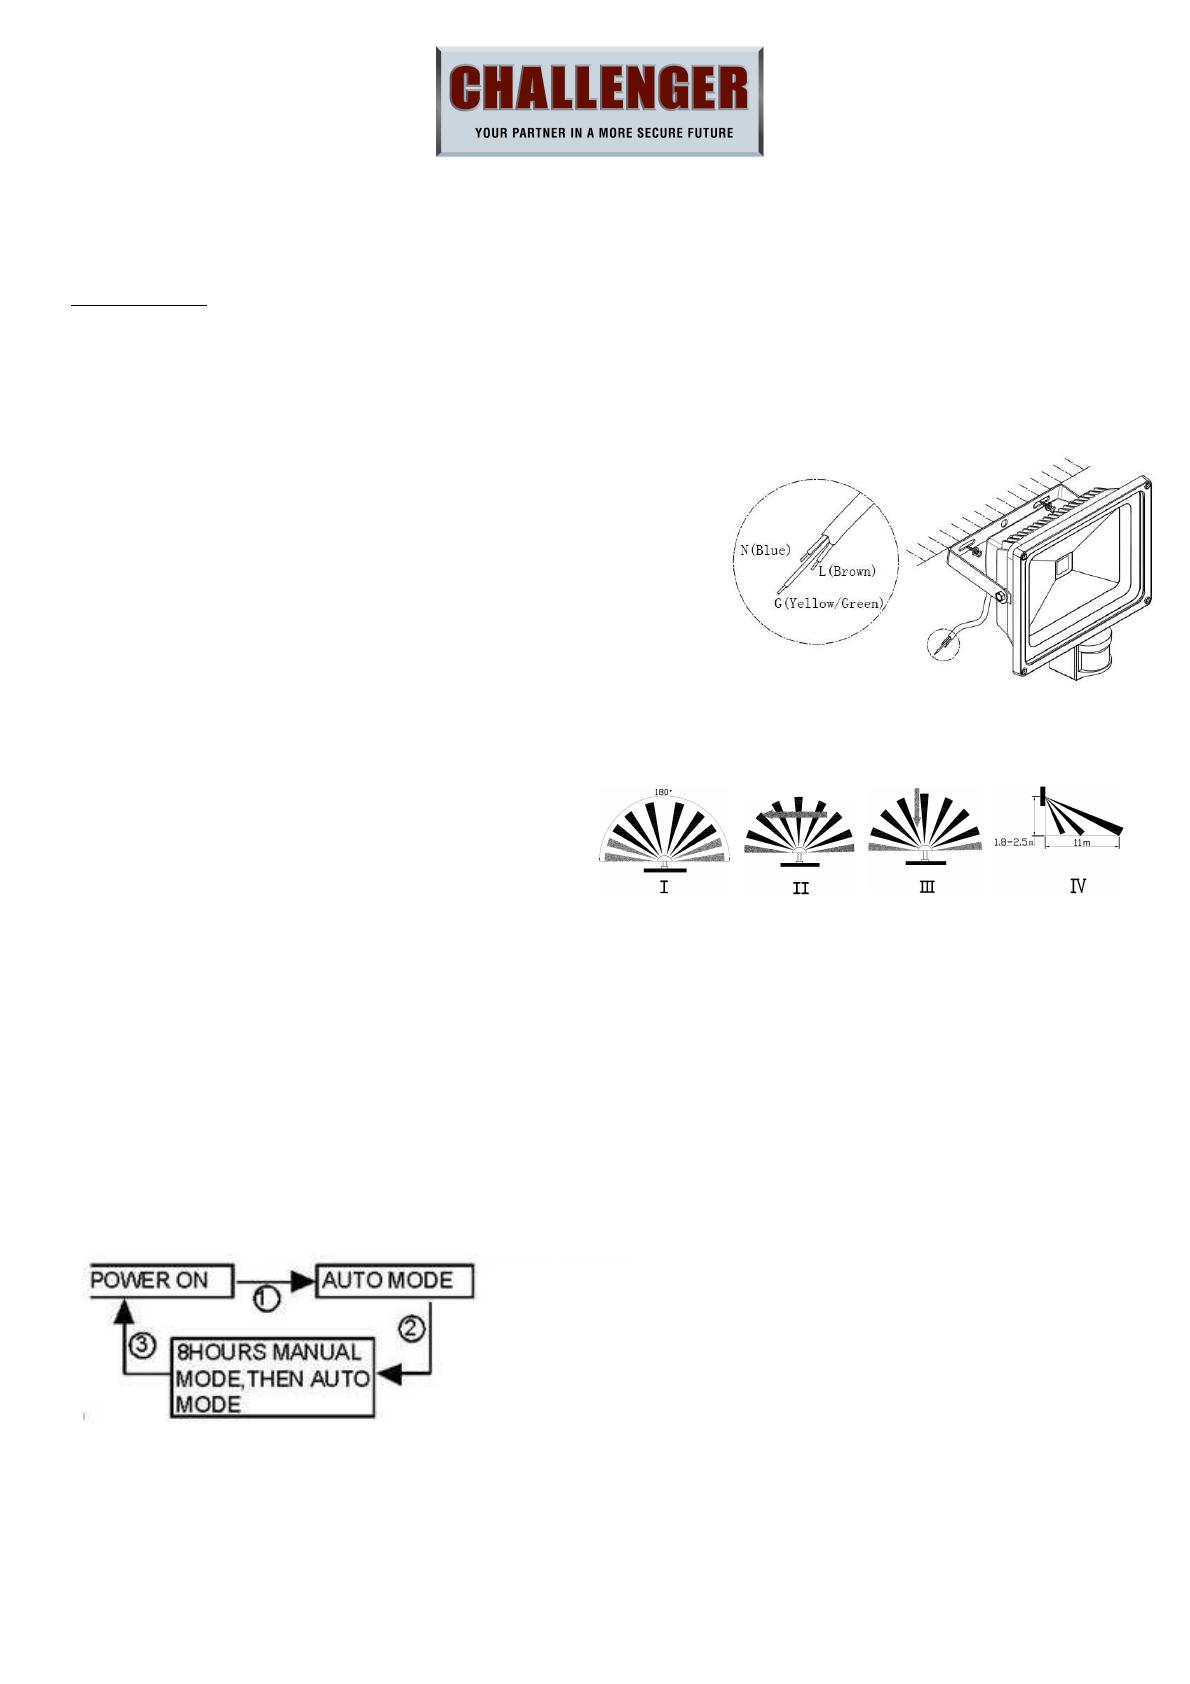
The sensor is designed for optimum performance when mounted 1.8-2.5 meters above ground level.
Avoid positioning close to trees or shrubs which may cause false triggering during wet, windy weather.
Avoid pointing at or positioning close to heat sources such as flues or heat extraction units, which may
cause false triggering.
Avoid pointing at bright lights as unit will not function when you set day/night control level to dark (_ position)
Avoid mounting close to strong electromagnetic fields, which may cause false triggering.
The sensor is most sensitive to movement across the detection area as opposed to directly towards or away from the unit. Position the sensor so movement is
across the sensor (See Fig 2)
INSTALLATION-Surface Mounting
1. Do not remove any part of the fixture.
2. Mount the fitting at a height between 1.8m-2.5m meters (see Fig.2).
3. Use expansion bolts to secure the fixture on mounting surface
The sensor should be pointing downwards. (See Fig.1)
4. Keep enough slack on the cable from the fittings to allow for the fitting to be adjusted On the bracket angle unhindered.
5. Connect the cable wires into terminal; Blue wire to “Neutral” terminal, Brown wire to “Live” terminal, Yellow / green wire to “Earth” terminal.
6.
Any external connections need to be made in a suitable IP rated enclosure, preferably with cable entry at the bottom.
Test:
1. After installation, please turn anti-clockwise the time adjuster (No:1 see Fig 3) to minimum and turn clockwise the day/night adjuster (No:3 see Fig 3) to day
setting before you switch on the mains supply.
2. Walk test the sensor, the sensor is more sensitive to movement across the detection area as opposed to directly towards or away from the unit (See Fig 2).
3. Your floodlight is now ready to work. You can now adjust the period of time and ambient-light level that light will be operational.
How to change into MANUAL CONTRL MODE (Override Function)
1.When power on, the PIR detector enters into the “WARM-UP” periods for about 1 minute, then automatically change into AUTO MODE.
2. During AUTO MODE, the PIR detector will change to 8hours MANUAL MODE from AUTO MODE by an effective override (turn the wall switch off and on twice
in about three seconds). In MANUAL MODE, the Lamps (S) will remain on, not affected by duration time and Lux control level, after 8 hours, the lamp will change
into AUTO MODE again.


