19
Using printer menus
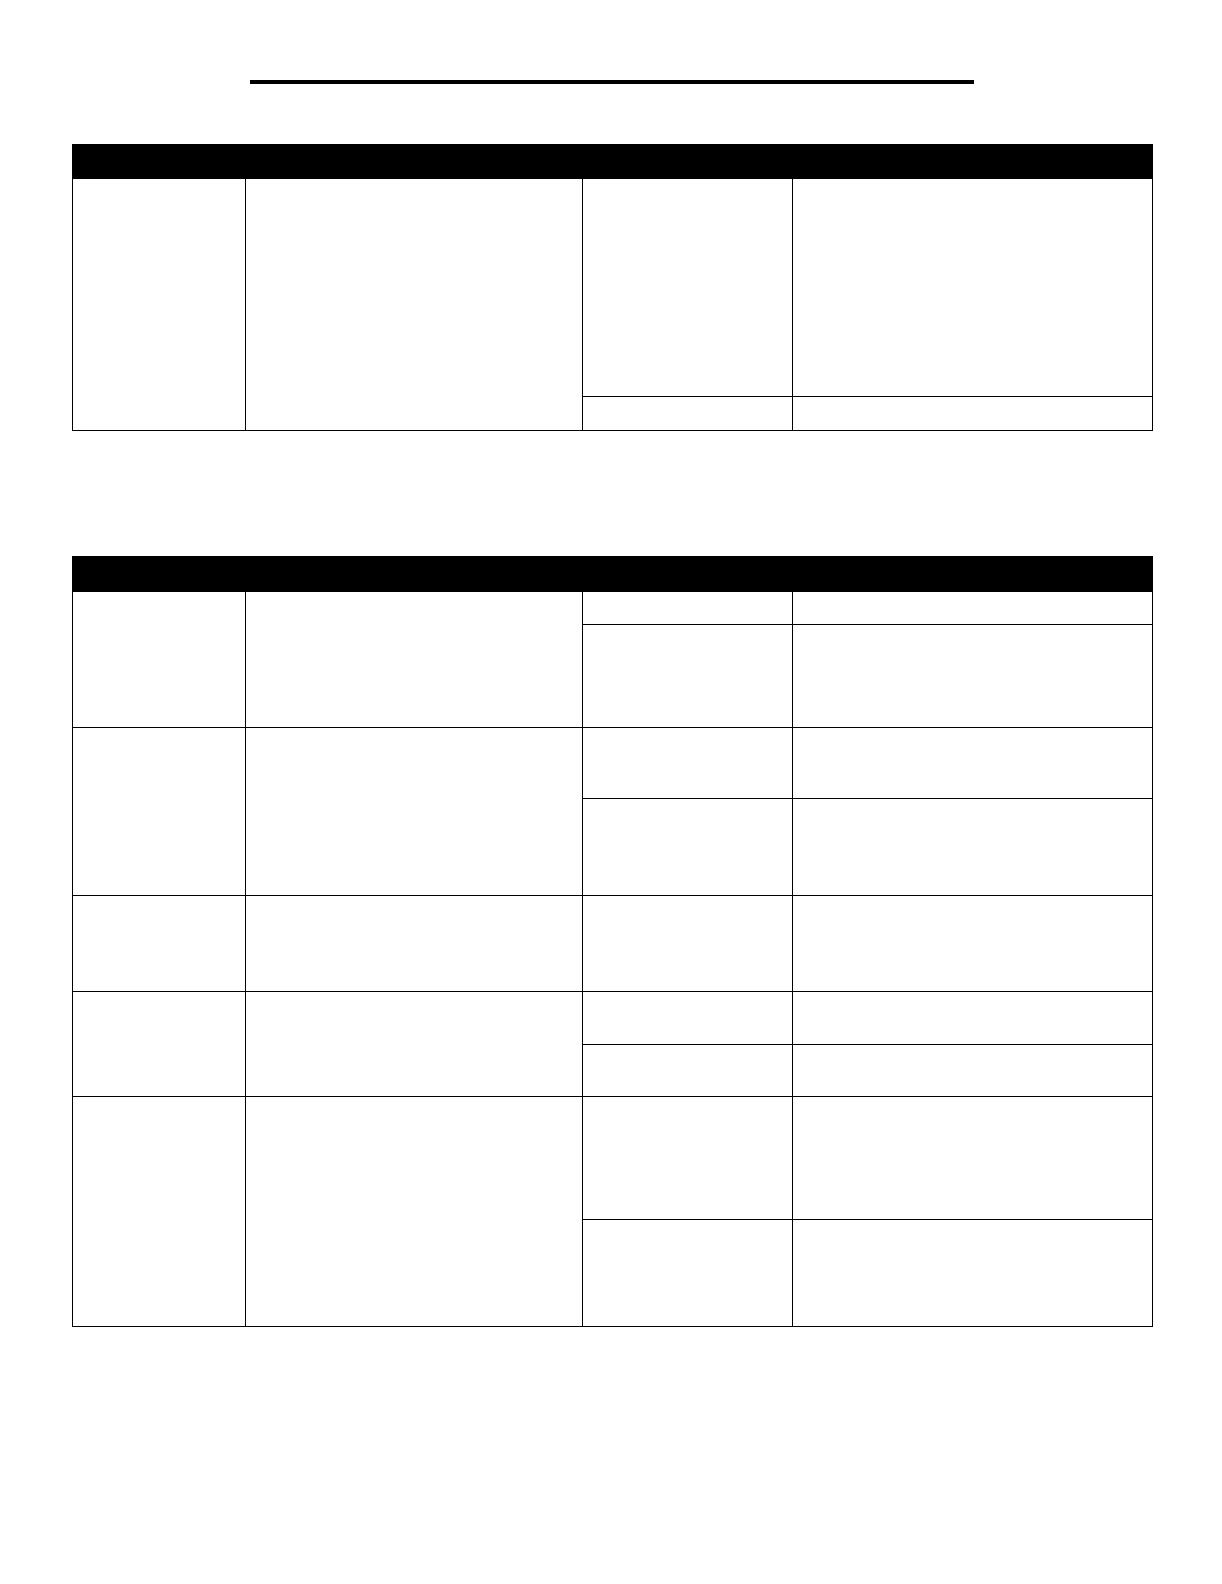
Finishing Menu
Use this menu selection to define how the printer delivers the printed output.
Factory Defaults Returns printer settings to the factory
default values.
Restore • All menu items are returned to the
factory default values except:
– Display Language.
– All settings in the Parallel Menu,
Serial Menu, Network Menu, and
USB Menu.
• All downloaded resources (fonts,
macros, and symbol sets) in printer
memory (RAM) are deleted. (Resources
residing in flash memory or on the hard
disk are unaffected.)
Do Not Restore* User-defined settings remain.
Menu selection Purpose Values
Duplex Sets duplexing as the default for all print
jobs.
Note: You must have an optional duplex
unit installed.
Note: Select Duplex from the printer
driver to duplex only specific jobs.
Off* Prints on one side of the paper.
On Prints on both sides of the paper.
Duplex Bind Defines the way duplexed pages would
be bound, and how the printing on the
back of the sheet (even-numbered
pages) is oriented in relation to the
printing on the front (odd-numbered
pages).
Note: You must have an optional duplex
unit installed.
Long Edge* Assumes binding along the long edge of
the page (left edge for portrait orientation
and top edge for landscape orientation).
Short Edge Assumes binding along the short edge of
the page (top edge for portrait orientation
and left edge for landscape orientation).
Copies Sets the number of copies you want for
the printer default value.
Note: Set the number of copies required
for a specific job from the printer driver.
1...999 (1*) Values selected from the printer driver
always override values selected from the
operator panel.
Blank Pages Specifies whether to include application-
generated blank pages as part of your
printed output.
Do Not Print* Does not print application-generated blank
pages as part of your job.
Print Prints application-generated blank pages
as part of your job.
Collation Keeps the pages of a print job stacked in
sequence when printing multiple copies
of the job.
Off* Prints each page of a job the number of
times specified by the Copies menu item.
For example, if you set Copies to 2, and
send three pages to print, the printer prints
page 1, page 1, page 2, page 2, page 3,
page 3.
On Prints entire job the number of times
specified by the Copies menu item. For
example, if you set Copies to 2, and send
three pages to print, the printer prints page
1, page 2, page 3, page 1, page 2, page 3.
Menu selection Purpose Values


