Page is loading ...

ASSEMBLY INSTRUCTIONS FOR
MODELS
CG65, CG66, CG67, CG69
WO65, WO66, WO67, WO69 AY01
15-2510807 English/French 08/07
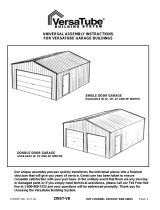
CAUTION: Some parts have sharp edges. Care must be taken when handling
the various pieces to avoid a mishap. For safety sake, please read the safety
information provided in this manual before beginning construction. Wear
gloves when handling metal parts.
100% CANADIAN
VERSION FRANÇAISE AU DOS

2
AH02
CONTENTS
•Pre-construction instructions • Anchoring the frame
•Assembling the building • Parts List and order information
PROCEED WITH CONFIDENCE
It might look complicated when you first unpack your building…but it really isn’t. Simply follow the
illustrated instructions and your building will go up quickly and accurately.
ASSEMBLY INSTRUCTIONS
•Before beginning construction...check local building codes regarding footings, location
and other requirements. Study and understand the owner's manual.
•You will need assistance…you’ll find that another person will speed the job and make
assembly easier.
•Selecting your site…choose an area that’s firm and level yet allows drainage away from
site.
WARNING! … DO NOT ERECT YOUR BUILDING IN AREAS THAT ARE SUBJECTED TO
HIGH WINDS, OR ERECT ON A WINDY DAY. ANY BUILDING LEFT PARTIALLY CON-
STRUCTED MAY BE SERIOUSLY DAMAGED IF LEFT IN THIS STATE.
•Sort and separate all parts and hardware…checking with the Parts List on Page 4 and
the illustrations on Page 5…be sure you have all parts and know where they belong in the
building. Each part has been numbered or illustrated, the quantity required and its part
number noted.
Foundation Preparation
• Hammer and Nails
• Spade or Shovel
• Hand Saw / Power Saw
• Lumber and/or Concrete
Optional Time-Savers
• Wrench / Nut Driver
• Electric / Cordless Drill
• Square
• String (for squaring frame)
Required
• Utility Knife / Scissors
• Pliers
• Carpenter's Level
• Tape Measure
Required
• Eye Goggles
• No. 2 Phillips Screwdriver
(with Hardened Magnetic Tip)
• Work Gloves
• Step Ladders
BUILDING CARE
•Carefree maintenance – Your building has been designed to give you years of carefree
service. All parts have been precision engineered for a perfect fit. It is manufactured from
heavily galvanized steel with exterior parts pre-enameled on both sides at the steel mill.
•IMPORTANT – This building is designed to withstand normal wind loads when
installed according to instructions. Manufacturer cannot be held responsible for
any consequences due to buildings that are not installed per instructions or for
damage due to weather conditions or acts of God.
•Follow step-by-step instructions carefully…complete
each step before going onto the next one.
•Retain this manual after assembly is completed…it
contains a complete parts list.

L03
IMPORTANT
PERSONAL SAFETY DURING BUILDINGS CONSTRUCTION
Some of the building components may contain sharp edges prior to assembly. Wear protective
work gloves while handling these components. Wear eye protection when using any form of power
tool. Do not use household voltage power tools in a wet or damp environment. Household voltage
power tools must be monitored and controlled by a Ground Fault Interrupter or more commonly
called a G.F.I. Do not use any part of the building's frame as a means of personal support while
attaching components during assembly.
PREPARATION OF BUILDING SITE
This building must be constructed on a SOLID
BASE FOUNDATION. We recommend a
poured concrete pad or large size concrete
patio stone squares for a suitable floor and
base. Which ever you select…
make sure your
foundation area is firm and level and will allow
drainage away from the site.
Make your solid
base foundation at least 4” (100mm) larger than
your building. The manufacturer is not re-
sponsible for the choice and the construc-
tion of the foundation.
NOTE: For a concrete pad base, prepare a
level bed for a firm footing layer of crushed
stone. The concrete pad should then be poured
to a thickness of 4” (100mm) to 5” (125mm).
When completed, allow to dry thoroughly for at
least 48 hours.
YOUR BUILDING MUST BE
ANCHORED
Your building must be firmly anchored to your concrete
pad or large concrete patio stone squares…to help
protect against damage in high winds.
FURTHER ANCHORING INSTRUCTIONS
FOLLOW AFTER ALL WALL AND ROOF
PANELS HAVE BEEN INSTALLED.
MODEL "A" "A" "B" "B"
CM INCH CM INCH
6x4 172.7 68 114.9 45 1/4
6x5 172.7 68 146.1 57 1/2
6x6 172.7 68 177.2 69 3/4
6x7 172.7 68 208.3 82
6x9 172.7 68 270.5 106 1/2
3
OUTSIDE MEASUREMENTS OF BUILDING AT BASE
“B” + 100mm (4")
MINIMUM
“A” + 100mm (4")
MINIMUM
DOORWAY

Part Part Quantity
Number Description 6x5 6x6 6x7 6x9
64H Rear Base Rail 2 2 2 2
53H Side Base Rail 2 - - 4
63H Side Base Rail - 2 - -
73H Side Base Rail - - 4 -
62H Front Base Rail 2 2 2 2
610H Entry Ramp 1 1 1 1
* Corner Panel 2 2 2 2
* Half Corner Panel (Front Only) 2 2 2 2
640H Rear Top Rail 2 2 2 2
527M Side Top Rail 2 - - 4
627M Side Top Rail - 2 - -
727M Side Top Rail - - 4 -
66H Door Track 2 2 2 2
635H Door Fascia 1 1 1 1
69** Door Jamb 2 2 2 2
628H Front Midwall Brace 2 2 2 2
* Wall Panel 5 5 7 9
* Half Wall Panel - 2 - -
640H Rear Midwall Brace 2 2 2 2
527M Side Midwall Brace 2 - - 4
627M Side Midwall Brace - 2 - -
727M Side Midwall Brace - - 4 -
* Left Gable 2 2 2 2
* Right Gable 2 2 2 2
516L Main Ridge Beam 2 - - -
616L Main Ridge Beam - 2 - -
H716H Main Ridge Beam - - 4 -
H516H Main Ridge Beam - - - 4
618H Left Roof End Panel 2 2 2 2
644H Right Roof End Panel 2 2 2 2
* Roof Panel 4 4 6 8
* Half Roof Panel - 2 - -
520H Ridge Cover 1 - - 1
620H Ridge Cover - 1 - -
720H Ridge Cover - - 2 -
920H Ridge Cover - - - 1
541H Roof Edge Trim 2 - - 4
641H Roof Edge Trim - 2 - -
741H Roof Edge Trim - - 4 -
* Door Panel 2 2 2 2
632 Top & Bottom Door Brace 4 4 4 4
* Weatherseal Tape 1 1 1 1
49H Ridge Cover End Cap 2 2 2 2
* Door Handle 2 2 2 2
* Plastic Washer Tree 2 2 2 2
Owner's Manual 1 1 1 1
Hardware Kit Contains
(Bolts, Nuts and Screws)
* Roof Corner Cap 4 4 4 4
* Door Spacer 2 2 2 2
A67 Door Glide 4 4 4 4
L04
4
* Indicates that part number is NOT stamped in the part see illustrations.
** Indicates letter or letters that designates different heights.
Painted parts may contain a prefix that designates color / material.
Parts List
IMPORTANT...When ordering parts please provide number stamped on the surface of galvalized parts. In the case of wall
and roof panels please provide the model number of the building, color and size of panels.
To order parts please use order form on the last page.

Parts Not Identified with Part Number
L05
5
CORNER PANEL HALF CORNER PANEL WALL PANEL HALF WALL PANEL
LEFT GABLE RIGHT GABLE
ROOF PANEL HALF ROOF PANEL
ROOF CORNER
CAP
DOOR PANEL
WEATHERSEAL TAPE DOOR HANDLE PLASTIC WASHER TREE
ITEMS in the HARDWARE BAG
DOOR SPACER DOOR GLIDE
A67

SIDE AND REAR BASE RAILS
Assemble lengths of side base rails (2 pcs.)
together with a lap joint. Align large holes.
Repeat for other side.
NOTE - for product sizes 6x4, 6x5 and 6x6
these parts are in one full length piece.
Repeat above procedure to assemble lengths
of rear base rails No. 64H (2 pcs.).
STEP
1
6
L06
INSIDE
USE SELF TAPPING SCREWS..10mm (3/8") LONG
See Pages 4 and 5 for profile,
correct part number and quantity
required for your building.
OUTSIDE SIDE BASE RAIL
LARGE
6mm (1/4") HOLES
SIDE BASE RAIL
USE 10mm (3/8") LONG BOLTS AND NUTS
VIEWED FROM
INSIDE BUILDING
INSIDE
OUTSIDE
ENTRY RAMP
No. 610H
FRONT BASE RAIL
No. 62H
FRONT BASE RAIL
No. 62H
VIEWED FROM
INSIDE BUILDING
WIDE FLANGE ON OUTSIDE
FRONT BASE RAILS AND ENTRY RAMP
Space out lengths of front base rails No. 62H (2 pcs.) and
fasten entry ramp No. 610H between lengths.
STEP
2
1.
2.
1.

BASE FRAME ASSEMBLY
Assemble all 4 base rails into a base frame in proper position
on your foundation. Use 10mm (3/8") self tapping screws on
front and on back corners.
Check base frame for squareness by measuring diagonal
corners. Your measurements should be equal. See "A"
STEP
3
7
E07
BACK CORNER
REAR BASE RAIL
DOORWAY
SOLID
FOUNDATION
"A"
FRONT CORNER
FRONT BASE RAIL AND
ENTRY RAMP
SIDE BASE RAIL
DOORWAY
* AFTER ASSEMBLY CHECK BASE DIMENSIONS (SEE PAGE 3) TO VERIFY CORRECT POSITION OF RAILS.
USE SELF TAPPING SCREWS...10mm (3/8") LONG
* AFTER ASSEMBLY CHECK BASE DIMENSIONS (SEE PAGE 3) TO VERIFY CORRECT POSITION OF RAILS.
WARNING!
DO NOT ERECT ON A WINDY DAY. THE LARGE
WALL AND ROOF PANELS PROVIDE A LARGE
SURFACE AND THE WIND COULD EASILY CARRY
THEM AWAY. ANY BUILDING LEFT PARTLY CON-
STRUCTED MAY BE SERIOUSLY DAMAGED IF LEFT
IN THIS STATE.
1.
2.

STEP
4
8
L08
SIDE AND REAR TOP RAILS
Assemble lengths of side top rails (2 pcs.) together with a lap joint...see
"A". Fasten to top of corner panels. Repeat for other side. NOTE - for
sizes 6x4, 6x5 and 6x6 these parts are in one full length piece.
Repeat above procedure to assemble and fasten lengths of rear top rail
No. 640H (2 pcs.)...See "B".
STEP
5
USE SELF TAPPING SCREWS
...10mm (3/8") LONG
CORNER PANELS
Position rear corner panels and fasten to rear
and side base rails...with narrow flange of
panel along the side of the building.
Position front half corner panels and fasten to
front and side base rails...with narrow flange
of panel along the side of building.
See Pages 4 and 5 for profile,
correct part number and quantity
required for your building.
DOORWAY
REAR
SIDE
SIDE TOP RAIL
REAR TOP RAIL
No. 640H
SIDE
"A"
REAR "B"
USE 10mm (3/8") LONG
BOLTS AND NUTS
1.
2.
1.
2.

STEP
6
9
L09
DOOR TRACK INSTALLATION
Install 4 door glides No. A67 into door track. See "A"
Fasten door track to the front corner panels with screws.
IMPORTANT: PLACE EDGE OF DOOR TRACK WITH
THE MOST HOLES FACING THE OUTSIDE.
STEP
7
USE SELF TAPPING SCREWS...10mm (3/8") LONG
SPLICED ASSEMBLY OF DOOR
TRACK AND DOOR FASCIA
Assemble lengths of door track No. 66H
(2 pcs.) together with door fascia No. 635H. See Pages 4 and 5 for profile,
correct part number and quantity
required for your building.
FRONT
SIDE
Door Track
"A"
DOOR GLIDE
No. A67
DOOR FASCIA No. 635H
MOST HOLES ON THIS SIDE
MOST HOLES ON THIS SIDE DOOR TRACK
No. 66H
VIEWED FROM INSIDE
DOORWAY
SLIDE DOOR GLIDES
INTO DOOR TRACK
INSIDE
OUTSIDE
USE SELF TAPPING SCREWS...10mm (3/8") LONG
1.
2.
1.

STEP
8
10
L10
DOOR JAMBS AND FRONT MIDWALL BRACE
Remove corner panel screws as necessary and install door jambs No. 69** on
each side of entry ramp...sliding door jamb under the half corner panel and
under door fascia. Fasten at base rail --- then fasten through the door fascia and
door jamb into the side of door track. Replace half corner panel screws.
Fasten door jamb to half corner panels at midwall height with 10mm (3/8") bolts
and nuts.
Install front midwall brace No.628H on each side of doorway.
Use short bolts 6mm (1/4").
DOOR TRACK
USE SELF
TAPPING SCREWS
...10mm (3/8") LONG
DOOR JAMB
No. 69**
DOOR FASCIA
DOORWAY FRONT MIDWALL BRACE
No. 628H
USE SHORT 6mm (1/4") BOLTS AND NUTS
DOOR JAMB
No. 69**
1.
2.
3.

STEP
9
11
L11
SIDE AND REAR WALL PANELS
Install wall panels on each side wall...fasten to base rails and top rails. NOTE - Size
6x4 and 6x6 uses a smaller half wall panel along the side walls only.
At the midwall height on the overlap ridge joint of each wall panel...fasten with
10mm (3/8") long bolts and nuts. See "A"
Repeat above procedure to install rear wall panels.
USE SELF TAPPING SCREWS
...10mm (3/8") LONG
"A"
USE 10mm (3/8") LONG
BOLTS AND NUTS "A"
STEP
10 SIDE AND REAR MIDWALL BRACE
Assemble lengths of side midwall brace (2 pcs.) together with a lap joint. See "A" Fasten
midwall brace to wall panels from the outside. Repeat for other side. NOTE - for sizes 6x4, 6x5
and 6x6 these parts are in one full length piece.
Repeat above procedure to assemble and fasten lengths of rear midwall brace No. 640H (2 pcs.)...
See "B". "B"
"B"
REAR
USE 10mm (3/8") LONG
BOLTS AND NUTS
USE 10mm (3/8") LONG
BOLTS AND NUTS
"A" SIDE
ALL WALL PANELS ARE TO
BE ATTACHED TO TOP RAIL,
MID-WALL BRACE AND BASE
RAIL WITH SCREWS.
1.
2.
3.
1.
2.

STEP
11
12
L12
GABLE INSTALLATION
Place right rear gable in position and fasten to rear top rail with screws. See "A"
Install left rear gable as above.
Fasten right and left gables together...leaving 2 top holes vacant.
Repeat above for front set of gables.
USE SELF TAPPING
SCREWS...10mm (3/8") LONG
"A"
STEP
12 MAIN RIDGE BEAM ASSEMBLY
To combine the main ridge beam...select 2 pieces that
combine (when lapped) to make the proper length for your
building. NOTE - For sizes 6x4, 6x5 and 6x6 these
parts are in one full length piece.
Lay pieces on hard surface. Position one end (with flange
cutout---See "A" and note small holes position) into
the second piece (at the end with the full flange---See "A"
and note small holes position). Align holes in beams
--- then step on raised edge to snap top beam into place.
Tap beams into place to align holes if necessary.
Assemble another set in same manner and fasten the
2 sets together with bolts and nuts as per "B".
(For sizes 6x4, 6x5 and 6x6 fasten together as per
"C".)
LEFT FRONT GABLE RIGHT FRONT GABLE LEFT REAR GABLE RIGHT REAR GABLE
* VIEWED FROM INSIDE BUILDING *
"A"
DOORWAY
LEAVE 2 TOP HOLES VACANT
GABLE SECTION
USE 10mm (3/8") LONG BOLTS AND NUTS USE 10mm (3/8") LONG
BOLTS AND NUTS
USE A STEP LADDER
NOTE-SMALL HOLES ON
BOTH THESE FLANGES.
"A"
MAIN RIDGE BEAM ASSEMBLY
USE 10mm (3/8") LONG BOLTS
AND NUTS
NOTE-USE BOLTS
AND NUTS ONLY IN
HOLES MARKED
WITH BLACK DOT.
1.
2.
3.
4.
1.
2.
3.
"B"
"C"

STEP
13
13
L13
INSTALLATION OF MAIN RIDGE BEAM
Position the main ridge beam section on the
gables...with the extended lips of the gable section
fitting between the 2 pieces...See "A". Fasten with
bolts and nuts.
NOTE - TO INSTALL USE ONLY 2 BOLTS
AND NUTS AT EACH END.
STEP
14 ROOF END PANELS
Position roof end panel over gable section...line up holes
and fasten with bolts and washers through the roof end panel
and with nuts on the outside of the gable.
Then fasten to ridge beam and side top rails with screws and
washers.
NOTE - THE SURFACE OF THE RIDGE BEAM
CONTAINING THE MOST NUMBER OF FIXING
HOLES TO FACE UPWARD
MAIN RIDGE BEAM
USE 10mm (3/8") LONG BOLTS AND NUTS
USE 10mm (3/8") LONG BOLTS AND NUTS
WITH WASHERS
ROOF END PANEL
No. 618H (left)
No. 644H (right)
USE SELF TAPPING SCREWS...
10mm (3/8") LONG WITH WASHERS
AT RIDGE BEAMS AND TOP RAILS
DOORWAY
1.
1.
2.
"A"

STEP
15
14
L14
ROOF PANELS AND TAPE
Install roof panels by overlapping the adjacent panel. Fasten
to ridge beam and top rails with screws and washers.
NOTE - Size 6x4 and 6x6 uses a small half roof panel on
each side at the center.
Start panels at one end and do both sides. Carefully apply
tape (as you progress) between the top of the roof panels on
each side of the roof. See "A" This is a weatherseal and
must be applied with care with no air gaps.
NOTE - Be sure surface is clean, dry and dust free and apply
only when temperature is above 13°C (55°F). Be sure all
edges on all sides are sealed tightly to surface.
STEP
16 RIDGE COVER ASSEMBLY
Assemble lengths of ridge cover together by inserting
one end inside the other. Fasten with screws and
washers and handle carefully! NOTE - for sizes 6x4,
6x5 and 6x6 these parts are in one full length piece.
TAPE
HALF ON EACH SIDE
PRESS TAPE DOWN FIRMLY AND DO NOT
CUT TAPE UNTIL ROOF IS COMPLETE
"A"
ROOF PANELS
ASSEMBLY SCREW
WITH WASHER
USE SELF TAPPING SCREWS...10mm (3/8") LONG WITH WASHERS
TURN UPSIDE DOWN TO AS-
SEMBLE THEN HANDLE CARE-
FULLY AFTER
ASSEMBLY
See Pages 4 and 5 for
profile, correct part
number and quantity
required for your building.
1.
2.
1.

STEP
17
15
L15
RIDGE COVER AND END CAP INSTALLATION
Carefully position ridge cover section and arrange for a
helper outside on a ladder to adjust position and to apply
pressure as necessary.
From the inside of building start from the gable ends and
fasten with screws and washers up through the holes in the
overlap ridge of the upper roof panels. The screws go through
into the under return lip of the ridge cover.
Continue to fasten both sides as you work from the ends to the
center.
Clip ridge end caps No. 49H in place and fasten with screws.
STEP
18 ROOF EDGE TRIM AND ROOF CORNER CAP
Install lengths of roof edge trim (2 pcs.) separately and place
over edge of roof panels with a lap joint. Fasten with bolts and
nuts. NOTE - for sizes 6x4, 6x5 and 6x6 these parts are in
one full length piece.
Fasten corner caps (4) through roof end panels and roof edge
trim with bolts and nuts.
RIDGE COVER
SECTION
See Pages 4 and 5 for
profile, correct part
number and quantity
required for your building.
1.
2.
3.
4.
1.
2.
ASSEMBLY SCREW
WITH WASHER
THROUGH OVERLAP RIDGE
OF UPPER ROOF PANEL
SCREW HOLES ARE ON THE
UNDER RETURN LIP..IN
THESE GROOVES
RIDGE COVER
END CAP
No. 49H
TAPE
ROOF CORNER CAP
USE 10mm (3/8") LONG
BOLTS AND NUTS
ROOF EDGE
TRIM
ROOF CORNER CAP
USE 10mm (3/8") LONG BOLTS AND NUTS

STEP
19
16
L16
COMPLETE THE ANCHORING OF YOUR
BUILDING NOW!
YOUR BUILDING MUST BE ANCHORED!
Check building position on concrete base and adjust
to original planned position.
Carefully position base frame in the center of solid
base foundation --- to allow at least 100mm (4") of
solid base outside the frame.
Check base frame for squareness by measuring
diagonal corners. Your measurements should be
equal! See "A"
Inside your base frame...there are 6mm (1/4") holes in
the entry ramp and on the inside flange of the front,
side and rear base rails. These are anchor
holes...for installation of anchor screws into the con-
crete or patio stones. See "B" and "C"
When your base frame is square...use a black felt pen
to mark location of anchor hole center on the con-
crete. Mark for all anchor holes.
With an electric drill and a Carbide Bit (Check size to
suit anchor shield)...drill proper holes into concrete at
each mark.
Insert anchor shields into each hole.
Fasten all base rails to concrete with anchor screws.
ANCHOR HOLES
1.
2.
3.
4.
5.
6.
7.
8.
NOTE: Anchor screws, washers and shields
are NOT supplied as part of the hardware
package and may be purchased at your local
store. You will require No. 10 concrete
anchor screws 38mm (1 1/2") long with wash-
ers and expansion shields PLUS a Carbide
Bit to suit.
QUANTITY REQUIRED
6x4 - 12 6x7 - 18
6x5 - 14 6x9 - 20
6x6 - 14
ENTRY RAMP
"B"
OUTSIDE
INSIDE
ANCHOR SCREWS
WASHER & SHIELD
INSIDE OF BUILDING
IMPORTANT
This building is designed to withstand normal
wind loads when installed according to in-
structions. The manufacturer cannot be held
responsible for any consequences due to
buildings that are not installed per instruc-
tions or for damage due to any weather
conditions or acts of God.
DOORWAY
REAR BASE RAIL
"C"
OUTSIDE
WALL PANEL
INSIDE OF BUILDING
ANCHOR HOLES
BASE RAIL
WALL PANELS
ANCHOR SCREWS
WASHER & SHIELD
INSIDE
ANCHOR HOLES
SIDE BASE RAIL
"A"

STEP
20
17
L17
DOOR AND HARDWARE ASSEMBLY
Install door braces No. 632 over top and bottom of left door panel...exactly as illustrated below.
Line up holes in brace with holes in door panel.
Fasten bottom brace only...with screw and door spacer on door jamb end and bolt and nut on
the other end. Use hole positions exactly as shown below.
Repeat for right door panel...be sure to position door spacer in correct position.
Install door handles. See "A"
1.
2.
3.
4.
LEFT HAND DOOR PANEL TOP DOOR BRACE
No. 632
* INSIDE VIEW OF DOOR *
RIGHT HAND DOOR PANEL TOP DOOR BRACE
No. 632
USE 10mm
(3/8") LONG
BOLT AND NUT
BOTTOM DOOR BRACE
No. 632
DOOR
SPACER
USE SELF
TAPPING
SCREW
10mm (3/8")
LONG
USE SELF
TAPPING SCREW
10mm (3/8")
LONG
USE 10mm (3/8")
LONG BOLT
AND NUT
BOTTOM DOOR BRACE
No. 632
DOOR SPACER
DOOR HANDLE
VIEWED FROM OUTSIDE BUILDING
"A"
USE 13mm (1/2") LONG BOLTS
AND NUTS FOR DOOR HANDLE
USE SMALL
WASHERS

STEP
21
18
L18
DOOR INSTALLATION
(FROM INSIDE)
Inside and near the corner of build-
ing, install bottom lip of left door
into track formed in base rail.
Position top of door so that holes
in door line up with CENTER holes
in door glide. Fasten door glides
to door with 10mm (3/8") long bolts
and nuts from THE INSIDE.
See "A"
Install right hand door in the same
manner.
1.
2.
3.
DOOR TRACK
"A"
DOOR HANDLE
INSTALL DOOR INTO TRACK IN BASE RAIL
AND TILT UP INTO PLACE
USE 10mm (3/8")
LONG BOLTS
AND NUTS
INSIDE OF BUILDING
ADJUST BOLT LOCATION
IN THESE 3 HOLES
FOR SQUARE FIT
STEP
22 DOOR ADJUSTMENT (FROM INSIDE)
Close doors to see if they meet squarely. There are 3
holes in each of the door glides to raise or lower doors
as required for a square fit.
1.
No. A67
CARE AND MAINTENANCE
••
••
•Finish: For long lasting finish, periodically clean and wax the exterior surface. Touch up scratches
as soon as you notice them on your building. Immediately clean the area with a wire brush; wash
it and apply touch up paint per manufacturer’s recommendation.
••
••
•Roof: Keep roof clean of leaves and snow with long handled, soft bristled broom. Heavy amounts
of snow on roof can damage the building making it unsafe to enter.
••
••
•Doors: Keep doors closed to prevent wind damage.
••
••
•Fasteners: Regularly check your building for loose screws, bolts, nuts, etc. and retighten them as
necessary.
••
••
•Moisture: With changing temperatures, condensation can accumulate inside the building.
••
••
•Other Tips: A non-corrosive caulking is helpful to seal the building.
Do not store swimming pool chemical in your building. Combustibles and corrosives must be stored
in airtight containers.

NOTES
NOTES-ENG

REPLACEMENT PARTS OR ANY QUESTIONS REGARDING YOUR BUILDING SHOULD BE
REFERRED DIRECTLY TO CUSTOMER SERVICE. DO NOT CONTACT YOUR DEALER,
THEY ARE NOT EQUIPPED TO SERVICE YOUR REQUESTS AS PROMPTLY AS THE
CUSTOMER SERVICE DEPARTMENT (1-800-851-1085).
PARTS REPLACEMENT ORDER FORM
** MODEL NO.______________ **
PART NO. QTY. COLOR
FOR PARTS REPLACEMENT PLEASE CONTACT
CUSTOMER SERVICE DEPARTMENT.
TELEPHONE NO. (1-800-851-1085)
NAME:
ADDRESS:
CITY: PROVINCE/STATE:
POSTAL CODE/ZIP: TELEPHONE:
PURCHASED FROM:
STORE ADDRESS:
DATE PURCHASED:
AH20
Parts Required
or Mail To: 3069 Wolfedale Road
Mississauga, Ontario L5C 1V9
/