Page is loading ...

CAUTION: Some parts have sharp edges. Care must be taken when handling
the various pieces to avoid a mishap. For safety sake, please read the safety
information provided in this manual before beginning construction. Wear
gloves when handling metal parts.
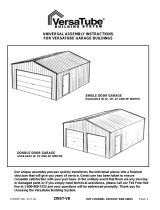
ASSEMBLY INSTRUCTIONS FOR
"GA" MODULAR BUILDINGS
ALL MODELS W01
15-0950807 English/French 08/07
VERSION FRANÇAISE AU DOS


W03
This building must be constructed on a SOLID AND
LEVEL BASE FOUNDATION. We recommend a poured
concrete pad for a floor and base. M
ake sure your
foundation area is firm and will allow drainage away from
the site.
A slight incline around the perimenter of the pad
is recommended to allow drainage of water away from the
wall panels. Make your solid base foundation at least
30cm (12”) larger than your building's base rail dimen-
sions. Refer to the chart on Page 4 for base dimensions.
This building could also be constructed on a wooden base
(floor) or wood frame, depending on requirements for
permits. The owner or installer should choose the type
of base (concrete or wood) prior to installation. The
manufacturer is not responsible for the choice and
the construction of the base.
3
“E” + 30cm (12")
MINIMUM
“D” + 30cm (12")
MINIMUM
DOORWAY
NOTE 1: To construct the concrete pad, first prepare a
level bed of compacted crushed stone. A concrete pad
should then be poured to a thickness of 15cm (6"). When
completed, allow to harden thoroughly for at least 48
hours.
NOTE 2: The foundation should be extended accordingly
with the number of extension modules purchased.
YOUR BUILDING MUST BE ANCHORED
Your building must be firmly anchored to your con-
crete pad...to help protect against damage from high
winds. Check the anchoring procedure and hardware
required on Page 38 NOW!
NOTE: Building anchors are NOT supplied as part of the
hardware package and may be purchased locally. Further
anchoring instructions follow after all wall and roof panels
have been installed.
GA Modular Buildings are available in a master module
of 152 cm (5') and extension modules of 122 cm (4'), 183
cm (6') and 244 cm (8'). The 152 cm (5') master module
contains the front and back walls.
The extension modules can be used in any combination
and sequence with the 152 cm (5') master module and in
any desired quantity. See the illustration below for sizes
and as a guide.
PREPARATION OF BUILDING SITE
MODULAR BUILDING COMPONENTS
MODULES
Can be used in any quantity and sequence with C1 module
DIMENSIONS - cm (inches)
A A1 B B1
307 (121) 236 (93) 243 (95.7) 190 (74.8)
C1 152 cm (5') master module
includes front and back walls
C2 122 cm (4') extension
C3 183 cm (6') extension
C4 244cm (8') extension

W04
"A" "C"
Model cm (in.) cm (in.)
GA105 307.3cm (121.0") 153.6cm (60.5")
GA109 307.3cm (121.0") 278.1cm (109.5")
GA1011 307.3cm (121.0") 340.4cm (134.0")
GA1013 307.3cm (121.0") 402.6cm (158.5")
GA1015 307.3cm (121.0") 464.8cm (183.0")
GA1017 307.3cm (121.0") 527.0cm (207.5")
GA1019 307.3cm (121.0") 589.2cm (232.0")
GA1021 307.3cm (121.0") 651.5cm (256.5")
GA1023 307.3cm (121.0") 713.7cm (281.0")
GA1025 307.3cm (121.0") 775.9cm (305.5")
GA1027 307.3cm (121.0") 838.2cm (330.0")
GA1029 307.3cm (121.0") 900.4cm (354.5")
GA1031 307.3cm (121.0") 962.7cm (379.0")
GA1033 307.3cm (121.0") 1024.8cm (403.5")
GA1035 307.3cm (121.0") 1087.1cm (428.0")
4
OVERALL MEASUREMENTS OF BUILDING
(ROOF DIMENSIONS)
"D" "E"
cm (in.) cm (in.)
293.3cm (115.5") 142.2cm (56.0")
293.3cm (115.5") 266.7cm (105.0")
293.3cm (115.5") 328.9cm (129.5")
293.3cm (115.5") 391.1cm (154.0")
293.3cm (115.5") 453.4cm (178.5")
293.3cm (115.5") 515.6cm (203.0")
293.3cm (115.5") 577.8cm (227.5")
293.3cm (115.5") 640.1cm (252.0")
293.3cm (115.5") 702.3cm (276.5")
293.3cm (115.5") 764.5cm (301.0")
293.3cm (115.5") 826.8cm (325.5")
293.3cm (115.5") 889.0cm (350.0")
293.3cm (115.5") 951.2cm (374.5")
293.3cm (115.5") 1013.5cm (399.0")
293.3cm (115.5") 1075.7cm (423.5")
MAXIMUM OUTSIDE DIMENSIONS OF BASE RAILS
ENTRANCE DIMENSIONS: HEIGHT 190.5 cm 75.0 in.
WIDTH 236.2 cm 93.0 in.
INSIDE HEADROOM: 207.0 cm 81.5 in.
Dimensions "C" and "E" may change depending
on the number and configuration of modules
purchased. Use this table as a guide.

5
W05

W06
6


PART # PART NAME (1.52m) 5' (1.22m) 4' (1.83m) 6' (2.44m) 8'
MASTER CARTON MODULE MODULE MODULE
R5G76MWH RIGHT FRONT CORNER PANEL 1 - - -
33 LEFT/RIGHT GABLE BRACKET 16 - - -
21H76WH WALL PANEL 7468
49H RIDGE COVER END CAPS 2 - - -
40H ALUMINUM WEATHER SEAL TAPE 1 - - -
50H ALUMINUM WEATHER SEAL TAPE ---1
P61 PLASTIC WASHERS (SHEET OF 64) 5234
BT1A WEATHER SEAL FOAM 2 - - -
13-100 LOUVER 2 - - -
19-000F DOOR ALUMINUM EXTRUSION 2 - - -
19-001F DOOR RUBBER INSERT FOR EXTRUSION 2 - - -
4L HINGE 4 - - -
DH14L LEFT DOOR HANDLE 1 - - -
DH14R RIGHT DOOR HANDLE 1 - - -
C14 PLASTIC DOOR HANDLE SPACER 4 - - -
C15 PLASTIC DOOR HANDLE SPACER 2 - - -
12-220 TINNERMAN NUT 2 - - -
19-020 CANE BAR BRACKET - BENT 2 - - -
19-021 CANE BAR BRACKET 2 - - -
19-023 CANE BAR ASSEMBLY 2 - - -
19-030 HANDLE COVER 2 - - -
13-007 EMBLEM 2 - - -
80 TAPE FOR EMBLEM 2 - - -
12-005P HARDWARE PACK 1 - - -
12-004P HARDWARE PACK - 1 - -
12-006P HARDWARE PACK - - 1 -
12-008P HARDWARE PACK ---1
INSTRUCTION MANUAL 1 - - -
WARRANTY REGISTRATION CARD 1 - - -
9
W09


W17
From what will be the outside of the Entry Frame
(i.e. the side without fasteners) position the
#R5G76MWH Right Front Corner Panel. Attach
Right Front Corner Panel to the Right Hand Front
Entry Frame (viewed from inside building) using the
six (6) vacant front fixing holes of each Entry Frame.
INSTALLATION NOTE... These six (6) fasteners
are required to pass through the Corner Panel and
the top, mid and lower fixing holes of the Entry
Frame. Refer to Fig. 4b on page 18.
IMPORTANT NOTE...All Midwall height fixing bolts
are required to be fitted with a #P61 Plastic Washer.
Repeat the instruction above to install the
#L5G76MWH Left Hand Corner Panel to the oppo-
site Side Entry Frame assembly.
17
4.4
4.5
Attaching Front Corner Panels
.
Attach each Hinge using three (3) Countersunk
bolts, nuts and 1.9cm (3/4") steel washers. Each
countersunk bolt is required to pass first through the
Hinge, and the Entry Frame where the 1.9cm (3/4")
washer is fastened by a lock nut on the inside of the
Entry Frame. (See Fig. 4c on page 18.)
4.6
Attaching Door Hinges
Select the four (4) Door Hinges #4L. NOTE...One leaf of
each hinge has a slight offset in it, this leaf is required to
be attached to the Door Frame and not on the Door.
Ensure that all fixing bolts and screws used in the
assembly of the Entry Frame are tight.

W18
18


/