Page is loading ...

IP4M-1052W-AI
4MP Wi-Fi Bullet Security Camera
User Manual
Version: 1.0.0
January 5th, 2023

2
Contents
Welcome ........................................................................................................................................................................ 3
Overview ........................................................................................................................................................................ 3
Live................................................................................................................................................................................10
Playback ........................................................................................................................................................................11
Cloud Storage ................................................................................................................................................................12
Setup .............................................................................................................................................................................13
Camera ..........................................................................................................................................................................13
Video .............................................................................................................................................................................17
Audio .............................................................................................................................................................................19
Network ........................................................................................................................................................................19
Event .............................................................................................................................................................................24
Destination ....................................................................................................................................................................33
System...........................................................................................................................................................................35
Alarm ............................................................................................................................................................................40
Logout ...........................................................................................................................................................................41
FCC Statement ...............................................................................................................................................................41
Appendix A: Toxic or Hazardous Materials or Elements ...................................................................................................41

3
Welcome
Thank you for purchasing an Amcrest camera!
Here you can find information about your camera’s features and functions and information to aid in
troubleshooting. For access to the quick start guide and other support information, go to
http://amcrest.com/support
To contact Amcrest support, visit http://amcrest.com/contact and use the email form.
Call Amcrest Support using one of the following numbers:
Toll Free: (888) 212-7538
International Callers (Outside of US): +1-713-893-8956
USA: +1-713-893-8956
Canada: 437-888-0177
UK: 203-769-2757
Important Security Warning
To keep your Amcrest camera secure and prevent unauthorized access, please make sure to follow the steps
below:
• Always make sure that your camera has the latest firmware as listed on
www.amcrest.com/firmware
• Never use the default password for your camera. Always ensure that your
password is at least 810 characters long and contains a combination of
lowercase characters, uppercase characters, and numbers.
Overview
This 4MP Wi-Fi bullet camera features the latest JS technology and updated chipset which allows the camera to be
viewed in any web browser such as Google Chrome, Mozilla Firefox, Safari, Microsoft Edge, etc. The camera
connects to your network using SoftAP. SoftAP is an abbreviated term for "software-enabled access point" and is
used to provide a more efficient way of connecting your device wirelessly. The camera by default broadcasts a
unique SSID that will be used for the SoftAP connection process. This means, if you are connecting your camera
wirelessly, SoftAP must be used using the Amcrest View Pro.
The camera provides a full 114° angle of view and features 1 IR LED for night vision or 2 white light LEDs to achieve
color night vision. The camera features on-board motion detection and built-in AI features, such human detection,
using smart motion detection, and IVS features such as tripwire and intrusion for increased perimeter protection.
The camera also features flexible storage options to store recordings to a microSD card (up to 256GB), SFTP/FTP,
NAS, or an NVR. All features can be accessed and customized using a web browser however can be viewed as well
using the Amcrest View Pro app.
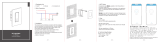
Connection & Installation
The below represents the height and width of the camera. The camera weights roughly 1.5lbs.

4
Installing a MicroSD Card
The camera can support a microSD card of up to 256GB. To insert a microSD card, open the hatch on the bottom of
the camera. Locate the microSD card slot and insert the microSD card into the slot and press in to secure the
microSD card into the slot. Place the hatch on the camera and secure it back onto the camera.
Physical Installation
Before physical installation of your camera please make sure the surface you are installing the camera on can
support up to 3x the weight of the camera.
1. Peel the sticker of the installation sticker off and place it onto the mounting surface. Use a drill to drill the
installation holes and insert the included wall anchors into the holes.
2. Align the holes on the installation bracket with the wall anchors. Insert the installation screws into the holes and
use a Phillips head screwdriver to secure the installation bracket to the mounting surface.
3. To adjust the camera angle, use a Phillips head screwdriver to loosen the screw located on the installation
bracket. Adjust the camera accordingly and tighten the screw to secure the camera.
Note: If you are installing on a wall the Wi-Fi antennas can be facing upwards, however, if you are installing on a
surface such as a ceiling, the antennas can be facing forwards if needed.
Camera Access Setup
This device uses SoftAP to connect the camera to your network. SoftAP is an abbreviated term for "software-enabled
access point" and is used to provide a more efficient way of connecting your device wirelessly. The camera by default
broadcasts a unique SSID that will be used for the SoftAP connection process. This means, if you are connecting your
camera wirelessly, SoftAP must be used using the Amcrest View Pro app to connect the camera to your Wi-Fi
network.
Before proceeding, please ensure the camera is plugged into a power source, make sure the camera and your mobile
device are on the same network during setup. Please note, users using iOS can connect to the hotspot automatically
however users using Android 10 or higher will have to manually connect to the hotspot during setup. For more
information on how to connect your camera using SoftAP, please refer to the information provided below.
Amcrest View Pro Setup
Please ensure the camera is plugged into a power source.
Make sure the camera and the mobile device are on the same network during setup.
The camera broadcasts a hotspot that will be used for initial setup. Users using iOS can connect to the hotspot
automatically however users using Android 10 or higher will have to manually connect to the hotspot during
setup.

5
1. Download the Amcrest View Pro app from the App
Store or Play Store. Open the app and allow all
requested permissions. Tap Start to begin.
2. Open the app and allow all requested permissions.
Tap Start to begin. Tap WiFi Camera.
3. Tap WiFi Configuration Setup.
4. Scan the QR Code located on your camera.
Note: If you do not have access to the QR code, tap
Enter S/N Manually to enter the serial number for the
camera manually. Tap Next to continue.

6
5. Ensure the camera is powered on and disconnected
from an Ethernet cable. Tap Next to continue.
6. The app will attempt to automatically connect to
the camera's hotspot (SSID). Allow up to 30 seconds
for the app to connect. Once it connects to the
hotspot, enter the default password for the camera's
hotspot. The default password will be admin.
Tap Next to continue.
7. If the app fails to automatically connect to the app
on this step you will need to manually connect to the
hotspot. To manually connect to the hotspot, tap on
the Go to the WLAN Setting option.
This will direct you to your mobile device's WiFi
settings page. Select the camera's hotspot SSID from
the menu (DAP-AMC501XXXXXXXXX) and return to the
app to complete the setup.
8. Locate your WiFi network then enter the WiFi
password in the interface. Tap Next and allow the
camera to connect to your WiFi network.

7
9. Give the camera a name (e.g. Garage, Kitchen,
Living Room, etc.) and provide the username and
password for your camera. The default username and
password will be admin. Tap Start Live View to
continue.
10. Enter a new password for your camera, confirm
the password, and click Modify Password.
For more information about Amcrest View Pro and its functionalities visit amcrest.com/support
Amcrest Cloud App Setup
Once the camera has been successfully connected to your network you can then connect the camera to the
Amcrest Cloud. This is an optional paid service Amcrest Cloud allows you to access your device from anywhere in
the world. Please note, you will need an Amcrest Cloud account to proceed with Amcrest Cloud app setup. You can
register for a cloud account in the Amcrest Cloud app or from the Amcrest Cloud website at amcrestcloud.com
• Please make sure your camera is plugged into a power source and your Ethernet cable is connected from the
camera to your router.
• Make sure your camera and mobile device are on the same network during setup.
• To ensure the camera connects to the cloud, a reboot of your camera is recommended. To add your camera onto
the Amcrest Cloud app, follow these steps:
1. Download and open the Amcrest Cloud app from the App Store or Play Store
Note: Connect your mobile device to the same network that your camera is on.
2. Register for an Amcrest Cloud account. To register click on Sign Up and fill out the form to complete registration.

8
3. Tap on Add Camera
4. Give your camera a name (Ex. Garage, Living Room,
Kitchen, etc.) and tap Next to continue.
5. Scan the QR code on the back/side/bottom of
the camera or manually enter the camera’s serial
number in the Enter camera S/N (serial number field.
Press Next to continue.
6. If you are adding a new camera that does not have a
set password the app will automatically detect that a
new camera is being added. Tap OK to proceed.

9
7. Set a new password for your camera. The password
must be between 8 to 32 characters long and contain
only letters and numbers. When you have finished
setting the password for your camera, enter the
password again in the Confirm Camera Password
section. Tap Next to continue.
8. If you are connecting a WiFi camera to the Amcrest
Cloud and would like to enable WiFi via the Ethernet
WiFi Setup method, tap Setup Camera WiFi.
Additionally, if you would like to skip the WiFi process
and have your WiFi camera running solely as a wired
device, tap on Skip WiFi Setup.
9. If you wish to enable WiFi on your WiFi camera, tap
Scan to scan and select your WiFi network from the
WiFi Network List. Enter the password for your WiFi
network onto the Password field. When the WiFi
password has been entered, tap Next to continue.
10. Confirm and adjust any needed settings for your
camera. When all settings have been confirmed, tap
Finish.

10
Accessing the Web User Interface
After the camera has been successfully connected to your network the web UI can now be accessed. This camera
features the latest in Javascript technology which allows you to access your camera using a wide variety of web
browsers including, Google Chrome, Firefox, Safari, or other mainstream web browsers using your PC or Mac.
Please note, for an optimal experience with a web browser, it is highly recommended to use the Internet Explorer
or IE Mode using Microsoft Edge as some features may still require the use of a plugin.
If using IE Mode, please make sure to allow all plugins as they will be necessary to view all the features. For more
information on how to access your camera from your computer please refer to the information below.
To access your camera from your computer you will need to first locate the camera’s IP address. To locate the
camera’s IP address is it highly recommended to download our free Amcrest IP Config Tool software. The Amcrest
IP Config Tool can be downloaded at the following web page: amcrest.com/downloads
In the All-Downloads menu, click on IP Config Software to begin the free download. Once the download has
completed installing, locate the IP address associated with the device you would like to view in the browser. Open
the web browser and enter this IP address into the browser. Press Enter to access the web user interface. Enter
the username and password for your camera and click Login to access the web UI.
Live
The live view interface allows the user to see a live video feed from the camera, the current bit rate (Kbps), adjust
PT controls, set PT functions, etc. Below is a description of the options provided in this menu.
Main Stream: Click this option to view the main stream feed of the camera.
Sub Stream: Click this option to view the sub stream feed of the camera.
Please refer to the tables provided below for a description of the features listed in this menu.
Section 1: This bar allows the user to select which stream type and which protocol they want to choose. Section 2:
The functions bar allows the user to perform different camera functions while in live mode. See the table below for
an explanation of the different functions available:
Button
Function Name
Function Description
Spotlight Activation
Click this option to manually activate the built-in spotlight (blinking). If
this option is triggered or enabled, click this icon again to turn off the
light.
Siren Activation
Click this option to manually activate the built-in siren (IE Mode only).
Digital Zoom
Click this option and use your mouse on the interface to digitally zoom in
on an area. Only available in IE Mode
Snapshot
Click this button to manually take a snapshot of the live view.
Triple Snapshot
Click this button to manually take 3 consecutive snapshots of the live
view. Only available in IE Mode
Manual Record

11
Click this button to manually record video of the live view Only available
in IE Mode.
Audio
Click this button to enable or disable audio output from the camera. This
feature allows the user to listen in on the audio the camera’s microphone
is picking up.
Talk
Click and hold this button to enable bidirectional talk. This feature allows
the user to broadcast audio from their computer to the camera. While
this is active, the camera’s speaker is shut off to keep audio quality high.
Only available in IE Mode
Button
Function Name
Function Description
Image Adjustment
This button opens the image adjustment toolbar, which allows the user to
adjust brightness, contrast, saturation, and hue for the live feed’s picture.
Only available in IE Mode
Adapt/Original Size
This button allows the user to switch between displaying the original size of
the stream in its set resolution, or to adapt to the size of the monitor display
the feed is being viewed on. Only available in IE Mode
Full Screen
This button allows the user to make the live feed go into full screen mode.
Double click the mouse or click the ESC button to exit full screen mode. Only
available in IE Mode
Width/Height Ratio
This button allows the user to change the width/height ratio for the live feed.
The options are Original and Adaptive. Original uses the aspect ratio of the
stream’s set resolution, and adaptive fits the feed to the aspect ratio of the
monitor display the feed is being viewed on. Only available in IE Mode
Stream Fluency
This button allows the user to change the stream fluency. There are 3
options. Realtime reduces delay and decreases fluency, and Fluency has a
larger delay, but the video stream becomes more fluid. Only available in IE
Mode
IVS Overlay
Click this button to enable or disable the IVS overlay if enabled. Only
available in IE Mode
Playback
The Playback tab allows the user to playback the camera’s recorded video. Below is a screenshot of the Playback
tab:

12
This is the interface for the playback menu. There are 7 main sections:
Quick Actions: This panel allows the user to zoom in on playback footage, take a snapshot of the playback footage,
or open the help menu.
File Menu: This panel allows the user to select a file type and data source.
Calendar: This panel allows the user to pick a date that they would like to playback video from. When a date has
recorded footage available, it’s green. The current date is blue, unless it has recorded footage, then it’s a lighter
green.
File List: This button opens a file list of all recorded video for a specific date range. From here, the user can
download these videos to their PC.
Trim Panel: This panel allows the user to trim playback video for download. By specifying time stamps, the user
can trim down.
Recorded Video Panel: This panel allows the user to specify what type of video they would like to playback and it
also allows the user to select where to start playback from. The buttons on the bottom right allow the user to
select a zoom level.
Playback Bar: This panel allows the user to control playback. It also allows the user to control playback speed, and
playback volume. Clicking the File List opens the following screen on the sidebar:
This allows the user to select files for download. Select the files by clicking the checkbox next to each file, and then
click to download the files to your computer.
Cloud Storage
The Cloud Storage button allows the user quick access to the Amcrest Cloud website. At this website
(amcrestcloud.com) users can register for new accounts as well as view or modify existing accounts.
For more information on Amcrest Cloud visit: amcrest.com/cloud

13
Setup
The Setup tab allows the user to change different camera settings Below is a screenshot of the setup tab:
There are 3 main sections to note in the Setup tab:
1. Menu Bar: The menu bar is composed of menu sections, which when clicked display any menu items that fall
under their category.
2. Menu Items: These menu items each open a different menu that allows the user to change specific settings.
3. Menu Tab: These options allow the user to access other tabs associated with a selected menu item.
Camera
This menu section allows the user to change different camera settings for video, audio, and to manage image
profiles.
Configuration
This menu allows the user to configure image profiles for normal, day, and night usage.
Picture
The picture menu allows the user to adjust image options for the camera. Below is an explanation for each of the
fields on the Configuration tab in the Configuration menu item:
Profile: This dropdown box allows the user to select which profile to modify. The 3 options are Day, Night, and
General.
Brightness: This slider is used to adjust playback and recorded video window brightness. The value ranges from 0
to 100. The default value is 50. The larger the number, the brighter the video is. When you input the value here,
the bright section and the dark section of the video will be adjusted accordingly. You can use this function when

14
the whole video is too dark or too bright. Please note the video may become hazy if the value is too high. The
recommended value ranges from 40 to 60.
Contrast: This slider is used to adjust playback and recorded video window contrast. The value ranges from 0 to
100. The default value is 50. The larger the number is, the higher the contrast is. You can use this function when
the whole video brightness is OK but the contrast is not correct. Please note the video may become hazy if the
value is too low. If this value is too high, the dark section may lack brightness while the bright section may
overexpose. The recommended value ranges from 40 to 60.
Saturation: This slider is used to adjust playback and recorded video window saturation. The value ranges from 0
to 100. The default value is 50. The larger the number, the stronger the color is. This value has no effect on the
general brightness of the whole video. The video color may become too strong if the value is too high. For the grey
part of the video, distortion may occur if the white balance is not accurate. Please note the video may not be clear
if the value is too low. The recommended value ranges from 40 to 60.
Sharpness: This slider is used to adjust the sharpness of the video. The value ranges from 0 to 100. The larger the
value is, the clearer the edges are and vice versa. Note: The higher the value, the higher likelihood of picture noise
occurring. The default value is 50 and the recommended value ranges from 40 to 60.
Gamma: This slider is used to adjust the gamma of the video. The larger the number, the brighter the video is.
The default value is 50 and the recommended value ranges from 40 to 60.
Mirror: Enable this option to mirror the image.
Flip: This dropdown box allows the user to flip the video feed picture. Flipping the picture is recommended only if
the camera is mounted upside down.
To reset to default settings, click the Reset Defaults button. To refresh the screen, click on Refresh. To save the
settings, click the Save button.
Exposure
This menu allows users to select and adjust exposure settings which ultimately control the amount of light that
reaches your camera’s sensor. Below is an explanation of the exposure features for this camera.
Profile: This dropdown box allows the user to select which profile to modify. The 3 options are Day, Night, and
General.
Anti-Flicker: These radio buttons allow the user to select what type of antiflicker technology should be used for the
video feed. The three options are 50 Hz, 60 Hz, and Outdoor. The desired option should offset any flickering effect
caused by the electrical current used in the specific area.
Mode: This dropdown box allows the user to select different exposure settings such as, Auto, Aperture Priority,
Shutter Priority, Gain Priority or manual settings. For more information on these settings, refer to the information
provided below:
Auto: Allows the user to automatically set exposure settings based on surrounding environments.
Shutter Priority: Allows the user to set shutter settings in the camera. This allows the camera to
automatically detect optimal aperture settings based on surrounding environments. The default shutter
speed is 1/30, however, it can range to 1/30000.
gainFirst: Allows the user to prioritize gain levels based on the surrounding environment of the camera.
The default gain value is from 0 ~ 50, however, can range from 0 ~ 100.
Manual: Allows the user to manually control and adjust aperture, shutter, and gain priorities. Each value
will be set to default unless modified by the user.
3D NR: This radio button allows the user to turn the 3D Noise Reduction feature on or off.
Advanced 3D: This slider allows the user to specify the 3D Noise Reduction level. The value ranges from 1-100.
Advanced 2D: This slider allows the user to specify the 2D Noise Reduction level. The value ranges from 1-100.

15
To reset to default settings, click the Reset Defaults button. To refresh the screen, click on Refresh. To save the
settings, click the Save button.
BLC Mode
This menu allows the user to set backlight composition settings to enhance image quality. Below is an explanation
of the features provided in this menu.
Profile: This dropdown box allows the user to select which profile to modify. The 3 options are Day, Night, and
General.
Mode: These modes allow the user to set compensation settings within the camera. The items listed in this
dropdown box are BLC, and HLC.
BLC: Stands for backlight compensation. Select this option to optimize exposure in the foreground and
background of the video stream.
HLC: Stands for highlight compensation. Select this option to reduce glare or other high-level light spots.
This is typically useful for night vision or in other dark or low-level light environments.
To reset to default settings, click the Reset Defaults button. To refresh the screen, click on Refresh. To save the
settings, click the Save button.
WB
This menu allows the user to apply white balance presets to the video stream. The different options in this menu
are auto, indoor, outdoor, ATW, customized, sodium lamp, sunny, night. Below is an explanation of the features
provided in this menu.
Profile: This dropdown box allows the user to select which profile to modify. The 3 options are Day, Night, and
General.
Mode: Use this dropdown menu to select a white balance preset.
Auto: Allows the user to automatically set white balance settings based on surrounding environments
Sunny: Allows the user to automatically set white balance settings based on heavily lite or sunny
environments.
Night: Allows the user to automatically set white balance settings based on low light or dark
environments.
Outdoor: Allows the user to set preset white balance settings for outdoor use.
Customized: Allows the user to adjust the red and blue colors of the video stream. The default settings for
both values are 50, but they can range from 0 ~ 100.
Regional Customized: Allows the user to select an area (region) on the live view screen in which white
balance will be most applicable.
To reset to default settings, click the Reset Defaults button. To refresh the screen, click on Refresh. To save the
settings, click the Save button.
Day & Night
Used to determine when black and white mode is turned on in a dark environment. Below is an explanation of the
features provided in this menu.

16
Profile: This dropdown box allows the user to select which profile to modify. The 3 options are Day, Night, and
General.
Type: These radio buttons are used to switch between Electrical and ICR settings.
Electrical: This option uses an image processing method for day & night transition.
ICR: This option uses an IR filter for day and night transitions.
Mode: This menu allows user to select day & night presets based on the surrounding environment of the camera.
For more information on the items listed in this field, refer to the information provided below:
Color - Always represents picture in color, does not use IR or black and white mode. Performs poorly in
dimly lit areas unless you are using the Starlight series cameras.
B/W: Allows the user to set the video stream to black and white, however, if the illuminated image is too
dark it will switch to IR mode.
Auto: Uses day and night sensitivity settings to change between color mode, infrared, and black& white
modes.
Sensitivity: This option allows the user to change the Day/Night Sensitivity of the camera. The three
options are Low, Middle, and High. The higher the sensitivity, the quicker the camera will change into
another mode depending on the light levels.
Delay: This dropdown box allows the user to set a delay in seconds for how long it takes to switch
between Day and Night modes. The values range from 2 seconds to 10 seconds.
To reset to default settings, click the Reset Defaults button. To refresh the screen, click on Refresh. To save the
settings, click the Save button.
IR Light
This menu allows users to choose different night vision modes. Below is an explanation of the features provided in
this menu.
Profile: This dropdown box allows the user to select which profile to modify. The 3 options are Day, Night, and
General.
Fill Light: Allows the user to choose between different night vision modes.
White Light: Illuminates the spotlights for color night vision.
IR Mode: Illuminates the IR LEDs for black and white night vision.
Smart Illumination: Controls the intensity of the white light based on conditions in the area. It also allows
you to set an illuminator delay which will illuminate the light based on a set duration. The default delay is
60 seconds however it can range from 30~300 seconds.
Mode: Allows the user to set a selected night vision mode to activate manually, automatically, or turn it off.
Flash Delay: Allows the user to set an amount of time in between flashes once motion is detected.
To reset to default settings, you can also click the Reset Defaults button. To refresh the screen, click on Refresh. To
save the settings, click the Save button.
Indicator Light
This menu allows the user to enable or disable the on-board indicator LED found on the motherboard of the
camera. Please note, do not dismantle your camera, this is for internal use only.
Profile: This dropdown box allows the user to select which profile to modify. The 3 options are Day, Night, and
General.
Mode: Use this dropdown menu to select the on off options.

17
To reset to default settings, you can also click the Reset Defaults button. To refresh the screen, click on Refresh. To
save the settings, click the Save button.
Profile Management
Allows the user to manage global profile settings. Below is an explanation for each of the fields on the Profile
Management tab in the Configuration menu item:
Profile Management: This set of radio buttons allow the user to set what basis the profile management settings
run on. There are 4 options: General, Full Time, Schedule, and Day/Night.
General: The camera can be set to manually alternate between night and day based on the profiles for each.
Full Time: The camera sticks to one profile the entire time it is running.
Schedule: Allows the user to choose which times of the day are designated for the day profile and the night
profile.
Day/Night: The camera can be set to manually alternate between night and day based on the profiles for
each.
To reset to default settings, click the Reset Defaults button. To refresh the page, click the Refresh button. To save
the settings, click the Save button.
Video
The video menu allows the user to view and adjust encode, snapshot, overlay, and path settings. Below is an
explanation for each of the fields on the Video tab in the Video menu item:
Encode Mode: This dropdown box allows the user to select a compression protocol. The system supports H.264
and MJPEG video compression protocols.
Smart Codec: Reduces bandwidth consumption without losing visible image quality by intelligently increasing
compression where it will not make a visible difference in the scene.
Resolution: This dropdown box allows the user to set the resolution. The system supports various resolutions and
they can be selected from this dropdown list.
Frame Rate (FPS): This dropdown box allows the user to select a frame rate. Frame rate settings are measured in
frames per second (FPS) and can range from 1f/s to 25f/s in PAL mode and 1f/s to 30f/s in NTSC mode.
Bit Rate Type: This dropdown box allows the user to select a bit rate type. The system supports two bit rate types:
CBR and VBR. In VBR mode, video quality can be set.
Reference Bit Rate: This is the recommended bit rate value according to the resolution and frame rate selected.
Bit Rate: This dropdown box allows the user to select a bit rate.
Frame Interval: This field allows the user to set the P frame amount between two I frames. The value ranges from
1 to 150 seconds. Default value is 50. Recommended value is frame rate *2.
Watermark Settings: This function allows the user to verify if the video has been tampered with.
Watermark Character: This field allows the user to set the watermark’s text. The default string is Digital CCTV. The
maximum length is 85 characters. This string can only include numbers, characters, and underscores.
Sub Stream is a lower quality stream that allows the feed to take up less resources and bandwidth when
streaming.
To reset to default settings, click the Reset Defaults button. To refresh the page, click the Refresh button. To save
the settings, click the Save button.

18
Snapshot
The snapshot tab allows the user to adjust all snapshot settings sent by the camera. This includes the type, size,
quality and intervals. Below is an explanation of the features provided in this menu.
Snapshot Type: This dropdown box allows the user to select a snapshot mode. There are two snapshot modes:
General: Apply settings to all general snapshot events sent by the camera.
Event: Apply settings to all event snapshot events sent by the camera.
Image Size: This dropdown box shows the image size. By default, the screenshot size is the same size as the video
feed’s resolution.
Quality: This dropdown box allows the user to select image quality. Quality is adjusted on a scale of
1-6.
Interval: This is to set snapshot frequency. The value ranges from 1 to 7 seconds. The maximum setting for a
customized interval is 3600s/picture.
To reset to default settings, click the Reset Defaults button. To refresh the page, click the Refresh button. To save
the settings, click the Save button.
Overlay
The overlay tab allows the user to customize channel titles, time, OSD information, and/or custom titles. This menu
also allows the user to enable or disable the Amcrest overlay on the live view screen. Please note, due to certain
limitations within the camera, it does not offer features such as privacy masking. Below is an explanation of the
features in this menu.
Privacy Masking: Allows the user to block out up to 4 different areas of the screen. Use your mouse to adjust the
custom privacy masking blocks accordingly. Click Delete to remove a single block, to remove all, click Remove All.
Channel Title: Modify the name of the camera in the provided overlay. Use your mouse to place the overlay in
different areas on the screen.
Time: Enable or disable the date & time overlay on the live view screen. Enable the Display Day of the Week option
to display the day of the week as well in the overlay.
Text Overlay: Create a custom text overlay that will be displayed on the live view screen. Use the Text Align
dropdown menu to align the text left or right.
Logo Overlay: Enable or disable the Amcrest logo on the live view screen.
To reset to default settings, click the Reset Defaults button. To refresh the page, click the Refresh button. To save
the settings, click the Save button.
Path
This menu allows the user to set a designated path on their computer for a specified recording type. Please note,
this feature is only available on IE Mode in Microsoft Edge as it requires a plugin from the browser to function.
Below is an explanation for each of the fields on the Path tab in the Video menu item:
Live Snapshot: Allows the user to select where to save live snapshots to. Click the Browse button to select a
different destination folder.
Live Record: Allows the user to select where to save live recordings to. Click the Browse button to select a different
destination folder.

19
Playback Snapshot: Allows the user to select where to save playback snapshots to. Click the Browse button to
select a different destination folder.
Playback Download: Allows the user to select where to save playback video downloads to. Click the Browse button
to select a different destination folder.
Video Clips: Allows the user to select where to save video clips to. Click the Browse button to select a different
destination folder.
To reset to default settings, click the Reset Defaults button. To save the settings, click the Save button.
Audio
This menu allows the user to modify audio settings for the camera. Below is an explanation for each of the fields
on the Audio menu:
Enable: This checkbox allows the user to enable audio recording.
Encode Mode: This dropdown box allows the user to select what audio format the audio should be recorded in.
Sampling Frequency: This dropdown box allows the user to select a sampling frequency for audio. The options are
8k, 16k, 32k, 48k, and 64k. It is recommended to keep this option as default which is 8k for both mainstream and
substream.
Audio in Device: This field allows the user to select what source to get audio from. The default is the camera’s
built-in mic. Alternatively, the line in mic can be selected.
Noise Filter: This dropdown box allows the user to enable or disable the audio noise filter function. This function
provides cleaner audio quality when enabled.
Microphone Volume: This slider allows the user to adjust the audio in volume for the camera. The value ranges
from 0 to 100. The default value is 100.
Speaker Volume: This slider allows the user to adjust the audio out volume of the camera. The value ranges from 0
to 100. The default value is 50.
To reset to default settings, click the Reset Defaults button. To refresh the page, click the Refresh button. To save
the settings, click the Save button.
Alarm Audio
This menu allows the user to choose between different audio clips for the siren.
By default, the default siren will be “siren.wav”. A custom audio file can also be used if necessary. The audio file
must be in .wav format and no less than 1 to 2 seconds long. To add a custom siren, click on Add Audio File and
import the .wav file into the interface. Choose the file and exit the interface. The siren options chosen will be
applicable to all siren options available on the camera.
To test the siren, return to the Live menu and click the siren icon ( ) located on the interface.
Network
This menu allows the user to modify network settings for the camera. This includes, TCP/IP settings, port
connections, DDNS, Email settings, Wi-Fi, and HTTPS settings.

20
TCP/IP
The TCP/IP menu item has two tabs: TCP/IP and P2P. TCP/IP stands for Transmission Control Protocol/Internet
Protocol and it is the language/protocol that allows communication between internet connected devices, whether
on a local network, or a on the Internet at large. This screen allows for TCP/IP settings to be modified for the
camera to establish a connection to the network.
Below is an explanation of the fields on the TCP/IP settings tab:
Host Name: This text field allows the user to change the host device name for the camera. This field supports a
maximum of 15 characters.
Ethernet Card: This dropdown box allows the user to select which internet access device to use. If the device is
connected to a wired connection and a wireless one at the same time, then this box will have options to pick either
of the connections. The Set as Default button allows the user to select one of the connection methods as the
default one.
Mode: Static vs DHCP: This radio button allows the user to choose between a static IP address, and a dynamic IP
address. DHCP stands for Dynamic Host Configuration Protocol, and this enables the camera to automatically
obtain an IP address from another network device such as a server or more commonly, a router. When the DHCP
function is enabled, the user cannot modify the IP address, Subnet Mask, or Default Gateway, as these values are
obtained from the DHCP function. To view the current IP address, DHCP needs to be disabled.
MAC Address: This field shows the camera’s MAC address, which is unique to this device. This number is read only
and is used to access a local area network (LAN).
IP Version: This dropdown allows the user to select the IP version. The two options are IPV4 and
IPV6.
IP Address: This field allows the user to enter a custom IP address.
Subnet Mask: This field allows the user to enter a custom subnet mask.
Default Gateway: This field allows the user to enter a custom default gateway.
Preferred DNS Server: This field allows the user to enter the preferred DNS server
IP address.
Alternate DNS Server: This field allows the user to enter the alternate DNS server IP address.
Enable ARP/Ping to set IP Address Service: This checkbox allows the user to enable the ARP/Ping service to change
the IP address service. For more information on this feature, click the help button while on the TCP/IP settings tab.
To reset to default settings, click the Reset Defaults button. To refresh the page, click the Refresh button. To save
the settings, click the Save button.
P2P
This menu provides the ability to enable or disable P2P, the current P2P, the serial number of the camera, and a
scannable QR code which can be used to link the camera to the Amcrest View Pro app or other applicable devices.
Below is an explanation of the fields on the P2P settings tab:
Enable: This checkbox allows the user to enable the P2P feature for the camera. This feature must be enabled for
the camera to connect to a smartphone or tablet via the Amcrest View app.
Status: This field displays the status of the P2P connection. Once the camera is connected to a device, this field
should display the word Online.
S/N: This field displays the Token ID for the camera. The Token ID can be used to manually enter the camera’s
information on a mobile or tablet device in case the QR code scanning feature cannot be used.
/