Page is loading ...

Solenoid valve, electric pump
and pressure switch assembly
Transformer
PARTS BAG
Rerverse osmosis system water return valve for hot water
line with brass insert, delrin sleeve and brass compression
nut. Four Pump mounting screws, drain plug and four plas-
tic nuts.
Check valves and flow
restrictor assembly
Parts Included in the Kit
ZERO WASTE REVERSE OSMOSIS RETROFIT KIT
INSTALLATION INSTRUCTIONS
Watts Premier, Inc.
1725 W. Williams Dr
Phoenix, AZ 85027
Flow Restrictor
Check Valves
4' of Black Tube
Electric
Pump
Solenoid
Valve Wire Harness for
valve & Pump
Pressure
Switch
4' of Green Tube
WATTS
Recommended Tools for Installation
Sharp knife Channel lock
5/8” wrench Cressant wrench
Philips screwdriver / Screw gun Phone: 800-752-5582
Fax: 623-931-0191
www.wattspremier.com
Adapta-valve
Rev 10/15/02
page 1

Installation Steps for Zero Waste Reverse Osmosis Retrofit Kit
Note: RO unit must be installed a mimimun of 25 feet from hot water heater.
Step 1Turn off the hot (#1 in Fig. 1) and cold (#2 in Fig. 1) water supply lines to the sink at the angle
stop valves. If system is hooked up to an ice maker close the valve to the ice maker.
Step 2Drain tank by opening the RO faucet (#3 in Fig. 1).
Step 3Disconnect the standard hot water sink faucet supply line and install the included water supply
valve to the hot water angle stop (#4 in Fig. 2). Then reconnect the standard sink faucet supply
line to the included water supply valve. If the standard hot water sink faucet supply line does
not disconnect from the hot water angle stop, the included hot water supply valve will have to be
installed at the hot water sink faucet fitting (#21 Fig. 2).
Step 4Remove waste water tube on membrane housing (#5 in Fig. 1).
Step 5a If system has an air gap faucet, cut the air gap inlet tube approximately 6” from the faucet
connection ( #6 in Fig. 1). This tube will not be reconnected to anything.
Step 5b If system has a non air gap faucet, disconnect at drain saddle (#7 in Fig. 1) and use the plug
provided to seal opening where the tube was connected with drain saddle.
Step 6Attach the short tube of the new flow restrictor assembly on the membrane housing at #8 in
Fig. 2).
Step 7Attach the long tube from the flow restrictor assembly to the hot water supply valve (#9 in Fig.
2).
Step 8Remove the inlet water tube going into the membrane filter vessel (#10 in Fig. 2).
Step 9Attach the tube from the solenoid (#11 in Fig. 2) to membrane inlet (#10 in Fig. 2).
Step 10 Remove the outlet tube coming from the last prefilter bowl’s lid (#13 Fig. 2).
Step 11 Attach the new tube that is attached to the pump inlet (#12 Fig. 2) to the outlet of the last
prefilter bowl’s lid (#13 in Fig. 2).
Step 12 Mount the solenoid and pump in a convienant location. Be sure that the tubes are not kinked.
Step 13 Locate the outlet of RO water from membrane filter vessel (#14 in Fig. 1). Cut the tubing at the
shut off valve (#15 in Fig. 1).
Step 14 Locate the tube going to the tank (#16 in Fig. 1). Follow it back to automatic shut off switch and
cut the tube at the shut off valve (#17 in Fig. 1).
Step 15 Insert the tube from step 13 by pushing it into the connector on the side of the pressure switch
(#18 in Fig. 2). Insert the tube from step 14 into the connector on the other side (#19 in Fig. 2).
The switch has a quick disconnect fittings which require the tube to be inserted and pushed
firmly into the fitting. To disconnect, push on the plastic ring while pulling the tube.
Step 16 All Electrical connections are color coded for your convenience. Connect the transformer to
the wiring harnesses (#20 in Fig. 2).
Step 17 Turn on the hot and cold water supply lines (open ice maker valve after tank has filled, if con-
nected to an ice maker.) Check for leaks and tighten fittings as needed.
Step 18 Plug the transformer into an electrical outlet (not the garbage disposal outlet) and let the unit run for
two minutes. Check for leaks and tighten fittings as needed.
Step 19 Periodically check unit for leaks during the first 5 days of operation. If leaks develop, please shut off the
unit by closing the small valve on the angle stop valve and call customer service for troubleshooting.
(Customer service is available 8:00am to 5:00pm Arizona time at 1-800-752-5582.
page 2

Serial # NSF Premier
Membrane
Cold Water
Angle Stop
Valve
Sediment
Filter Carbon
Filter
Reverse Osmosis
Storage Tank
Reverse Osmosis
Water Faucet
Carbon
Filter
<-- Flow--
Flow Restrictor
Rev 9/19/02
Electric
Pump
Sol.
Valve
Transformer
110VAC to 24VAC
Wire Harness
for valve
& Pump
Pressure
Switch
Check Valves
Hot Water
Angle Stop
Valve
Figure 2 - Reverse Osmosis System with Zero Waste Kit Installed
Yellow background indicates the retro-fit kit parts
Standard Sink
Water Faucet
RO System
Valve Fitting
8
10
13
18
19
1
9
2
Standard
Sink
Drain
20
4
11 12
21
<-- Flow--
Standard Sink
Water Faucet
Standard
Sink
Drain
1
Figure 1 - Standard Reverse Osmosis System
Before Kit is Installed
Rev 9/19/02
Serial # NSF Premier
Membrane
Cold Water
Angle Stop
Valve Sediment
Filter Carbon
Filter
Reverse Osmosis
Storage Tank
Reverse Osmosis
Water Faucet
Carbon
Filter
Flow Restrictor
Hot Water
Angle Stop
Valve
5
14
6
1517
3
7
2
16
LEGEND
Blue Tube = Reverse Osmosis Water
Red Tube = System to Air Gap Water
Black Tube = Air Gap to Drain Water
Green Tube = Incoming & Pre-filter Water
page 3

Warranty
LIMITED WARRANTY: Watts Pure Water warrants each product to be free from defects in material
and workmanship for a period of one year from the date of original shipment. In the event of such
defects within the warranty period, the Company will, at its option, replace or recondition the product
without charge. This shall constitute the sole and exclusive remedy for breach of warranty, and the
Company shall not be responsible for any incidental, special or consequential damages, including,
without limitation, lost profits or the cost of repairing or replacing other property which is damaged if
this product does not work properly, other costs resulting from labor charges, delays, vandalism,
negligence, fouling caused by foreign material, damage from adverse water conditions, chemicals, or
any other circumstances over which the Company has no control. This warranty shall be invalidated
by any abuse, misuse, misapplication or improper installation of the product. THIS WARRANTY IS IN
LIEU OF ALL OTHER WARRANTIES, EXPRESS OR IMPLIED, INCLUDING ANY IMPLIED
WARRANTIES OF MERCHANTIBILITY OR FITNESS FOR A PARTICULAR PURPOSE. Any implied
warranties that are imposed by law are limited in duration to one year.
Some States do not allow limitations on how long an implied warranty lasts, and some States do not
allow the exclusion or limitation of incidental or consequential damages. Therefore, the above
limitations may not apply to you. This Limited Warranty gives you specific legal rights, and you may
have other rights that vary from State to State. You should consult applicable State laws to determine
your rights.
page 4
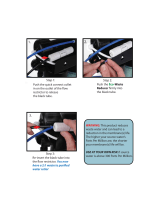
Step 1
Step 2
Step 3
Step 4
Step 5
Turn off hot and cold water supply lines, (close ice maker valve if
it applies).
Unplug the pump from electrical outlet.
Open RO faucet to drain tank, leave faucet open. If unit has a
ball valve on tank close the ball valve and tank does not have to
be emptied.
Follow normal maintenance procedures found in the original RO
manual.
After maintenance is complete turn on hot and cold water supply.
Step 6Plug pump into electrical outlet.
Step 6Close RO faucet once water begins to trickle out.
Shut down procedure for filter and membrane maintenance
/