Amcrest IP4M-1025EB User manual

Category
Security cameras
Type
User manual
1
1.3MP POE Bullet (IPM-743ES)
2MP POE Bullet (IP2M-842E)
3MP POE Bullet (IP3M-954E)
4MP POE Bullet (IP4M-1025E)
User Manual
Version 1.0.3
Revised May 3
rd
, 2016
2
Welcome ........................................................................................................................................................................ 5
Important Security Warning .......................................................................................................................................... 5
Important Safeguards and Warnings ............................................................................................................................. 6
1 Features and Specifications ........................................................................................................................................ 7
1.1 Overview .............................................................................................................................................................. 7
1.2 Features ............................................................................................................................................................... 7
2 Device Overview ......................................................................................................................................................... 8
3 Connection & Installation ........................................................................................................................................... 9
3.1 Connection Guide ................................................................................................................................................ 9
3.2 Installation Guide ................................................................................................................................................. 9
4 Camera Access Setup ................................................................................................................................................ 11
4.1 Default Username and Password ...................................................................................................................... 11
4.2 How to Setup the Camera.................................................................................................................................. 12
4.2.1 Setting up Your Camera for the First Time ................................................................................................. 12
4.2.1 For Configuring Advanced Settings On Your Camera ................................................................................. 12
4.2.3 For Cloud Storage and Playback ................................................................................................................. 12
4.2.4 For Quick Web Access To Your Cameras .................................................................................................... 12
4.3 Amcrest View App Setup ................................................................................................................................... 13
4.4 Desktop Access Setup ........................................................................................................................................ 16
4.6 Amcrest Cloud Setup ......................................................................................................................................... 18
4.7 Web Access Setup (AmcrestView.com) ............................................................................................................. 19
4.8 Remote Web Access Setup ................................................................................................................................ 20
4.8.1 UPnP/DDNS Remote Web Access Setup ..................................................................................................... 20
4.8.2 Port Forwarding Remote Web Access Setup .............................................................................................. 21
4.10 NVR Access ...................................................................................................................................................... 22
5 Operation and Interface ........................................................................................................................................... 23
5.1 Live ..................................................................................................................................................................... 23
3
5.2 Setup .................................................................................................................................................................. 25
5.2.1 Camera ........................................................................................................................................................ 26
5.2.1.1 Configuration ....................................................................................................................................... 26
5.2.1.2 Video .................................................................................................................................................... 29
5.2.2 Network ...................................................................................................................................................... 33
5.2.2.1 TCP/IP .................................................................................................................................................. 33
5.2.2.2 Connection ........................................................................................................................................... 35
5.2.2.3 PPPoE ................................................................................................................................................... 36
5.2.2.4 DDNS .................................................................................................................................................... 37
5.2.2.5 IP Filter ................................................................................................................................................. 38
5.2.2.6 SMTP (Email) ........................................................................................................................................ 39
5.2.2.7 UPnP .................................................................................................................................................... 40
5.2.2.8 SNMP ................................................................................................................................................... 41
5.2.2.9 Bonjour ................................................................................................................................................ 41
5.2.2.10 Multicast ............................................................................................................................................ 42
5.2.2.11 WiFi (Not Available on Amcrest POE Bullet Cameras) ....................................................................... 42
5.2.2.12 802.1x ................................................................................................................................................ 43
5.2.2.13 QoS..................................................................................................................................................... 43
5.2.3 Event ........................................................................................................................................................... 44
5.2.3.1 Video Detection ................................................................................................................................... 44
5.2.3.2 Abnormality ......................................................................................................................................... 46
5.2.4 Storage ........................................................................................................................................................ 49
5.2.4.1 Schedule .............................................................................................................................................. 49
5.2.4.2 Destination .......................................................................................................................................... 52
5.2.4.3 Record Control ..................................................................................................................................... 53
5.2.5 System ........................................................................................................................................................ 55
5.2.5.1 General ................................................................................................................................................ 55
4
5.2.5.2 Manage Users ...................................................................................................................................... 57
5.2.5.2 Restore Factory Settings ...................................................................................................................... 58
5.2.5.4 Import/Export ...................................................................................................................................... 58
5.2.5.5 Auto Maintain ...................................................................................................................................... 59
5.2.5.6 Upgrade ............................................................................................................................................... 59
5.2.6 Information ................................................................................................................................................. 60
5.2.6.1 Version ................................................................................................................................................. 60
5.2.6.2 Log ....................................................................................................................................................... 60
5.2.6.3 Online Users ......................................................................................................................................... 61
5.3 Alarm ................................................................................................................................................................. 61
5.4 Logout ................................................................................................................................................................ 61
6. FAQs/Troubleshooting ............................................................................................................................................. 62
Glossary of Terms ........................................................................................................................................................ 67
Appendix A: Toxic or Hazardous Materials or Elements .............................................................................................. 69
5
Welcome
Thank you for purchasing our Amcrest POE Bullet Cameras!
This user manual is designed to be a reference tool for the installation and operation of your camera.
Here you can find information about the camera’s features and functions, as well as information to aid in
troubleshooting.
Many of the setup and installation sections below have corresponding videos on YouTube
To access the setup videos, please go to http://amcrest.com/videos
For access to the quick start guide and other support information, go to http://amcrest.com/support
To contact Amcrest support, please do one of the following:
Visit http://amcrest.com/contacts and use the email form
Call Amcrest Support using one of the following numbers
Toll Free: (888) 212-7538
International Callers (Outside of US): +1-713-893-8956
USA: (888) 212-7538
Canada: 437-888-0177
UK: 203-769-2757
Email Amcrest Customer Support [email protected]
Important Security Warning
In order to keep your Amcrest camera secure and prevent unauthorized access, please make sure to follow the
steps below:
Always make sure that your camera has the latest firmware as listed on
www.amcrest.com/firmware
Never use the default password for your camera. Always ensure that your
password is at least 8-10 characters long and contains a combination of lowercase
characters, uppercase characters as well as numbers.
6
Important Safeguards and Warnings
1Electrical Safety
All installation and operation should conform to your local electrical safety codes.
The product must be grounded to reduce the risk of electric shock.
We assume no liability or responsibility for any fires or electrical shock caused by improper handling or installation.
2Transportation Security
Heavy stress, violent vibrations, and excess moisture should not occur during transportation, storage, and
installation of the device.
3Installation
Handle the device with care. Keep the device right side up.
Do not apply power to the camera before completing installation.
Do not place objects on top of the camera.
4Repair Professionals
All the examination and repair work should be done by qualified service engineers.
We are not liable for any problems caused by unauthorized modifications or user-attempted repair.
5Environment
The camera should be kept in a cool, dry place away from direct sunlight, flammable materials, explosive
substances, etc.
This product should be transported, stored, and used only in the specified environments as stated above.
Do not aim the camera at a strong light source, as it may cause overexposure of the picture, and may affect the
longevity of the camera’s sensors.
Ensure that the camera is in a well ventilated area to prevent overheating.
6. Operation and Maintenance
Do not touch the camera sensor or lens directly.
To clean dust or dirt off of the lens, use an air blower or a microfiber cloth.
7. Accessories
Be sure to use only the accessories recommended by manufacturer.
Before installation, please open the package and check to ensure that all of the components are present.
Contact the retailer that you purchased from, or Amcrest directly if anything is broken or missing in the package.
7
1 Features and Specifications
1.1 Overview
Amcrest POE Bullet Cameras are an excellent digital surveillance product that can be useful to a wide variety of
users. The camera connects to any router, and uses an internet connection to allow the user to access all of its
functionality from many internet connected devices. It’s easy to use and can be set up in a relatively small amount
of time. It has various functions such as recording, playback, and monitoring functionality.
These POE cameras adopt a high-quality design in order to achieve high levels of reliability and security. It can be
configured to work locally, as well as on a network.
1.2 Features
Amcrest POE Bullet Cameras has the following features:
Network Access
Our POE cameras connect to a wide variety of routers in order to connect to the internet. Once setup, the
camera can be accessed remotely from a wide variety of internet connected devices, including PCs,
iPhones, iPads, Android tablets, and Android phones.
Cloud Storage Functionality
Our POE cameras are able to record video streams to the Amcrest Cloud service in order to enable long-
term storage for recordings. Amcrest Cloud also allows the user to easily find and download recorded
video for playback from any internet connected PC or Mac computer.
Advanced Playback Function
This device supports real-time recording and can support search, fast forwarded playback, recorded
searches, and downloading of videos and screenshots. Amcrest POE Bullet Cameras can also playback in
slow motion, backwards, and frame by frame as needed. When recording, Amcrest POE Bullet Cameras
shows a date/time overlay to ensure accurate viewing of events when they occurred. Lastly, Amcrest POE
Bullet Cameras can support video enlargement of certain zones within a stream.
Advanced Network Protocol Support
Amcrest POE Bullet Cameras are UPnP compatible, and also includes functionality for use with PPPoE,
DDNS, and other protocols in order to allow remote and local connection with a large variety of network
hardware.
Note: There may be slight differences in functionality due to the existence of different product series.
8
2 Device Overview
Please refer to the following chart for information about the camera and its ports.
No.
Port Name
Function
Connection
Note
1
POE LAN
Network port
Ethernet port
Used to connect the camera using a standard Ethernet cable. The
cable must be hooked up to a POE port to power the camera.
3
Reset
WPS/Reset port
Power
Touching the ends of the wire together for more than 5 seconds
resets the device to factory default settings.
The images below show the dimensions for the camera. The measurements are in millimeters (mm):
9
3 Connection & Installation
This section provides information about the connection and installation of Amcrest POE Bullet Cameras.
3.1 Connection Guide
The camera initially should be connected via the following method:
In addition to connecting the camera to a computer, the camera can also be connected to a power source, by
connecting the power cable to both a power outlet, and the camera.
Note: If the camera is using a PoE (Power over Ethernet) connection, DO NOT connect the camera to a power
source, otherwise this can result in a major malfunction.
3.2 Installation Guide
Follow the steps and use the diagram in this section to install the POE cameras.
Note: Prior to installation ensure that the installation environment can support at least 3 times the weight of the
camera.
10
1. Stick the installation sticker on the designated surface where the device will be installed (wall or ceiling).
2. Drill 3 holes through the holes on the installation sticker.
3. Open the accessories bag and take out the expansion bolt, and insert it into the holes.
4. Open accessories bag and take out the screws. Tighten the 3 screws to fix the device on the installation
surface (wall or ceiling).
5. Loosen the sunshade screw to move it around to the desired position, then tighten the screw to lock it into
place.
6. Plug in the camera to power it, using either an Ethernet or power cable.
7. Using a Philip’s head screwdriver, (not included) loosen the adjusting screw near the base of the camera. This
allows the camera to be rotated, as well as pivoted within the ball joint.
8. Adjust the device to the desired position.
9. Using a Philip’s head screwdriver, (not included) tighten the adjusting screw near the base of the camera to
lock the camera in position.
Note: The process for mounting the eyeball camera is similar, but some of the steps may vary
11
4 Camera Access Setup
This section of the guide will provide the user with information on how to setup access to the camera through any
of the following methods.
4.1 Default Username and Password
To login to the system for the first time, use one of the following default username/password combinations. Once
you’ve successfully logged in, it is highly recommended to change the password for security reasons.
Username: admin
Password: admin
Note: Logging in for the first time will prompt the user to change the password to the admin account.
12
4.2 How to Setup the Camera
To make your experience with the Amcrest POE camera easy and simple, we've provided multiple ways to set up,
view, and operate your camera depending on your needs. Please follow the instructions on this page to set up your
camera in the way that works best for you.
4.2.1 Setting up Your Camera for the First Time
If you are setting up your camera for the first time, or you are setting up your camera for mobile viewing, please
follow the instructions as outlined on section 4.XXX. Using the Amcrest View app on your smartphone or tablet,
you can view your camera live from anywhere, and access features such as taking snapshots, creating recordings,
and more.
4.2.1 For Configuring Advanced Settings On Your Camera
If you would like to configure your camera to enable advanced features such as motion direction, e-mail alerts,
FTP, image adjustments, scheduling and more, please follow the instructions as outlined on section 4.XXX (Desktop
Access).
4.2.3 For Cloud Storage and Playback
Amcrest Cloud is our optional cloud storage and playback service which allows you to access recorded footage
from any device. We offer 4 hours of free storage for your first camera. Please follow the instructions as outlined
on section 4.XXX (Cloud Access) to sign up for our Amcrest Cloud service and get 4 hours of free storage.
4.2.4 For Quick Web Access To Your Cameras
AmcrestView.com is a web portal that allows you to view your cameras and recordings quickly and easily from
anywhere in the world using a web browser. Use AmcrestView.com if you need to simply check-in at a moment's
notice. If you would like to use AmcrestView.com, please follow the instructions outlined on section 4.XXX (Web
Access).
13
4.3 Amcrest View App Setup
Amcrest POE Bullet Cameras enable access through the use of the Amcrest View app on either iOS or Android
mobile operating systems. There are two versions of the app, Amcrest View Lite, and Amcrest View Pro. Amcrest
View (Lite or Pro) on the App Store or Play Store. The Pro version contains features such as push notifications,
sharing video and image files, exporting video in MP4 format, and exporting image files to your phone.
Note: For purposes of this guide, we will use iOS, though both apps have the same interface. The App Interface
may differ slightly from the screenshots below as updates are released.
1. Connect the camera to a Power Over Ethernet (POE) jack on your router or switch using an Ethernet cable.
Wait 30 seconds for the camera to start-up and initialize.
2. Download and Install either the Amcrest View Lite or Amcrest View Pro app from the app store.
3. Open the app, and tap the icon in the top right hand corner to view connected devices. Or tap the menu icon
on the top left and select “Device Manager”
14
4. Tap the plus sign in the top right hand corner.
5. Tap P2P
15
6. Tap the QR code icon that shows in the right part of the S/N field. Your mobile device’s camera will activate,
and you are now ready to scan your camera’s QR code.
7. Point the phone’s camera at the QR code on the bottom of the camera. Make sure the QR code fits inside of
the clear box in the center of the phone screen. Try to move the camera back and forth slowly to ensure that
the entire QR code is within the scanning window. Your phone will vibrate and take you back to the previous
page when the scan is successful. In case the QR code cannot be scanned, please enter in the Serial Number
(S/N) that is found on the bottom of the camera.
Note: Picture below for reference only. The camera’s QR code sticker will differ.
16
8. Enter a name for the camera, then enter the Username and Password used to login to the camera. By default,
the username is “admin” and the password is “admin”, then tap Start Live Preview.
9. If you are logging in for the first time, you will be prompted to create a new password. Please select a
password that is at least 8 characters long, and one that uses a combination of uppercase letters, lowercase
letters, and numbers. Note that once the password is changed here, it will take effect immediately. If you
forget your password, you can always hard reset your camera by touching the leads of the green and white
reset wires together for 30 seconds.
10. To better understand the App's interface and features, please visit the Help Center within the app. To access
the Help Center, tap the menu icon on the top left hand side, tap Help, then select which screen you'd like
more information about. For additional assistance, please contact us at www.amcrest.com or give us a call at
1-888-212-7538. Step by step video tutorials available at www.amcrest.com/videos
4.4 Desktop Access Setup
Access your camera and all its features and settings on your local network using Internet Explorer, Firefox, or Safari
on Windows or Mac.
This method of accessing the camera’s interface is necessary to setup remote access. Ensure that the following
items are completed:
The camera is connected to the Network via an Ethernet cable and connected to a POE port.
The camera and the PC are on the same network.
17
Use one of the following web browsers: Safari, Internet Explorer, or Mozilla Firefox (Google Chrome support in
Development).
To easily connect to the camera’s interface, use the included CD to install and run the IP Config tool. Alternatively,
you can download the IP Config software from www.amcrest.com/support. The IP Config tool’s interface looks like
the below image:
After launching the IP Config tool, click the Refresh button to bring up the cameras on the network. Double click
the camera’s line item to login and connect to the camera. Once logged in, click the icon to open the camera’s
interface in a web browser.
Log in to the camera using your login credentials (default username and password are both “admin”). If this is your
first time logging into the camera, you will be prompted to change your password. Please select a password that is
at least 8 characters long, and one that uses a combination of uppercase letters, lowercase letters, and numbers.
When opening the camera’s interface, the browser may prompt you to install a plugin. The plugins are necessary
for using the camera’s interface. Click install to download the plugin, and then click on the plugin installation file to
install the plugin. If the browser prompts you to allow the plugin to work on the computer, hit Allow to ensure the
plugin can run successfully.
The camera is now successfully set up for live viewing and playback!
For quick and easy remote access on your PC or Mac, please use AmcrestCloud.com (section 4.6) or
AmcrestView.com (section 4.7).
To setup advanced remote access via UPnP/DDNS or Port Forwarding see section 4.8 and 4.9.
For additional assistance, please contact us at www.amcrest.com or give us a call at 1-888-212-7538. Step by step
video tutorials available at www.amcrest.com/videos
18
4.6 Amcrest Cloud Setup
Amcrest POE Bullet Cameras are able to sync with Amcrest Cloud; a service that stores recorded video streams in
order to enable long-term storage. Amcrest Cloud also allows the user to easily find and download recorded video
for playback from any internet connected PC or Mac computer.
1. Connect the camera to a Power Over Ethernet (POE) jack on your router or switch using an ethernet cable.
Wait 30 seconds for the camera to start-up and initialize.
2. Using a web browser on your PC or Mac, visit www.amcrest.com/cloud and register for a free account. Once
registered, click the “Add Camera” button. Select “Amcrest”, give the camera a name, and enter the camera’s
SN (located on the bottom of the camera), then click “Next”.
3. On the settings page, you can adjust optional preferences for your camera. Once settings have been adjusted,
click “Finish”. Your camera is now successfully set up for cloud access and storage.
4. View your camera live or watch recorded clips using the menu button on the top of the page. You can also use
the Amcrest Cloud app on iOS and Android to add more cameras, play recordings, and view your camera live,
from anywhere.
5. For additional assistance, please contact us at www.amcrest.com or give us a call at 1-888-212-7538. Step by
step video tutorials available at www.amcrest.com/videos
19
4.7 Web Access Setup (AmcrestView.com)
1. Connect the camera to a Power Over Ethernet (POE) jack on your router or switch using an ethernet
cable. Wait 30 seconds for the camera to start-up and initialize.
2. Using Internet Explorer or Safari, go to www.AmcrestView.com and register an account. You will be
required to activate your account by e-mail (double-check your spam folder).
3. Once activated, download and install the plugin for your web browser. The installation of the plugin will
require all web browsers to close.
4. Log in to your account. To add a camera, click the “Add Device” button. Give the camera a name, enter
the UID (found on the bottom of your camera), then enter the login details for the camera. The default
username and password for the camera is admin.
5. Once added, the camera should appear in the device list. Click the icon next to the camera’s UID to
open the live viewing and playback interface.
6. The device is now successfully setup for live viewing and playback!
7. For additional assistance, please contact us at www.amcrest.com or give us a call at 1-888-212-7538. Step
by step video tutorials available at www.amcrest.com/videos
20
4.8 Remote Web Access Setup
There are two main methods for setting up remote access: UPnP/DDNS, and Port Forwarding.
4.8.1 UPnP/DDNS Remote Web Access Setup
Using Universal Plug and Play (UPnP) and Dynamic Domain Name Server (DDNS) functionality is the easiest way to
setup stable remote access. For this method, your router should support the uPnP networking protocol and the
protocol should be enabled. Please refer to your router manufacturer’s documentation to learn how to enable
uPnP on your router.
Below is a step-by-step walkthrough that details how to setup Amcrest POE Bullet Cameras for Remote Web
Access using UPnP and DDNS:
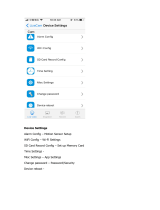
1. Login to your camera’s web interface, open the main menu then go to Setup -> Network.
2. Using the left hand menu, go to the Connection menu, and write down the HTTP port. It is recommended
to ensure the port number is at least 5 digits long to prevent any port conflicts. If need be, change the
port to a 5 digit number that is less than 65535, note the number down, and click save before proceeding
to the next step.
3. The system will prompt you to reset the camera. Click OK and wait for the camera to restart.
4. Restarting the camera may cause the device to use another IP address. Use the included IP Config tool to
find the IP address as detailed in section 3.2.1.
5. Login to your camera, open the main menu then go to Setup -> Network.
6. Click the Connections menu item on the left hand menu, and ensure that the HTTP port has changed.
7. Click the DDNS menu item on the left hand menu, pick QUICK DDNS from the drop down box, click the
checkbox next to Server Type, and then click the Save button on the bottom right.
8. To set a custom DDNS name, fill out the Domain Name field and click Save.
9. Write down the entire Domain Name field, including the white text that says .quickddns.com
10. Click the UPnP menu item on the left hand menu, and click the enable checkbox at the top.
11. While in the UPnP menu, double click the HTTP port, and change both the internal and external HTTP
ports to match the number that was used in step 2.
12. Uncheck the last 4 checkboxes in the PAT table on the UPnP menu.
13. Click apply, then exit this menu to go back to the main menu, then re-enter the UPnP menu, and ensure
the UPnP status says “Mapping Successful”.
14. Open a web browser and enter in the DDNS domain name address from step 9, enter in a colon, then
type the port number from step 4 on to the end.
a. For example, if the DDNS domain name is http://abc123456789.quickddns.com and your HTTP
Port is 33333, the URL would be http://abc123456789.quickddns.com:33333
15. The browser may prompt you to install a plugin. Click install to download the plugin, and then click on the
plugin installation file to install the plugin.
16. If the browser prompts you to allow the plugin to work on the computer, hit Allow to ensure the plugin
can run successfully.
17. Enter in login details into the username and password fields and click login.
  • Page 1 1
  • Page 2 2
  • Page 3 3
  • Page 4 4
  • Page 5 5
  • Page 6 6
  • Page 7 7
  • Page 8 8
  • Page 9 9
  • Page 10 10
  • Page 11 11
  • Page 12 12
  • Page 13 13
  • Page 14 14
  • Page 15 15
  • Page 16 16
  • Page 17 17
  • Page 18 18
  • Page 19 19
  • Page 20 20
  • Page 21 21
  • Page 22 22
  • Page 23 23
  • Page 24 24
  • Page 25 25
  • Page 26 26
  • Page 27 27
  • Page 28 28
  • Page 29 29
  • Page 30 30
  • Page 31 31
  • Page 32 32
  • Page 33 33
  • Page 34 34
  • Page 35 35
  • Page 36 36
  • Page 37 37
  • Page 38 38
  • Page 39 39
  • Page 40 40
  • Page 41 41
  • Page 42 42
  • Page 43 43
  • Page 44 44
  • Page 45 45
  • Page 46 46
  • Page 47 47
  • Page 48 48
  • Page 49 49
  • Page 50 50
  • Page 51 51
  • Page 52 52
  • Page 53 53
  • Page 54 54
  • Page 55 55
  • Page 56 56
  • Page 57 57
  • Page 58 58
  • Page 59 59
  • Page 60 60
  • Page 61 61
  • Page 62 62
  • Page 63 63
  • Page 64 64
  • Page 65 65
  • Page 66 66
  • Page 67 67
  • Page 68 68
  • Page 69 69
  • Page 70 70

Amcrest IP4M-1025EB User manual

Category
Security cameras
Type
User manual

Ask a question and I''ll find the answer in the document

Finding information in a document is now easier with AI