Page is loading ...

IN STRUC TIONS
For The Safe Use And Enjoyment
Of Your New Barbeque
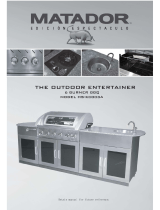
2 burner Billabong
trolley mounted
barbeque
Tools required:
1 adjustable spanner
1 phillips head screwdriver
WELCOME TO THE WORLD OF BARBEQUES
GALORE OUTDOOR COOKING

2
Safety First
Congratulations On Your Pur chase
Australia has an excellent safety record when it comes to gas appliances. This reflects both
the high quality of appliances sold, as well as growing consumer awareness about safe
practice. We urge you to follow the guidelines below together with these instructions for
safe use, to prevent overheating and to produce great cooking results.
• This barbeque is an outdoor appliance only. Under no circumstances should it be used indoors.
• This barbeque has not been approved for marine use.
• Do not perform any servicing on the barbeque yourself. This includes internal adjustment of the
regulator and gas valves. Servicing can only be carried out by authorised technicians.
• It is important that you install your barbeque exactly as described in these instructions. In particular
you should keep the barbeque clear of combustible material, and you should check for leaks whenever
a new connection is made.
• Do not store chemicals or fl ammable materials near this appliance. Do not spray aerosols in the vicinity
of this appliance.
• Do not place articles on or against, or enclose this appliance.
• The barbeque gets extremely hot while in use. Keep children away from the appliance until it has
cooled to normal temperatures.
• It is a good idea to tie back long hair and loose clothing while cooking in case of unexpected fl are ups.
• Fat fi res are the most common cause of problems in barbeques. They are caused by a build up of
grease in the fat cup and the inside of the barbeque frame. A fat fi re can be diffi cult to put out, and
will be dangerous if it spreads to the gas hose. You should keep your barbeque clean to avoid this
occurrence. Fat fi res will void the warranty.
• Do not transport the barbeque whilst it is hot because there is a risk that the contents of the drip tray
will fall out.
• NEVER leave a barbeque unattended with any burners switched on. Always switch off all burners and
cylinders when the barbeque is not in use.
• Take care when touching a hot barbeque, especially on surfaces close to the fi rebox or roasting hood.
• Its fi ne to pre-heat with all burners on HI and the hood closed, but NEVER let the temperature on the
hood thermometer enter the red danger zone.
• When cooking with the hood closed, turn one or more burners to LO or OFF as required to keep the
barbeque from getting too hot. NEVER let the temperature on the hood thermometer enter the red
danger zone.
• NEVER leave all burners on HI for more than 15 minutes, always stay in control by adjusting burners
to LO and OFF as required to maintain suitable cooking temperatures.
• Follow all manufacturer’s instructions to periodically check for gas leaks.
Thank you and congratulations for choosing a quality barbeque as part of your outdoor
entertaining world.
By following these instructions for safe and easy operation, you will enjoy years of satisfying, trouble-
free outdoor cooking.
And when you’re fully up and running, you can visit your retailer for some great accessories and
cooking tips to make your experience even more rewarding.
But first things first....

3
Most importantly, you must observe the clearances listed on the data sticker on your barbeque.
It will tell you how close you can put the barbeque to combustible surfaces (wood, gyprock, trees, wooden
fences etc). If you don’t follow these clearances, there is a chance that nearby surfaces will heat up and catch
fire. If you purchased your barbeque in a trolley, you don’t need to be concerned with side clearances. The
barbeque-trolley combination has been laboratory tested, and complies with relevant Australian Standards.
• Keep the barbeque sheltered from the wind. Wind interferes with the fl ames and can prevent your
barbeque from heating up properly and can even damage some components.
• Make sure the surface is level. This is safer, and makes cooking easier.
• Don’t put the barbeque too close to windows or anywhere else where cooking smoke is likely to cause
a problem.
Where To Put Your Barbeque
Any enclosure with walls on
all sides, but at least one
permanent opening at ground
level, and no overhead cover.
Within a partial enclosure
that includes an overhead
cover and no more than
two walls.
Within a partial enclosure that includes an overhead cover and
more than two walls, the following shall apply:
• At least 25% of the total wall area is completely open; and
• At least 30% of the remaining wall area is open and
unrestricted.
In the case of balconies, at least 20% of the total of the side,
back and front wall areas shall be and remain open and
unrestricted.
Putting Your Barbeque In An Enclosure
This appliance must only be used in an above ground, open air situation with natural ventilation, without
stagnant areas, where gas leakage and products of combustion are rapidly dispersed by wind and natural
convection. Any enclosure in which the appliance is used must comply with one of the following:

4
Assembling Your Barbeque
2 wheels
one piece grill plate
2 folding side shelves
1 barbeque
2 right legs
(hollow at
bottom)
1 back brace
2 hubcaps 2 left legs
(capped on
bottom)
1 fat cup 1 warming rack
1 base tray
2 side braces
steel fl ame tamer
(actual shape may differ)
Parts List
2 pairs shelf
brackets
1 axle
1
a
x
le
2 large steel
washers 2 c-clips
1 front panel
4 x 50mm
screws
4 x 12mm
screws
4 x 15mm
screws
12 x 40mm
screws
8 x collar
screws
12 x fl ange
nuts
20 x nuts
24 x steel
washers
8 x spring
washers
8 x soft
washers

5
Assembling Your Barbeque
Take the two left legs - the ones
with the plastic cap on the
bottom. If the barbeque was
upright, these legs would form
the left hand side of the trolley
frame.
Insert the legs into the frame
openings, front and back, as
shown.
You may find it easier to complete
this step with the barbeque on its
side.
We won't secure the legs just yet
- this will be done in a later step.
Start by unpacking the barbeque, and placing it on a smooth, flat surface. Be careful not to damage the
painted or enamel finish. If there is any protective film on the barbeque, it should be removed at the end
of the assembly process.
Prepare For Assembly
Attach The Left Legs
1
Now, take the legs with the hollow
bottom, as detailed.
As you face the barbeque, these legs
form the right hand side of the trolley
frame.
Insert the legs into the frame
openings on the right hand side of
the barbeque body, front and back.
Again, we won't secure the legs until
later.
Attach The Right Legs
2

6
Assembling Your Barbeque
Attach The Back And Side Braces
3
WHAT YOU NEED
8 x 40mm
screws
8 x steel
washers
8 x spring
washers
8 x nuts
Attach the side braces and back brace
as shown. This will secure the legs to
the barbeque body.

7
Assembling Your Barbeque
Attach The Base Shelf
4
WHAT YOU NEED
4 x 40mm
screws
4 x fl ange
nuts
In this step, we will attach the base
shelf to the legs. Place the base inside
the legs.
When you are screwing the base into
the right hand legs, use the second
hole up from the bottom. The very
bottom hole will be used in the next
step for the wheel axle.
Insert a screw through the face of each
leg, into the base shelf and secure with
a flange nut.
Ensure all screws are tight.

8
Assembling Your Barbeque
Attach The Wheels
5
To fit the wheels, notice that the axle has
a groove on one end and a metal stopper
on the other. Place a large steel washer
onto the axle. Then feed it through the
solid face of one of the wheels and then
through the bottom holes of the right
side legs.
2 large steel
washers
1 c-clip
WHAT YOU NEED
Now attach the hubcaps.
Push them directly into the
face of the wheel till they
click into place.
From the other side, push the wheel onto
the axle as shown, then a large steel washer,
and then fix the c-clip to the groove at the
end of the axle. This will keep the wheel in
place.

9
Assembling Your Barbeque
Attach The Side Shelf Brackets
6
9
12mm screw
12mm screw
15mm screw
15mm screw
4 x 12mm
screws
WHAT YOU NEED
4 x 15mm
screws
8 x steel
washers
8 x soft
washers
8 x nuts
The side shelf brackets come in pairs. Look at the
illustration carefully to see how they are positioned on
the side of the barbeque.
Notice that the top of each bracket takes a 12mm screw,
and the bottom takes a 15mm screw. Note also the
arrangement of washers, particularly the soft washers
between the barbeque side and the brackets.
soft washers

10
Assembling Your Barbeque
Attach The Side Shelves
7a
WHAT YOU NEED
4 x collar
screws
4 x fl ange
nuts
Bring the side shelf to the brackets.
Hold the side shelf onto the
brackets using the collar screws
and fl ange nuts through the
bottom bracket holes.

11
Assembling Your Barbeque
Attach The Front Panel
8
WHAT YOU NEED
4 x 50mm
screws
Screw the front panel into the
legs.
7b
WHAT YOU NEED
4 x collar
screws
4 x steel
washers
4 x fl ange
nuts
With the side shelf still in the
folded down position, place
a screw, washer and fl ange
nut into the top hole of each
bracket.
When you lift the side shelf
into the upright position, the
shelves hook onto these top
screws.
4 x steel
washers
4 x nuts

12
Position the flame tamer so that it
rests on the lower shoulder of the
barbeque body.
Position the one piece hotplate
and grill so that it sits on the upper
shoulder of the barbeque body.
Flame Tamer
Hotplate and Grill
Assembling Your Barbeque
Main Barbeque Assembly

13
Your barbeque is now ready to connect up to gas.
Assembling Your Barbeque
Fat Cup
Slide the fat cup into the rear of the barbeque,
along the tracks at the bottom of the barbeque
frame. Ensure the handle points to the rear.
Attach the warming rack as shown. The
arms that can rotate go into the base.
You will need to squeeze the wire ends
inwards so that they fit into the holes
in the barbeque and hood.
Warming Rack
e
rea
r.

14
Installation
Portable LPG Cylinders
Place the gas cylinder securely in the cutout of the base shelf.
Ensure that it remains upright at all times.
Take the hose that came with the barbeque, check that it has a
rubber seal on the regulator end of it, and connect this end of the
hose to the gas cylinder. You won’t need a spanner here. Just
turn the fitting in an anticlockwise direction and hand tighten as
much as you can. This should seal it sufficiently.
Important - Conduct a leak test before use. See below.
Leak Testing
Before proceeding, it is important that you leak test the barbeque. Make sure all
the barbeque control knobs are OFF.
Turn the cylinder ON by rotating the knob anti-clockwise.
Spray or pour soapy water (about the same concentration
as washing up water) along the gas line including:
• The gas connection at the inlet of the barbeque
• The gas hose.
• The gas connection at the gas cylinder.
If bubbles appear, there is a gas leak.
If the leak is at a connection, tighten and retest. If the
leak is anywhere else, or if you cannot resolve the leak,
do not proceed. Turn the gas cylinder off and consult
your retailer.
You can also check for leaks using a gas safety gauge,
available at your Barbeques Galore store. This provides
an easier and more convenient way to check for leaks.
ce t
y
u
se.
S
ee below
.

15
Lighting the barbeque is easy, but must be done with due care.
Make sure that the gas is turned on at the cylinder. Also, ensure that the hood is up.
Flame Thrower Ignition - Right Hand Burner: This ignition
system works by throwing a flame to the side of the burner to
light it. Push the right hand knob inwards and turn anticlockwise
to the high position. Hold the knob in until the burner ignites. You
may need to push and turn the knob several times before ignition.
Left Hand Burner: Once the right hand burner is alight, you
can light the left hand burner by pushing the knob in and turn
anticlockwise to the high position.
Manual Ignition: You can light your barbeque manually by
holding a lighted match next to one of the burners, then turning
the burner control knob to high. You can access the burner from
underneath the barbeque.
Lighting The Barbeque
If the burner doesn’t light first go, return the knob to the off position and try a couple more times. If the
burner still does not light, wait a few minutes to allow the gas to disperse before trying again. If satisfactory
operation cannot be achieved, consult your retailer before proceeding.
Note carefully: Failure to follow the lighting procedures correctly can lead to a hazardous condition.
If You Have Diffi culty Lighting
Lighting Your Barbeque
The knobs have three basic positions:
Off, High and Low. You can achieve
any flame height between low and high
by rotating the barbeque control knob
between these positions.
Controlling The Flames
burner on high burner on low

16
Look underneath the barbeque so that you can see the flames. They should be a soft
blue colour with yellow tips. If the flames are too yellow, there is too much gas and
not enough air. The flame will be inefficient and will give off too much smoke. If the
flame is too pale, there is too much air and not enough gas. If either of these situations
occur, you should consult your Barbeques Galore store
Special note: “Blowback” is a situation where the flame burns inside the burner, towards
the front. It can be recognised by a sharp roaring sound coming from the burner. It is
not dangerous unless it is allowed to persist. If this occurs, simply turn the burner off,
wait a few seconds, then relight.
Checking The Flame
Lighting Your Barbeque
correct flametoo much yellow tipping
Turning Off
When you’ve finished cooking, leave the burner controls on high for a maximum of 5 minutes to
burn off excess grease from the flame tamer, burners and other surfaces.
To turn the barbeque off, it is best to turn off the cylinder first, and allow all the gas left in the hose
to burn off. This will only take a couple of seconds. Then turn off all burner controls. It’s okay to
leave the cylinder connected to your barbeque while it’s not in use.
Note carefully: Failure to follow these shutdown procedures correctly can lead to a hazardous
condition.

17
First Time Use
Lightly coat the cooking surfaces with oil. This will prevent food from sticking. Light the burners
and leave on high for about 3-5 min utes to warm the barbeque up. Once the barbeque is warmed
up, you should set the burners to your desired cooking temperature. You’re now ready to start
cooking up a feast.
Preparing To Cook
During manufacturing, the cooking surfaces (plates and grills) were coated with a non-toxic paint.
This paint will come off completely over time. Its purpose is purely to help protect your barbeque
during transport and storage.
Coat the top of the hotplates and grills with canola oil or something similar. Light the barbeque
as described earlier. Leave the barbeque with all burners on low and the hood open for about 10
minutes. Some paint may come off the cast iron at this time. Now clean the surfaces with water
and a brush. Be careful of steam coming off the cast iron surface while doing this. The hotplates
and grills are now cured and ready for use.
This process only needs to be done the first time you use the barbeque. For ongoing protection
of the cooking surfaces, follow the procedures in the Cleaning, Storage and Maintenance sections.
Curing The Cast Iron
Controlling Flare Up
Flare-ups are caused by juices and oils from the food igniting in sudden bursts of flame that come up over
the grill. A little bit of flare up as well as the resulting smoke is a good thing. It’s what gives barbequed
food that unique outdoor flavour. But if it happens too often, or if the flame lasts more than a couple of
seconds, your food will char, so you need to control it.
First of all, cooking very fatty foods will cause a lot of flare up. You should trim excess fat off your meat.
Also, excess flaring usually means the burners controls are up too high, turning them down before flare-
up occurs will usually prevent it happening in the first place.
Moving the meat away from the flare up will also reduce the problem.
Some very fatty foods can only be cooked on the hotplate or indirectly with the hood closed.
Always remember to switch the barbeque OFF once you are finished cooking.
Don’t ever let the temperature reach into the "very hot"
zone or the barbeque will overheat and burn your food. A
separate probe thermometer is available as an accessory
from all Barbeques Galore stores. This takes the guesswork
out of knowing when your food is cooked.

18
It’s easy to keep your food moist and succulent on a barbeque by following these
guidelines:
• Use tongs instead of a fork when turning meat and poultry. A fork pierces the fl esh and causes
the juice to seep out.
• Resist the temptation to keep turning meat over. Juices tend to rise to the top of a piece of meat
and then settle. Each time you turn the meat over, the juices are lost. It’s better to quickly sear
the meat on each side (about half a minute) then with the burner controls down near low, leave
the meat cook on one side at a time, turning once only before serving.
• If you like salt with your food, try adding it at the end instead of before or during cooking. Salt
draws the natural moisture out of the food and dries it out.
• Baste food with light marinade or canola oil a couple of times while cooking, though watch out
for excessive fl are-up if too much oil is used.
• Using a roasting hood as outlined later in these instructions is an excellent way to preserve
moisture and succulence and takes the hard work out of barbeque cooking.
Keeping Your Food Moist
Other Useful Tips
Cooking Hints
You don’t need to be an expert to serve up a tasty, good looking meal. Try these ideas:
• Although cooking on the plate looks easier, cooking on the grill gives you a more authentic
barbeque fl avour. Natural juices drip onto the fl ame tamer and then vapourise, with the vapours
penetrating back into the food.
• As an alternative to simply grilling, try marinating your meat, fi sh, poultry or vegetables fi rst.
The longer you leave the food to stand in the marinade, the more thoroughly the fl avour will
soak through. Several pre-made marinades are available and good recipes are easy to come
by. It is best to leave food standing in the refrigerator.
• If you use a tomato or sugar based sauce for basting, apply it in the last 5-10 minutes of cooking.
Using these sauces over a longer period of time will result in over-browning.
• To prevent meat from curling, slash the remaining fat at roughly 5cm intervals, taking care not
to cut into the meat.
• Avoid burning or charring food as this has been shown to be unhealthy. Don’t leave cooked
food standing for too long before eating.
Great chefs will tell you that most meats need to “rest” away from the heat of the barbeque
before slicing for a few minutes to allow the moisture pushed to the surface to redistribute. If
you don’t rest the meat, moisture that has pooled near the surface will run out and the rest of
the roast will be quite dry.
Use the few minutes while resting the meat to open the barbeque hood, turn all burners to high
for 2 or 3 minutes to burn off food residue. After 3 minutes, turn the barbeque OFF. While the
cooking surfaces are still hot, take a long handled brush or scraper and remove remaining oil and
food residue. You should use an oven mitt to avoid burns. 3 minutes now will save 30 minutes
next barbeque.
Always remember to switch the barbeque OFF once you are finished cooking.

19
This is when you place the food directly over the lit burners, either on the grill or the hotplate. This method
is great for frying, searing and grilling, especially with thinner cuts and foods that require shorter cooking
time. Cooking takes less time than with the hood open, and the results are more tender and juicy.
Preheat the barbeque with all burners on high and the hood closed for 5 minutes. Note that the temperature
at the cooking surface will be around 100ºC higher than the temperature measured at the hood thermometer.
Importantly, once the barbeque is pre-heated and the hood is closed, heat is trapped around the food, so the
burners will only need to be on LO and in many cases, some of the burners OFF. Heat from the lit burners
will circulate all through the hood cooking quite evenly.
Fatty foods like sausages, can be cooked completely above the OFF burners, retaining juiciness and flavour
without risk of flare-up that results only in burning. Quite close attention needs to be paid to the food, and
the burners frequently reset to LO or OFF as required to prevent overheating.
(A) Direct Cooking Method
Covered Cooking
Cooking with the Hood Closed
Using the roasting hood traps heat, moisture and flavour that is normally lost on an open top barbeque.
The Billabong range of barbeques is designed with plenty of power to heat up quickly with the hood open
or closed. With the hood closed and the barbeque pre-heated, its important to then turn some burners to
LO and others to OFF in order to not overheat the barbeque which could result in increased temperature
hazards and burning your food.
For covered cooking, there are two basic ways to cook: (A) Direct Cooking and (B) Indirect Cooking
LO
OFF
OFF
LO
(B) Indirect Cooking Method
This is when you place the food only above burners that
are OFF. The other burners are adjusted in combinations
of LO and OFF to maintain constant lower roasting
temperatures. This method is ideal for thicker cuts of
meat, legs of lamb, pork, shoulders of beef, whole
chickens and whole fish.
Moist, hot air rises from the lit burners and circulates
around the food, trapping juices and flavour. Even
cakes and breads can be cooked in your barbeque
this way. Cooking low and slow lets the food cook
completely through without burning on the outside,
yet remaining juicy and tender on the inside.
Best results are achieved by placing your roast in a
rack and that rack in a drip pan. The roast is elevated
to allow heat to circulate all the way around, and
water, wine, juices, herbs can be added to the drip pan to help flavour the roast and make a baste
or gravy.
Preheat the barbeque with all burners on high and the hood closed for 5 minutes.
Importantly, once the barbeque is pre-heated and the hood is closed, heat is trapped around the
food, so the burners that are on will mostly only need to be on LO and in many cases, more of the
burners turned OFF. Heat from the lit burners will circulate all through the hood cooking quite evenly.
On a 4 burner barbeque, 2 burners under the grills on LO and 2 burners under the hotplate OFF is
the best setting for roasting. The hotplate can be positioned left, right or middle of the barbeque.

20
Internal Meat Temperatures
Beef
Preference Meat Probe temperature
Rare 140ºF / 60ºC
Medium 150ºF / 66ºC
Well Done 170ºF / 77ºC
Lamb
Preference Meat Probe temperature
Rare 140ºF / 60ºC
Medium 150ºF / 65ºC
Well Done 165ºF / 75ºC
Veal
Preference Meat Probe temperature
Rare not advised
Medium 155ºF / 70ºC minimum safe temperature
Well Done 165ºF / 75ºC
Pork
Preference Meat Probe temperature
Rare not advised
Medium 150ºF / 6ºC minimum safe temperature
Well Done 160ºF / 70ºC
Poultry
Preference Meat Probe temperature
Rare not advised
Medium 170-175ºF / 75-80ºC minimum safe temperature
Well Done not advised; poultry tends to dry out over 175ºF / 80ºC
To obtain correct temperature use an instant-read meat thermometer in
the thickest part of the flesh, careful not to touch any bone.
/