Page is loading ...

Page 1
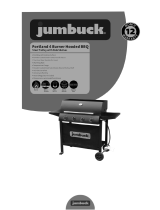
INSTRUCTIONS FOR ASSEMBLY AND USE OF
ARCOBELLE 4B BBQ ON SIDE BURNER CART BARBEQUES
These instructions contain important information that needs to be followed for the safe assembly and use of your
new barbeque. Please read through carefully and completely prior to assembly.
Take care to remove all packaging materials and protective coatings from the barbeque
before first use.
For Barbeque Models: G4ARCM
Tools required:
2 x adjustable spanners
1 x Phillips head screwdriver
1 x Regular screwdriver
IMPORTANT: READ ALL OPERATING INSTRUCTIONS BEFORE LIGHTING.
By following these instructions for safe and easy operation, you will enjoy years of
satisfying, trouble free outdoor cooking. And when you’re fully up and running, you can
visit your retailer for some great accessories and cooking tips to make your experience
even more rewarding. But first things first....

Page 2
Safety warnings
HAZARDOUS FIRE OR EXPLOSION MAY RESULT IF THESE INSTRUCTIONS ARE IGNORED
It is the consumer’s responsibility to see that the barbeque is properly assembled, installed, and taken
care of. Failure to follow the instructions in this manual could result in bodily injury and/or property damage.
FOR YOUR SAFETY IF YOU SMELL GAS:
1. Turn “OFF” gas supply at bottle.
2. Turn the control knobs to “OFF” position.
3. Open barbeque hood
4. Extinguish all naked flames; do not operate any electrical appliances.
5. Ventilate the area.
6. Check for leaks as detailed in this manual whenever the gas cylinder is replaced or reconnected.
If odour continues or you have a fire you cannot extinguish, call your fire department.
Do not call from near the LPG gas cylinder because your telephone is an electrical device and could
create a spark resulting in fire and or explosion.
PRECAUTIONS:
1. Leak test all connections after each cylinder refill.
2. Never check for leaks with a lit match or open flame.
3. Do not store or use gasoline or other flammable vapours and liquids in the vicinity of this or any other
appliance.
4. Any LP cylinder not connected for use, shall not be stored in the vicinity of this or any other gas,
electrical or motorised appliance.
WARNINGS
THIS BARBEQUE MUST NOT BE USED INDOORS.
DO NOT OPERATE THIS APPLIANCE BEFORE READING THE INSTRUCTION BOOKLET
DO NOT PLACE ARTICLES ON OR AGAINST THIS APPLIANCE
DO NOT STORE CHEMICALS OR FLAMMABLE MATERIALS, OR SPRAY AEROSOLS
NEAR THIS APPLIANCE
DO NOT OPERATE THE APPLIANCE INDOORS
DO NOT OPERATE IN AN ENCLOSED AREA
DO NOT OPERATE THIS APPLIANCE BEFORE LEAK CHECKING HOSES AND GAS
CYLINDER CONNECTION
DO NOT MOVE THE APPLIANCE DURING USE.
ACCESSIBLE PARTS MAY BE VERY HOT. KEEP YOUNG CHILDREN AND THE INFIRM
AT A SAFE DISTANCE AWAY.
ANY MODIFICATION OF THE APPLIANCE MAY BE DANGEROUS.
TURN ALL GAS VALVES “OFF” INCLUDING THE GAS CYLINDER AFTER USE.
This barbeque has not been approved for marine use.

Page 3
Safety warnings (continued)
Do not perform any servicing on the barbeque yourself. This includes internal
adjustment of the regulator and gas valves. Servicing can only be carried out by
authorised technicians.
It is important that you install your barbeque exactly as described in these instructions.
In particular: you should keep the barbeque clear of combustible material, and you
should check for leaks whenever a new connection is made.
It is a good idea to tie back long hair and loose clothing while cooking in case of
unexpected flare ups.
Fat fires are the most common cause of problems in barbeques. They are caused by a
build-up of grease in the drip tray and the inside of the barbeque frame. A fat fire can
be difficult to put out, and will be dangerous if it spreads to the gas hose. You should
keep your barbeque clean to avoid this occurrence. Fat fire damage is not covered
under warranty. In case of fat fire, turn cylinder off. Do not try and extinguish with
water. Call the fire brigade.
Do not transport the barbeque whilst it is hot because there is a risk that the contents
of the grease cup will fall out.
NEVER leave a barbeque unattended with any burners switched on. Always switch off
all burners and cylinders when the barbeque is not in use.
Take care when touching a hot barbeque, especially on surfaces close to the firebox or
roasting hood.
Particular care must be taken when removing d
the rip tray. Hot fat can cause
serious injury. Let the barbeque cool completely before removing the fat tray.
It is fine to pre-heat with all burners on HI and the hood closed, but NEVER let the
temperature on the hood thermometer exceed 250ºC .
When cooking with the hood closed, turn one or more burners to LO or OFF as
required to keep the barbeque from getting too hot. NEVER let the temperature on the
hood thermometer exceed 250ºC .
NEVER leave all burners on HI for more than 15 minutes, always stay in control by
adjusting burners to LO and OFF as required to maintain suitable cooking
temperatures.
If the burner makesa hissing sound when lit, it may be burning internally. Turn burner off,
allow it to cool and try again.
Follow all manufacturers’ instructions to periodically check for gas leaks.
Do not allow build up of unburned gas.
Strong winds and low temperatures can affect the heating and performance of your gas
grill so factor in these elements when positioning your grill outdoors for cooking.
Never use your gas grill in a garage, porch, shed, breezeway or any other enclosed area.
Your gas grill is to be used outdoors only, at least 60cm from the back and side, 100cm
from above of any combustible surface. Your gas grill should not be placed under any
surface that will burn. Do not obstruct the flow of ventilation air around the gas grill housing.
This gas grill is not intended to be installed in or on recreational vehicles and/or boats.

Page 4
Where to put your barbeque
This barbeque must only be used in an above ground, open air situation with natural
ventilation, without stagnant areas, where gas leakage and products of combustion are
rapidly dispersed by wind and natural convection. Any enclosure in which the appliance is
used must comply with one of the following:
(2) Within a partial enclosure that includes an overhead
cover and no more than two walls.
(1) Any enclosure with walls on all sides, but at
least one permanent opening at ground level,
and no overhead cover.
(3) Within a partial enclosure that includes an overhead
cover and more than two walls, the following shall apply:
(i) At least 25% of the total wall area is
completely open; and
(ii) At least 30% of the remaining wall area is
open and unrestricted.
(iii) In the case of balconies, at least 20% of the
total of the side, back and front wall areas
shall be and remain open and unrestricted.

Page 5
Where to put your barbeque (continued)
When used on the ground always place the appliance and cylinder on flat level ground.
NEVER light the GRILL with the HOOD in the closed position.
NEVER light the SIDE BURNER with the LID in the closed position.
Storage of Appliance
Storage of an appliance indoors is only permissible if the cylinder is disconnected and
removed from the appliance. When the appliance is not to be used for a period of time it
should be stored in its original packaging and stored in a dry and dust free environment.
This barbeque is designed to use outdoors, away from any flammable materials. It is
important that there are no overhead obstructions . It is important that the ventilation
openings of the appliance are not obstructed. The barbeque must be used on a level,
stable, heat resistant surface. The appliance should be protected from direct draughts and
shall be positioned or protected against direct penetration by any trickling water (e.g. rain).
Parts sealed by the manufacturer must not be altered by the user. No modifications should
be made to any part of this barbeque and repairs and maintenance should only be carried
out by an authorised service technician.
Connection to Appliance
Before connection, ensure that there is no debris caught in the head of the gas cylinder,
regulator, burner and burner ports. Spiders and insects can nest within and clog the
burner/venturi tube at the orifice. A clogged burner can lead to a fire beneath the
appliance.
Clean burner holes if necessary with a heavy-duty pipe cleaner.
Disconnect the regulator from the cylinder when the barbeque is not in use. Do not
disconnect the hose at the barbeque. If the hose is replaced fit the new hose to the
appliance using a spanner to tighten it onto the connection thread. Check for leaks.

Page 6
Contents list. Carefully unpack the carton and check all the parts:
1 x Firebox & Hood Assembly
1 x Le Side Shelf
1 x Right Side Burner & Shelf
1 X Le Door
1 X Right Door
4 X Flame Tamers
1 x Cross Brace
2 x Side Panel Braces
1 x Le Front Leg
1 x Le Rear Leg
1 x Right Front Leg
1 x Right Rear Leg
2 x Cart Side Panels
1 x Cylinder Hook
1 x Cart Base Panel
2 x Castors
2 x Wheels
1 x Locking Pin
1 x Axle
2 x Hubcaps
1 x Grease Channelling Tray
2 x Grease Channelling Tray
Brackets
1 x Magnet
1 x Grease Channelling Tray Handle

Page 7
Contents list (continued)
1 x Grease Cup
2 x Cooking Grills
1 x Warming Rack
2 x M3*12mm Flat Head Screws
22 x M4*10mm Round Head Screws
5 x M5*10mm Round Head Screws
2 x M6*12mm Round Head Screws
8 x M6*50mm Round Head Screws
2 x M3 Nuts
4 x M4 Nuts
4 x M6 Nuts
4x M4 Washers
2 x Lower Door Hinges
Before you start, check that you have all the contents as above. Remove all items
including any packing materials from the firebox and hood assembly.

Page 8
Assembly instructions
STEP 1: Attach magnet and lower door hinges to the cart base panel.
WHAT YOU NEED:
2 x M3*12mm Flat Head Screws
2 x M3 Nuts
1 x Magnet
2 x Door Hinge
2 x M6 Nuts
Screw the magnet to the cart
base panel with M3*12mm screws
and M3 Nuts. Ensure the magnetic
strips are facing outwards.
Fit the 2 lower hinges to the cart base panel as shown using 2 x M6 nuts.
STEP 2: Assemble the Cart Left Side Panel.
WHAT YOU NEED:
1 x Left Front leg
1 x Left Rear leg
1 x Cart Side Panel
1 x Cart Side Panel Brace
6 x M4*10mm Round Head Screws
Attach the cart side panel and side panel brace to the left front and rear legs as below.
Tighten by M4*10mm round head screws firmly.

Page 9
Assembly instructions (continued)
STEP 3: Attach the Cylinder Hook.
WHAT YOU NEED:
2 x M6*12mm Round Head Screws
2 x M6 Nut
1 x Cylinder Hook
Attach the cylinder hook to cart left side panel. Tighten by M6*12mm round head screws and
M6 nut.
STEP 4: Attach the Castors.
WHAT YOU NEED:
2 x Castors
Screw two castors to the legs as shown.

Page 10
Assembly instructions (continued)
STEP 5: Assemble the Cart Right Side Panel.
WHAT YOU NEED:
1 x Right Front leg
1 x Right Rear leg
1 x Cart Side Panel
1 x Cart Side Panel Brace
6 x M4*10mm Round Head Screws
Attach the cart side panel and side panel brace to the right front and rear legs as below.
Tighten by M4*10mm round head screws firmly.
STEP 6: Attach the Wheels.
WHAT YOU NEED:
1 x Axle
2 x Wheels
1 x Locking pin
2 x Hubcaps
Thread the axle to go through the cart front and rear legs and two wheels as shown. Then insert
the locking pin into the slot on the axle.

Page 11
Assembly instructions (continued)
Snap the hubcaps onto the wheels.
STEP 7: Attach the Cart Base Panel.
WHAT YOU NEED:
4 x M5*10mm Round Head Screw
1 x Cart Base Panel
Attach the cart base panel to the cart left and side panel by M5*10mm screws.

Page 12
Assembly instructions (continued)
STEP 8: Attach the Cross Brace.
WHAT YOU NEED:
4 x M4*10mm Round Head Screws
1 x Cross Brace
Attach the cross brace to the top of the cart as below. Tighten by M4*10mm screws.
The magnet should be oriented as shown below.
STEP 9: Attach the Doors.
WHAT YOU NEED:
1 x Left Door
1 x Right Door
Start by locating the door lower pin into the hole in the base panel.
Swing the top of the door into position near the cross brace.
Push the door upper hinge pin down then let it spring back into the hole in the cross brace.

Page 13
Assembly instructions (continued)
STEP 10: Attach the Firebox & Hood Assembly
WHAT YOU NEED:
1 x BBQ Head and Firebox Assembly
8 x M6*50mm Round Head Screws
With help, carefully lower the head unit onto the cart, fix 8 x M6*50mm Round Head Screws
through the hole on the cart leg. Don’t fully tighten the screws yet as they are needed to hold
the side shelves in place. Leave the screws with 5mm thread exposed to hang the side
shelves in the next two steps.

Page 14
Assembly instructions (continued)
STEP 11: Attach the Right Side Burner and Shelf Assembly
WHAT YOU NEED:
1 x Side Burner & Shelf
1 x M4*10mm Round Head Screw
Hang the side burner onto the loose M6*50mm screws from Step 10 above step and then
tighten the M6 screws firmly.
Fit and fully tighen the M4*10mm round head screw to connect the side burner and control panel
as below.

Page 15
Assembly instructions (continued)
STEP 12: Connect the side burner gas hose to the BBQ
WHAT YOU NEED:
2 x Adjustable Spanners
The side burner gas hose is factory fitted to the side burner gas inlet. Once the side burner
shelf is fully installed, connect the other end of the gas hose to the bbq manifold as shown.
Use two spanners, one to hold the manifold firm, the other to tighten the nut on the gas hose.
A leak test as outlined later in these instructions needs to be performed before using the bbq
or side burner.
STEP 13: Attach the Left Side Shelf.
WHAT YOU NEED:
1 x Left Side Shelf
1 x M4*10mm Round Head Screw
Hang the side shelf onto the loose M6*50mm screws from Step 10 above and then tighten
the M6 screws firmly.
Fit and tighen the M4*10mm round head screw to connect the side shelf and control panel as
below.

Page 16
Assembly instructions (continued)
STEP 14: Attach the Grease Channelling Tray Brackets.
WHAT YOU NEED:
1 x Grease Channelling Tray
2 x Grease Channelling Tray Brackets
1 x Grease Channelling Tray Handle
4 x M4*10mm Round Head Screws
4 x M4 Washers
4 x M4 Nuts
1 x M5*10mm Round Head Screw
Fit the two brackets to the grease channelling tray with M4*10mm screws, nuts and washers
as shown. Fit the round handle to the tray with one M5*10mm screw.
STEP 15: Fit the Grease Channelling and Grease Cup
WHAT YOU NEED:
1 x Grease Cup
The grease channelling tray fits underneath the barbeque by sliding into the folds on the bbq.
The grease cup slides into the brackets on the underside of the grease channelling tray.

Page 17
Assembly instructions (continued)
STEP 16: Position the Cooking Grills, Warming Rack & Flame Tamers
WHAT YOU NEED:
2 x Cooking Grills
4 x Flame Tamers
1 x Warming Rack
First place four flame tamers into place on the lower ledge above the burners in the bbq, one
above each burner as shown below. A small notch on the ledge locates them in position.
Place the Cooking Grills into position on the upper ledge as shown below.
It is OK to purchase an optional hotplate to replace one cooking grill (but never use more than
half the cooking area as a hotplate as this could be dangerous and / or damage the bbq).
The warming rack hooks onto the side windshield as shown below.

Page 18
Checking the gas type and supply
Before assembling your barbeque, you should ensure your barbeque is suited to the type of
gas which you are going to use. This is a low pressure barbeque and must only be used with
propane gas and only use the hose and regulator supplied. Your barbeque is designed for use
with 4kg or 9kg refillaa ble propane cylinders. The cylinder should be filled by a reputable gas
supplier and visually inspected at each filling.
LPG, also known as Propane or Universal LPG:
Barbeques suited to LPG should have an orange sticker on the side saying “UNIVERSAL
LPG”. This is most commonly supplied as a portable 4kg or 9kg gas cylinder, which can be
refilled or swapped at petrol stations or your place of purchase when empty. Follow the
assembly instruction steps for how to fit and connect your portable cylinder.
Some homes have twin 45kg LPG cylinders permanently installed near an outside wall.
These cylinders supply LPG gas to multiple appliances in the home via copper pipes, and are
filled as required by the gas supply company.
Natural Gas:
This barbeque is not approved or suitable for Natural Gas use. It is dangerous to try and
use the wrong type of gas supply or connecting hose.
Fixed LPG Supply or Natural Gas Supply:
Barbeques which are connected to twin 45kg LPG cylinders or to Natural Gas must be
installed by a licensed gasfitter, in accordance with the requirements of AS 5601, and local
gas authority requirements.
There are two approaches to installation:
(1) Permanent Piped Connection: Your barbeque may be permanently connected to the
main gas lines or LPG cylinders via copper pipe. This must be done entirely by the gasfitter,
in accordance with requirements of AS 5601, and local gas authority requirements. Your
gasfitter will ensure that your barbeque is permanently connected to the supply via copper
pipe, the gas pressure in the lines is adequate, pipe sizes are correct, all connections are
secure, and that all necessary components (such as secondary regulators and manual
shutoffs) are included where regulations require them. Once this is done, the barbeque
cannot be moved. It is a permanent fixture of the property.
(2) Bayonet Point: Alternatively, you can have the gas fitter terminate the gas line using a
“bayonet point”. This allows you to connect and d isconnect the barbeque using a special
hose and bayonet termination. For LPG installations, an appropriate hose is available from
most barbeque retailers.

Page 19
Checking for gas leaks and lighting the bbq
Always keep cylinder in an upright position. Always close the cylinder valve when
the
the
barbeque is not in use.
Do not subject the cylinder to excessive heat.
NEVER STORE YOUR GAS CYLINDER INDOORS.
If you store your barbeque indoors, ALWAYS disconnect the cylinder first and store it
safely outside. Cylinders must be stored outdoors in a well ventilated area out of reach of
children, and must not be stored in a building, garage or any other enclosed area.
Hose and Regulator Safety
The regulator and hose assembly supplied with the barbeque are suitable for propane only.
The gas regulator adjusted to have an outlet pressure of 2.75kPA and is
is supplied for
connection to the LPG cylinder. Hose diameter 8mm. The pressure regulator and hose
assembly supplied with the barbeque must be used. Replacement pressure regulators and
hose assemblies must be those specified by the barbeque manufacturer.
When connecting the hose and regulator assembly to the gas cylinder, take care to avoid
unnecessary twisting or kinking of the flexible hose.
After the assembly has been secured, turn on the gas cylinder and check for leaks by
brushing a soap and water solution over all connections.
TO SAFELY CHECK FOR LEAKS:
Make 100ml of leak detecting solution by mixing one part washing up liquid with 3 parts
water. Ensure all the barbeque control valves are “OFF”. Connect the regulator to the
cylinder, ensure the connections are secure then turn ON the gas.
Brush the soapy solution onto the hose and all joints. If bubbles appear you have a leak,
which must be rectified before use. Retest after fixing the fault. Turn “OFF” the gas at
the cylinder after testing.
If leakage is detected and cannot be rectified. Do not attempt to cure leakage but consult
your store of purchase.
Lighting Instructions for barbeque
After confirming there are no leaks:
1. Open the hood of the barbeque while lighting the main burners.
2. Turn all the control knobs clockwise to “OFF” position.
3. Connect the regulator to the gas bottle. Turn the gas supply “ON” at the gas cylinder.
Check using soapy water for any gas leakage between the bottle and the regulator.

Page 20
Checking for gas leaks and lighting the bbq (continued)
4. Push down any main burner control knob and keep pressing whilst turning
anti-clockwise to the “HI” position (a clicking sound is heard). This will light that main
burner.
5. If the burner has not lit after retrying once, turn the control knob “OFF” (clockwise) wait
5 minutes and repeat step 4.
6. If the burner does not light. Light the appliance with a match using the lighting hole in the
side of the appliance. Consult your store of purchase if necessary to service the ignition.
Warning: If the burner completely fails to ignite, turn the control knob “OFF” (clockwise)
and also turn the cylinder valve “OFF”. Wait five minutes before attempting to relight with
ignition sequence.
7. Adjust the heat by turning the knob between the “HI” and “LO” positions.
8. Light individual main burners in the same way as above.
9. To turn the barbeque “OFF” turn the cylinder valve or regulator switch to the “OFF”
position and then turn the control knob on the appliance clockwise to the “OFF” position.
Lighting Instructions (Side burner)
1. Open the lid of the side burner.
2. Push down the side burner control knob and keep pressing whilst turning anti-clockwise
to the “OFF” position (a clicking sound is heard), this will light the side burner. Observe if
the burner has lit. If the burner is not lit, repeat this process once.
3. If the burner has not lit after retrying once, wait 5 minutes and repeat step 2.
4. If the burner still does not light. Light the appliance with a match using a long match or
taper. Consult your gas dealer to rectify the ignition.
Warning: If the burner fails to ignite, turn the control knob “OFF” (clockwise) and also turn
the cylinder valve “OFF”. Wait five minutes before attempting to relight with above ignition
sequence.
5. Adjust the heat by turning the knob between the “HI” & “LO” positions.
6. To turn the side burner “OFF”, turn the control knob clockwise to the “OFF” position.
NEVER CLOSE THE SIDE BURNER LID WHILE THE BURNER IS ON OR HOT!
If you wish to turn the complete barbeque ”OFF” turn the cylinder valve or regulator switch
to the “OFF” position and then turn the control knob on the appliance clockwise to the
“OFF” position.
Before cooking for the first time, operate the barbeque for about 15 minutes with the hood
closed and the gas turned on “LO”.This will “heat clean” the internal parts and dissipate
odour from the painted finish.
/