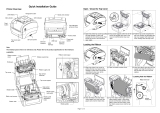
TSC TTP-244CE User manual

Category
Label printers
Type
User manual

TSC TTP-244CE is a versatile thermal transfer and direct thermal printer capable of producing high-quality labels, tags, and receipts. It features a compact design, fast print speeds, and a variety of connectivity options, making it suitable for various applications, including shipping, retail, healthcare, and manufacturing.

TSC TTP-244CE is a versatile thermal transfer and direct thermal printer capable of producing high-quality labels, tags, and receipts. It features a compact design, fast print speeds, and a variety of connectivity options, making it suitable for various applications, including shipping, retail, healthcare, and manufacturing.

USERS
MANUAL
TTP-245C / TTP-343C / TTP-244CE
THERMAL TRANSFER / DIRECT THERMAL
BAR CODE PRINTER
i
Contents
Copyright Declaration ....................................... i
1. Introduction ............................................ ii
1.1 Product Introduction .................................................................................... ii
1.2 Compliances .................................................................................................. ii
2. Operations Overview ...................................... 1
2.1 Unpacking and Inspection .......................................................................... 1
2.2 Printer Overview ........................................................................................... 2
2.2.1 Front View ........................................................................................... 2
2.2.2 Interior view ........................................................................................ 4
2.2.3 Rear View ............................................................................................ 5
3. Setup .................................................. 6
3.1 Setting up the Printer ................................................................................... 6
3.2 Open / Close the Top Cover ........................................................................ 7
3.3 Loading the Ribbon ...................................................................................... 8
3.4 Loading the Media ...................................................................................... 11
3.4.1 Loading the media ........................................................................... 11
3.4.2 Loading the Fan-fold media ...........................................................13
3.4.3 External Label Roll Mount Installation (Option) ..........................15
3.4.4 Loading Media in Peel-off Mode (Option) ....................................17
3.4.5 Loading Media in Cutter Mode (Option) .......................................19
3.5 Diagnostic Tool ...........................................................................................20
3.5.1 Start the Diagnostic Tool ................................................................20
3.5.2 Printer Function (Calibrate sensor, Ethernet setup, RTC
setup………) ...............................................................................................21
3.6 Setting Ethernet by Diagnostic Utility .....................................................22
3.6.1 Using USB interface to setup Ethernet interface........................22
3.6.2 Using RS-232 interface to setup Ethernet interface ...................23
3.6.3 Using Ethernet interface to setup Ethernet interface ................24
3.7 Install SD Memory Card .............................................................................26
4. LED and Button Functions ................................. 28
4.1 LED indicator ...............................................................................................28
4.2 Regular button function ............................................................................28
4.3 Power on utilities ........................................................................................28
4.3.1 Ribbon and Gap/Black Mark Sensor Calibration ........................29
4.3.2 Gap/Black Mark Calibration, Self-test and Dump Mode ............30
ii
4.3.3 Printer Initialization .........................................................................33
4.3.4 Set Black Mark Sensor as Media Sensor and Calibrate the Black
Mark Sensor ...............................................................................................34
4.3.5 Set Gap Sensor as Media Sensor and Calibrate the Gap Sensor
34
4.3.6 Skip AUTO.BAS ................................................................................35
5. Troubleshooting ......................................... 36
5.1 LED Status ...................................................................................................36
5.2 Print Quality .................................................................................................37
6. Maintenance ............................................ 38
Revise History ............................................ 40
i
Copyright Declaration
Information in this subject to change without notice and does not represent a commitment on
the part of TSC Auto ID Technology Co., Ltd.. No part of this manual may be reproduced or
transmitted in any form by any means, for any purpose other than the purchaser’s personal
use, without the expressed written permission of TSC Auto ID Technology Co., Ltd..
ii
1. Introduction
1.1 Product Introduction
Thank you for purchasing TSC bar code printer. Although the printer takes only a small
amount of space, it delivers reliable, superior performance.
This printer provides both thermal transfer and direct thermal printing at user selectable speed
of: 2.0, 3.0, 4.0 or 5.0 ips, for TTP-245C series; 2.0 or 3.0 ips for TTP-343C series. It accepts
roll feed, die-cut, and fan-fold labels for both thermal transfer and direct thermal printing. All
common bar codes formats are available. Fonts and bar codes can be printed in 4 directions,
8 different alphanumeric bitmap fonts and a build-in true type font capability. You will enjoy
high throughput for printing labels with this printer.
1.2 Compliances
iii
Note: There may have certification differences in the series models, please refer to product label for
accuracy.
Important safety instructions:
1. Read all of these instructions and keep them for later use.
2. Follow all warnings and instructions on the product.
3. Disconnect the power plug from the AC outlet before cleaning or if fault happened.
Do not use liquid or aerosol cleaners. Using a damp cloth is suitable for cleaning.
4. The mains socket shall be installed near the equipment and easily accessible.
5. The unit must be protected against moisture.
6. Ensure the stability when installing the device, Tipping or dropping could cause damage.
7. Make sure to follow the correct power rating and power type indicated on marking label
provided by manufacture.
8. Please refer to user manual for maximum operation ambient temperature.
WARNING:
Hazardous moving parts, keep fingers and other body parts away.
CAUTION:
(For equipment with RTC (CR2032) battery or rechargeable battery pack)
Risk of explosion if battery is replaced by an incorrect type.
Dispose of used batteries according to the Instructions as below.
iv
1. DO NOT throw the battery in fire.
2. DO NOT short circuit the contacts.
3. DO NOT disassemble the battery.
4. DO NOT throw the battery in municipal waste.
5. The symbol of the crossed out wheeled bin indicates that the battery should not be placed in
municipal waste.
Caution: The printhead may be hot and could cause severe burns. Allow the printhead to
cool.
CAUTION:
Any changes or modifications not expressly approved by the grantee of this device could
void the user's authority to operate the equipment.
2. Operations Overview
2.1 Unpacking and Inspection
This printer has been specially packaged to withstand damage during shipping.
Please carefully inspect the packaging and printer upon receiving the bar code printer.
Please retain the packaging materials in case you need to reship the printer.
Unpacking the printer, the following items are included in the carton.
One printer unit
One Windows labeling software/Windows driver CD disk
One quick installation guide
One power cord
One auto switching power supply
One USB interface cable
If any parts are missing, please contact the Customer Service Department of your
purchased reseller or distributor.
2
2.2 Printer Overview
2.2.1 Front View
1. Ribbon access cover
2. Top cover open lever
3. Media view window
4. LED indicator
5. Feed button
6. SD card socket
* Recommended SD card specification.
SD card spec
SD card capacity
Approved SD card manufacturer
V1.0, V1.1
128 MB
SanDisk, Transcend
V1.0, V1.1
256 MB
SanDisk, Transcend, Panasonic
V1.0, V1.1
512 MB
SanDisk, Transcend, Panasonic
V1.0, V1.1
1 GB
SanDisk, Transcend, Panasonic
V2.0 SDHC CLASS 4
4 GB
V2.0 SDHC CLASS 6
4 GB
SanDisk, Transcend, Panasonic
V1.0, V1.1
microSD 128 MB
Transcend, Panasonic
V1.0, V1.1
microSD 256 MB
Transcend, Panasonic
1
2
6
3
4
5
3
V1.0, V1.1
microSD 512 MB
Panasonic
V1.0, V1.1
microSD 1 GB
Transcend, Panasonic
V2.0 SDHC CLASS 4
microSD 4 GB
Panasonic
V2.0 SDHC CLASS 6
microSD 4 GB
Transcend
V1.0, V1.1
miniSD 128 MB
Transcend, Panasonic
V1.0, V1.1
miniSD 256 MB
Transcend, Panasonic
V1.0, V1.1
miniSD 512 MB
Transcend, Panasonic
V1.0, V1.1
miniSD 1 GB
Transcend, Panasonic
V2.0 SDHC CLASS 4
miniSD 4 GB
Transcend
V2.0 SDHC CLASS 6
miniSD 4 GB
- The DOS FAT file system is supported for the SD card.
- Folders/files stored in the SD card should be in the 8.3 filename format
- The miniSD/microSD card to SD card slot adapter is required.
4
2.2.2 Interior view
1. Ribbon rewind hub
2. Ribbon rewind gear
3. Gap sensor (receiver)
4. Media holder
5. Media holder lock switch
6. Gap sensor (transmitter)
7. Printhead
8. Ribbon supply hub
9. Top cover support
10. Media guide adjustment knob
11. Black mark sensor
12. Platen roller
9
11
10
5
4
3
8
7
1
2
12
6
5
2.2.3 Rear View
1. Ethernet interface
2. USB interface
3. Centronics interface
4. RS-232C interface
5. Power jack socket
6. Power switch
7. Fan-fold paper entrance chute
1
3
5
4
2
6
7
6
3. Setup
3.1 Setting up the Printer
1. Place the printer on a flat, secure surface.
2. Make sure the power switch is off.
3. Connect the printer to the computer with the provided USB cable.
4. Plug the power cord into the AC power cord socket at the rear of the printer, and
then plug the power cord into a properly grounded power outlet.
Note:
Please switch OFF printer power switch prior to plug in the power cord to printer power jack.
Power Supply
Plug
Power
Switch
USB interface
RS-232C interface
Centronics interface
Ethernet RJ-45
interface
7
3.2 Open / Close the Top Cover
1. Open the printer top cover by pulling the tabs located on each side towards the front
of the printer, then lift the top cover to the maximum open angle.
2. A top cover support at the rear of the printer will engage with lower inner cover to
hold the printer top cover open.
3. Hold the top cover and press the top cover support to disengage the top cover
support with lower inner cover. Gently close the top cover.
8
3.3 Loading the Ribbon
1. Open the printers top cover by pulling the top cover open levers located on each
side of the printer and lifting the top cover to the maximum open angle.
2. Open the ribbon access cover.
Note:
1. In normal printing mode, ribbon access cover can be opened while opens the top cover.
Ribbon access cover can be closed while top cover is open or close.
2. In peeler and cutter mode, please open the top cover then the ribbon access cover can be
opened or closed.
3. Insert the ribbon right side onto the supply hub. Align the notches on the left side
and mount onto the spokes.
4. Insert the paper core right side onto the rewind hub. Align the notches on the left
side and mount onto the spokes.
9
5. Stick the ribbon onto the ribbon rewind paper core.
6. Turn the ribbon rewind gear until the ribbon plastic leader is thoroughly wound and
the black section of the ribbon covers the print head. Close the ribbon access cover
and the top cover.
Note:
Please refer to videos on TSC YouTube or driver CD.
10
Loading Path for Ribbon
11
3.4 Loading the Media
3.4.1 Loading the media
1. Open the printer top cover by pulling the tabs located on each side towards the front
of the printer, then lift the top cover to the maximum open angle.
2. Separate and hold open the media holders.
3. Place the roll between the holders and close them onto the core.
4. Press down the media holder lock switch to hold the label roll firmly.
5. Place the paper, printing side face up, through the media sensor and place the label
leading edge onto the platen roller. Move the media guides to fit the label width by
turning the guide adjuster knob. Disengage the top cover support and close the top
12
cover gently.
6. Use Diagnostic Toolto set the media sensor type and calibrate the selected sensor.
(Start the “Diagnostic tool” Select the “Printer Configuration” tab Click the
Calibrate Sensor” button ) Please refer to the diagnostic utility quick start guide for
more information.
Note:
* Please calibrate the gap/black mark sensor when changing media.
* Please refer to videos on TSC YouTube or driver CD.
Loading path for roll labels
13
3.4.2 Loading the Fan-fold media
1. Open the printer top cover then insert the fan-fold media through the external label
entrance chute.
2. Separate and hold open the media holders.
Note: Press down the media holder lock switch to hold the media firmly.
3. Place the paper, printing side face up, through the media sensor and place the
media leading edge onto the platen roller. Move the media guides to fit the media
width by turning the guide adjuster knob.
  • Page 1 1
  • Page 2 2
  • Page 3 3
  • Page 4 4
  • Page 5 5
  • Page 6 6
  • Page 7 7
  • Page 8 8
  • Page 9 9
  • Page 10 10
  • Page 11 11
  • Page 12 12
  • Page 13 13
  • Page 14 14
  • Page 15 15
  • Page 16 16
  • Page 17 17
  • Page 18 18
  • Page 19 19
  • Page 20 20
  • Page 21 21
  • Page 22 22
  • Page 23 23
  • Page 24 24
  • Page 25 25
  • Page 26 26
  • Page 27 27
  • Page 28 28
  • Page 29 29
  • Page 30 30
  • Page 31 31
  • Page 32 32
  • Page 33 33
  • Page 34 34
  • Page 35 35
  • Page 36 36
  • Page 37 37
  • Page 38 38
  • Page 39 39
  • Page 40 40
  • Page 41 41
  • Page 42 42
  • Page 43 43
  • Page 44 44
  • Page 45 45
  • Page 46 46
  • Page 47 47
  • Page 48 48

TSC TTP-244CE User manual

Category
Label printers
Type
User manual

TSC TTP-244CE is a versatile thermal transfer and direct thermal printer capable of producing high-quality labels, tags, and receipts. It features a compact design, fast print speeds, and a variety of connectivity options, making it suitable for various applications, including shipping, retail, healthcare, and manufacturing.

Ask a question and I''ll find the answer in the document

Finding information in a document is now easier with AI