Ricatech RR2100 Specification

Category
Jukeboxes
Type
Specification
ENGLISH
CAUTION: TO REDUCE
THE RISK OF ELECTRIC
SHOCK, DO NOT REMOVE
COVER (OR BACK). NO
USER - SERVICEABLE
PARTS INSIDE. REFER
SERVICING TO QUALIFIED
SERVICE PERSONNEL.
The lighting flash with
arrowhead symbol, within
an equilateral triangle, is
intended to alert user to
the presence of uninsulated
"dangerous voltage" within
the product's enclosure
that may be of sufficient
magnitude to constitute
risk of electric shock
to persons.
The exclamation point
within an equilateral
triangle is intended to
alert user to the
presence of important
operating and
maintenance (servicing)
instruction in the
literature accompanying
the appliance.
RISK OF ELECTRIC SHOCK
DO NOT OPEN
CAUTION
WARNING:
TO PREVENT FIRE OR SHOCK HAZARD, DO NOT EXPOSE THIS APPLIANCE TO
RAIN OR MOISTURE. DO NOT REMOVE COVER. PILOT LAMPS SOLDERED IN
PLACE. NO USER SERVICEABLE PARTS INSIDE. REFER SERVICING TO QUALIFIED
SERVICE PERSONNEL.
Specification
Frequency Range : MW 522 - 1620 KHz
: FM 87.5 - 108 MHz
USB Port 2.0 : Full Speed 512MB - 4GB
(Support FAT16, FAT32)
Power Consumption : 85W
Antennas : External FM antenna wire
: Built-in ferrite AM bar
Power Source : AC 230V ~ 50Hz
Speaker Size : 6 1/2” Dynamic type x 2
Speaker Ohm : 4 Ohm
Speaker Watt : 40W
Speaker Size : 2 1/2” Tweeter type x2
Speaker Ohm : 8 Ohm
Speaker Watt : 10W
Power Output : 13W x 2
*DESIGN AND SPECIFICATIONS SUBJECT TO CHANGE WITHOUT NOTICE.
2
ESPAÑOL
65
ENGLISH
3. Press the FF / o FB / repeatedly to set the hours.
4. Press PROGRAM /
again to confirm.
The minutes digit starts flashing
5. Hold down FF /
o FB / repeatedly to set the minutes.
6. Press PROGRAM /
again to confirm.
The minutes digit stop flashing, the clock begins to run.
7. Press PROGRAM /
to select between 12 and 24 hours, shown as below
Setting the timer
The unit can be used as an alarm clock, whereby the selected source (CD, TUNER, USB, SD CARD OR PHONO) to start
playback at a preset time. Make sure theZ clock is set before using the timer.
1. In the standby mode, press and hold TIMER /
on the remote over 1 second, icon " " and message” TURN ON”
start flashing. Press TIMER /
again on the remote to begin the “SYSTEM POWER ON” timer setting.
2. Press FF /
or FB / repeatedly to set hours.
3. Press TIMER /
on the remote to enter minutes setting mode.
4. Press FF /
or FB / repeatedly to set minutes.
5. Press TIMER /
on the remote again to begin “SYSTEM POWER OFF” timer setting.
Icon "
" and message “TURN OFF” start flashing. Press TIMER / on the remote again to begin timer setting.
6. Press FF /
or FB / repeatedly to set hours.
7. Press TIMER /
on the remote to enter minutes setting mode.
8. Press FF /
or FB / repeatedly to set minutes.
9. Press TIMER /
on the remote again to begin setting the source from wake up.
Default at TUNER mode. Message TUNER start flashing.
10. Press FUNCTION /
to select wake up source.
The unit will be waked up from last tuned station if TUNER mode is selected.
11. Press TIMER /
on the remote again to complete timer on/off setting. Icon " " will keep display on LCD if timer is
set.
Note: The wake up sound level will be increased gently to preset volume level.
12. Press TIMER /
on the remote control to turn on/off the timer. The icon " " will be on/off respectively.
SLEEP
You can set a certain period of time after which the set will switch to standby.
On the remote control, press SLEEP /
repeatedly to select the desired time period options (in minutes):
- Display shows in sequence: SLEEP 90, 80, 70, 60, 50, 40, 30, 20, 10
- Display shows the selected option briefly and returns to its previous status.
To deactivate the sleep timer, press SLEEP /
again to “00 “ or Press POWER / to switch the unit into standby mode.
6
ESPAÑOL
TOCADISCOS
PREPARACIÓN ANTES DE USAR EL TOCADISCOS
1. Retire la brida negra desenrollándola y extráigala con cuidado del BRAZO.
2. Quite la cubierta protectora blanca de la aguja tirando suavemente hacia la parte frontal de la unidad.
3. Libere el BRAZO y pulse suavemente hacia la derecha el clip de sujeción. Así liberará el brazo del SOPORTE. Cuando
mueva la unidad de lugar, vuelva a bloquear el brazo con el clip.
FUNCIONAMIENTO DEL TOCADISCOS
1. Pulse FUNCTION /
para ajustar la unidad en modo PHONO.
2. Ajuste el CONTROL DE VELOCIDAD según la velocidad (3, 1/3, 45 ó 78 rpm) del disco seleccionado.
3. Mueva el brazo sobre el disco y colóquelo en el punto en el que quiera comenzar la reproducción.
4. Cuando el disco finalice, el BRAZO se detendrá automáticamente. Debe volver a colocarlo manualmente sobre el
SOPORTE.
ACCESORIOS INCLUIDOS: Adaptador para discos de 45 rpm
Para reproducir un disco de 45 rpm, saque el adaptador con los dedos pulgar e índice y tire de él.
Colóquelo sobre el EJE. Ya podrá colocar el disco sobre el tocadiscos.
FUNCIONAMIENTO DEL CONECTOR PARA AURICULARES
Para escuchar con auriculares / cascos (no incluidos)
REPRODUCTOR DE CD
Reproducción de un CD
1. Pulse FUNCTION /
para ajustar la unidad en modo CD.
2. Pulse CD OPEN / CLOSE /
para abrir el compartimento del CD.
3. Introduzca un disco con la parte impresa hacia arriba. Pulse CD OPEN / CLOSE /
. de nuevo para cerrar el
compartimento, aparecerá READ mientras el reproductor busca el contenido del disco.
4. Se reproducirá automáticamente la pista 1 cuando termine la lectura del contenido del CD.
5. Pulse FF /
o FB / una o más veces hasta que aparezca en pantalla el número de pista que desea.
6. Pulse STOP/BAND /
para detener la reproducción.
Reproducción de un CD de MP3
1. Introduzca un disco con formato CD-MP3. Pulse CD OPEN / CLOSE /
de nuevo para cerrar el compartimento.
Aparecerá READ en pantalla mientras el sistema lee el contenido del CD.
2. Se reproducirá automáticamente la pista 1 de la carpeta raíz (carpeta 1) cuando acabe la lectura del CD MP3.
3. Pulse FF /
o FB / una o más veces hasta que aparezca en pantalla el número de pista que desea.
4. Pulse PRESET + /
or PRESET / para seleccionar el álbum que desee.
5. Pulse STOP/BAND /
para detener la reproducción.
61
ENGLISH
1. Press and hold PROGRAM / button until Auto appears
- Icon “ memory” will start flashing
- Available stations are programmed
- After all stations are stored, the last preset station will then be played
ANTENNA
Antenna: for FM reception, the unit is provided with a FM WIRE ANTENNA, move the wire until the reception is clear
and with no interferences. For AM reception, the unit is provided with a directional build-in ferrite antenna. Rotate the set
to find the position in which the best reception is obtained. Do not connect the EXTERNAL FM ANTENNA to any outside
antenna.
USB & SD-CARD OPERATION
USB operation:
1. Press the FUNCTION /
to set the unit to USB mode.
2. Plug-in USB mass storage device. READ is displayed as the system scans the contents of USB device.
3. Track no. 1 of root folder (Folder 1) will be playback automatically after finish reading USB device contents.
4. Press FF /
or FB / once or repeatedly until the desired track number appears in display.
5. Press PRESET + /
or PRESET / to select desired album.
6. Press STOP/BAND /
to stop playback.
SD-Card operation:
1. Press the FUNCTION /
to set the unit to CARD mode.
2. Insert SD-Card into the card slot. “READ” is displayed as the system scans the contents of SD card.
3. Track no. 1 of root folder (Folder 1) will be playback automatically after finish reading SD card contents.
4. Press FF /
or FB / once or repeatedly until the desired track number appears in display.
5. Press PRESET + /
or PRESET / to select desired album.
6. Press STOP/BAND /
to stop playback.
Remarks:
1) USB connector does not support connection with USB extension cable .
2) This unit is not designed for communication with computer directly.
3) It is not guarantee that all USB memory devices and SD cards will work on this audio system
IMPORTANT:
Do not disconnect the USB device during USB mode, as this may damage the external device or its files. Please power
off first or press another Mode before safely disconnecting the USB device.
USB Specification:
Interface
- USB 2.0 Full speed, HOST (USB HUB is not supported) Corresponding Flash memory
- Compatible with MPEG Audio 1, 2, 2.5
- Compatible with Layer 1, 2, 3
- Compatible with Bit rate: 128 – 320 Kbps
- Subfolder nest : 8 levels
- Number of track / titles max 999
- Support ID3 tag V2.0
8
ESPAÑOL
Control del volumen
Pulse VOLUME UP /
/ VOLUME DOWN / en el mando para ajustar el volumen.
FUNCIÓN MUTE
Puede desconectar de forma temporal el sonido sin tener que apagar la unidad.
1. Pulse MUTE /
en el mando a distancia para desactivar el sonido, la reproducción continuará sin sonido.
2. Para activar el sonido puede:
- pulsar MUTE /
de nuevo;
- ajustar los controles de volumen;
- cambiar la fuente
EQ
Pulse EQ /
en el mando a distancia para seleccionar el modo EQ que desee.
Hay 5 modos de EQ:
RADIO
Sintonización de AM/FM
1. Pulse FUNCTION /
para ajustar la unidad en modo RADIO.
2. Pulse STOP/BAND /
varias veces para seleccionar la banda que desee. AM o FM.
3. Sintonización automática – Mantenga pulsado FF /
o FB / hasta que la radio encuentre una emisora con
suficiente recepción. Si se recibe una emisora en estéreo, aparecerá (ST). Repita el paso 3 si es necesario hasta que
encuentre la emisora que desea,
4. Sintonización manual – Pulse FF /
o FB / brevemente varias veces hasta que encuentre una emisora.
Memorización de emisoras de radio
Puede almacenar hasta un total de 40 emisoras de radio (FM y AM) en la memoria, de forma manual o automática.
1. Sintonice la emisora que desee.
2. Pulse PROGRAM /
para activar la memorización, parpadearán el icono “MEMORY” y P01.
3. Pulse PRESET + /
or PRESET / para asignar un número del 1 al 20 (hasta 20 emisoras).
4. Pulse PROGRAM /
para confirmar, en la pantalla aparecerá el número de memoria, la banda y la frecuencia de la emisora.
5. Repita los pasos 1-4 para guardar otras emisoras para escuchar una emisora guardada.
Pulse PRESET + /
or PRESET / una o más veces hasta que aparezca la emisora que desea.
Escuchar una emisora memorizada
Pulse PRESET + /
or PRESET / una o más veces hasta que aparezca la emisora que desea.
Memorización automática de emisoras de radio
La memorización automática comenzará a memorizar emisoras desde la memoria 1, de modo que las emisoras memorizadas
anteriormente se borrarán.
59
ENGLISH
PROGRAMMING TRACKS
You may store up to 20 tracks in the desired sequence.
1. In the stop position, press PROGRAM /
to start programming. Icon “MEMORY” and P0-01 start flashing.
2. Press FF /
or FB / once or repeatedly until the desired track number appears in the display. For MP3:
press PRESET + /
or PRESET / to select the desired album.
3. Press PROGRAM /
to confirm, display shown stored track no. and next store position.
4. Repeat step 2-3 to select and store all desired tracks. FULL is displayed if you attempt to program more than 20 tracks
5. Press PLAY/PAUSE /
to play the program.
Erasing the program
You can erase the contents of the memory by:
- once if in stop position, twice during playback;
- Press POWER /
- Select another sound source
- Open the CD door
RECORDING
From CD to SD/USB
The system is capable to convert whole CD disc to MP3 format and copy to USB mass storage device or SD card. And
also have the ability to copy one single MP3 track to and from on USB/SD card.
1. In CD playback mode, press REC /
to start ripping to USB/SD card (default USB if both device are detected),
playback will be stopped and skipped back to the beginning of current track, system will scan the contents of USB/SD
card and create folder to store MP3 track. Resume CD playback and start ripping from the moment. The corresponding
target device icon “ USB ” / “ CARD “ start flashing.
2. Press STOP/BAND /
to exit CD ripping.
MP3 copying
1. In CD-MP3, USB or SD card playback mode, press REC /
to start MP3 copying from CD to USB/SD card, or USB
to SD card or vice versa. Playback will be stopped and system will scan the contents of USB/SD card and create
folder to store MP3 track.
2. icon “ REC displayed
3. Message COPY 01 will be displayed, the proportional copied percentage will be shown on the decimal number.
4. The target device icon “USB” or “CARD” start flashing, the decimal number will be increment from 01 as MP3 copying
starts, the process will stop as it reach 100
5. Current MP3 will be playback from beginning
From Phono to SD / USB
The system is capable to convert audio signal from PHONO input to MP3 format and store in USB mass storage device
or SD card (default USB if both devices are detected)
1. Press the FUNCTION /
to set the unit to PHONO mode.
2. Press REC /
to start ripping, the system will scan the contents of USB/SD card and create folder to store MP3
tracks.
3. Icon “ REC ” and message “ RIPP TO” are displayed, icon “ PHONO “ start flashing.
4. The target device icon “ USB ” or “ CARD ” start flashing as ripping begins.
5. Press STOP/BAND /
to exit PHONO ripping
10
ESPAÑOL
PREPARACIÓN
DESEMBALAJE
1 Retire todos los materiales de embalaje de la unidad.
Nota: Guarde todos los materiales de embalaje.
2 El mando a distancia está colocado en la parte exterior de la espuma del embalaje.
3 Retire la bolsa de plástico que envuelve la radio y el mando a distancia.
4 Desenrolle el cable de la antena en la parte trasera de la radio.
5 Abra la tapa y saque el material de embalaje de espuma de poliestireno del plato.
6 Retire la brida negra de la parte inferior del BRAZO.
7 Quite la cubierta protectora blanca de la aguja tirando suavemente hacia la parte frontal de la unidad.
Notas:
a) Nota ESD: En caso de mal funcionamiento debido a descargas electrostáticas, simplemente resetee el producto
(desconéctelo y vuelva a conectarlo) para volver al funcionamiento normal.
b) Nota sobre rápidos transitorios eléctricos (explosiones) (I2): En caso de mal funcionamiento, simplemente resetee el
producto (desconéctelo y vuelva a conectarlo) para volver al funcionamiento normal.
CONFIGURACIÓN
1 Desenrolle el cable de corriente AC.
2 Pulse el botón de encendido en la parte trasera de la unidad para conectar la corriente.
3 Pulse POWER /
en la parte frontal de la unidad para que la unidad entre en modo Standby.
4 Desate la antena FM y déjela colgada en línea recta para una óptima recepción de FM. Si tiene problemas al sintonizaruna
emisora de FM, mueva l a antena externa de FM para una mejor recepción. No conecte la antena FM a una antena externa.
ALIMENTACIÓN DE LA UNIDAD
Conecte el cable de corriente AC a un enchufe. Este sistema cambia a modo Standby automáticamente y en el LCD
aparecerá lo siguiente
Para encender la unidad, pulse POWER /
y la luz del LCD se encenderá.
El LED de STANDBY se apagará y aparecerá lo siguiente:
FUNCIONAMIENTO BÁSICO
Selección de función
1. Pulse FUNCTION /
para seleccionar entre:
2. Cuando la unidad esté encendida, pulse POWER /
para apagar la unidad. La luz del LCD se apagará y aparecerá
el mensaje “GOOD BYE” durante 2 segundos y después se encenderá el LED de STANDBY.
Nota: En modo Standby, se almacenarán en la memoria de la unidad los ajustes de tono y sonido y el nivel del volumen
(hasta un nivel máximo de 30).
BATERÍA DE EMERGENCIA
El sistema de batería de emergencia sirve para mantener los ajustes del reloj y de la alarma durante un corte eléctrico.
En el caso de un corte eléctrico, la betería de emergencia hará que los ajustes del reloj y de la alarma se mantengan
hasta que se restablezca el suministro. Para utilizar la batería de emergencia coloque dos pilas tipo AAA. Este sistema
no funcionará sin tener pilas. Para colocarlas, siga las siguientes instrucciones.
1 Retire la tapa del copartimento de las pilas de la parte trasera de la unidad.
2 Coloque dos pilas nuevas AAA en la posición correcta, tal y como se indica en la tapa de la batería.
3 Vuelva a colocar la tapa del compartimento de las pilas.
NOTA: No use tipos de pilas diferentes
No mezcle pilas nuevas y usadas
Ajuste del reloj
Después de enchufar el sistema, ajuste primero el reloj.
1. Pulse POWER /
para que la unidad entre en modo Standby
- En la pantalla aparecerá la hora
- “0:00” parpadeará por defecto si el reloj no está ajustado
2 En modo Standby, mantenga pulsado PROGRAM /
durante 1 segundo.
- Los dígitos de las horas empezarán a parpadear.
57
ENGLISH
TROUBLESHOOTING
There is no power
1. Make sure radio is plugged in correctly.
2. Look at the STAND BY INDICATOR and check to see if it is red.
3. If the red light is on, press the POWER /
to turn the unit on.
There is no sound
1. Make sure the mute function is turned off.
2. Check that the volume is turned up by pressing VOLUME UP /
on the remote.
Note: Volume range on some units start at level 15 and ends at level 40.
3. Make sure INT./EXT. switch on back of radio is switched to INT. (Unless you are using external speakers,
in which case it should be on EXT. )
4. Check to make sure power is turned on.
CD does not play
1. Check to make sure CD is inserted correctly (label side facing up).
2. Check to see that surface of CD is clean.
3. Make sure function switch is set to CD mode.
USB - There is no music playing when PLAY/PAUSE (USB) is pressed.
1. Make sure the MP3 device/Flash Drive has stored music files.
2. The unit will only play Flash Drives up to 512MB – 4GB
3. Reset USB by switching the unit Off or switching to another Mode.
4. Check if the file(s) is WMA file(s). The unit does not play WMA format, only MP3 format.
Remote not working
1. Replace battery.
2. Be sure to point the remote towards remote sensor when operating.
3. Remove obstacles in the path of the remote and radio so the remote signal has a straight path to the
radio.
Turntable will not work
1. Check it the AC Power source is connected.
2. Press the POWER /
(on front of unit or on RC) to turn the unit on, the STAND BY INDICATOR light
should be off.
3. Check that the unit is in PHONO Mode. Try moving the Tone Arm to the right until a click is heard.
No Sound is coming from the unit
1. The white protective needle cover has not been removed
2. The Volume is not turned up
The Tone Arm will not move
1. The black tie-wrap has not been removed from underneath Tone Arm.
2. Tone Arm hold down clip has not been released
Trademarks – MPEG Layer-3 audio coding technology licensed from Fraunhofer IIS and Thomson
12
ESPAÑOL
55
UBICACIÓN DE LOS CONTROLES
LUZ
PRESET +
PRESET –
INDICADOR
STANDBY
SENSOR
REC/
BORRAR
FUNCI
Ó
N
PUERTO
USB
PLAY/PAUSA
STOP/BANDA
ABRIR/CERRAR CD
REPETIR/ST
PUERTA DEL CD
ABAJO / F.R.
ALARMA
PROGRAMA
TARJETA
SD
CONTROL
DEL
VOLUMEN
PANTALLA
LCD
POWER
ARRIBA/F.F
ALTAVOZ
CONECTOR PARA
AURICULARES
33 45 78
BRAZO
SOPORTE
DEL
BRAZO
PLATO
EJE
ADAPTADOR PARA
DISCOS DE 45RPM
INTERRUPTOR DE CONTROL DE VELOCIDAD
( 33 1/3 , 45 , 78 RPM)
FRANCAIS
AVERTISSEMENT:
POUR EVITER DES RISQUES D’INCENDIE OU DE DECHARGES ELECTRIQUES,
N’EXPOSEZ PAS CET APPAREIL A LA PLUIE OU A L’HUMIDITE. N’ENLEVEZ PAS LE
COUVERCLE, LES VOYANTS LUMINEUX Y SONT SOUDES, IL N’Y A AUCUNE PIECE
UTILE A L’INTERIEUR. EN CAS DE REPARATION, CONTACTEZ TOUJOURS UN
PERSONNEL DE MAINTENANCE QUALIFIE.
Le voyant avec le symbole
de l’éclair à l’intérieur du
triangle prétend avertir
l’utilisateur de la présence
d’un « voltage dangereux
» non isolé à l’intérieur du
produit , suffisamment
puissant pour constituer un
risque de choc électrique.
ATTENTION
RISQUE DE CHOC ELECTRIQUE
NE PAS OUVRIR
PRECAUTION : POUR REDUIRE LE
RISQUE DE CHOC ELECTRIQUE,
N’ENLEVEZ PAS LE BOITIER (OU
DOS).IL N’Y A A L’INTERIEUR AUCUNE
PIECE UTILE A L’UTILISATEUR.
CONTACTEZ UN PERSONNEL DE
SERVICE QUALIFIE.
Le point d’exclamation à
l’intérieur du triangle
équilatéral prétend avertir
l’utilisateur de la présence
effective d’instructions
d’entretien dans le manuel
joint au produit.
Spécifications
Echelle de fréquences : MW 522 - 1620 KHz
: FM 87.5 - 108 MHz
Port USB 2.0 : Vitesse 512MB – 4GB
(Supporte FAT16, FAT32)
Consommation d’énergie : 85W
Antennes : Câble d’antenne externe pour FM
: Antenne de ferrite intégrée pour AM
Courant électrique : AC 230V ~ 50Hz
Dimensions haut-parleur : 2 x 6 1/2” de type dynamique
Ohms haut-parleur : 4 ohms
Watts haut-parleur : 40W
Sortie de courant : 2 x 13W
*CONCEPTION ET SPECIFICATIONS SUJETS A MODIFICATIONS SANS PREAVIS
28
FRANCAIS
39
ENGLISH
1
IMPORTANT SAFEGUARDS FOR AUDIO PRODUCTS
PLEASE READ CAREFULLY THE FOLLOWING IMPORTANT SAFEGUARDS THAT ARE APPLICABLE TO
YOUR EQUIPMENT.
1. Read Instructions - All the safety and operating instructions should be read before the
appliance is operated.
2. Retain Instructions - The safety and operating instructions should be retained for future
reference.
3. Heed Warnings - All warnings on the appliance and in the operating instructions should be
adhered to.
4. Follow Instructions - All operating and use instructions should be followed.
5. Water and Moisture - The appliance should not be used near
water-for example, near a bathtub, washbowl, kitchen sink, laundry tub,
in a wet basement, or near a swimming pool and the like.
6. Carts and Stands - The appliance should be used only with a cart or stand
that is recommended by the manufacturer.
6A.An appliance and cart combination should be moved with care. Quick stops, excessive force, and
uneven surfaces may cause the appliance and cart combination to overturn.
7. Wall or Ceiling Mounting - The appliance should be mounted to a wall or ceiling only as recommended
by the manufacturer.
8. Ventilation - The appliance should be situated so that its location or position does not interfere
with-its proper ventilation. For example, the appliance should not be situated on a bed, sofa, rug, or
similar surface that may block the ventilation openings; or, placed in a built-in installation, such as a
bookcase or cabinet that may impede the flow of air through the ventilation openings.
9. Heat - The appliance should be situated away from heat sources such as radiators, heat registers,
stoves, or other appliances (including amplifiers) that produce heat.
10.Power Sources - The appliance should be connected to a power supply only of the type described
in the operating instructions or as marked on the appliance.
11. Grounding or Polarization - Precautions should be taken so that the grounding or polarization means
of an appliance is not impeded.
12.Power - Cord Protection - Power-supply cords should be routed so that they are not likely to be walked
on or pinched by items placed upon or against them, paying particular attention to cords at plugs,
and the point where they exit from the appliance.
13.Cleaning - The appliance should be cleaned only as recommended by the manufacturer.
14.This product is designed for use with the antenna attached and should not be connected to any other
external antennas.
15.Non-use Periods - The power cord of the appliance should be unplugged from the outlet when left
unused for a long period of time.
16.Object and Liquid Entry - Care should be taken so objects do not fall and liquids are not spilled
into the enclosure through openings
17.Damage Requiring Service - The appliance should be serviced by qualified service personnel
when:
A. The power-supply cord of the plug has been damaged; or
B. Objects have fallen, or liquid has been spilled into the appliance; or
C. The appliance has been exposed to rain; or
D. The appliance does not appear to operate normally or exhibits a marked change
inperformance; or
E. The appliance has been dropped, or the enclosure damaged.
18. Servicing - The user should not attempt to service the appliance beyond that described in the
operating instructions. All other servicing should be referred to qualified service personnel.
Through this, Lauson states that CL130 models meet the essential requirements and other
relevant or required provisions of Directive 1999/5/EC.
ENGLISH
GETTING STARTED
UNPACKING
1 Remove packing materials from unit.
Note: Save all packing materials
2 Remote control is located in the outside of the Styrofoam packaging
3 Remove plastic bag covering radio and remote control.
4 Untie antenna wire on back of radio.
5 Open lid and remove Styrofoam shipping material from turntable.
6 Remove black tie-wrap from under the TONE ARM .
7 Remove white protective needle cover by gently pulling towards the front of the unit.
Remarks:
a) ESD remark: In case of malfunction due to electrostatic discharge, just reset the product
(reconnect of power source may be required) to resume normal operation.
b) Electrical Fast Transient (Burst) Remark (I2): In case of malfunction due to electrical fast transient (Burst), just reset
the product. (reconnect of power source may be required) to resume normal operation.
SET UP
1 Untie the wire on the AC power cord .
2 Press the MAIN POWER button on the back of the unit to switch the main power on.
3 Press the POWER /
button on the front of the unit to switch the unit to Standby mode.
4 Untie the FM antenna and allow it to hang down in a straight line for optimum FM reception. If you have trouble tuning
in an FM station, move the external FM antenna for best reception. Do not connect FM antenna to outside antenna.
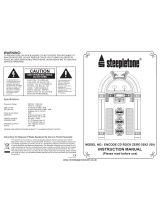
POWER UP YOUR UNIT
Connect the AC power cord to the wall socket. This system switches to Standby mode automatically and LCD would shown
as below
To switch the unit on, press POWER /
LCD backlight will be turned on.
STANDBY LED is turned off and displayed as below.
BASIC OPERATION
Function select
1. Press FUNCTION /
to select among:
2. When the set is on, press POWER /
to switch the unit off. LCD
backlight will be turned off and shown message“GOOD BYE” for 2 seconds,
then the STANDBY LED is turned on.
Note: In the standby mode, the tone, sound settings tuner presets and the volume level (up to a maximum volume level
of 30) will be stored in the unit’s memory.
BATTERY BACK UP
The battery backup system to maintain your clock and alarm settings during a power outage. In the event of a power outage,
the battery backup will save your time and alarm settings until power is restored. To utilize the battery backup, you must
install two AAA batteries. The battery backup will not operate unless batteries are installed. To install batteries, follow the
instructions below.
1 Remove the Battery Compartment cover from the back of the unit.
2 Install two new AAA batteries in the correct position as shown inside the battery cover.
3 Reinstall the Battery Compartment cover.
NOTE:
Do not different batteries
Do not mix old and new batteries
Setting the clock
After connecting the system to power supply, set the clock first.
1. Press POWER /
to switch the unit to Standby mode
- The display shows the time
- “0:00” flashes by default if you have not set the clock
2 In the Standby mode, press and hold PROGRAM /
over 1 second.
- The hours digit starts flashing
5
ESPAÑOL
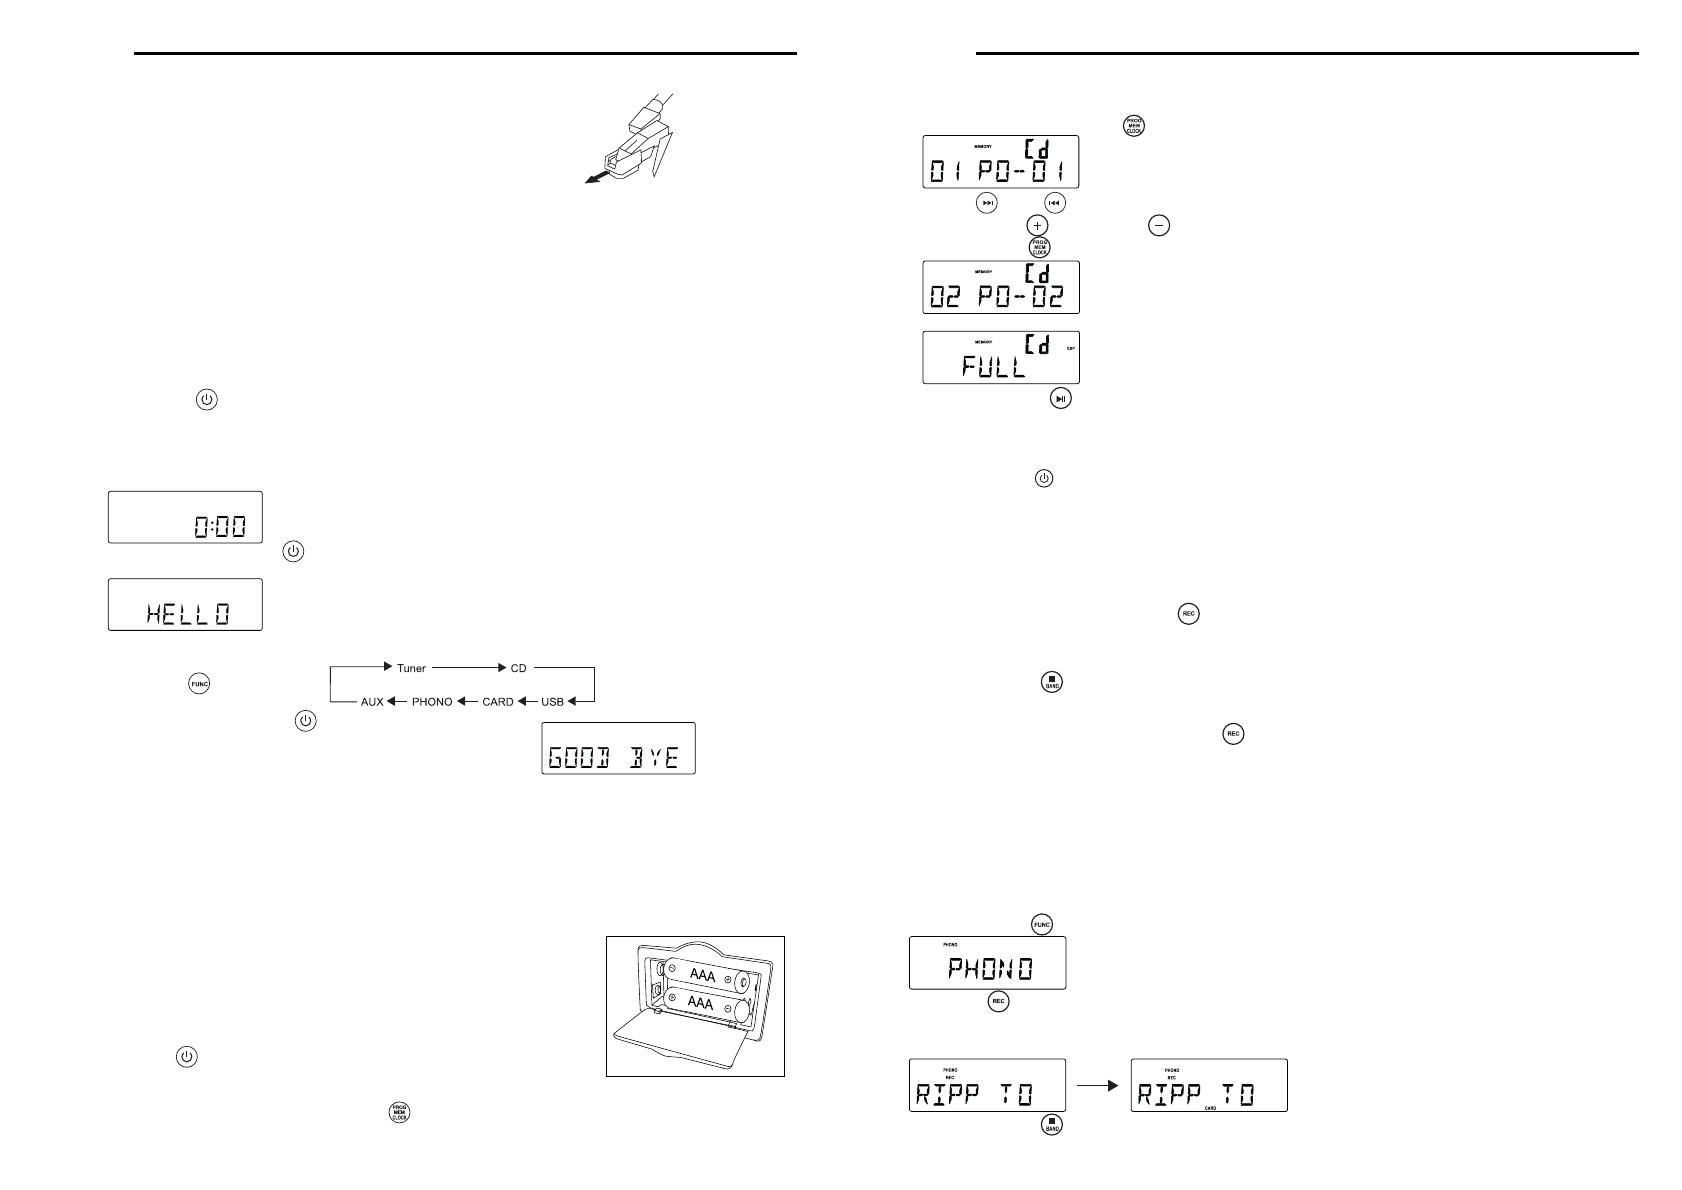
PROGRAMACIÓN DE PISTAS
Puede guardar hasta 20 pistas en la secuencia que desee.
1. En posición Stop, pulse PROGRAM /
para comenzar la programación. El icono “MEMORY” y P0-01 empezarán a parpadear.
2. Pulse FF /
o FB / una o más veces hasta que aparezca en pantalla el número de pista que desea. Para MP3:
Pulse PRESET + /
or PRESET / para seleccionar el álbum que desee.
3. Pulse PROGRAM /
para confirmar, en la pantalla aparecerá el número de pistas almacenadas y la siguiente posición.
4. Repita los pasos 2-3 para seleccionar y guardar todas las pistas que desee. Aparecerá FULL cuando complete las 20 pistas.
5. Pulse PLAY/PAUSE /
para reproducir el programa.
Borrar el programa
Puede borrar el contenido de la memoria:
- Pulsando Stop una vez en posición Stop, o pulsando dos veces durante la reproducción.
- Pulsando POWER /
- Seleccionando otra fuente de sonido
- Abriendo el compartimento del CD.
GRABACIÓN
De CD a SD/USB
Este sistema puede convertir un CD entero en formato MP3 y copiarlo a un dispositivo de almacenamiento masivo USB o
a una tarjeta SD. También puede copiar una única pista de MP3 a o desde una tarjeta SD.
1. En modo Reproducción de CD, pulse REC /
para empezar a ripear a USB/tarjeta SD (por defecto USB si se detectan
ambos dispositivos), la reproducción se detendrá y volverá al principio de la pista actual, el sistema buscará el
contenido del USB/tarjeta SD y creará una carpeta para almacenar las pistas en MP3. Vuelva a la reproducción del
CD y comience a ripear al momento. El icono del dispositivo correspondiente (“USB” / “CARD”) parpadeará.
2. Pulse STOP/BAND /
para salir de esta función.
Copiar MP3
1. En modo CD-MP3, USB o tarjeta SD, pulse REC /
para empezar a copiar de CD a USB/tarjeta SD, de USB a SD
o viceversa. La reproducción se detendrá y el sistema buscará los contenidos del USB/tarjeta SD y creará una
carpeta para guardar la pista MP3.
2. Aparecerá el icono “REC”.
3. Aparecerá el mensaje COPY 01 junto al porcentaje del proceso de copiado en número decimal.
4. El icono del dispositivo correspondiente (“USB” o “CARD”) parpadeará y el número irá aumentando desde 01 hasta que
el proceso se detenga en 100.
5. El MP3 actual se reproducirá desde el principio.
De Phono a SD/USB
Este sistema puede convertir la señal de audio de la entrada del tocadiscos en formato MP3 y almacenarlo en un dispositivo
de almacenamiento masivo USB o tarjeta SD (por defecto USB si ambos dispositivos están conectados).
1. Pulse FUNCTION /
para ajustar la unidad en modo PHONO.
2. Pulse REC /
para comenzar el ripeo, el sistema buscará el contenido del USB/tarjeta SD y creará una carpeta para
almacenar las pistas en MP3.
3. El icono “REC” y el mensaje “RIPP TO” aparecerán en la pantalla y parpadeará el icono “PHONO”.
4. El icono del dispositivo correspondiente ("USB” o "CARD”) empezará a parpadear cuando comience el ripeo.
5. Pulse STOP/BAND /
para salir de esta función.
62
ENGLISH
RADIO
AM/FM Tuning
1. Press the FUNCTION /
to set the unit to TUNER mode.
2. Press STOP/BAND /
repeatedly to select your desired waveband. FM or AM
3. Auto Tuning – Press and hold FF /
or FB / until frequency begins to scroll the radio automatically tunes to a
station with sufficient reception. If a station in received in stereo, (ST) is shown. Repeat step 3 if necessary until you
find the desired station.
4. Manual Tuning – Press FF /
or FB / briefly and repeatedly until found a station.
Programming radio stations
You can store up to a total of 40 radio stations (FM and AM) in the memory, manually or automatically (Autostore)
1. Tune to your desired station
2. Press PROGRAM /
to activate programming, icon “ MEMORY” and P01 will start flashing.
3. Press PRESET + /
or PRESET / to allocate a number from 1 to 20 stations.
4. Press PROGRAM /
to confirm, display shows the preset number waveband and the frequency of the preset station.
5. Repeat steps 1-4 to store other stations to listen to a preset station. Press PRESET + /
or PRESET / once
or more until the desired preset station in displayed.
To listen to a preset station
Press PRESET + /
or PRESET / once or more until the desired preset station in displayed.
Automatic programming radio stations
Automatic programming will station preset 1, from this preset number upwards, former programmed tuner stations will
be erased.
Volume control
Press VOLUME UP /
/ VOLUME DOWN / on the remote control to adjust the volume.
MUTE
You can temporarily switch off the sound without switching off the unit.
1. Press MUTE /
on the remote control to switch off the sound, playback continues without sound.
2. To switch on the sound , you can:
- press MUTE /
again;
- adjust the volume controls;
- change source
EQ
Press EQ /
on the remote control to select desired EQ mode.
5 modes preset EQ:
7
ESPAÑOL
1. Mantenga pulsado el botón PROGRAM / hasta que aparezca Auto
- El icono “memory” empezará a parpadear
- Se memorizarán las emisoras disponibles
- Después de guardar todas las emisoras, se reproducirá la última que se encontró
ANTENA
Antena: para la recepción de FM, la unidad viene equipada con una ANTENA DE CABLE PARA FM, mueva el cable hasta
que la recepción sea clara y sin interferencias. Para la recepción de AM, la unidad está equipada con una antena de ferrita
direccional incorporada. Gire el equipo hasta encontrar la posición en la que se consigue una mejor recepción. No conecte
la ANTENA EXTERNA PARA FM a ninguna antena exterior.
FUNCIONAMIENTO DEL USB / TARJETA SD
Funcionamiento del USB:
1. Pulse FUNCTION /
para ajustar la unidad en modo USB.
2. Conecte el dispositivo de almacenamiento masivo USB. Aparecerá READ en pantalla mientras el sistema lee el
contenido del dispositivo USB.
3. Se reproducirá automáticamente la pista 1 de la carpeta raíz (carpeta 1) cuando acabe la lectura del USB.
4. Pulse FF /
o FB / una o más veces hasta que aparezca en pantalla el número de pista que desea.
5. Pulse PRESET + /
or PRESET / para seleccionar el álbum que desee.
6. Pulse STOP/BAND /
para detener la reproducción.
Funcionamiento de la tarjeta SD:
1. Pulse FUNCTION / para ajustar la unidad en modo CARD (tarjeta).
2. Introduzca una tarjeta SD en la ranura. Aparecerá READ en pantalla mientras el sistema lee el contenido de la tarjeta SD.
3. Se reproducirá automáticamente la pista 1 de la carpeta raíz (carpeta 1) cuando acabe la lectura de la SD.
4. Pulse FF /
o FB / una o más veces hasta que aparezca en pantalla el número de pista que desea.
5. Pulse PRESET + /
or PRESET / para seleccionar el álbum que desee.
6. Pulse STOP/BAND /
para detener la reproducción.
Notas:
1) El conector USB no soporta la conexión mediante alargadores USB.
2) Esta unidad no está diseñada para comunicarse directamente con un ordenador.
3) No garantizamos que todos los dispositivos USB y todas las tarjetas SD funcionen en este sistema de audio.
IMPORTANTE:
No desconecte el dispositivo USB mientras esté en modo USB ya que puede dañar el dispositivo o los archivos. Por favor,
apague la unidad o pulse otro modo antes de desconectar el dispositivo USB.
Especificaciones del USB:
Interfaz
- USB 2.0 gran velocidad, HOST (no soporta HUB USB) correspondiente a memoria Flash
- Compatible con MPEG Audio 1, 2, 2.5
- Compatible con Layer 1, 2, 3
- Compatible con Bit rate: 128 – 320 Kbps
- Niveles de subcarpetas: 8 niveles
- Número de pistas / títulos: máx 999
- Soporta ID3 tag V2.0
60
ENGLISH
TURNTABLE
PREPARING TO USE THE TURNTABLE
1. Remove black tie-wrap by untwisting and gently sliding out from TONE ARM .
2. Remove white protective needle cover by gently pulling towards front of unit.
3. Release TONE ARM and hold-down clip by gently pushing to the right. This will unlock tone arm from its
ARM REST .Re-lock the hold-down clip when moving the unit to another location.
TURNTABLE OPERATION
1. Press the FUNCTION /
to set the unit to PHONO mode.
2. Set the SPEED CONTROL SWITCH to the correct speed (33 1/3, 45 or 78 rpm) for the selected record.
3. Move the tone arm over the record and lower it to the point you want the record to start.
4. At the end of the record, the TONE ARM will stop automatically. You must return it to the TONE ARM REST by hand.
ACCESSORY SUPPLIED: Adaptor for 45 rpm records
To play a 45 rpm record, remove the adaptor by placing thumb & forefinger in recesses and pulling it upwards. Then placing
it on the SPINDLE. The record can then be placed on the turntable.
EARPHONE JACK OPERATION
Listening through Earphones / Headphones (not included)
CD PLAYER
Playing a CD
1. Press the FUNCTION /
to set the unit to CD mode.
2. Press CD OPEN / CLOSE /
to open the CD compartment
3. Insert a disc with the printed side facing up. Press CD OPEN / CLOSE /
. again to close the compartment, READ
is displayed as the CD player scans the contents of a disc.
4. Track no. 1 will be playback automatically after finish the reading CD disc contents.
5. Press FF /
or FB / once or repeatedly until the desired track number appears in display.
6. Press STOP/BAND /
to stop playback.
CD-MP3 disc playback
1. Insert CD-MP3 format disc. Press CD OPEN / CLOSE /
again to close the compartment. READ is displayed as the
CD player scans the contents of a disc.
2. Track no. 1 of root folder (Folder 1) will be playback automatically after finish reading CD-MP3 disc contents.
3. Press FF /
or FB / once or repeatedly until the desired track number appears in display.
4. Press PRESET + /
or PRESET / to select desired album.
5. Press STOP/BAND /
to stop playback.
9
ESPAÑOL
3. Pulse FF / o FB / varias veces para ajustar las horas.
4. Pulse PROGRAM /
de nuevo para confirmar.
Los dígitos de los minutos empezarán a parpadear.
5. Pulse FF /
o FB / varias veces para ajustar los minutos.
6. Pulse PROGRAM /
de nuevo para confirmar.
Los dígitos de los minutos dejarán de parpadear y el reloj se activará.
7. Pulse PROGRAM /
para seleccionar entre 12 y 24 horas, como se muestra debajo.
Ajuste de la alarma
La unidad puede usarse a modo de despertador y la fuente seleccionada (CD, TUNER, USB, SD CARD O PHONO) sonará
a la hora establecida. Asegúrese de ajustar el reloj antes de usar la alarma.
1. En modo Standby, mantenga pulsado TIMER /
en el mando durante 1 segundo, aparecerá el icono " " y el mensaje
”TURN ON” parpadeará. Pulse TIMER /
de nuevo en el mando para comenzar el ajuste “ENCENDIDO” de la alarma.
2. Pulse FF /
o FB / varias veces para ajustar las horas.
3. Pulse TIMER /
en el mando para entrar en modo ajuste de minutos.
4. Pulse FF /
o FB / varias veces para ajustar los minutos.
5. Pulse TIMER /
de nuevo en el mando para comenzar el ajuste de “APAGADO AUTOMÁTICO".El icono " "
y el mensaje “TURN OFF” empezarán a parpadear. Pulse TIMER /
en el mando para comenzar el ajuste.
6. Pulse FF /
o FB / varias veces para ajustar las horas.
7. Pulse TIMER /
en el mando para entrar en modo ajuste de minutos.
8. Pulse FF /
o FB / varias veces para ajustar los minutos.
9. Pulse TIMER /
en el mando de nuevo para comenzar a ajustar la fuente del despertador.
Por defecto será modo RADIO. TUNER parpadeará en la pantalla.
10.Pulse FUNCTION /
para seleccionar la fuente del despertador.
La unidad sintonizará la última emisora escuchada si está seleccionado el modo RADIO.
11.Pulse TIMER /
en el mando de nuevo para completar la activación/desactivación de la alarma El icono " " aparecerá
en el LCD cuando la alarma esté ajustada.
Nota: El nivel de sonido del despertador irá aumentando progresivamente hasta el nivel seleccionado.
12.Pulse TIMER /
en el mando para activar/desactivar la alarma. El icono " " aparecerá / desaparecerá.
FUNCIÓN SLEEP
Puede ajustar el periodo de tiempo antes de que la unidad entre en modo Standby de forma automática.
En el mando a distancia, pulse SLEEP /
varias veces para seleccionar el periodo de tiempo que desea (en minutos):
- En la pantalla aparecerá la secuencia: SLEEP 90, 80, 70, 60, 50, 40, 30, 20, 10
- En la pantalla aparecerá brevemente la opción seleccionada y volverá al estado anterior.
Para desactivar esta función, pulse SLEEP /
de nuevo hasta “00 “ o pulse POWER / para que la unidad entre en
modo Standby.
58
ENGLISH
From AUX to SD/USB
The system is capable to convert audio signal from AUX input to MP3 format and store in USB mass storage device or
SD card (default USB if both devices are detected).
1. Press FUNCTION /
once or more to select AUX
2. Press REC /
to start ripping, the system will scan the contents of USB / SD card and create folder to store
MP3 track.
3. Icon “REC” and message “ RIPP TO “ are displayed, icon “ AUX “ start flashing.
4. The target device icon “ USB “ or “ CARD “ start flashing as ripping begins.
5. Press STOP/BAND /
to exit AUX ripping
Note: The message “ NO FUNCT “ will be displayed if any key pressed during AUX ripping process. The message “
NO DEV “ will be shown if neither USB or SD card not detected. The message “ FULL “ will be displayed if not enough
memory in target device.
Delete MP3 tracks
The system support deleting previous recorded MP3 or existing files.
1. In USB or SD card playback mode, press and hold REC/ERASE /
for 2 seconds, current playback track is stopped
and will be deleted.
2. Message “ delete “ is displayed
OPTIONAL EXTERNAL SPEAKERS
1. With your new radio, you have the option of adding external speakers.
2. The speaker jacks for external speakers are located on the back of the radio.
Along with the speaker jacks is a switch labeled Int./Ext.
When using external speakers, this switch must be switched to the EXT. position. Doing this turns off the internal
speakers in the radio and redirects the power to the external speakers.
3. If you decide not to use the external speakers, be sure the switch is switch to INT.
LED LIGHTING
The 7-colour changing LED lights in the front tubes are controlled by the LIGHTING SWITCH (RELEASE/HOLD) on the
rear of the unit.
11
ESPAÑOL
BATERÍA DE EMERGENCIA
UBICACIÓN DE LOS CONTROLES
ANTENA
EXTERNA
CABLE DE
CORRIENTE
EQ MUTE
OPEN/
CLOSE
PROG
MEM
0 1
2
3
4
5
6 7 8
TIMER
9
ID3
MONO
STEREO
REPEAT
CLOCK
RANDOM
BAND
PRESET
REC
VOL
SLEEP
FUNC
POWER / STAND BY
EQ
PRESET +
PRESET -
PLAY / PAUSA
IR ATR
Á
S-
ALEATORIO
ID3
STOP / BANDA
MONO/EST
É
REO
ALARMA
PROGRAMA
IR ADELANTE/+
VOLUMEN -
VOLUMEN +
SLEEP
MUTE
ABRIR/CERRAR CD
REC
REPETIR
0-9
FUNCI
Ó
N
CONECTOR DE
ENTRADA AUX
TOMA DE CORRIENTE
INTERRUPTOR DE
LUCES(MANTENER/
CAMBIAR)
CONECTOR DE
ALTAVOZ EXTERNO
INTERRUPTOR
ALTAVOZ INT./EXT.
CONECTOR DE SALIDA 12V
56
ESPAÑOL
CAUTION: TO REDUCE
THE RISK OF ELECTRIC
SHOCK, DO NOT REMOVE
COVER (OR BACK). NO
USER - SERVICEABLE
PARTS INSIDE. REFER
SERVICING TO QUALIFIED
SERVICE PERSONNEL.
The lighting flash with
arrowhead symbol, within
an equilateral triangle, is
intended to alert user to
the presence of uninsulated
"dangerous voltage" within the
product's enclosure
that may be of sufficient
magnitude to constitute
risk of electric shock
to persons.
The exclamation point
within an equilateral
triangle is intended to
alert user to the
presence of important
operating and
maintenance (servicing)
instruction in the
literature accompanying
the appliance.
RISK OF ELECTRIC SHOCK
DO NOT OPEN
CAUTION
ADVERTENCIA:
PARA EVITAR RIESGO DE INCENDIO O DE DESCARGAS ELÉCTRICAS, NO
EXPONGA ESTE APARATO A LLUVIA O HUMEDAD. NO QUITE LA CUBIERTA. LOS
PILOTOS LUMINOSOS ESTÁN SOLDADOS EN SU LUGAR. NO HAY PIEZAS ÚTILES
EN SU INTERIOR. EN CASO DE REPARACIONES, ACUDA SIEMPRE A PERSONAL
DE REPARACIONES CUALIFICADO.
Especificaciones
Rango de frecuencias : MW 522 - 1620 KHz
: FM 87.5 - 108 MHz
Puerto USB 2.0 : Velocidad 512MB – 4GB
(Soporta FAT16, FAT32)
Consumo de energía : 85W
Antenas : Cable de antena externo para FM
: Antena de ferrita incorporada para AM
Corriente eléctrica : AC 230V ~ 50Hz
Tamaño del altavoz : 2 x 6 1/2” de tipo dinámico
Ohmios del altavoz : 4 ohmios
Vatios del altavoz : 40W
Tamaño del altavoz : 2 x 2 1/2 tipo Tweeter
Ohmios del altavoz : 8 ohmios
Vatios del altavoz : 10W
Salida de corriente : 2 x 13W
*
DISE
ÑO Y ESPECIFICACIONES SUJETOS A CAMBIOS SIN PRECIO AVISO.
54
ESPAÑOL
13
  • Page 1 1
  • Page 2 2
  • Page 3 3
  • Page 4 4
  • Page 5 5
  • Page 6 6
  • Page 7 7
  • Page 8 8
  • Page 9 9
  • Page 10 10
  • Page 11 11
  • Page 12 12
  • Page 13 13
  • Page 14 14
  • Page 15 15
  • Page 16 16
  • Page 17 17
  • Page 18 18
  • Page 19 19
  • Page 20 20
  • Page 21 21
  • Page 22 22
  • Page 23 23
  • Page 24 24
  • Page 25 25
  • Page 26 26
  • Page 27 27
  • Page 28 28
  • Page 29 29
  • Page 30 30
  • Page 31 31
  • Page 32 32
  • Page 33 33
  • Page 34 34

Ricatech RR2100 Specification

Category
Jukeboxes
Type
Specification

Ask a question and I''ll find the answer in the document

Finding information in a document is now easier with AI