Page is loading ...

Thank you for your purchase of this Electrohome product. Please read this instruction manual carefully before using
product to ensure proper use. Keep this manual in a safe place for future reference.
www.electrohome.com
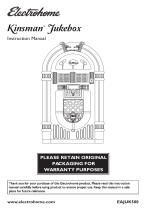
INSTRUCTION MANUAL
ELECTROHOME®
KINSMAN™ JUKEBOX
EAJUK500

- 2 -
TO PREVENT FIRE OR SHOCK HAZARD, DO NOT USE THIS PLUG WITH AN EXTENSION CORD, RECEPTACLE OR OTHER OUTLET
UNLESS THE BLADES CAN BE FULLY INSERTED TO PREVENT BLADE EXPOSURE. TO PREVENT FIRE OR SHOCK HAZARD, DO NOT
EXPOSE THIS APPLIANCE TO RAIN OR MOISTURE.
IMPORTANT SAFETY INSTRUCTIONS
1. Read these instructions.
2. Keep these instructions.
3. Heed all warnings.
4. Follow all instructions.
5. Do not use this apparatus near water.
6. Clean only with dry cloth.
7. Do not block any ventilation openings. Install in accordance with the manufacturer’s instructions.
8. Do not install near any heat sources such as radiators, heat registers, stoves, or other apparatus (including ampliers)
that produce heat.
9. Do not defeat the safety purpose of the polarized or grounding type plug. A polarized plug has two blades with
one wider than the other. A grounding type plug has two blades and a third grounding prong. The wide blade or
the third prong is provided for your safety. If the provided plug does not t into you outlet, consult an electrician for
replacement of the obsolete outlet.
10. Protect the power cord from being walked on or pinched particularly at plugs, convenience receptacles, and point
where they exit from the apparatus.
11. Only use attachments / accessories specied by the manufacturer.
12. Unplug this apparatus during lightning storms or when unused for long periods of time.
13. Refer all servicing to qualied service personnel. Servicing is required when the apparatus has been damaged in any
way, such as power-supply cord or plug is damaged, liquid has been spilled or objects have fallen into the apparatus,
the apparatus has been exposed to rain or moisture, does not operate normally, or has been dropped.
14. This appliance shall not be exposed to dripping or splashing water and no object lled with liquids such as vases shall
be placed on the apparatus.
15. Do not overload wall outlet. Use only power source as indicated.
16. Use replacement parts as specied by the manufacturer.
17. The product may be mounted to a wall only if recommended by the manufacturer.
18. Upon completion of any service or repairs to this product, ask the service technician to perform safety checks.
The lightning ash with arrowhead
symbol within an equilateral triangle
is intended to alert the user to the
presence of uninsulated dangerous
voltage within the product’s enclosure
that may be of sucient magnitude
to constitute a risk of electric shock to
persons.
The exclamation point within an
equilateral triangle is intended
to alert the user to the presence
of important operating and
maintenance (servicing) instructions
in the literature accompanying the
appliance.
WARNING:TO REDUCE THE RISK OF
ELECTRIC SHOCK DO NOT REMOVE
COVER (OR BACK), NO USER
SERVICEABLE PARTS INSIDE REFER
SERVICING TO QUALIFIED SERVICE
PERSONNEL.
CAUTION
RISK OF ELECTRIC SHOCK
DO NOT OPEN

- 3 -
CLASS 1
LASER PRODUCT
APPAREIL À LASER DE CLASSE 1
PRODUCTO LASER DE CLASE 1
CAUTION
INVISIBLE LASER RADIATION
WHEN OPEN AND INTERLOCKS DEFEATED.
AVOID EXPOSURE TO BEAM
• Avoid installing this unit in places exposed to direct sunlight or close to heat radiating appliances such as electric
heaters, on top of other stereo equipment that radiates too much heat, places lacking ventilation or dusty areas,
places subject to constant vibration and/or humid or moist areas.
• Do not attempt to clean this unit with chemical solvents as this might damage the nish. Use a clean dry cloth.
• Operate controls and switches as described in the manual. Before turning on the power, make certain that power
cord is properly installed.
• Store your CDs in a cool area to avoid damage from heat.
• When moving the set, be sure to rst disconnect the power cord.
FCC INFORMATION:
This equipment has been tested and found to comply with the limits for a Class B digital device, pursuant to Part 15 of
the FCC Rules. These limits are designed to provide reasonable protection against harmful interference in a residential
installation. This equipment generates, uses and can radiate radio frequency energy and, if not installed and used in
accordance with the instructions, may cause harmful interference to radio communications. However, there is no guarantee
that interference will not occur in a particular installation. If this equipment does cause harmful interference to radio or
television reception, which can be determined by turning the equipment o and on, the user is encouraged to try to correct
the interference by one or more of the following measures:
• Re-orient or relocate the receiving antenna.
• Increase the separation between the equipment and receiver.
• Connect the equipment into an outlet on a circuit dierent from that to which the receiver is connected.
• Consult the dealer or an experienced radio/TV technician for help.
This device complies with Part 15 of the FCC Rules. Operation is subject to the following two conditions:
(1) This device may not cause harmful interference, and
(2) This device must accept any interference received, including interference that may cause undesired operation.
IMPORTANT
Since digital circuitry may cause interference to other radio or television tuners nearby, switch this unit o when not in use
or move it away from the aected radio/television tuner.
NOTE: This digital apparatus does not exceed the Class B limits for radio noise emissions from digital apparatus as set out in
the Radio Interference Regulations of Industry Canada. These limits are designed to provide reasonable protection against
harmful interference in a residential installation. This equipment generates, uses and can radiate radio frequency energy
and, if not installed and used in accordance with
the instructions, may cause harmful interference to radio communications. However, there is no guarantee that interference
will not occur in a particular installation. If this equipment does cause harmful interference to radio or television operation
(which can be determined by turning the equipment o), the user is encouraged to try to correct the interference by one
or more of the following measures:
• Reorient or relocate the receiving antenna.
• Increase the separation between the equipment and receiver.
• Connect the equipment into an outlet on a circuit dierent from that to which the receiver is connected.
• Consult the dealer or an experienced radio/TV technician for help.
IMPORTANT SAFETY INSTRUCTIONS

- 4 -
Important Safety Instructions ..................................................................................................................... 2
What’s Included ........................................................................................................................................... 4
Buttons and Connections ............................................................................................................................. 5
Preparation for Use .....................................................................................................................................10
Power Source ......................................................................................................................................10
Battery Backup ....................................................................................................................................10
Operation ...................................................................................................................................................11
Basic Function ....................................................................................................................................11
Setting the Clock ................................................................................................................................11
Setting the Timer ...............................................................................................................................11
Sleep ..................................................................................................................................................12
Volume Control ..................................................................................................................................12
Mute ..................................................................................................................................................12
EQ ......................................................................................................................................................12
Radio Operation .................................................................................................................................13
Using Earphones ................................................................................................................................14
Using External Speakers .....................................................................................................................14
USB & SD Card Operation ....................................................................................................................14
CD Player ............................................................................................................................................15
Recording ...........................................................................................................................................17
Care and Maintenance................................................................................................................................18
Specications .............................................................................................................................................18
Electrohome Warranty ...............................................................................................................................19
Notes ..........................................................................................................................................................20
WHAT’S INCLUDED
• RCA Auxiliary Cable
• 3.5mm Auxiliary Cable
• Lighting System Remote Control
• Jukebox Remote Control
• External Power Adapter
• Instruction Manual
• 1 Year Warranty
• Lifetime Live Customer Support
TABLE OF CONTENTS

- 5 -
Main Unit – Front
BUTTONS AND CONNECTIONS
3
54
1. VOLUME – TOUCH PLATE
2. VOLUME + TOUCH PLATE
3. FRONT PANEL
4. MAGNETIC PANEL (LEFT)
5. AUX INPUT
6. USB CHARGING PORT
7. MAGNETIC PANEL (RIGHT)
8. EARPHONE INPUT
9. SPEAKER
6
7
8
9
1
2

- 6 -
BUTTONS AND CONNECTIONS
Main Unit – Control Panel
1. LIGHT BUTTON
2. SD CARD INPUT
3. PRESET +
4. PRESET –
5. STANDBY LED
6. SENSOR
7. VOLUME CONTROL KNOB
8. LCD DISPLAY
9. REC/ERASE
10. FUNCTION
11. USB INPUT
12. POWER BUTTON
13. PROGRAM
14. UP/F.F.
15. TIMER
16. DOWN/F.R.
17. CD DRAWER
18. REPEAT/ST
19. CD OPEN/CLOSE
20. PLAY/PAUSE
21. STOP
1 2
3
4 5 6 7
8
15
16
17
18 19
20
21
9
10
13
14
11
12

- 7 -
BUTTONS AND CONNECTIONS
Jukebox Remote Control
1. POWER STANDBY
2. EQ
3. PRESET +
4. RECORD
5. PRESET –
6. PLAY/PAUSE
7. SKIP BACKWARD
8. RANDOM
9. ID3
10. STOP
11. 0-9 NUMBER KEYS
12. CD OPEN CLOSE
13. MUTE
14. SLEEP
15. VOLUME
16. FUNCTION
17. VOLUME
18. SKIP FORWARD
19. PROGRAM
20. REPEAT
21. TIMER
22. MONO/STEREO
The remote controls can be stored on one of the front magnetic panels of the cabinet,
as indicated on page 5, provided that a metal battery has been tted.
1
2
3
4
5
6
7
8
9
10
11
12
13
14
15
16
17
18
19
20
21
22

- 8 -
Lighting Remote Control
1. BRIGHTNESS –
2. BRIGHTNESS +
3. GREEN
4. RED
5. LIGHT GREEN
6. ORANGE
7. STATIC CYAN
8. DARK YELLOW
9. LIGHT BLUE
10. YELLOW
11. INCREASE GREEN
12. INCREASE RED
13. DECREASE GREEN
14. DECREASE RED
15. PLAY/PAUSE
16. NO FUNCTION
17. BLUE
18. WHITE
19. DARK BLUE
20. COLOUR CHANGE
21. PURPLE
22. STROBE
23. PINK
24. CASCADING COLOUR
25. INCREASE BLUE
26. FAST COLOUR CHANGE
27. DECREASE BLUE
28. DIY (USER COLOUR SET)
The remote controls can be stored on one of the front magnetic panels of the cabinet,
as indicated on page 5, provided that a metal battery has been tted.
BUTTONS AND CONNECTIONS
1
2
3
4
5
6
7
8
9
10
11
12
13
14
15
16
17
18
19
20
21
22
23
24
25
26
27
28

- 9 -
BUTTONS AND CONNECTIONS
Main Unit – Back
1
2
3 4
5
6
7
1. EXTERNAL FM ANTENNA
2. AUX IN INPUT
3. BATTERY BACKUP
4. MAIN POWER
5. DC POWER INPUT
6. SPEAKER INT./EXT. SWITCH
7. EXTERNAL SPEAKER OUTPUT

- 10 -
PREPARATION FOR USE
POWER SOURCE
1. Unwind the AC power cord at the back of unit and connect it to power adaptor AC inlet.
2. The power adaptor DC cord connect to main unit of the DC INPUT JACK.
3. Connect the AC power cord to the wall socket.
POWER UP YOUR UNIT
• This system goes into STANDBY MODE automatically and the LCD screen will
appear as shown on the right.
• Press POWER /
to power on the unit, LCD backlight will light up. When out
of STANDBY MODE, the LED is OFF and the LCD screen will appear as shown on
the right.
BATTERY BACKUP
The BATTERY BACKUP system is to maintain your clock and alarm settings during a
power outage. In the event of a power outage, the BATTERY BACKUP will save your
time and alarm settings until the power is restored. To utilize the BATTERY BACKUP,
you must install two AAA batteries. THE BATTERY BACKUP WILL NOT OPERATE
UNLESS BATTERIES ARE INSTALLED.
To install batteries, follow the instructions below:
1. Remove the BATTERY COMPARTMENT COVER from the back of the unit.
2. Insert two new AAA batteries. Follow the diagram inside the battery cover to
ensure that the batteries are properly inserted with correct polarity as shown
inside the battery cover.
3. Reinstall the BATTERY COMPARTMENT COVER.
WARNING
• Alkaline batteries are recommended.
• Place batteries based on the polarity shown inside the battery compartment.
• DO NOT mix dierent types of batteries and DO NOT mix new and exhausted batteries.
• DO NOT use rechargeable batteries and DO NOT charge non-rechargeable batteries.
• Batteries must be inserted with correct polarity.
• When not using the unit for a prolonged period of time, please remove the batteries to avoid
possible damage caused by leaking batteries.
• DO NOT short circuit the supply terminals of the batteries.
• Exhausted batteries must be removed from the unit.
• DO NOT throw batteries into the re. They may explode.

- 11 -
BASIC FUNTION
1. Press FUNCTION /
FUNC
to select from:
2. When the unit is on, press POWER /
to switch the unit o. LCD backlight
will be turned o and the LCD screen will show "GOOD BYE" for 2 seconds,
then the STANDBY LED is turned on.
SETTING THE CLOCK
After connecting the system to the power supply, set the clock rst.
1. Press POWER /
to switch the unit to STANDBY MODE.
• The display shows the time.
• 0:00 ashes by default if you have not set the clock.
2. In the STANDBY MODE, press and hold PROGRAM / until the HOUR
digits start ashing.
3. Press the FF / or FB / repeatedly to set the HOUR.
4. Press PROGRAM / again to conrm. The MINUTE digits will start ashing.
5. Hold down FF / or FB / repeatedly to set the minutes.
6. Press PROGRAM / again to conrm. The time will stop ashing, and the
clock is set.
7. Press PROGRAM / to select between 12 and 24 hours, shown as below.
SETTING THE TIMER
The unit can be used as an alarm clock, whereby the selected source (CD, TUNER,
USB, SD CARD OR PHONO) to start playback at a preset time. MAKE SURE THE
CLOCK IS SET BEFORE USING THE TIMER.
1. In the standby mode, press and hold TIMER /
on the remote for more
than 1 second, the " " icon and "TURN ON" message start ashing. Press
TIMER / again on the remote to begin the "SYSTEM POWER ON"
timer setting.
OPERATION
In the STANDBY MODE, the tone, sound settings, tuner presets and the volume level (up to a maximum
volume level of 30) will be stored in the unit’s memory.
FM CD USB
AUX CARD

- 12 -
OPERATION
2. Press FF / or FB / repeatedly to set hours.
3. Press TIMER / on the remote to enter minutes setting mode.
4. Press FF / / or FB / repeatedly to set minutes.
5. Press TIMER / on the remote again to begin "SYSTEM POWER OFF"
timer setting. The " " icon and "TURN OFF" message starts ashing.
Press TIMER / on the remote again to begin timer setting.
SLEEP
You can set a certain period of time after which the system will switch to STANDBY MODE.
On the remote control, press SLEEP / repeatedly to select the desired time period options (in minutes):
• Display shows in sequence: SLEEP 90, 80, 70, 60, 50, 40, 30, 20, 10
• Display shows the selected option briey and returns to its previous status.
To deactivate the sleep timer, press SLEEP /
again to "00" or Press POWER /
to switch the unit into standby mode.
VOLUME CONTROL
To adjust the volume, you can press the VOLUME UP / / VOLUME DOWN / button on the remote
control, turn the VOLUME CONTROL KNOB on the front panel or press lightly on the touch sensitive plates
behind the chrome embellishments on the top of the jukebox. The left button decreases the volume, the
right button increases the volume.
MUTE
You can temporarily switch o the sound without switching o the unit.
1. Press MUTE /
on the remote control to switch the sound OFF, playback
will continue without sound.
2. To switch the sound ON , you can:
• press MUTE / again;
• adjust the volume controls;
• change the source
EQ
Press EQ /
on the remote control to select the desired EQ mode. There are 5 preset EQ modes:

- 13 -
OPERATION
RADIO
Antenna
For FM reception, the unit is equipped with an FM WIRE ANTENNA, move the wire until the reception is
clear and with no interferences.
FM Tuning
1. Press the FUNCTION /
button to set the unit to FM mode.
2. Auto Tuning – Press and hold FF /
or FB / until frequency begins to scroll through the
stations and automatically tunes to a station with sucient reception. If a station is received in stereo,
(ST) is shown. Repeat step 3 if necessary until you nd the desired station.
3. Manual Tuning – Press FF / or FB / briey and repeatedly until a station is located.
Programming radio stations
You can store up to a total of 40 radio stations (FM and AM) in the memory; manually or
automatically (Autostore).
1. Tune to your desired station
2. Press PROGRAM /
to activate programming, MEMORY and P01 will start to ash on the screen.
3. Press PRESET + /
or PRESET – / to allocate a number from
1 to 20 stations.
4. Press PROGRAM / to conrm, display shows the preset number waveband
and the frequency of the preset station.
5. Repeat steps 1-4 to store other stations to listen to a preset station. Press PRESET + / or
PRESET – /
once or more until the desired preset station in displayed. To listen to a preset station
Press PRESET + /
or PRESET – / once or more until the desired preset station in displayed.
Automatic programming radio stations
Automatic programming will station preset 1, from this preset number upwards, former programmed
tuner stations will be erased. Press and hold the PROGRAM /
button until AUTO appears.
• MEMORY will start ashing on the screen
• Available stations are programmed
• After all of the stations are programmed, the last preset station will play.

- 14 -
OPERATION
Using earphones (not included)
For private listening, plug your earphones into the EARPHONE INPUT on the front panel of the jukebox. The
speakers will be disconnected when headphones are plugged in.
Using external speakers (not included)
With your new jukebox, you have the option of adding external speakers. The SPEAKER OUTPUTS for
external speakers are located on the back of the radio. Along with the speaker outputs, there is a switch
labeled INT./EXT. When using EXTERNAL SPEAKERS, the switch must be switched to the EXT. position. This
turns o the internal speakers in the radio and redirects the power to the external speakers. If you decide
not to use the external speakers, be sure the switch is set to INT.
USB & SDCARD OPERATION
USB operation
1. Press the FUNCTION /
button to set the unit to USB mode.
2. Plug-in the USB storage device. READ is displayed as the system scans the contents of USB device.
3. Track no. 1 of root folder (Folder 1) will be playback automatically after nish
reading USB device contents.
4. Press FF / or FB / once or repeatedly until the desired track number
appears in display.
5. Press PRESET + /
or PRESET – / to select desired album.
6. Press STOP / to stop playback.
EARPHONE INPUT

- 15 -
SD-Card operation
1. Press the FUNCTION / button to set the unit to CARD mode.
2. Insert SD-Card into the card slot. “READ” is displayed as the system scans the contents of SD card.
3. Track no. 1 of root folder (Folder 1) will be playback automatically after nish reading SD card
contents.
4. Press FF / or FB / once or repeatedly until the desired track number appears in display.
5. Press PRESET + /
or PRESET – / to select desired album.
6. Press STOP / to stop playback.
NOTE
• USB connector does not support connection with USB extension cable .
• This unit is not designed for communication with computer directly.
• It is not guarantee that all USB memory devices and SD cards will work on this audio system
USB Specication:
• USB 2.0 Full speed, HOST (USB HUB is not supported) Corresponding Flash memory
• Compatible with MPEG Audio 1, 2, 2.5
• Compatible with Layer 1, 2, 3
• Compatible with Bit rate: 128 – 320 Kbps
• Subfolder nest : 8 levels
• Number of track / titles ; max 999
• Support ID3 tag V2.0
CD PLAYER
Playing a CD
1. Press the FUNCTION /
to set the unit to CD mode.
2. Press CD OPEN / CLOSE / to open the CD compartment
3. Insert a disc with the printed side facing up. Press CD OPEN / CLOSE / . again to close the
compartment, READ is displayed as the CD player scans the contents of a disc.
OPERATION
IMPORTANT – Do not disconnect the USB device during USB mode, as this may damage the external
device or its les. Please power o rst or press another Mode before safely disconnecting the USB device.

- 16 -
OPERATION
4. Track no. 1 will playback automatically after it nishes reading the CD disc contents.
5. Press FF / or FB / once or repeatedly until the desired track number appears in the display.
6. Press STOP / to stop playback.
CD-MP3 disc playback
1. Insert CD-MP3 format disc. Press CD OPEN / CLOSE /
again to close
the compartment. READ is displayed as the CD player scans the contents
of a disc.
2. Track no. 1 of root folder (Folder 1) will playback automatically after it
nishes reading the CD-MP3 disc contents.
3. Press FF / or FB / once or repeatedly until the desired track number
appears in the display.
4. Press PRESET + /
or PRESET – / to select the desired album.
5. Press STOP / to stop playback.
PROGRAMMING TRACKS
You may store up to 20 tracks in the desired sequence.
1. When the CD player is stopped, press PROGRAM /
to start programming.
MEMORY and P0-01 start ashing on the screen.
2. Press FF / or FB / once or repeatedly until the desired track number
appears in the display.
• For MP3: press PRESET + /
or PRESET – / to select the desired album.
3. Press PROGRAM /
to conrm, display shows stored track no. and
next position.
4. Repeat steps 2 and 3 to select and store all desired tracks. FULL is displayed if
you attempt to program more than 20 tracks.
5. Press PLAY/PAUSE to play the program.
Erasing the program
You can erase the contents of the memory by:
• Pressing REC / ERASE /
once if player is stopped, or twice during playback;
• Press POWER /
• Select another sound source
• Open the CD door

- 17 -
RECORDING From CD to SD/USB
The system is capable of converting entire CD discs to MP3 format and copy to a USB storage device or SD
card. It can also copy one single MP3 track to and from a USB/SD card.
1. In CD playback mode, press REC /
to start ripping to a USB/SD card (default to USB if both devices
are detected), playback will stop and skip back to the beginning of the current track, system will then
scan the contents of the USB/SD card and create a folder to store the MP3 track. Resume CD playback
and continue ripping from the starting point. The corresponding target device USB / CARD will start to
ash on the screen.
2. Press STOP / to exit CD ripping.
MP3 copying
1. In CD-MP3, USB or SD card playback mode, press REC /
to start MP3 copying from a CD to a
USB/SD card, or from a USB to SD card or vice versa. Playback will stop and system will scan the
contents of the USB/SD card and create folder to store the MP3 track.
2. REC will be displayed on the screen
3. Message COPY 01 will be displayed, the proportional copied percentage will be shown on the
decimal number.
4. The target device USB or CARD will start to ash on the screen, the decimal number will be in
increments from 01 as MP3 copying starts, the process will stop as it reaches 100.
5. Current MP3 will be playback from beginning.
From AUX to SD/USB
The system is capable of converting an audio signal from AUX input to MP3 format and store it in a USB
storage device or SD card (defaults to USB if both devices are detected).
1. Press FUNCTION /
once or more to select AUX.
2. Press REC / to start ripping, the system will scan the contents of the USB / SD card and create a
folder to store the MP3 track.
3. The REC and RIPP TO messages are displayed, AUX will start ashing on the screen.
4. The target device USB or CARD will start ashing on the screen as ripping begins.
5. Press STOP / to exit AUX ripping.
OPERATION
IMPORTANT – The message NO FUNCT will be displayed if any key is pressed during the AUX ripping
process. The message NO DEV will be shown if neither USB or SD card is detected. The message FULL will be
displayed if not enough memory available in the target device.

- 18 -
CARE AND MAINTENANCE
CARING FOR COMPACT DISCS
• Treat the compact disc carefully. Handle the compact disc only by its edges. Never allow your ngers to
come in contact with the shiny, unprinted side of the compact disc.
• Do not attach adhesive tape, stickers, etc. to the compact disc label.
• Clean the compact disc periodically with a soft, lint-free, dry cloth. Never use detergents or abrasive
cleaners to clean the compact disc. If necessary, use a CD cleaning kit.
• If a disc skips or gets stuck on a section of the compact disc, it is probably dirty or damaged (scratched).
• When cleaning the compact disc, wipe in straight lines from the center of the compact disc to the outer
edge of the compact disc. Never wipe in circular motions.
• Compact Discs should be stored in their cases after each use to avoid damage.
• Do not expose compact discs to direct sunlight, high humidity, high temperatures or dust, etc. Prolonged
exposure or extreme temperatures can warp the compact disc.
• Do not stick or write anything on either side of the compact disc. Sharp writing instruments, or the ink,
may damage the surface.
Frequency Range FM 87.5 - 108 MHz
USB Port 2.0 Full Speed 512MB - 4GB (Support FAT16, FAT32)
Antennas External FM antenna wire
Power Source AC 120-240V DC15V 8A
Speaker Size 6 1/2” Dynamic Speakers x 2
Ohm 4 Ohm / Speaker
Watt 40W / Speaker
Tweeter Size 2 1/2” Tweeters x 2
Ohm 8 Ohm / Tweeter
Watt 10W / Tweeter
Power Output 100 Watt Total
DESIGN AND SPECIFICATIONS SUBJECT TO CHANGE WITHOUT NOTICE.
SPECIFICATIONS

- 19 -
ELECTROHOME® WARRANTY
Thank you for choosing ELECTROHOME® Consumer Electronics Products!
ELECTROHOME gives the following express warranty to the original consumer purchaser or gift recipient for this ELECTROHOME
product, when shipped in its original container and sold or distributed by ELECTROHOME or by an Authorized ELECTROHOME Dealer:
ELECTROHOME warrants that this product is free, under normal use and maintenance, from any defects in material and workmanship.
If any such defects should be found in this product within the applicable warranty period, ELECTROHOME shall, at its option, repair or
replace the product as specied herein. Replacement parts furnished in connection with this warranty shall be warranted for a period
equal to the unexpired portion of the original equipment warranty.
This warranty shall not apply to:
A. Any defects caused or repairs required as a result of abusive operation, negligence, accident, improper installation or
inappropriate use as outlined in the owner’s manual.
B. Any ELECTROHOME product tampered with, modied, adjusted or repaired by any party other than ELECTROHOME or
ELECTROHOME’s Authorized Service Centres.
C. Damage caused or repairs required as a result of the use with items not specied or approved by ELECTROHOME, including
but not limited to head cleaning tapes and chemical cleaning agents.
D. Any replacement of accessories, glassware, consumable or peripheral items required through normal use of the product
including but not limited to earphones, remote controls, AC adapters, batteries, stylus, trays, lters, cables, paper, cabinet,
cabinet parts, knobs, buttons, baskets, stands and shelves.
E. Any cosmetic damage to the surface or exterior that has been defaced or caused by normal wear and tear.
F. Any damage caused by external or environmental conditions, including but not limited to transmission line/power line
voltage or liquid spillage.
G. Any product received without appropriate model, serial number and CSA /cUL /cULus /cETL /cETLus markings.
H. Any products used for rental or commercial purposes.
I. Any installation, setup and/or programming charges.
Should this ELECTROHOME product fail to operate during the warranty period, warranty service may be obtained upon delivery
of the ELECTROHOME product together with proof of purchase and a copy of this LIMITED WARRANTY statement to an Authorized
ELECTROHOME Service Centre. In-home warranty service may be provided at ELECTROHOME’s discretion on any ELECTROHOME
television with the screen size of 40” or larger. This warranty constitutes the entire express warranty granted by ELECTROHOME and
no other dealer, service centre or their agent or employee is authorized to extend, enlarge or transfer this warranty on behalf of
ELECTROHOME. To the extent the law permits, ELECTROHOME disclaims any and all liability for direct or indirect damages or losses or
for any incidental, special or consequential damages or loss of prots resulting from a defect in material or workmanship relating to
the product, including damages for the loss of time or use of this ELECTROHOME product or the loss of information. The purchaser will
be responsible for any removal, reinstallation, transportation and insurance costs incurred. Correction of defects, in the manner and
period of time described herein, constitute complete fulllment of all obligations and responsibilities of ELECTROHOME Electronics to
the purchaser with respect to the product and shall constitute full satisfaction of all claims, whether based on contract, negligence,
strict liability or otherwise.
1 YEAR PARTS & LABOUR WARRANTY PERIODS
TO OBTAIN THE NAME AND ADDRESS OF THE NEAREST AUTHORIZED ELECTROHOME SERVICE CENTRE OR FOR MORE
INFORMATION ON THIS WARRANTY
• Contact ELECTROHOME Support by Email: [email protected]
• Visit www.ELECTROHOME.com
• Mail your inquiry to:
ELECTROHOME Customer Service, 4080 Montrose Road, Niagara Falls, ON L2H 1J9
• Call toll free 1-800-663-5954
ELECTROHOME is a registered trade-mark of Circus World Displays Limited.
06.2012

- 33 -
Télecommande pour lumières
1. LUMONOSITÉ –
2. LUMONOSITÉ +
3. VERT
4. ROUGE
5. VERT PALE
6. ORANGE
7. CYAN STATIQUE
8. JAUNE FONCÉ
9. BLEU PALE
10. JAUNE
11. AUGMENTER VERT
12. AUGMENTER ROUGE
13. RÉDUIRE VERT
14. RÉDUIRE ROUGE
15. LECTURE/PAUSE
16. AUCUNE FONCTION
17. BLEU
18. BLANC
19. BLEU FONCÉ
20. CHANGEMENT COULEUR
21. POURPRE
22. LUMIÈRE STROBOSCOPIQUE
23. ROSE
24. COULEUR EN CASCADE
25. AUGMENTER BLEU
26. CHANGEMENT DE COULEUR RAPIDE
27. RÉDUIRE BLEU
28. CHANGEMENT LIBRE (utilisateur règle la
couleur)
TOUCHES ET CONNEXIONS
1
2
3
4
5
6
7
8
9
10
11
12
13
14
15
16
17
18
19
20
21
22
23
24
25
26
27
28
La télécommande peut être accrochée sur un des panneaux avant magnétiques de
l'appareil, comme indiqué à la page 5, tant qu'une pile métal a été mise en place.
-8 -
/