Molex 207129 Series User manual

Type
User manual

Molex 207129 Series is a versatile, user-friendly labeling solution designed to meet your diverse identification needs. With its advanced printing technology, you can create crisp, clear labels that resist smudging, fading, and tearing, ensuring long-lasting performance in various settings.

Molex 207129 Series is a versatile, user-friendly labeling solution designed to meet your diverse identification needs. With its advanced printing technology, you can create crisp, clear labels that resist smudging, fading, and tearing, ensuring long-lasting performance in various settings.

Air Crimp Tool Head
Doc No: ATS-640073500 Release Date: 06-08-04 UNCONTROLLED COPY Page 1 of 6
Revision: B Revision Date: 07-05-06
Air Powered
Crimp Tool Head
Application Tooling
Specification Sheet
Order No. 64007-3500
FEATURES
Quick-change tool head for the 19279-0001 (AT-200)
3-nested tool eliminates the need for additional tools
A precision user-friendly terminal locator wire stop holds terminals in the proper crimping position for each of
the three nests
Pneumatic powered crimp tools help reduce fatigue and discomfort from repetitive manual crimping
SCOPE
Products: 2.13mm (.084”) Diameter Solid Pin and Socket Male Terminals and Female Connector Terminals for 14–
20 AWG. This tool head is intended for use in the 19279-0001 (AT-200) either hand held or with optional
bench adapter 19078-0307 (ATBA) and foot switch.
Terminal Series No.
Wire Size
Insulation Diameter
Strip Length
AWG
mm²
mm
In.
mm
In.
14
-
20
2.00
-
0.50
1.52
-
3.30
.060
-
.130
3.96
-
5.53
.156
-
.218
14
-
20
2.00
-
0.50
1.
52
-
3.30
.060
-
.130
3.96
-
5.53
.156
-
.218
Conditions
After crimping, the conductor profile should measure the following. See notes on page 2.
Note:
It may be required to run 18 AWG terminals with pressure setting at 120 PSI on the regulator.
Terminal Series No.
Wire Size
Crimp Height
(REF)
Punch Width
(Ref)
Pull Force Minimum Profile
AWG
mm
2
mm
In.
mm
In.
N
Lb.
A
B
C
42023
14
2.00
1.55
-
165
.061
-
.065
2.70
3.20
222.4
50.00
X
16
1.30
1.40
-
1.50
.055
-
.059
2.50
3.20
133.4
30.00
X
18
0.80
1.30
-
1.40
.
051
-
.055
2.20
2.80
88.9
20.00
X
20
0.50
1.30
-
1.40
.051
-
.055
2.20
2.80
57.8
13.00
X
42024
14
2.00
1.55
-
165
.061
-
.065
2.70
3.20
222.4
50.00
X
16
1.30
1.40
-
1.50
.055
-
.059
2.50
3.20
133.4
30.00
X
18
0.80
1.30
-
1.40
.051
-
.055
2.20
2.80
88.9
20.00
X
20
0.50
1.30
-
1.40
.051
-
.055
2.20
2.80
57.8
13.00
X
Air Crimp Tool Head
Doc No: ATS-640073500 Release Date: 06-08-04 UNCONTROLLED COPY Page 2 of 6
Revision: B Revision Date: 07-05-06
Figure 1
WIRE AGAINST
LOCATOR BLADE
WIRE
TERMINAL
Figure 3
LOCATOR
WIRE
CONDUCTOR
PUNCH
INSULATION
ANVIL
CONDUCTOR
ANVIL
INSULATION
PUNCH
LOCATOR
BLADE
LOCATOR
BLADE
JAWS
OPEN
SAFETY
SHIELD
LOCATOR
Figure 2
PUSH UP
TO LOAD
TERMINAL
Notes:
1. This tool should only be used for the terminals and wire gauges
specified on this sheet.
2. This tool is not adjustable for crimp height. Variations in tools,
terminals, wire strandings and insulation types may affect crimp height.
3. This tool is intended for standard conductor sizes. It may not give a
good insulation crimp support for all insulation sizes and types.
4. Pull force should be used as the final criteria for an acceptable crimp.
Pull force is measured with no influence from the insulation crimp. The
insulation should be stripped long 12.7mm (1/2”) so the insulation grips on the terminal do not grip the
insulation on the wire or the conductor. Refer to the Molex Quality Crimping Handbook 63800-0029 for
additional information on crimping and crimp testing.
Operation
Refer to the instruction manual for the 19279-0001 (AT-200) for mounting this crimp tool head.
Caution: Never operate this tool without the supplied safety shield in place. Never place fingers in the tool nests.
Crimping Terminals
1. Push up on the locator blade and position the terminal with the barrel facing up into the correct die profile
A,B, or C), centering the barrel in the lower jaw as shown in Figure 1 and Figure 2. Release the locator
blade to hold the terminal in position.
2. Insert the properly stripped wire into the terminal barrel. See Figure 2.
3. Place a wire into the terminal and up against the locator blade. See Figure 3. Cycle the tool.
4. Lift up on the locator blade or wire stop and remove the crimped terminal. Inspect for proper crimp location.
Air Crimp Tool Head
Doc No: ATS-640073500 Release Date: 06-08-04 UNCONTROLLED COPY Page 3 of 6
Revision: B Revision Date: 07-05-06
Maintenance
It is recommended that each operator of the tool be made aware
of, and responsible for, the following maintenance steps:
1. Remove dust, moisture and other contaminants with a clean
brush, or soft, lint-free cloth.
2. Do not use any abrasive materials that could damage the
tool.
3. Make certain all pins; pivot points and bearing surfaces are
protected with a thin coat of high quality machine oil. Do
not oil excessively. The 64007-3500 was engineered for
durability, but like any fine piece of equipment it needs
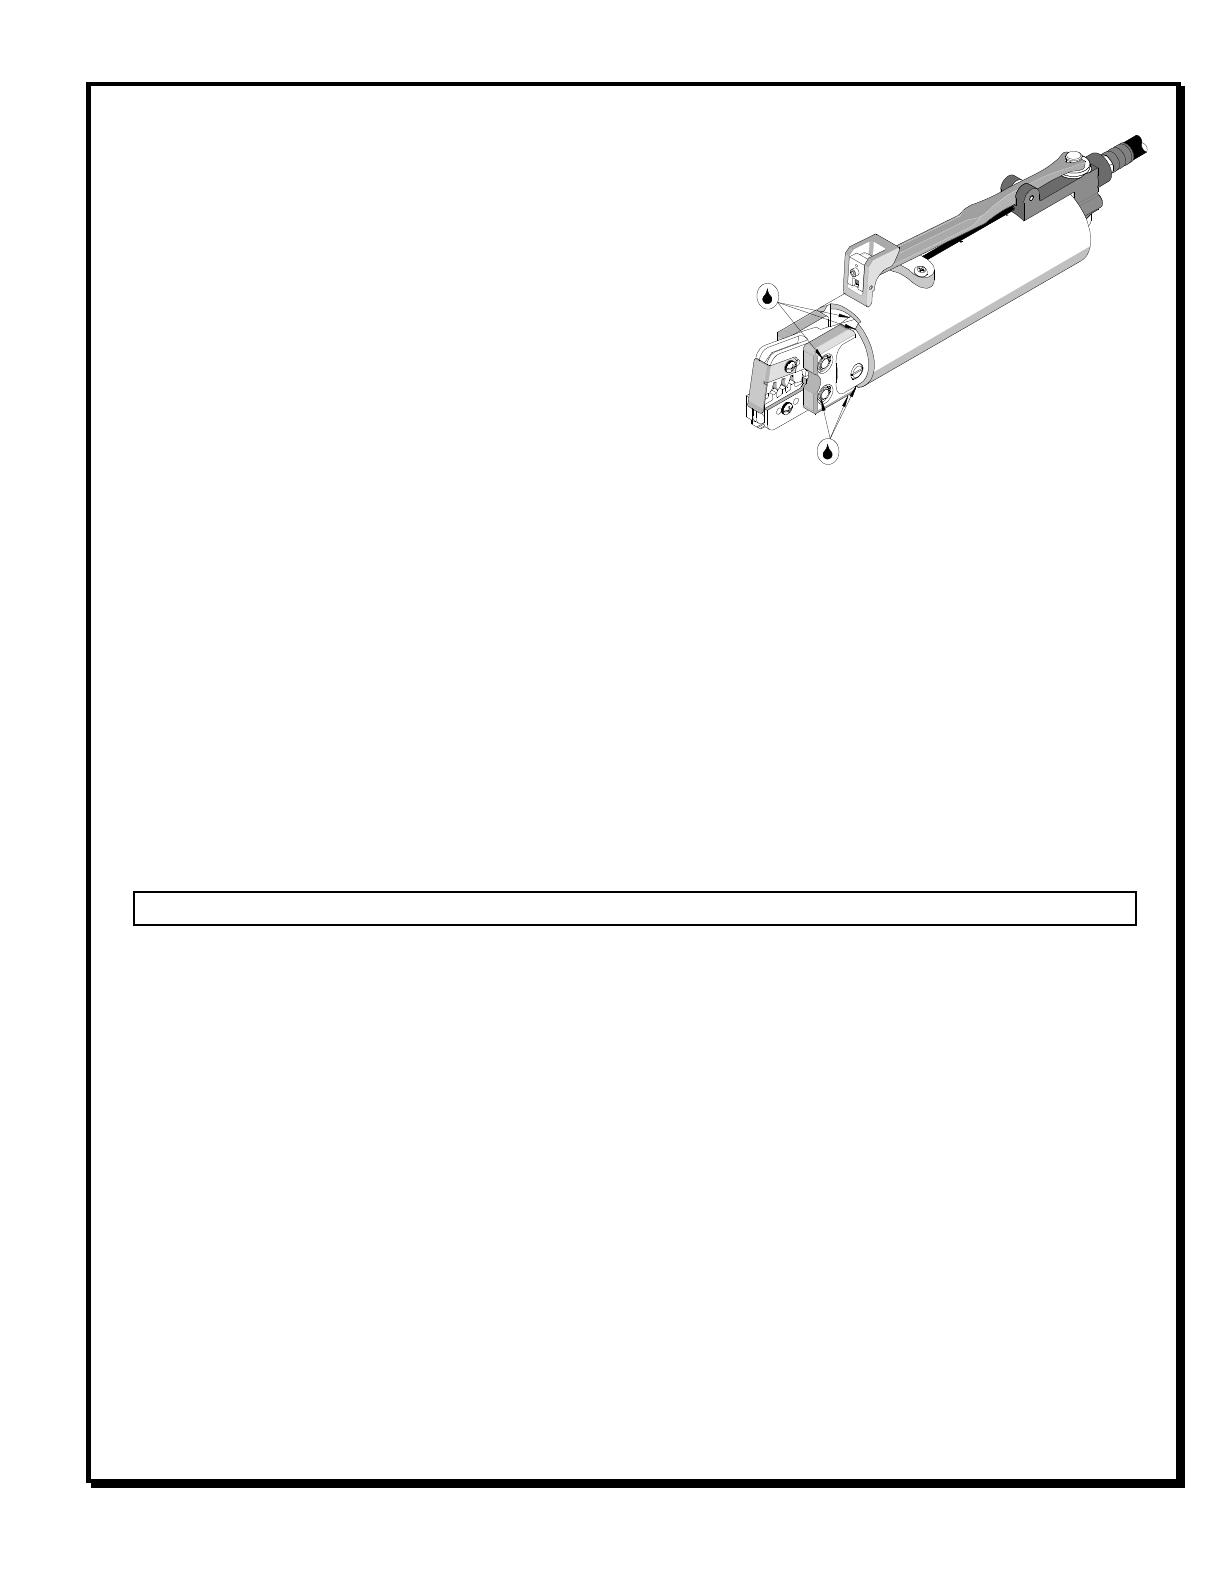
cleaning and lubrication for a maximum service life of trouble-free crimping. Use a light oil such as 30
weight automotive oil used at the oil points shown in Figure 4, every 5,000 crimps or monthly will
significantly enhance the tool life and ensure a stable calibration.
4. When the tool is not in use store the tool in a clean, dry area.
Warranty
This tool is for electrical terminal crimping purposes only. This tool is made of the best quality materials. All vital
components are long life-tested. All tools are warranted free of manufacturing defects for a period of 30 days.
Should such a defect occur, we will repair or exchange the tool free of charge. This repair or exchange will not
be applicable to alter, misused, or damaged tools. This tool is designed for hand use only. Any clamping,
fixturing, or use of handle extensions voids this warranty.
Hand held crimping tools are intended for low volume, prototyping, or repair requirements only.
CAUTION: Molex crimp specifications are valid only when used with Molex terminals, applicators and tooling.
LUBRICATION POINTS
(BOTH SIDES) LIGHT OIL
(EVERY MONTH
OR 5,000 CRIMPS)
Figure 4
Air Crimp Tool Head
Doc No: ATS-640073500 Release Date: 06-08-04 UNCONTROLLED COPY Page 4 of 6
Revision: B Revision Date: 07-05-06
PARTS LIST
Item
Order No
Description
Quantity
64007
-
3500
Crimp Tool Head
Fig
ure
5
1
64005
-
0130
Basic Air Tool Head
1
2
63811
-
3575
Locator Assembly
1
3
63811
-
3570
Tooling Kit
1
Tooling Kit Only
4
N/A
Conductor Punch
1
5
N/A
Conductor Anvil
1
6
N/A
Insulation Punch
1
7
N/A
Insulation Anvil
1
8
N/A
4.08 Dia. by 10mm Long
Dowel Pins
2**
9
N/A
4.08 Dia. by 12.5mm Long Dowel Pins
2**
10
N/A
.25 I.D. by .357 O.D. by .005” Thick Washer
2**
** Available from an Industrial supply company such as MSC (1
-
800
-
645
-
7270).
REF
637002803
2
3
1
Figure 5
6
M4 NYLON HEX NUT
(2)
8
5
7
9
4
M4 NYLON HEX NUT
M4 FLAT WASHER
(2)
10
(2)
Air Crimp Tool Head
Doc No: ATS-640073500 Release Date: 06-08-04 UNCONTROLLED COPY Page 5 of 6
Revision: B Revision Date: 07-05-06
Figure 6
3
4
2
2
2
1
6
(4)
(4)
(
2)
(4)
2
2
(2)
(2)
2
7
(2)
5
Parts List (Continued)
Item
Order No.
Description
Quantity
64005
-
0130
Basic Air Tool Head
Fig
ure
6
1
64005
-
0103
Nose Guard
1
2
64000
-
0077
Repair Kit (Springs, Rods Pivots ,Rings, and Washers)
1
3
N/A
M4 by 20 L
ong
Freedrive Pan Head Screw
1**
4
N/A
M4 by 25 L
ong
Freedrive Pan
Head Screw
1**
5
N/A
3/16” by 3/8” Long Dowel Pin
1**
6
N/A
Nylon Hex Nut M4 by 0.70mm
2**
7
N/A
M4 Flat Washer
1**
** Available from an Industrial supply company such as MSC (1
-
800
-
645
-
7270).
Air Crimp Tool Head
Doc No: ATS-640073500 Release Date: 06-08-04 UNCONTROLLED COPY Page 6 of 6
Revision: B Revision Date: 07-05-06
Air Powered
Crimp Tool Head
Certificate of Calibration
Order No. 64007-3500
Tool Order Number -----------------------------
Tool Eng. Number -----------------------------
Tool Revision ----------------------------
Serial Number -----------------------------
Date of Manufacture ----------------------------
Pin Gauge of Conductor Nest/Nests or Slug height if the nest is the “F” Crimp style.
Range Conductor Nest # 1 = -------------------- Actual = --------------------
Range Conductor Nest # 2 = -------------------- Actual = --------------------
Range Conductor Nest # 3 = -------------------- Actual = --------------------
Technician --------------------
Date of Calibration --------------------
Calibration should be done every 5,000 cycles or 3 months.
Tools should be lubricated during this operation.
Visit our Web site at http://www.molex.com
  • Page 1 1
  • Page 2 2
  • Page 3 3
  • Page 4 4
  • Page 5 5
  • Page 6 6

Molex 207129 Series User manual

Type
User manual

Molex 207129 Series is a versatile, user-friendly labeling solution designed to meet your diverse identification needs. With its advanced printing technology, you can create crisp, clear labels that resist smudging, fading, and tearing, ensuring long-lasting performance in various settings.

Ask a question and I''ll find the answer in the document

Finding information in a document is now easier with AI