Hand Crimp Tool for Krimptite / VersaKrimp Terminals
Doc No: ATS-640160038 Release Date: 06-27-12 UNCONTROLLED COPY Page 4 of 5
Revision: A Revision Date: 06-27-12
9. Continue to close the tool handles until the anti-backup ratchet releases. Allow the handles to open.
10. Remove the crimped terminal from the tool.
11. Inspect the crimp for loose wire strands, missing crimp, or other damage. Any minor terminal bending may
be straightened by hand.
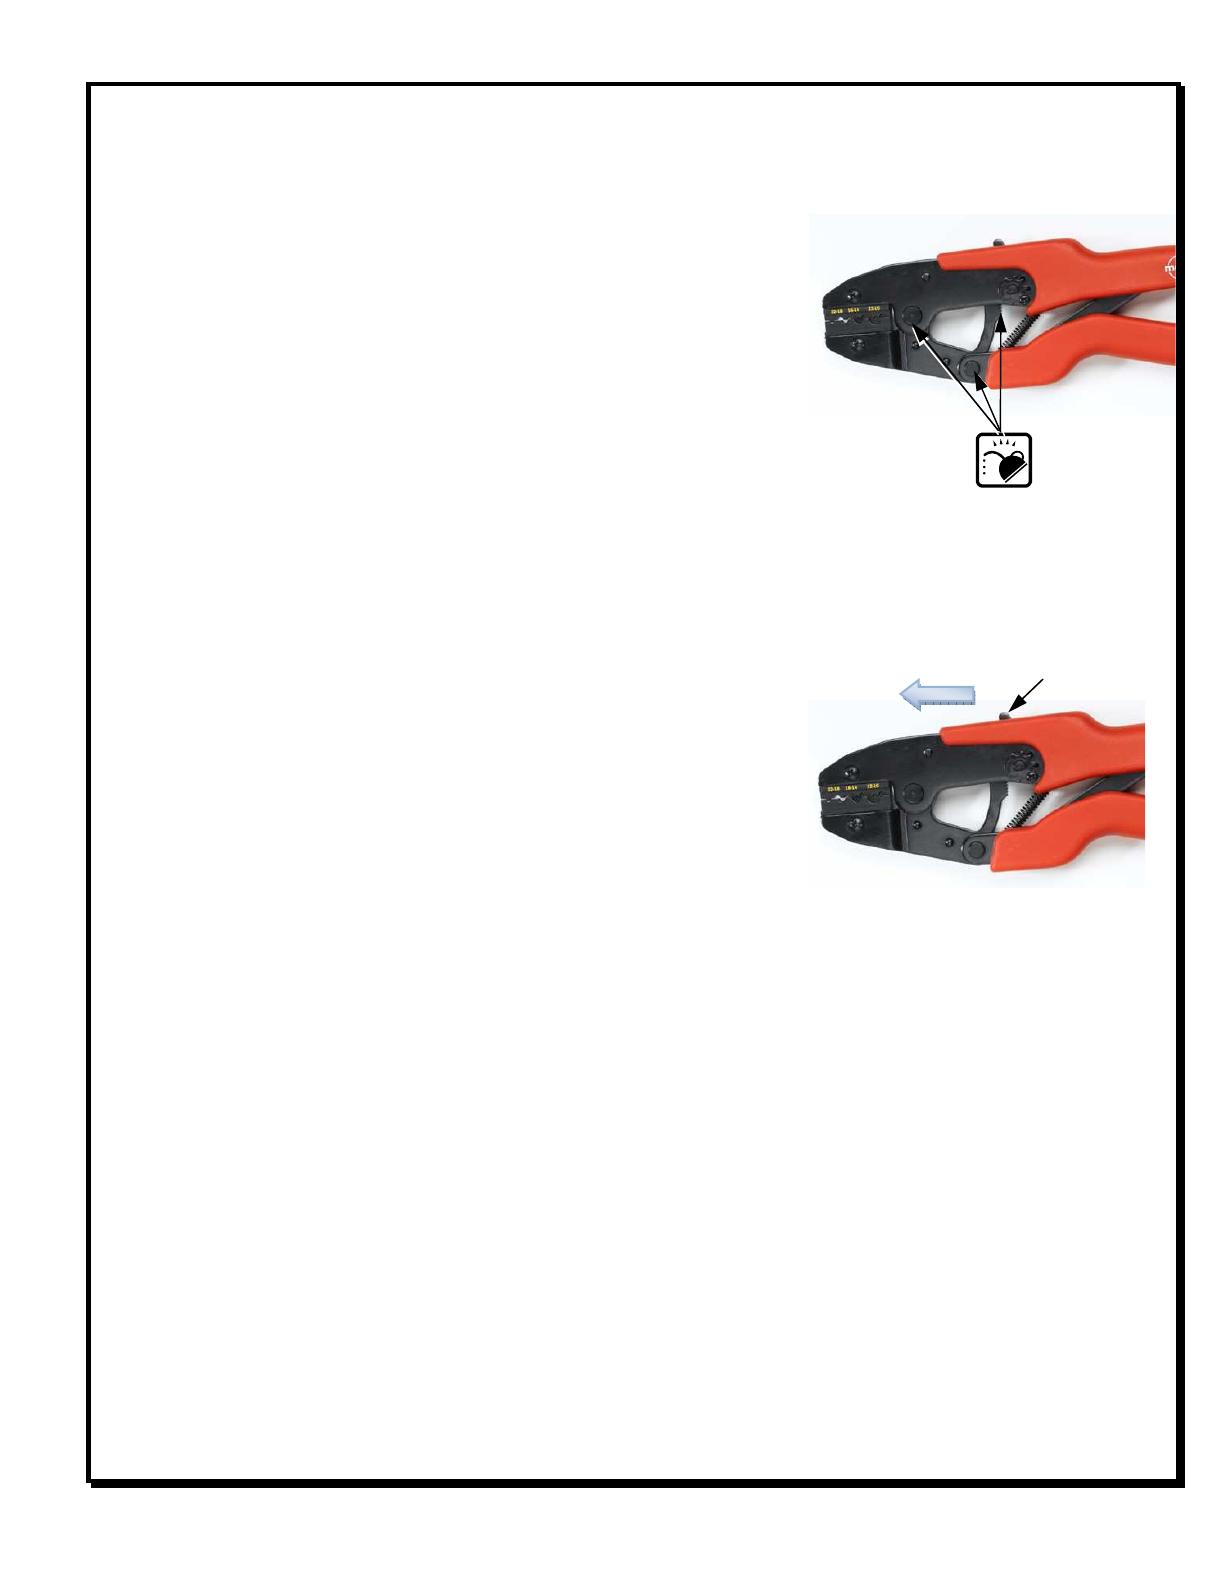
Maintenance
It is recommended that each operator of the tool be made aware of, and
responsible for, the following maintenance steps:
1. Remove dust, moisture, and other contaminants with a clean brush, or
soft, lint free cloth.
2. Do not use any abrasive materials that could damage the tool.
3. Make certain all pins; pivot points and bearing surfaces are protected
with a thin coat of high quality machine oil. Do not oil excessively. Light oil (such as SAE30W oil) applied at
the oil points, shown in Figure 4, every 5,000 crimps or 3 months, is recommended.
4. Wipe excess oil from hand tool, particularly from crimping area. Oil transferred from the crimping area onto
certain terminations may affect the electrical characteristics of an application.
5. When tool is not in use, keep the handles closed to prevent objects from becoming lodged in the crimping dies,
and store the tool in a clean, dry area.
Miscrimps or Jams
If the tool ever becomes jammed in a partially closed position, DO NOT
force the handles open or closed. The tool will open by lifting the ratchet
release lever. See Figure 5.
Tool Handle Preload
Tool handle preload should NOT require adjustment upon receipt of tool.
This hand tool is set from the factory to a preload that will fully close the tool jaws without excessive force from the
operator. Over the life of the tool the tool linkage can wear and handle preload force may decrease and preload
can be adjusted. It is the operator’s responsibility to periodically perform a tensile pull test on the crimped wire. If
the pull test value falls below the specification, the preload should be adjusted. If after adjustment, the crimp does
not meet the pull test value, then the tool should be replaced.
Warranty
This tool is for electrical terminal crimping purposes only. All tools are warranted to be free of manufacturing
defects for a period of 30 days. Should such a defect occur, the tool will be repaired or exchanged free of charge.
This exchange will not be applicable to altered, misused, or damaged tools. This tool is designed for hand use only.
Any clamping, fixturing, or use of handle extensions voids this warranty.
ServiceGrade™ crimp hand tools are low cost tools used in field repair for a limited number of terminations. If a
high quality tool is required or a higher volume of terminations required, please purchase the corresponding
PremiumGrade™ crimp hand tool. A ServiceGrade™ crimp tool may or may not have a terminal locator and in
some case may need the locator removed to operate properly.
LEVER