Page is loading ...

5.959201 A2002757 11/01
HD 650 *GB


4
English
1. Important notice
Safety features
Relief valve with pressure switch
On reducing the flow rate with the pressure and
flow control, the relief valve opens and part of the
water runs back to the suction side of the pump.
If the lever (2) is released, the pressure switch
switches the pump off. If the lever is retracted,
the pressure switch switches the pump on again.
Warranty
The warranty terms issued by our authorised
marketing company are valid in every country.
We remedy any fault in the cleaner free of charge
within the warranty period providing the cause of
the fault proves to be a material or manufacturing
error.
The warranty only becomes operative when
your dealer has completed the reply card
accompanying the sale of the unit, has stamped
and signed it and you have then sent the reply
card to the marketing company in your country.
Should you wish to call upon the guarantee,
please apply to your dealer or nearest authorised
Customer Service centre taking along also the
accessories and bill of sale.
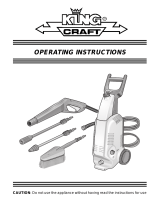
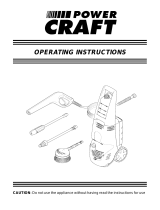
Unit parts
Please fold out illustration page at the front
1 Handgun (with built-in pressure gauge)
2 Lever
3 Safety switch
4 Spray lance
5 High-pressure hose
6 Handgun support
7 Nozzle rest
8 Detergent metering valve
9 Cap for detergent reservoir
10 Detergent reservoir
11 Detergent suction-hose with filter
12 Fastening screws for unit cover
13 Pressure/flow control
14 High-pressure outlet
15 Water outlet with strainer
16 Checkpoint for oil level
17 Unit switch
18 Hose rest
19 Fastening screws for handle
20 Cable/hose rest
21 Handle
22 Nozzle
For your safety
Before you use the cleaner for the first time, read
these operating instructions and take special note
of the accompanying booklet “Safety Instructions
for High-pressure Cleaners” No. 5.951-949.
Use of the cleaner
Use this cleaner exclusively for
– cleaning with high-pressure jet and detergent
(e.g. cleaning of machines, vehicles, buildings,
tools)
– cleaning with high-pressure jet without detergent
(e.g. cleaning facades, terraces, gardening
equipment).
For stubborn dirt we recommend the dirt blaster
as an optional accessory.

5
English
2. Preparing the cleaner for use
Unpack the cleaner
• When unpacking the cleaner, check the
contents of the packaging. If there has been any
damage in transit inform the dealer.
• Do not dispose of the packaging with the
household rubbish, hand it in at the appropriate
collection point for recycling.
Check the oil level
See illustrations
1
to
3
at the end of the
instructions.
• Screw out the fastening screws on the left and
right of the unit cover, remove unit cover.
• Cut off the tip on the cover to the oil reservoir.
• Check the oil level in the oil reservoir.
• Fasten the unit cover.
Mount the accessories
See illustrations
4
to
6
at the end of the
instructions.
• Mount handle (screws and nuts supplied).
• Engage the holder for handgun at the side of the
handle.
• Mount nozzle on the spray lance (see markings
on the top of the setting ring).
• Mount spray lance on the handgun.
3. Using the cleaner for the first time
Electrical connection
Caution! The voltage specified on the model
rating plate must correspond to the voltage
supplied.
Caution! Use an extension cable whose cable
cross-section is adequate (10 m = 2.5 mm²,
30 m = 4 mm²) and unreel it completely from
the cable drum.
• For connected loads see model rating plate/
Technical Specifications
Water connection/suction feed
operation
Connection to water main
Caution! Pay attention to the regulations of the
water supply company; according to DIN 1988,
the cleaner may not be connected direct to the
public drinking water supply. A short-term
connection via a non-return valve (Order no.
6.412-578) is allowed.
For connected loads see Technical
Specifications.
• Connect a supply hose (not supplied) to the
water outlet (15) on the cleaner and to the water
inlet (e.g. water tap).
• Open water inlet.
Suctioning water from an open container
• Screw suction hose with filter (Order no.
4.440-238) to the water outlet (15).
Venting the unit
• To vent the unit, unscrew the nozzle and leave
the unit running until the water exits with no air
bubbles.
• Switch off the unit and screw the nozzle back
on.

6
English
4. Operating the cleaner
Danger! Observe the relative safety
regulations when using the cleaner at filling
stations or other high-risk areas.
Caution! Only clean engines in places which
have appropriate oil separators (protection of
the environment).
Caution! Only wash animals with the low-
pressure fan jet (see “Selecting the type of
spray”).
Operating with high pressure
The cleaner is equipped with a pressure switch.
The motor only starts up when the lever (2) is
retracted.
• Press safety switch (3) and retract lever (2).
• Set unit switch (17) to “I”.
• Adjust operating pressure and flow rate (+/–)
by rotating the pressure/flow control (13)
(infinitely variable).
Read off operating pressure on pressure gauge.
Selecting the type of spray
The handgun must be closed.
• Rotate the housing of the nozzle (22) until the
desired symbol corresponds with the marking:
High-pressure pencil jet for
particularly stubborn accumulation
of grime
Low-pressure fan jet for operating
with detergent or cleaning with
negligible pressure
High-pressure fan jet for dirt
accumulation over a large surface
Operating with detergent
Caution! Unsuitable detergents can harm the
cleaner and the object which is to be cleaned.
Use only detergents which are released by
Kärcher. Proportions of detergent to be used
and accompanying instructions should be
noted carefully. Use detergents sparingly out
of consideration for the environment.
Kärcher cleaning agents guarantee trouble-free
operation. Please seek advice or ask for our
catalogue of information sheets on cleaning
agents.
–Active cleaner RM 31 ASF
–Universal cleaner RM 55 ASF
–Active wash RM 81 ASF
• Fill detergent reservoir (10).
• Set nozzle (22) to
.
• Set detergent metering valve (8) to the centre
position. Adjust dosage with + or – as required.
Recommended cleaning methods
1. Spray detergent sparingly over the dry surface
to be cleaned and let it take effect but not dry
out.
2. Spray off (rinse off) the loosened dirt using the
high-pressure spray.
• When you have finished the operation, set
detergent metering valve (8) to “0” and switch
the cleaner on for about 1 minute and rinse it
clear of detergent.
Interrupting the operation
• Release lever (2), the cleaner switches off.
Retract lever again and the cleaner switches on
again.
Switching the cleaner off
• Set unit switch (17) to “0” and pull out power
plug.
• Close water inlet.
• Retract lever (2) until the cleaner is without
pressure.
• Press safety switch (3) to secure lever against
being activated unintentionally.
Transporting the cleaner
• To transport the cleaner over relatively long
stretches, take hold of it by the handle (21) and
pull it along behind you.
• To transport it up steps or over ledges pick it up
by the handle.
• Empty the detergent reservoir (10) before
transporting it horizontally.
Storing the cleaner
• Place the handgun (1) in the support (6).
• Reel in the high-pressure hose (5) and hang it
over the hose rest (18).
• Coil the connecting cable round the cable/hose
rest (20).

7
English
4. Operating the cleaner
Protection from sub-zero temperatures
Caution! Water which has frozen in the cleaner
can destroy parts of it. At best store the cleaner
in a heated room during the winter or empty it or
rinse it thoroughly with antifreeze.
• Empty the cleaner
– Unscrew supply hose and high-pressure hose
from the cleaner.
– Leave the cleaner running until the pump and
lines have emptied (max. 1 minute).
• Putting in antifreeze
For longer intervals between operations,
pumping antifreeze through the cleaner is to be
recommended. By this means also you obtain
a sure protection against corrosion.
5. Care and maintenance
Every week
• Check oil level in oil reservoir (16): if the oil is
milky (water in oil), seek the help of Customer
Service immediately.
• Clean the strainer at the water outlet.
• Clean the filter at the suction hose for detergent.
Annually or after 500 operating hours
• Change the oil
– For oil quantity and type see Technical
Specifications.
– Undo fastening screws (12), remove unit
cover, remove cover of oil reservoir.
– Lay cleaner on its side and drain oil into
a suitable container.
– Fill slowly with fresh oil; air bubbles have
to escape.
Danger! Before undertaking any care or
maintenance work on the cleaner, pull out the
power plug.
Caution! When changing the oil, dispose of any
waste oil only at authorised collection points.
Safety inspection/maintenance contract
You can arrange with your dealer to have
a regular safety inspection carried out or to have
a maintenance contract. Please seek advice on
this.
Each time before operating the cleaner
• Check connecting cable for damage (risk of
getting an electric shock), have a damaged
connecting cable replaced without delay by
authorised Customer Service personnel or an
electrician.
• Check high-pressure hose for damage
(danger of explosion), replace a damaged high-
pressure hose without delay.
• Check cleaner (pump) for any leaks. Three
drops per minute are allowable and can appear
on the underside of the cleaner. Seek the help
of Customer Service if leaks are more serious.

8
English
6. Troubleshooting
Danger! Before any repair work is undertaken, switch the cleaner off and pull out the power plug.
Have electrical components checked and repaired only be authorised Customer Service personnel.
For faults which are not identified in this chapter, or when in doubt or when expressly instructed to do
so, consult authorised Customer Service personnel.
Cleaner does not work
• Check mains voltage.
• Check connecting cable for damage.
• If the motor has overheated, let the cleaner cool
down. Then switch it on again.
• Consult Customer Service if there is an
electrical fault.
Cleaner does not come up to pressure
• Set nozzle (22) to “high pressure”.
• Clean nozzle or replace with new one.
• Clean strainer at the water connection (15).
• Evacuate air from the cleaner.
• Check water inlet volume (see Technical
Specifications).
• Check all supply lines to the pump for leaks or
obstructions.
• Seek the help of Customer Service
if necessary.
Pump is leaky
• Three drops per minute are allowable and can
appear on the underside of the cleaner. Seek
the help of Customer Service if leaks are more
serious.
Pump makes a knocking noise
• Check all supply lines as well as the detergent
system for leaks.
• Evacuate air from the cleaner.
• Seek the help of Customer Service
if necessary.
Detergent is not being drawn in
• Set nozzle (22) to “low pressure”.
• Check detergent suction hose (11) with filter for
leaks or obstructions and clean it if necessary.
• Clean/renew non-return valve in detergent
suction-hose (11) connection.
• Open detergent metering valve (8) or
check it for leaks/remove obstruction.
Also clean venting orifice in the cap.
• Tip the cleaner backwards over the wheels.
Empty the detergent reservoir (10) and rinse
it out.
• Seek the help of Customer Service
if necessary.
7. Spare parts
You will find a list of spare parts at the end of
these operating instructions.

9
English
8. Technical Specifications
,(
1EMRWGSRRIGXMSR
:SPXEKI :
8]TISJGYVVIRX b ,^
'SRRIGXIHPSEH O;
7YTTP]JYWIHIPE]IHEGXMSR %
;EXIVGSRRIGXMSR
7YTTP]XIQTIVEXYVIQE\ p'
7YTTP]ZSPYQIQMR PL
7YTTP]LSWIPIRKXL Q
7YTTP]LSWI
QMRMQYQHMEQIXIV
{ MRGLIW
7YGXMSRLIMKLXJVSQERSTIR
GSRXEMRIVp'
Q
7YTTP]TVIWWYVIQE\ FEV
4IVJSVQERGIHEXE
3TIVEXMRKTVIWWYVI FEV
*PS[VEXI PL
(IXIVKIRXMRXEOI PL
6IGSMPJSVGISJXLILERHKYR 2
7SYRHPIZIP(-2 H&%
(MQIRWMSRW
0IRKXL QQ
;MHXL QQ
,IMKLX QQ
;IMKLX[MXLSYXEGGIWWSVMIW OK
6IWIVZSMVGETEGMX]HIXIVKIRX P
3MPUYERXMX]TYQT P
3MPX]TITYQT QSXSVSMP;

EU Declaration of Conformity
We hereby declare that the equipment described below conforms to the relevant fundamental
safety and health requirements of the appropriate EU Directives, both in its basic design and
construction as well as in the version marketed by us.
This declaration will cease to be valid if any modifications are made to the machine without our
express approval.
Product: High-pressure cleaner
Model: 1.150-xxx, 1.151-xxx, 1.214-xxx
Relevant EU Directives:
EU Machinery Directive (98/37/EEC)
EU Low-Voltage Equipment Directive (73/23/EEC)
amended by 93/68/EEC.
EU Directive on Electromagnetic Compatibility (89/336/EEC) amended by 91/263/EEC,
92/31/EEC, 93/68/EEC.
Harmonised standards applied:
DIN EN 60 335 – 1 DIN EN 61 000 – 3 – 3 : 1995
DIN EN 60 335 – 2 – 79 DIN EN 55 014 – 2 : 1997
DIN EN 61 000 – 3 – 2 : 1995 DIN EN 55 014 – 1 : 1993
National standards applied: –
Appropriate internal measures have been taken to ensure that series-production units conform at
all times to the requirements of current EU Directives and relevant standards.
The signatories are empowered to represent and act on behalf of the company management.
5.957-565 01/00
Alfred Kärcher GmbH & Co.
Cleaning Systems
Alfred-Kärcher-Str. 28–40
P.O. Box 160
D-71349 Winnenden
Tel.: ++ 49 71 95 14-0
Fax: ++ 49 71 95 14 22 12
Alfred Kärcher Kommanditgesellschaft. Sitz Winnenden.
Registergericht: Waiblingen, HRA 169.
Persönlich haftende Gesellschafterin:
Kärcher Reinigungstechnik GmbH.
Sitz Winnenden, 2404 Registergericht Waiblingen, HRB
Geschäftsführer:
Dr. Bernhard Graf, Hartmut Jenner, Herbert Konhäusner,
Georg Metz, Thomas Schöbinger
Dr. B. Graf S. Reiser T. Schöbinger

02/9
9
1.150-112 GB
6.362-422.0
6.388-216.0
5.044-082.0
5.731-040.0
4.580-337.0
6.389-853.0
2.880-296.0
6.389-853.0
4.775-296.0
6.389-870.0
6.414-252.0
6.435-197.0
MAX
MIN
O
I
6.304-099.0
4.763-212.0
2.880-296.0
4.760-356.0
2.880-296.0

/