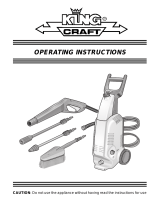
Kärcher K 2.110 M Operating Instructions Manual

Category
High-pressure cleaners
Type
Operating Instructions Manual

Kärcher K 2.110 M: Tackle dirt and grime with ease using Kärcher's powerful pressure washer. Effortlessly clean patios, cars, bikes, and more with its high-pressure water jets. Switch between high-pressure and low-pressure modes for delicate surfaces. Includes dirt blaster for stubborn dirt and detergent suction hose for effortless cleaning with detergent.

Kärcher K 2.110 M: Tackle dirt and grime with ease using Kärcher's powerful pressure washer. Effortlessly clean patios, cars, bikes, and more with its high-pressure water jets. Switch between high-pressure and low-pressure modes for delicate surfaces. Includes dirt blaster for stubborn dirt and detergent suction hose for effortless cleaning with detergent.

K 2.97 M
5.961-124
12/03_2006738
Operating Instructions
PRESSURE WASHER
Before first use of the unit read these operating instructions
and act in accordance with them
2
Safety Instructions
!
The operation of the device in hazardous
locations is not admissible.
!
Please comply with the corresponding
safety instructions if you use the
appliance in danger areas (e.g. filling
stations).
!
Do not turn on the appliance if the power
supply line or important components of
the appliance, such as safety
components, high-pressure hoses, spray
jet, are damaged.
!
Warning: High-pressure hoses, fittings,
and couplings are of importance for the
appliance safety. Only use high-pressure
hoses, fittings, and couplings
recommended by the manufacturer.
!
The appliance is not intended for use by
young children or infirm persons without
supervision.
Young children should be supervised to
ensure that they do not play with the
appliance.
!
The operator must use the appliance
properly. He must take the local
conditions into consideration and must
pay attention to third persons, in
particular children, while working with the
appliance.
!
Warning: Do not use the appliance if
third persons are within the reach of the
appliance unless such persons wear
protective clothes.
!
Warning: High-pressure jets may be
dangerous if they are used improperly.
The jet must not be directed at people,
animals, active electrical equipment, or
the appliance itself.
!
Never direct the jet at yourself or third
persons to clean clothes or shoes.
!
Never use the appliance to spray objects
containing hazardous substances (e.g.
asbestos).
!
Warning: Vehicle tyres/tyre valves may
be damaged and burst by the high-
pressure jet. A first sign is the
discoloration of the tyre. Damaged
vehicle tyres/tyre valves are hazardous.
Always perform the cleaning with a
minimum distance of 30 cm.
!
Cleaning operations during which oil
saturated waste water is generated, such
as engine cleaning and underbody
cleaning, may only be performed in
cleaning locations that are equipped with
an oil separator.
!
If you clean varnished surfaces, please
respect a minimum distance of 30 cm to
avoid damages.
!
Never take in solvent-containing liquids
or undiluted acids and solvents! These
include, for example, benzene, paint
thinner, or heating oil. The spray is highly
inflammable, explosive, and toxic. Do not
use acetone, undiluted acids, and
solvents as they affect the materials used
on the appliance.
!
If required, wear appropriate protective
clothes and glasses to protect yourself
from return spray.
!
Never leave the appliance unattended as
long as it turned on.
!
Warning: This appliance has been
developed for the use of detergent that
are supplied or recommended by the
manufacturer. The use of other detergent
or chemicals may affect the safety of the
appliance.
Safety Devices
Safety devices are intended to ensure the
protection from injuries and must not be
modified or circumvented.
Overflow Valve with Pressure Switch
When the lever located on the trigger gun is
released, the pressure switch turns off the pump,
and the high-pressure jet comes to a stop. When
the lever is pulled, the pressure switch turns
the pump on again. In addition, the overflow
valve ensures that the admissible operating
pressure is not exceeded.
Safety Ratchet
The safety ratchet located on the trigger gun
ensures that the appliance is not switched on
inadvertently.
3
Before first use of the unit read these operating instructions and act in accordance with
them. Keep these operating instructions in a safe place for later use or for a subsequent
owner.
Contents
1Detergent suction hose with filter
2Appliance switch (ON/OFF)
3High-pressure outlet
4Water inlet with sieve
5Coupling
6a Spray lance with double nozzle
6b Spray lance with dirt blaster
6c Cleaning brush
7High-pressure hose
8Spray gun with safety ratchet (A)
9Power plug
10 Transport cart
11 Accessory holder
12 Carry handle
9
32
1
4
5
6a
8
7
A
“Click”
11
12
10
“Click”
6b
6c
3.
1.
2.
“Click”
4
6
3
7
5
4
1/2
2.2. 1.1.
5
3
2.
1.1.
4
6
“clic”
2. 1.
3.
2
13
2.
1.
7
For additional
information
see page 8 and
following
Preparation
 Spray gun assembly
Insert the spray lance of your
choice
Screw on high-pressure hose
Connect to water inlet
Open water tap fully
Plug in power plug
5
Operation with high pressure
Adjust spray lance with double nozzle
to high-pressure mode, or choose
spray lance with dirt blaster
Note: the dirt blaster works always in
high-pressure mode
> 30
cm
6
5
2
1
5
1
1
3/4
2
/ON
/ ON
/ON
/ ON
Unit switch on ”I”
Release safety ratchet on
handgun
Press lever
Caution: recoil
Safety instructions
6
Operation with Detergent
3
1
5/6
3
56
2
4
2
1
2
/ON
/ON
4
Adjust spray lance to low-pressure
jet or choose cleaning brush
Note: No detergent in high-pressure
mode or with dirt blaster
 Suspend detergent suction hose in
detergent reservoir
Switch on high-pressure cleaner
Release safety ratchet on
handgun
Press lever
7
Unit switch to ”0”
Unplug power plug
Turn off water tap
Press lever (to de-pressurise)
Engage safety ratchet on handgun
Care, storageFinishing the operation
Clean detergent filter
Clean water filter
Frost protection
3
54
3
4/5
8
4
21
6
31/2
7
OFF/
12
8
Environmental protection
Dispose of packaging
The packaging materials are recyclable.
Please hand in the packaging for recycling.
Dispose of old equipment
In the development of this appliance careful
attention has been given to its ability to be
easily recycled. Nevertheless, it contains
parts or substances which should not go
into the household rubbish. You can obtain
information from any Kärcher sales house
about disposal facilities which protect the
environment.
Save water
In comparison to other cleaning methods,
by the use of this unit you save up to 85 %
of the water otherwise needed. The unit can
also be operated with rain-water (use a water
filter).
Ease the burden on waste water
Please use the detergent sparingly. Observe
the dosage recommendations which are
supplied with the detergent.
Before the First Use
Assembly
Check the contents of the box when unpacking
the appliance. If you detect any transport
damages, please contact your dealer.
Electrical Connection
!
Never use defect connection or
extension lines! If the connection line is
damaged, it must be replaced with a
special connection line that is available
from the manufacturer or his customer
service.
!
Please make sure that the connection or
extension lines are not damaged by being
ran over, pulled or dragged. Protect the
connection lines from heat, oil, and sharp
edges.
!
Never touch the mains plug and the
socket with wet hands.
!
The connection between connection line
and extension line must not lie in the
water.
!
All current-carrying components within
the working area must be jet-proof.
- The appliance may only be connected to
an electrical connection that was performed
by an electrician according to IEC 60364.
- Only connect the appliance to alternating
current. The voltage must comply with
the voltage specified on the typeplate.
- Minimum fuse protection of the socket 10
A (delay-action fuse).
- To avoid electric accidents, we recommend
to use sockets with a series connected
residual current operated device (rated
breaking current max. 30 mA).
-Warning: Inappropriate extension lines
may be dangerous. If you work outside,
only use extension lines that are approved
and specifically labelled and provide of a
sufficient conductor cross section:
1 to 10 m: 1.5 mm² 10 to 30 m: 2.5 mm²
- The plug and the coupling of an extension
line must be waterproof.
-Always unwind the extension line
completely from the cable drum.
Connection to the Water Conduit
Please observe the provisions of the local
water supply company.
Only use supply hoses (not included in the
delivery) with the following dimensions:
- minimum length 7.5 m
- minimum diameter ½‘‘
Please see the typeplate or the section
”Specifications” for the connection values.
9
Operation
!
Serious danger!
Vehicle tyres and tyre valves can be damaged
by the high-pressure jet and become
perforated. The first sign of this is a
discoloration of the tyre. When cleaning
them maintain a distance of at least 30 cm.
Never grasp the power plug with wet hands.
Before each use check the power cord and
power plug for damage. Have a damaged
power cord replaced immediately by an
authorized Kärcher service point or an
electrical specialist.
Before each use check the high-pressure
hose for damage. Replace a damaged high-
pressure hose immediately.
!
Danger of injury!
Owing to the water jet emerging from the
high-pressure nozzle a recoil force operates
on the handgun. Ensure you have a secure
footing and hold the handgun and spray
lance firmly.
If necessary wear protective clothing for
protection against return spray.
Water supply
Caution! Impurities in the intake water
damage the pump. To prevent this we
expressly urge you to use the Kärcher water
filter (not included, order no. 4.730-097).
The operation of the high-pressure cleaner
with a closed water supply line causes
damage to the pump. Please never operate
the high-pressure cleaner with a closed
water supply tap.
The unit can either be supplied from the
water main or from water in an open container.
Water supply from the water main
Connect a supply hose (not included) to
the water inlet of the unit and to the water
supply (e.g. water tap).
Open the water supply.
Water supply from an open container
Unscrew the coupling part for the water
inlet.
Screw the suction hose with filter (not
included, order-no. 4.440-238) onto the
water connection of the unit.
Hang the filter in the container.
Vent the unit before operation.
– Unscrew the high-pressure line at the
high-pressure outlet of the unit.
Switch on the unit and let it run until
water free of bubbles emerges at the
high-pressure outlet.
Switch off the unit and screw on the
high-pressure hose again.
Preparation
Insert power plug.
Turn master switch to “I”.
Switching on
Press safety ratchet on the handgun and
pull the lever.
Switching off
Release the lever.
During breaks in work and when leaving
the unit secure it against inadvertent
switching on by pressing the safety ratchet.
Finishing operations
Master switch to “0”.
Draw out power plug.
Water supplied from the water main
Close the water supply tap.
Separate the unit from the water
connection.
Water supplied from an open container
Unscrew the suction hose with filter at the
water inlet of the unit.
Pull the lever on the handgun until the unit
is without pressure.
Press in the safety ratchet to protect the
unit against inadvertent switching on.
Safekeeping
Caution! Frost can destroy an incompletely
emptied unit. In the winter keep the unit in
a frost-free room.
Separate the spray lance from the handgun.
Wind up the power cord and, for example,
hang it around the handgun.
Transportation
Switch off the unit before transporting it.
To transport it over stairs or obstacles lift
the unit at the carry handle.
To transport the unit over even surfaces
draw it by the transport cart.
Detergent
For trouble-free operation and for matching
to the relevant cleaning task we recommend
our Kärcher detergent and care range. Please
let us advise you or ask for information
about them. Here is a small selection:
Universal cleaner Profi RM 555 ULTRA
Automobile cleaner Profi RM 565 ULTRA
House and garden cleaner Profi RM 570 ULTRA
Boat cleaner Profi RM 575 ULTRA
10
Working with accessory
Cleaning brush
The cleaning brush is ideally suited for the
cleaning of vehicles.
Note: Please make sure that the cleaning
brush is free from dirt or other particles.
Otherwise, it may cause defects in the paint
work. Please make also sure that the water
flow is ensured.
Spray lance with double nozzle
Release the trigger of the handgun.
Rotate the nozzle head until the symbol
is aligned with the marking on the spray
lance.
Meaning of the symbols
Low-pressure fan jet; for operating with
detergent or for cleaning with low
pressure.
High-pressure fan jet; for large area
soiling.
Adding the detergent
Draw the detergent suction hose out of
the housing to the required length.
Hang the detergent suction hose in the
detergent container.
Rotate the spray lance in the direction of
( ) until reaching the stop.
If detergent has been added:
Hang the detergent suction hose in
a container of clear water, switch on the
unit for about one minute and flush through.
Recommended cleaning method
1. Spray the detergent on the dry surface
sparingly and let it react (but not dry out).
2. Wash off the loosened dirt with the high-
pressure jet.
Care and Maintenance
Cleaning
Before long periods of storage, e.g. in winter:
Pull out the sieve in the water inlet with
flat-nose pliers and clean it under running
water.
Maintenance
The unit is maintenance-free.
Help with faults
Faults often have simple causes which you
can rectify yourself with the aid of the following
summary. In case of doubt or of faults or
remedies not mentioned here apply to the
authorized customer service.
!
Danger of electric shock!
Repair work on the unit can only be carried
out by the authorized customer service.
Appliance does not work
- Please check whether the voltage specified
on the typeplate corresponds to that of
the power source.
- Check the power cord for damages.
Appliance does not achieve the operational
pressure
- Deaerate the appliance: allow the pump
to operate without the high-pressure hose
until bubble-free water emerges from the
high-pressure outlet. Then reconnect the
high-pressure hose.
- Clean the sieve in the water connection (it
can be easily removed using flat pliers).
- Check the inlet water flow rate.
- Check all supply lines to the pump for
leaks or clogging-up.
Strong pressure variations
- Clean the high-pressure nozzle. Remove
dirt from the nozzle boring using a needle,
and then rinse the nozzle with water.
11
Pump leakage
- A slight leakage of the pump is normal. If
you detect an excessive leakage, please
contact the authorized customer service.
Detergent is not taken in
- Clean filter of detergent suction hose
- Set to low-pressure jet
No detergent in high-pressure mode
Replacement parts
Use exclusively Kärcher original replacement
parts. You will find a replacement parts
summary at the end of these operating
instructions.
Service
Guarantee
In each country the guarantee conditions
issued by our responsible sales company
are applicable. We clear any faults occurring
in the unit free of charge during the period
of guarantee providing the cause is a fault
in a material or in the manufacture.
In the case of a claim under the guarantee
please contact your dealer or the nearest
authorized customer service point,
accompanying your claim with accessories
and purchase voucher.
Customer Service
In the case of questions or faults our Kärcher
branches will be pleased to assist you further.
Karcher Pty Ltd
40 Koornang Road
Scoresby 3179
Victoria, Australia
Tel. 61 3 9765 2300
12
Special accessories
Special accessories expand the scope of
use of your machine. You can obtain further
information from your Kärcher dealer.
See page 13 for illustrations.
1Rotary nozzle
for tenacious dirt accumulation, such as moss-covered or
weathered outside surfaces
2Spray guard for dirt blaster
3Tube cleaning kit
for choked tubes and discharges
4Rotary wash brush
for the cleaning of car bodies and glass surfaces
5Wash brush
for the cleaning of smooth surfaces, e.g. car or boat
7Flexible jet spray lance
swivelling nozzle for the cleaning of places difficult to access
8Triple nozzle with jet spray lance
9Jet spray lance for places that are difficult
to access
extra long jet spray lance, for example, for the cleaning of
gutters
11 Jet spray lance extension, 0.5 m
12 High-pressure hose, 7.5 m
13 Hose extension
14 Large volume suction kit
15 Suction hose with filter
to suck up water reserves, e.g., from ponds and water-butts
16 Water filter
17 Non-return valve
Technical Data
Power supply
Voltage (at 1~50 Hz) 240 V
Connected load 1,6 kW
Supply fuses (time-lag) 10 A
Safety class 1
Water connection
Supply temperature, max. 40 °C
Supply volume,min. (500 l/h) 8 l/min
Supply pressure, max. (12 bar) 1,2 MPa
Performance data
Operating pressure (85 bar) 8,5 MPa
Max. permissible pump
pressure (100 bar) 10 MPa
Flow volume (300 l/h) 5 l/min
Detergent metering 0,3 l/min
Recoil force of the handgun 10 N
Unit vibrations 0.8 m/s²
Sound level
LPA(EN 60704-1) 74 dB(A)
LWA (EN 4871) 84 dB(A)
Dimensions
Length/Width/Height 240/300/555 mm
Weight 10,5 kg
Circuit Diagram
C1 Capacitor
M1 Motor
Q1 Switch
T Temperature limiter
S1 Pressure switch
13
14
15
Karcher Pty Ltd
40 Koornang Road
Scoresby 3179
Victoria, Australia
Tel. 61 3 9765 2300
  • Page 1 1
  • Page 2 2
  • Page 3 3
  • Page 4 4
  • Page 5 5
  • Page 6 6
  • Page 7 7
  • Page 8 8
  • Page 9 9
  • Page 10 10
  • Page 11 11
  • Page 12 12
  • Page 13 13
  • Page 14 14
  • Page 15 15
  • Page 16 16

Kärcher K 2.110 M Operating Instructions Manual

Category
High-pressure cleaners
Type
Operating Instructions Manual

Kärcher K 2.110 M: Tackle dirt and grime with ease using Kärcher's powerful pressure washer. Effortlessly clean patios, cars, bikes, and more with its high-pressure water jets. Switch between high-pressure and low-pressure modes for delicate surfaces. Includes dirt blaster for stubborn dirt and detergent suction hose for effortless cleaning with detergent.

Ask a question and I''ll find the answer in the document

Finding information in a document is now easier with AI