Page is loading ...

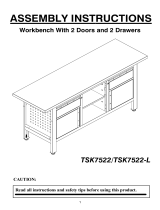
ASSEMBLY INSTRUCTIONS
HAVING TROUBLE?
TOLL-FREE:
CARLETON WARDROBE WITH
PULL-OUT MIRROR
PRODUCT NO. 168-0179-8

To the trend seeks and design mavens,
CANVAS is the furniture and décor brand
that helps you imagine and create a space
you can be pround of.
That’s because CANVAS offers style with
ease with products that are made for real life
and Canadian inspired.
We would love to hear from you and welcome
your thoughtful feedback. Visit our website
at canadiantire.ca to tell us about yout
experience, and share your photos with us
using #myCANVASstyle.
Show us how you bring CANVAS products
to life. We can’t wait to see!
TM
TM
TM

TABLE OF CONTENTS
TOOLS REQUIRED
Follow all warning labels.
4
9
10
37
38
38
No. 2 Cross-head Screwdriver
Tip Shown Actual Size
NOTE: Do not over-drill.
Be aware of over-drilling.

PARTS LIST
4
ITEM DESCRIPTION THUMBNAIL QUANTITY
1
2
1
1
Top panel
Left panel
3
4
6
Partition
Right panel
Shelf
Shelf
1
1
2
1
5
7
8
2
1
Vertical support
Support panel
9
10
12
Bottom panel
Front apron
Back support
Hanging rod
1
1
4
2
11
13
14
16
Left back
Right back
Mirror
Door
1
1
1
2
15
CARLETON WARDROBE WITH PULL-OUT MIRROR

PARTS LIST
ITEM DESCRIPTION THUMBNAIL QUANTITY
17
18
1
1
Small drawer front
Small drawer left
19
20
22
Small drawer right
Small drawer back
Small drawer bottom
Big drawer front
1
1
1
2
21
23
24
2
2
Big drawer left
Big drawer right
25
26
28
Big drawer back
Big drawer bottom
Lower drawer front
Lower drawer left
2
3
1
1
27
29
30
Lower drawer right
Lower drawer back
1
1
31 Back apron 1
32 Support rail
34 Shelf
1
1
33 Power station panel 1
5
CARLETON WARDROBE WITH PULL-OUT MIRROR

6
EXPLODED VIEW
Warning: Before assembly, please check all accessories in the hardware box,
and ensure parts are not missing.
CARLETON WARDROBE WITH PULL-OUT MIRROR
1
2
7
7
8
9
10
20
18
21
19
17
23
25 24 28
26
26
29
27
30
22
33
32
34
16
16
11
13
14
12
11
11
12
15
5
6
3
4
5
11
31

HARDWARE LIST
ITEM DESCRIPTION THUMBNAIL QUANTITY
60
60
6
36
46
A
B
C
D
E
Cam bolt
Cam lock
Anti-tip bracket
10
F
8
G
2
H
2
I
2
J
2
K
8
L
Wood dowel
Screw
Screw
Screw
Shelf holder
Hinge
Screw
7
Wall anchor
Screw
CARLETON WARDROBE WITH PULL-OUT MIRROR
1
M
4
NBracket
Hex key

HARDWARE LIST
ITEM DESCRIPTION THUMBNAIL QUANTITY
16
4
4
22
2
O
P
Q
R
S
Screw
Screw
Extension rail
50
T
4
U
6
V
2
W
68
X
4
Y
1
Z
Door handle
Screw
Extension rail
Screw
Power station
Metal plate
Magnetic catch
Backboard locker
Levelling feet
8CARLETON WARDROBE WITH PULL-OUT MIRROR

BEFORE YOU BEGIN ASSEMBLY
?
MAKE SURE ALL PARTS ARE PRESENT
REMOVE PACKAGING MATERIALS
READ EACH STEP CAREFULLY
ASSEMBLE IN A CLEARED AREA
If
9
® 70
CARLETON WARDROBE WITH PULL-OUT MIRROR

STEP-BY-STEP GUIDE
STEP 1
10
4x1
2x1
Insert twenty cam bolts A into left panel 2 and right panel 4. Insert six screws X
through the brackets N into the right panel 4. Tighten all cam bolts and screws.
Ax20 Xx6
4
CARLETON WARDROBE WITH PULL-OUT MIRROR
2
A
A
A
A
A
A
A
A
A
A
A
A
X
N
Nx2

STEP-BY-STEP GUIDE
STEP 2
11
Insert ten cam bolts A into vertical support 7 and bottom panel 9. Insert four
screws T through magnetic catches R into top panel 1. Tighten all cam bolts and
screws.
CARLETON WARDROBE WITH PULL-OUT MIRROR
A
T
TR
T
R
R
A
A
9
1
7
7x2
1x1 Ax10 Tx4 Rx2
9x1

STEP-BY-STEP GUIDE
12
Insert eight wood dowels C into support panel 8. Attach the vertical support 7
to support panel 8. Insert eight cam locks B into support panel 8. Tighten all
cam locks.
STEP 3
Bx8 Cx8
B
7x2
CARLETON WARDROBE WITH PULL-OUT MIRROR
8x1
7
8
7
BC

STEP-BY-STEP GUIDE
13
STEP 4
The extension rail V slide track V-2 and the slide runner V-1 will need to be
separated for assembly. To do so, slide the slide track V-2 slightly out from inside
the slide runner V-1 until the trigger disconnect lever is visible. In the groove of
the slide runner V-1 , press the trigger disconnect lever upwards as the same time
sliding the slide track V-2 out. Repeat this process for the entension rail W slide
track W-2 and slide runner W-1 separation. Repeat this process for the mirror 15
slide track 15-2 and the slide runner 15-1 separation.
CARLETON WARDROBE WITH PULL-OUT MIRROR
Vx6
Wx2
V
V-1 V-2
V-1 V-2
15
15-1
15-2
1 2 3

14 CARLETON WARDROBE WITH PULL-OUT MIRROR
STEP-BY-STEP GUIDE
Insert twenty-four screws X through the slide runners V-1 and W-1 into the
partition 3 and support panel 8. Insert six cam bolts A into the partition 3.
Insert six screws X through the slide runners 15-1 into the partition 3. Insert six
screws X through the brackets N into the partition 3. Insert six cam bolts A into
partition 3. Tighten all screws and cam bolts.
STEP 5
3
A
A
A
A
X
X
X
N
X
X
N
15-1
15-1
15 x1
3x1 Ax12 Xx36 Nx2
3
8
W-1
W-1
V-1
V-1
V-1
V-1
V-1
V-1
A
A
A
X
A
X
X
X
X
X
W-1
V-1
15-1

STEP-BY-STEP GUIDE
15
STEP 6
Insert two cam bolts A into power station panel 33. Insert six wood dowels C
into bottom panel 9 and power station panel 33. Attach front apron 10 and back
apron 31 to bottom panel 9. Attach support rail 32 to power station panel 33.
Insert four cam locks B into front apron 10, back apron 31 and support rail 32.
Tighten all cam locks.
Bx4 Cx6
Ax2
9x1 10 x1 31 x1 32 x1 33 x1
CARLETON WARDROBE WITH PULL-OUT MIRROR
10
9
31
C
C
B
B
A32
33
33

STEP-BY-STEP GUIDE
16
STEP 7
CARLETON WARDROBE WITH PULL-OUT MIRROR
Insert four wood dowels C into partition 3 and power station panel 33. Insert
two screws L through bottom panel 9 into partition 3. Insert two screws F
through shelf 34 into power station panel 33. Tighten all screws.
34 x1 Fx2 Cx4 Lx2
F
C
F
34
3
9
CL
L
L
M
M
33

STEP-BY-STEP GUIDE
17
STEP 8
CARLETON WARDROBE WITH PULL-OUT MIRROR
Insert three wood dowels C into support rail 32 and shelf 34. Attach back
supports 11, support rail 32 and shelf 34 to partition 3. Insert six cam locks B
into back supports 11 and shelf 34. Tighten all cam locks.
11 x2 Bx6 Cx3
B
C
B
B34
11
11

STEP-BY-STEP GUIDE
18 CARLETON WARDROBE WITH PULL-OUT MIRROR
STEP-BY-STEP GUIDE
STEP 9
Insert seven wood dowels C into bottom panel 9, front apron 10, back apron 31,
support rail 32 and shelf 34. Attach bottom panel 9, front apron 10, back apron 31,
back supports 11, support rail 32 and shelf 34 to left panel 2. Insert ten cam locks B
into back supports 11, shelf 34, front apron 10, back apron 31 and bottom panel 9.
Tighten all cam locks.
2x1 Bx10 Cx7
2
B
C
C
CB
B
B

STEP 10
STEP-BY-STEP GUIDE
Insert two wood dowels C into shelf 6. Attach shelf 6 and back supports 11 to
partition 3. Insert six cam locks B into shelf 6 and back supports 11. Tighten all
cam locks.
6x1 Bx6 Cx2
11 x2
B
CB
2
6
11
11
19
CARLETON WARDROBE WITH PULL-OUT MIRROR

STEP 11
STEP-BY-STEP GUIDE
Insert six wood dowels C into shelf 6, bottom panel 9, front apron 10 and back
apron 31. Attach shelf 6, back supports 11, bottom panel 9, front apron 10 and
back apron 31 to right panel 4. Insert ten cam locks B into shelf 6, back supports 11,
bottom panel 9, front apron 10 and back apron 31. Tighten all cam locks.
4x1 Bx10 Cx6
20 CARLETON WARDROBE WITH PULL-OUT MIRROR
BB
B
B
C
C
4
/