Page is loading ...

Model # 202AMC6, 202AMC63, 202AMC64, 202AMC67, 202AMC69,
202AMC8, 202AMC9, 202AMC93, 202AMC94, 202AMC96, 202AMC97
888-230-2225
help@manhattancomfort.com
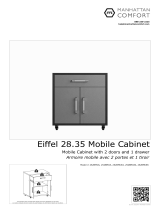
Liberty TV Stand 70.86
736 - Ed. 002, 2019/08 - Manhattan Comfort.
The indicated values consider static weights and evenly distributed over the parts.
22
lb
11
lb
44
lb
22
lb
11
lb
11
lb

n.° ID Parts Identification (Description) Quantity
REAR VIEW
FRONT VIEW / FINAL APPEARANCE
03
01
04
05
06 07
08
12
10
01
04
06
07
08
02
05
03
09
11
12
02
13
14
15
16
17
Base
Left Side Panel
Shelf
Left Partition
Top Panel
Door
Left Back Panel
Wood Feet
Right Side Panel
Lower Right Partition
Upper Right Partition
Lower Right Back Panel
Upper Right Back Panel
Front of the Drawer
Left Side Panel of the Drawer
Rear Panel of the Drawer
Base of the Drawer
1
1
1
1
1
1
2
4
1
1
1
1
1
1
1
1
1
09
09
10
11
18
18
19 Plastic Profile "H" 465mm
Metallic slide 300mm (pair)
1
1
20
INCLUDED IN THE PACKAGE
2
DRAWER
13
15
14
16
17
20
20
20
19
20
Right Side Panel of the Drawer 1

4x
A4x 32x
9x 15x 15x
12x 18x 70x
2x 8x
2x
M
4x
3
TOOLS NEEDED
INCLUDED IN THE HARDWARE
BC
D E F
GH I
J K L

18
01
05
06
04
07
08
07
04
01
02
08
05
06
03
STEP 1
STEP 2
STEP 3
• Fix the feet (18) under the
Base (01) with bolts (A).
• Apply the protective felt (L)
on bottom of the feet (18).
• Apply the plastic covers (B)
on top of the bolts (A).
• Connect Partition (08) onto
Shelf (05) with dowels (C)
and bolt (D).
• Connect the parts (04), (06)
and (07) into the Shelf (05)
with dowels (C) and
cam lock hardware (E + F).
• Connect Side Panels and
Partitions (03), (04), (06)
and (07) onto the Base (01)
with dowels (C) and bolts (D).
• Connect Top Panel (02) onto
the Side Panels and Partitions
(03), (04), (06) and (08)
with dowels (C) and
cam lock hardware (E + F).
• After fixing, apply the
adhesive covers (G).
DETAIL 1
4
18
18
18
20
02
03
20

04
02
19
12
STEP 4
STEP 5
STEP 6
5
• Connect Back Panels (09),
(10) and (11) with nails (I),
metallic plates (H) and
plastic profile (19).
Preparing the Door (12):
• Insert the plastic ring (M)
in the Door (12).
• Fix the hinges (J) in the
Door (12) with bolts (K),
as shown in the DETAIL 2.
Preparing the Drawer:
• Connect the parts (13), (14),
(15) and (16) with dowels (C)
and cam lock hardware (E + F),
as shown in the DETAIL 3.
• Apply the adhesive covers (G).
• Insert the plastic ring (M)
in the Front drawer (13).
• Insert the Base of the drawer
(17) into the channel in the
Side Panels (14) and (15) and
in the Front of the drawer (13),
and fix it at the lower edge of
the Rear Panel of the drawer
(16) with nails (I).
DETAIL 2
DETAIL 3
09
09
11
10
13
14
15
16
17
20

Fixer
bolt
01
04
03 05
12
13
06 07
08
STEP 7
6
Adjustment
Bolt
DETAIL 4 Installing the Door (12):
• Fix the hinge connectors (J)
of the Door (12) on the
Left Side Panel (03) with
bolts 3.5 x 14mm (K),
taking the markings on the
panel (03) as reference for
correct positioning.
The hinge connector includes
two bolts, shown in DETAIL 4.
Use the fixer bolt and the
adjustment bolt to tighten,
adjust and align the door.
• Install the drawer, fitting it
so that the metallic slides
slide smoothly.
02
/