Page is loading ...

in.touch
™
you’re always in touch with your relaxation
A cool new app
for spas
TechBook
Gecko Alliance
450 des Canetons, Quebec City (Qc), G2E 5W6 Canada, 1.800.78.GECKO
9225 Stellar Court, Corona, CA 92883 USA, 951.667.2000
www.geckoalliance.com
Printed in Canada
9919-101173-G
Rev. 04-2014
© Groupe Gecko Alliance Inc., 2014
All trademarks or registered trademarks
are the property of their respective owners.
US Pat. 6782309, 7489986, Canadian Pat. 2412221, 2361096
and other patents pending.


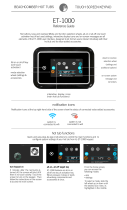
in.touch TechBook
11
Table of contents
Avertissements ................................................................................................ 2
Compatibility requirements ................................................................................. 2
Overview ...................................................................................................... 3
OEM installation .............................................................................................. 3
Connections .................................................................................................. 4
Connect the in.touch system ................................................................................ 4
Installation .................................................................................................... 5
Download application ....................................................................................... 5
Set the point-to-point connection (ad hoc mode) ......................................................... 5
Using the app ................................................................................................. 8
Home page ........................................................................................... 9
Start or stop accessories .............................................................................. 9
Water temperature ................................................................................... 9
Settings ............................................................................................... 10
Water care ........................................................................................... 10
Maintenance ......................................................................................... 11
Temperature unit .................................................................................... 12
Time display settings ................................................................................ 12
Spa management errors ............................................................................. 12
Spa Experiences ..................................................................................... 13
Updating in.touch internal software ........................................................................ 13
Troubleshooting ............................................................................................. 15
LED ........................................................................................................... 15
Update failure ................................................................................................ 15
Factory default ............................................................................................... 16
Troubleshooting ............................................................................................. 16
Specifications ............................................................................................... 20
Regulatory Compliance Information ...................................................................... 20
Annex A ...................................................................................................... 21
Troubleshooting (PC Setup software) ............................................................. 24
Annex B ...................................................................................................... 27
WiFi configuration for Android devices (With a Mac) ............................................. 27
Troubleshooting (Mac Setup software) ............................................................ 30
Annex C ...................................................................................................... 32
Information on router signal strength .............................................................. 32

2
in.touch Techbook
WARNINGS
Before installing or connecting the unit, please read the following
* FOR OPTIMUM PERFORMANCE PLEASE CAREFULLY READ THE MANUAL BEFORE INSTALLATION.
* INSTALL THE MODULE AT LEAST 12" (30 CM) AWAY FROM ANY METAL PART OR ANY METAL FOIL.
* THE MODULE SHOULD BE INSTALLED SO IT CAN BE RELOCATED UNDER THE SPA TO OBTAIN
THE OPTIMUM RECEPTION AFTER FINAL INSTALLATION OF THE SPA IN THE YARD.
* TO SATISFY FCC RF EXPOSURE REQUIREMENTS FOR MOBILE AND BASE STATION TRANSMISSION
DEVICES, A SEPARATION DISTANCE OF 8" (20 CM) OR MORE SHOULD BE MAINTANED BETWEEN
THE IN.TOUCH MODULE AND PERSONS DURING OPERATION. TO ENSURE COMPLIANCE, OPERATI
ON AT CLOSER THAN THIS DISTANCE IS NOT RECOMMENDED.
* THE ANTENNA(S) USED FOR THIS TRANSMITTER MUST NOT BE CO-LOCATED OR OPERATING
IN CONJUNCTION WITH ANY OTHER ANTENNA OR TRANSMITTER.
Avertissements
Compatible with:
iPod touch (3rd generation and later)
iPhone (3GS and later)
iPad
Requires iOS 5.0 or higher
Android 2.2 or higher,
compatible with Google Play
Compatibility requirements
in.touch module:
Model : 0608-521012 IN.TR-IT-P1-P2-P3-P4-CO
Model : 0608-521011 IN.TR-IT-P1-P2-P3-P4-P5
Compatible spa packs:
in.xm2, in.xe, in.ye, in.yj and in.yt with compatible software revision
in.touch application:
Aeware®, Gecko®, and their respective logos are Registered Trademarks of Gecko Alliance Group. intouch™, inxm2™,
inxe™, inyt™, inye™, and intherm™, and their respective logos are Trademarks of Gecko Alliance Group.
All other product or company names that may be mentioned in this publication are tradenames, Trademarks
or Registered Trademarks of their respective owners.
Minimum requirements for PC Setup software:
-Windows Vista or later
Router compatibility :
Should not filter broadcast messages and should not use WEP encryption.
Here is the list of routers that have been tested :
- Apple Extreme A1354
- Apple Express A1264
- Linksys WRT54G2
- Linksys WRT160N
- D-Link WBR-1310
- Buffalo WZR-HP-G300NH
- Linksys EA2500
- Linksys EA4500
- TP Link TL-WR740N
Minimum requirements for Mac Setup software:
- Mac OS 10.7 or later

in.touch TechBook
3
Model: 0608-521011
IN.TR-IT-P1-P2-P3-P4-P5
Model: 0608-521012
IN.TR-IT-P1-P2-P3-P4-CO
To spa pack
Antenna area Antenna area
To
spa pack
Fastening
bracket
Fastening
bracket
AC enclosure keyings
Overview
OEM installation
The unit must be installed under the skirt, at least 12" (30 cm) away from any metal component or structure.
This is necessary to ensure the proper transmission.In some cases, it will be necessary to relocate the unit once the spa is
installed in the yard, to ensure the proper signal transmission and distance.
Install the in.touch so the module can be repositioned to optimize the signal strength in the yard. We recommend that
you install the unit with #8 pan head screws.
Here are suggestions for a successful installation:
• Install the unit as high as possible in the spa skirt, but keep it away from the spa frame if it’s metal.
• Route the cable and leave some loose, so the in.touch can be moved in case of reception problems.
• Install the in.touch in a corner of the spa to help avoid metallic components and pipes in proximity of the in.touch.
• The in.touch module should be installed as close as possible to the house to optimize the signal strength.
It is recommended to install the side of the spa with the in.touch module facing the house, to increase the signal.
Water between the in.touch module and the router could drastically reduce the signal.
AC enclosure keyings
CO enclusure keyings
LD

4
in.touch Techbook
Connections
There are two different models of the in.touch module; one model has 5 ports to connect auxiliary keys “AC”
and the other has 4 ports for auxiliary keys plus a communication port “CO”. Those switches will turn the
corresponding accessories on and off.
Connect the in.touch system
Turn off the power before connecting the in.touch to the Aeware spa pack.
Simply connect the in.touch to the Aeware spa pack (see the illustration).
The cable of the in.touch module shoud be connected to the CO port
of the spa pack.
Note: Before powering the Aeware spa pack, make sure all accessories are linked to the bonding connector
and connected to the spa pack. Make sure that the spa pack door is closed, then turn on the breaker.
For more details, please refer to the techbook for your Aeware spa pack.
P1
Compatible Aeware
spa pack
or communication port
(CO) expansion
"AC" Auxiliary switch ports
P2 P4P3
P5/Blower

in.touch TechBook
5
Installation
The in.touch module has a built-in WiFi transceiver that allows you to communicate with your favorite iOS and
Android devices. The connection can be point-to-point (ad hoc mode) or with your home WiFi (infrastructure
mode). In infrastructure mode you have the option of using a shared network (home WiFi) or the Internet.
The following steps will show you how to connect with your spa. Note that the first time you install the in.touch,
you have to set the connection point-to-point, using either an iOS device or the PCSetup/Mac Setup software
that can be downloaded from www.geckoalliance.com/intouch.
Download application
The in.touch app is available in two versions: in.touch home allows you to control
your spa using your home network; in.touch world allows you to use the Internet
anywhere in the world to control your spa. Both versions of the app are waiting
for you at the App Store for iOS devices and the Google Play Store for Android
devices— search for "in.touch gecko" then click on the version you want to install.
Set the point-to-point connection (ad hoc mode)
For the first use, you must connect directly to the in.touch. After the
connection has been established you can use your home WiFi network
if you wish.
1. WiFi configuration for iOS devices
Note: If you have an Android device see Annex A (PC) or B (Mac).
On your iDevice, go to the WiFi section of Settings. The network
named in.touch should appear on the list. Press on it to select the
in.touch network. Once you’ve selected it, wait until the WiFi icon
appears on the top left corner of the screen. This icon shows that
your iDevice is now connected to the network.
Please note that with some iDevices and different versions of the iOS,
the icon may not appear as connected even if it is connected. If it does
not appear after 30 seconds, make sure that the in.touch network is
selected and proceed to step 2.
2. Start the in.touch application
Find the icon for the in.touch application, then tap on it to open it.
The first time you use the app a message will tell you to add a spa to
your list. You must add your spa to the list in order to configure it
and use it with the application.
Once you tap Ok, you will see a list of visible spas. Tap on yours.
If there is a message about firmware updates, please see the section titled
“Updating in.touch firmware” for more details.

6
in.touch Techbook
3. Naming and editing your spa
When adding your spa to your list, enter the name you want to give it
(e.g. Home) and tap Ok.
To edit the name of a spa, or to remove it from the list, tap the My Spas
icon. On the My Spas page, tap Edit. A red circle with a minus sign will
appear beside the names of the spas. If you want to remove the spa
from the list, tap the minus sign, and then tap Delete. A confirmation
message will appear — tap YES. If you want to change the name of
the spa, tap on the name, enter the new name when prompted,
and then select Save. To exit from My Spas, tap the name of the spa
you want to use.

in.touch TechBook
7
4. Set the connection using home WiFi or Internet
(infrastructure mode)
For iOS users only. If you are using an Android device,
skip this step.
Warning: Routers blocking broadcast messages and/or using WEP encryption
are not compatible with the in.touch.
To set the connection using home WiFi or Internet, you need to have already set
your point-to-point connection (see point-to-point connection instructions).
First Use
1. In the in.touch application, go to Settings and select WiFi Connection.
The list of networks in your area should appear on the screen; be
patient, as it may take a minute.
2. Choose the network that your device will be connected to (i.e. your
home WiFi). If the network has a security key, enter it when prompted.
You are now set to run in infrastructure mode.
As long as all hardware (router etc) and security keys remain
unchanged you will not have to repeat this process.
WiFi icon

8
in.touch Techbook
Home network
The in.touch home and world editions can be used with your home WiFi
network. Both the in.touch module and your device will connect to the same
router (WiFi network) and transfer information that way.
Go to the WiFi settings section of your device and choose the same network
that your spa is connected to (i.e. Home). Once you've selected it, wait until
your device confirms the connection.
Internet (world edition only)
The in.touch world allows you to use the Internet to control your spa from
anywhere in the world. In order for them to communicate, both the in.touch
module and your device must be connected to a network that allows access
to the Internet.
Once your spa is connected to the Internet, you can use your in.touch world
edition any time your device is also connected to the Internet (wireless or
cellular network), even if you are away from home.
A green icon with the word "Linked" beside it will appear at the top right
hand corner of the My Spas page to confirm your connection.
or
Internet
Using the app

in.touch TechBook
9
Start or stop accessories
To start or stop an accessory, tap on the icon. Icons will become animated
when their accessory is turned on , and inanimate when turned off.
Icons on the in.touch screen will reflect the speed or state of the devices
running on your spa.
When an accessory has more than two states, toggle the icon until it
reaches the desired state.
Water temperature
The temperature shown at the bottom of the screen gives the
actual water temperature. Use the + and - buttons to set the desired
temperature. The value will appear in blue, with Set Temperature written
beneath. After 3 seconds without any change to the set temperature
value, the actual water temperature will appear.
When the set value is equal to the current one, Temperature will
be indicated under the number. When the set value is lower than
the current temperature Cooling to xx.x will appear below. When the
set value is higher than the current temperature, Heating to xx.x will be
indicated under the value. Normally there is a delay before the heating
starts, during which Heating Suspended is indicated under the value.
Home page
Once you have named your spa and added it to your favorites you will see
the home screen.
At the top of the screen you will see the name of your spa. Just underneath
that is a section that will show maintenance and water care information,
along with any system errors. Below that you have access to all of your spa
accessories, and water temperature. At the bottom of the screen you can
edit your My Spas list, select from the spa Experiences, open Maintenance,
and adjust the Settings for your spa.

10
in.touch Techbook
Settings
From the home page you can access your Settings, where you can
find access:
• About this spa (Mac Address, hardware and rmware versions)
• WiFi Connection settings
• Water Care settings
• Maintenance settings and alerts
• Temperature Unit settings
• Time display settings
Water care
The Water Care section will help you set up your filtration and heating
settings. Choose from Away from Home, Beginner, Energy Savings,
Super Energy Savings, and Weekender, depending on your need.
A checkmark will appear on the icon to indicate the selected setting.
To modify a Water Care setting just tap on the blue arrow. It will open
the selected Water Care menu.
In Energy Savings mode, the set point will be reduced by 20°F*,
which means that the heating system will not be engaged unless the
temperature falls to 20°F below the spa's set temperature.
The filtration schedule shown on the screen will apply to the main
filtration pump, most likely pump 1. If your spa uses a circulation pump
configured to run 24 hours, the screen will show you the purge setting
instead of filtration. The purges are pre-programmed for a fixed number
of minutes, therefore the duration time will be set to N/A on the screen,
and only the start time can be modified.
You can add schedules by tapping Add Economy or
Add Filtration buttons.
*Default pack value

in.touch TechBook
11
You can modify or delete the programmed schedules by selecting one
and adjusting the schedule using the scroll wheel that appears or pressing
on the
Delete
button.
You have several possibilities to set the schedule (Mon-Fri, weekend,
every day, or single days). The schedules are recurrent and will be
repeated every week. The time and duration are set in 30 minute
increments. Once you have set the schedule, press
Ok
.
Pressing the Factory Settings button will restore settings to their original
default values.
The Close key returns you to the Water Care menu.
Maintenance
The in.touch will remind you to perform required maintenance tasks on
your spa, such as rinse filter or clean filter. Each task has its own reminder
duration based on normal usage. The period can be changed by the
owner. The owner can also add a reminder to the device calendar by
selecting Calendar.
Once the task is completed, press Done to reset the countdown.

12
in.touch Techbook
Temperature unit
The current temperature unit is displayed, and can be set to Celcius
or Farenheit by tapping and toggling the button.
Time display settings
Time display applies to water care only, and can be set to 24 hour
or AM/PM mode by tapping the button to toggle between options.
Spa management errors
If an error occurs in the spa, the warning message will appear in
the second section of the main screen. Tap on the warning message
to see the list of errors.
The next screen shows you the list of errors that are present in your spa.
Note that more than one error can occur at the same time and some
errors can be linked together. Solving one may resolve another.
Start at the top of the list, if there is more than one, and tap the error to get
details about how to troubleshoot it.
Once you tap the error, a screen will show you the detailed explanation
of how to solve the problem.

in.touch TechBook
13
Spa Experiences
Access preset programs by tapping on the Experiences button on
the Home page. Choose one of the experiences by tapping on it:
Beach Party, Gentle Movement, Kids, His, Hers, or Relaxation. To
customize your program, adjust the settings to your needs by tapping
each accessory icon on the Home page. Once you have your settings
picked, select the Experiences button and save the program by tapping
the Save Experience button and selecting a name to save it under. All
experiences except for
Relaxation
can be customized.
Each accessory will start as it is configured in the spa experience that is
selected. For safety reasons, all accessories start with a delay to prevent
from overcharging the system. You will see the accessory icons turn on
one after another.
Experiences can be stopped at any point by tapping on the experience
name in the message section of the Home page, or by modifying any of
the accessories (pump, light etc).
While in
Relaxation
mode, only modifications to the pump or blower
will stop the experience; changing the temperature will start the pump,
but the experience will remain active.
Updating in.touch internal software
Updating your in.touch internal software will provide you with the latest
features for controlling and using your spa. Updates can only be done
using the same WiFi as your in.touch module, or using point-to-point
connection (not on cellular network).
The latest version of in.touch will directly update the in.touch system.
Follow instructions on the display to complete the download.
Upon opening, the app will alert you if your spa needs to be updated.
You can select Yes for an immediate start, or select No. If you choose not
to update, the app will remind you each time you open the in.touch, until
it is up-to-date.
Note: Only Android devices with software version 10.00 or later are
capable of direct updates. If your software is 9.00 or older you must use
PC Setup or Mac Setup software (see Annex A or B).

14
in.touch Techbook
For a successful update, keep your in.touch app connected to your spa
during the entire process download cycle.
The update could take several minutes.
Please let the update run with the app open until the in.touch Updated
alert appears.
Tapping on Ok will complete the update process and the app will return
to the spa control page. Your spa is now ready to use.
If the update fails the in.touch Update Failed message will appear.
Close the app and reopen to restart the update.
See the Update Failure chart in the Troubleshooting section for
more information.

in.touch TechBook
15
The following table shows the different states of the in.touch module and the LED states for each condition.
LED
The in.touch module has three LEDs that can be used for
troubleshooting purposes. The LEDs are located behind
the accessible cover on the front of the unit. The cover
must removed in order to see the LEDs.
Emplacement DEL
Situation Sequence Orange Red Green
Normal use
(infrastructure mode)
In.touch network available OFF OFF Flashes
Normal use
(point-to-point mode)
In.touch network available Flashes OFF OFF
Update
Updating in.touch software (Phase 1) Flashes very fast OFF OFF
Updating in.touch software (Phase 2) ON OFF Flashes very
fast
Error
In.touch network not available,
restart your in.touch
(1)
.
OFF OFF OFF
Failure of the in.touch,
return unit for replacement
OFF ON OFF
Update Failure reason Action to resolve the issue
The device isn't connected to
in.touch network (iOS devices only)
Leave the in.touch application and completely close your app. Go to
the Settings of your device, WiFi menu, select the in.touch network and wait
30 seconds, then re-launch the in.touch application. If the in.touch network
does not apear in the WiFi list, power down and power up the spa, wait
2 minutes
(1)
and check again. If problem persists contact your dealer for a
replacement unit.
Your device closes due to low battery power Close your app, recharge your device and try again.
You close or put your app in the background
during the update
Completely close your app. Open it again. Do not close your app during
an update.
You moved too far from the in.touch module,
your device lost the in.touch connection
(iOS devices only)
Return near your spa; when the spa name is available in the Visible Spas,
select it.
An error occurs in file transfer and the
maximum retry count is reached
Completely close your app and restart your spa before trying again.
The current to the in.touch was interrupted When the in.touch experiences a power outage in infrastructure mode it will
rever
t
to ad hoc mode when power is r
estored
. T
he
update should be r
edone
.
Update failure
Note (1): Please, wait 2 minutes to let the WiFi module re-establish the in.touch network.
If the problem persists, please contact your spa dealer.
If the problem persists, please contact Gecko Alliance support for a unit replacement.
Troubleshooting

16
in.touch Techbook
Factory default
It is possible to erase the in.touch memory and return to factory settings.
To do this, open the front panel of the module and place a jumper
between pins 3 and 4 of P7 on the PCB. The LED (orange or green) will
stop blinking for a few seconds and the system will reset.
Warning: The jumper must be installed while the power is on.
The reset will not work if it is placed when the pack starts up.
*A computer jumper can be used.
Troubleshooting
Please note that in order to properly troubleshoot the in.touch it is
important to know if it is in point-to-point mode or connected to a
network. The best way to tell is by looking at the color of the LED
(see LED section).
Before starting the troubleshooting, restart the system by turning it off
and back on. Close the app and wait 2 minutes.
Pins #3 et #4
Connector P7
Incompatible spa pack:
Your spa pack is not compatible with the in.touch module. In some
cases it is possible to update the pack software to make it compatible.
Please contact customer service to find out more.

in.touch TechBook
17
Incompatible in.touch:
The in.touch app requires additional data to communicate with
your spa pack.
1. Close the in.touch app.
2. Make sure your device is connected to the Internet.
3. Restart your in.touch app and wait 30 seconds.
4. Close the in.touch app again.
5. Reconnect to the same network to which your in.touch module
is connected.
You can now use your in.touch app as usual.
Lost connection:
If your device has communication issues with your in.touch module,
the in.touch app will display a Lost Connection message.
Make sure you are within range of the in.touch system if you are in a
point-to-point connection.
When the in.touch app has difficulty communicating with your in.touch,
don’t do anything. It will try to connect to your in.touch again.
If the alert does not disappear after 2 or 3 minutes, or if a WiFi Alert
appears during this delay, please close your in.touch app.
Open the app again.

18
in.touch Techbook
Slow or unstable communication:
If your in.touch module is having trouble receiving a signal from your
routeur the communication might be slow or the in.touch module may
disconnect from time to time.
In this case, move your in.touch module and/or router so that the recep-
tion is better. In some cases it may be necessary to add a WiFi repeater
(such as the universal NETGEAR WiFi repeater) to amplify the signal
between the router and the in.touch module.
To get an idea of the signal being received, go to the Settings page
in the in.touch app and tap on WiFi Settings. For each network shown
there will be an icon indicating the signal level (out of 4 bars) received
by the in.touch module.
In order to troubleshoot, it is also possible to see the variation in signal
strength in real time by touching the blue arrow beside your network.
You will be taken to the Signal Quality page. By moving either your
in.touch module or your router (and repeater, if present) you will see
the change in signal strength and any other information available.
/