Page is loading ...

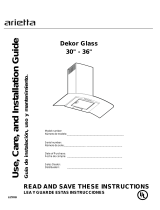
Installation, se & Care Guide
30" and 36" FreeoStandin 9 Range Hood

For online support and Internet product information visit http://www.electroluxusa.com
Table of contents
Important Safety Instructions ............................ 3-4
Electrical & Installation requirements ..................... 5
Electrical requirements ........................................... 5
Before installingthe hood ...................................... 5
List of Materials .................................................... 6
Parts Included with your Hood ............................... 6
Optional Accessories ............................................. 6
Tools/Materials required ......................................... 6
Installing the hood .......................................... 7-13
Installing preparation .............................................. 7
Wall framing for adequate support ......................... 7
Removing the packaging ....................................... 7
Examples of possible ducting ................................ 8
Ductwork installation guidelines ............................. 8
Ductwork and wiring locations ............................... 8
Mounting the duct cover bracket ........................... 9
Ceiling ducting ..................................................... 10
Wall ducting ......................................................... 10
House wiring location .......................................... 10
Installframing for hood support ........................... 10
Mounting the hood .............................................. 10
Connecting the ductwork .................................... 11
Air deflector installation
(Recirculating accessories) ................................... 11
Making the electrical connections ........................ 12
Mounting the duct cover ...................................... 13
Features ............................................................. 14
Control buttons .................................................. 15
Special functions ................................................ 16
Clock programming ............................................. 16
Grease filter saturation alarm ................................ 16
Charcoal filter saturation alarm
(Recirculating accessories) .................................. 16
Audible signal activation and deactivation ............ 16
Charcoal filter inclusion and exclusion
(Recirculating accessories) ................................... 16
Heat sensor ......................................................... 16
For Best results ................................................... 17
Care and cleaning .............................................. 18
Filters .................................................................. 18
Lights .................................................................. 18
Optional Charcoal Filters ...................................... 19
Charcoal filter placement
(Recirculating accessories) ................................... 19
Cleaning .............................................................. 19
Hood Surface ...................................................... 19
Warranty Information .......................................... 20
©2007 Electrolux Home Products, Inc. All rights reserved. Printed in Mexico

important Safety instructions
mmpo ant Safe mnstructions
Read all instructions before using this
appliance.
Save these instructions for future
reference.
Approved for residential appliances
For residential use only
Do not attempt to installor operate your appliance
until you have read the safety precautions inthis
manual. Safety items throughout this manual are
labeled with a WARNING or CAUTION based on the
risk type.
WARNmNG
This symbol alerts you to
situations that may cause
serious body harm, death
or property damage.
This symbol alerts you to
situations that may cause
bodily injuryor property
damage.
PLEASE READ ENTIRE INSTRUCTIONS BEFORE PROCEEDING.
INSTALLATION MUST COMPLY WITH ALL LOCAL CODES.
IMPORTANT: Save these Instructions for the Local Electrical Inspector's use.
INSTALLER: Please leave these Instructions with this unit for the owner.
OWNER: Please retain these instructions for future reference.
Safety Warning: Turn off power circuit at service panel and lock out panel, before wiring this appliance.
Requirement: 120 V AC, 60 Hz. 15 or 20 A Branch Circuit

_i_!_i_i!_i_!!!_ii!_i_!!_i_!!_!i_!_!_i_i!_!_i!_!_i!_!_i!_!_i!_!_i!_i_!_!_i_ii_!_!_ii_!_iiiii_!J_i_!_i_i_i_i_i_i:i!!_!i!i_!_!i!_!_ii_i_i_
; Important safety Instructions
READ AND SAVE THESE INSTRUCTIONS
mmpoAant safety mnstructions
ATiNG USE ONLY DO NOT USE
• -- Automatically Operated Device- To Reduce The
TO EXHAUST HAZARDOUS OR EXPLOS VE MATER- Risk Of In'u Disconnect From Power Su I
ALS OR VAPORS _ . _ J ry ppy
_ _eTore _ervtctng.
WARN N Th sun t s equpeed wth ntegra d sconnect ng
_ G
TO REDUCE THE RISK OF FIRE ELECTRIC SHOCK switch located Inside the blower housing
oR,NJURYTOPERSONSOBSERVETHEFOL-A WARNmN-
LOW_NG: _ G
A. Use this unit only in the manner intended by the menu- TO REDUCE THE R SK OF A RANGE TOP GREASE
facturer. If you have questions, contact the manufac- FIRE.
turer
• a) Never leave surface units unattended at high settings•
B. Before servicing or cleaning the unit, switch power off Boilovers cause smoking and greasy spillovers that may
at service panel and lock service paneldisconnecting ignite. Heat oils slowly on low or medium settings.
means to prevent power from being switched on accr
- b) Always turn hood ON when cooking at high heat or
dentally. When the service disconnecting means can- when flambeing food (I.e. Crepes Suzette, Cherries
not be ocked securey fasten a prom Rent warn ng Jub ee Pe ercorn Beef Fambe'
• , . , PP ).
device such as a tag to the service panel
, , • c) Clean ventilating fans frequently. Grease should not
C. Installation Work and Electrical Wiring Must Be Done be allowed to accumulate on fan or filter.
..... By Qualified Person(s)In Accordance With All Appli- d) Use proper pan size. Always use cookware appropri-
cable Codes & Standards, Including Fire-rated Con- ate for the size of the surface element.
struction.
i_i!_!_i!i_ii_!i!_!_i!i_ii_!i!_!_i!i_ii_!i!_!_i!i_ii_!i!_!_i!i_ii_!i!_!_i!i_ii_!i!_!_i!i_ii_!i!_!_i!i_ii_!i!_!_i!i_ii_!i!_!_i!i_ii_!i!_!_i!i_i

and o_inances.
Ifcodes permit and a separate ground wire is used, it
is recommended that a qualified electrician determine
that the ground path is adequate.
Do not ground to a gas pipe.
Check with a qualified electrician ifyou are not sure
range hood is properly grounded.
Do not have a fuse in the neutral or ground circuit.
iMPORTANT
Save Installation Instructions for electrical inspector's
use.
Qualified Installer, check ifthey perfectly fit with
your cabinet/wall.
4, Do not use flex ducting.
, COLD WEATHER installationsshould have an
additional backdraft damper installed to minimize
backward cold air flow and a nonmetallic thermal
break to minimize conduction of outside
temperatures as part of the ductwork. The
damper should be on the cold air side of the
thermal break.
The break should be as close as possible to
where the ducting enters the heated portion of
the house.
The range hood must be connected with copper wire
only.
The range hood should be connected directly to the
fused disconnect (Or circuit breaker) box through
metal electrical conduit.
Wire sizes must conform to the requirements of the
National Electrical Code ANSI/NFPA 70 -- latest edi-
tion*, or CSA Standards 022.1-94, Canadian Electri-
cal Code Part 1 and 022.2 No. 0-M91 - latest edi-
tion** and all local codes and ordinances.
6_
Make up air: Local building codes may require the
use of Make-Up Air Systems when using Ducted
Ventilation Systems greater than specified OFM of
air movement.
The specified OFM varies from locale to locale.
Consult your HVAC professional for specific
requirements in your area.
A U.L.- or C.S.A.-listed conduit connector must be
provided at each end of the power supply conduit (at
the range hood and at the junction box).
Copies of the standards listed may be obtained from:
* National Fire Protection Association Batterymarch Park Quincy,
Massachusetts 02269
** CSA International 8501 East Pleasant Valley Road Cleve-
land, Ohio 44131-5575

_!_!_!;;i!_!_i_!_!_i_!_!_i_!_!_i_!_!_i!_;_ii!!_ii!!_i_!i_!i_!i!ii_!i_i_;_i_i!_!!_i_!_ii_!i_i_i_i_i_!_i_i_i_i_i!_!ii_!i
List of Materials
List of Materials
.p°,.I.cl.aoawit,yo.r,ooa
Hoodstructureassemblywith blower, transition.
Lampalreadyinstalled. ,,
2 Greasefilters30 or3 Greasefilters36 .
• Duct covers.
• Hardwarebagwith:
• Template
• Duct coversupport bracket (1piece)
• Use, careand installationguide ,,
• Woodscrews(6 pieces-3/16 x 1 3/4)
• Concretewall anchors
(6pieces-I/8 x3/8)
• Assemblyscrews(4pieces)
• Telescopicductcovertofitceilingheightfrom8
'"':: to 10
• Recirculation KIT
• Charcoal Filter
i_i!_!_i!i_ii_!i!_!_i!i_ii_!i!_!_i!i_ii_!i!_!_i!i_ii_!i!_!_i!i_ii_!i!_!_i!i_ii_!i!_!_i!i_ii_!i!_!_i!i_ii_!i!_!_i!i_ii_!i!_!_i!i_ii_!i!_!_i!i_i

installing the hood
mnstaHing the hood
0
0
Forthe most efficient air flow exhaust, use a
straight run or as few elbows as possible.
Vent unit to outside of building, only.
On avarage 2 to 3 hours are necessary to com-
plete installation (without considering cut to be
done on wall and or on cabinet, installation of
ducts, conduit and electrical connections to the
mains).
The hood isfitted with Screws and Drywall
Anchors suitable for most surfaces, consult a
Qualified Installer, check if they perfectly fit with
your cabinet/wall.
Do not use flex ducting.
COLD WEATHER installationsshould have an
additional backdraft damper installed to minimize
backward cold air flow and a nonmetallic thermal
break to minimize conduction of outside
temperatures as part of the ductwork. The
damper should be on the cold air side of the
thermal break.
The break should be as close as possible to
where the ducting enters the heated portion of
the house.
Make up air: Local building codes may require the
use of Make-Up Air Systems when using Ducted
Ventilation Systems greater than specified CFM of
air movement.
The specified CFM varies from locale to locale.
Consult your HVAC professional for specific
requirements in your area.
Typical installation
Min installationheight from the range top to the
bottom of the hood is 30" if a gas range is used
or 24" to 30" if an electric range is used.
These hoods are not recommended to be used
over indoor grills.
The hood may be installed onto a wall and vented to
the outdoors, or it can be installed for recirculating
operation (recirculating accessories not supplied with
the hood).
This hood can be installed over any electric and gas
cooktop/range.
It can not be installed over any professional
cooktop / range.
installing preparation
Advance planning
• Determine the exact location of the vent hood.
Plan the route for venting exhaust to the
outdoors.
Use the shortest and straightest duct route
possible.
Refer to "Ductwork installation guidelines"
paragraph for further informations.
Install a wall cap with damper or roof cap at the
exterior opening. Order the wall or roof cap and
anytransition needed in advance.
Use 8" round metal ductwork only.
Wall framing for adequate support
= This vent hood isheavy.
'Adequate structure and support must be
provided in all types of installations. Thehood
must be secure to vertical studs in the wall, or to
a horizontal support.
The vent hood should be on site before final
framing and wall finishing. This will help to
accurately Iocatethe duct work and electrical
service.
Installation will be easier if the vent hood is
installed before the cook-top and countertop are
installed.
Removing the packaging
Remove carton carefully, Wear gloves to protect
against sharp edges.
Remove the protective film covering the product
before putting intooperation.

Keepductrunsasshortandstraightaspossible.
Ductfittings(elbowsandtransitions)reduceairflow
efficiency.
• Installationheight:30"gascooktop/rangeor24"
to30"electriccooktop/range.
Usealeveltodrawahorizontalstraightpencilline
onthewall,whichisyourdesired

installing the hood
Mounting the duct cover bracket
The duct cover bracket should be installedagainst
the back wall and flush with the ceiling. This bracket
will hold the telescopic duct cover in place at the top
(this a extra accessory available not included with the
hood).
Secure the bracket to the wall:
• Align the marked oenterline on the bracket with
the centerline on the wall.
Mark 2 screw hole locations in the wall.
Drill5/16" pilot holes in the marked locations.
Install wall fastener anchors.
Drive wood screws, by hand, into the fastener to
allow anchors to expand. Remove the screws.
Secure the bracket to the wall with wood screws
and/or fasteners.
Ceiling ducting
If the duct will vent straight up to the ceiling:
Use level to draw a line straight up, from the
oenterline on the template to the ceiling.
Measure at least 4 -3/4 "from the back wall to
the circle center of an 8-1/2"hole on the ceiling.
Waft ducting
If ductwork will vent to rear:
Use a levelto draw a line straight up from the
oentedine on the template.
Measure at least 23 - 3/4" (the measure might
vary dependig on the elbow used) above the
pencil line that indicates the bottom installation
height, to the circle center of an 8-1/2,diameter
duct hole (Hole may be elongated for duct elbow).
House wiring location
= The junction box islocated on the top leftside of
the hood.
• Wiring should enter the back wall at least 20"
above the bottom of the installation height, and
within 5-7/8" and 4-7/8"of the left side of the
oenterline.
-=.t_-----'_ _- FORCEILINGVENTDUCTING
4-3/4"drcle
center to wall _ / i
WALL..._( _ Circlecenterat233/4"
VENT \ J" _0ve the marked bottom
DUCT _" pencil line.
o o
Horizontalstraight
pencilline

i_i!_!_i!i_ii_!i!_!_i!i_ii_!i!_!_i!i_ii_!i!_!_i!i_ii_!i!_!_i!i_ii_!i!_!_i!i_ii_!i!_!_i!i_ii_!i!_!_i!i_ii_!i!_!_i!i_ii_!i!_!_i!i_ii_!i!_!_i!i_i

installing the hood
• Removethe hood.
Drive "lower" wood screws, by hand. Remove
screws.
Mount the hood onto the "upper" screws.
Drive and tighten the "upper" wood screws, by
hand.
Drive and tighten the "lower" wood screws, by
hand.
Air deflector in_allation
{Recirculating accessories)
= Assemble the air deflector with the duct cover
bracket with 4 assembly screws provided as
shown.
S
C7_
Connecting the ductwork
= Install ductwork, making connections inthe
direction of airflow as illustrated.
Push duct over the exhaust outlet.
Wrap all duct joints and the flange connections
with duct tape for an airtight seal.
Make the same connection in the wall or ceiling
vent exit.
Airflow
Measure from the bottom of the air deflector to
the bottom of the hood outlet, as shown.
]
- t
Dimension to measure
I
Duct tape
over seam
Cut the duct at the measured size.
Uninstall the air deflector removing the 4
assembly screws.
Slip the duct onto the bottom of the deflector.
Place the assembled deflector and duct over the
exhaust outlet from the hood.
Assemble the air deflector to the duct cover
bracket with 4 assembly screws provided as
shown.

_!_!ii:i_iiii_i_ii_!_i:_i!_i:_i!_i:_i!_i:_i!_:ii!ii_i_ii_ii_i!_!_!:!_!_!:!_!_:i_!_i_ii_:_!_i!i_i_!!_i_i!2_ii_i_!_iiiiiiii!i!i:i_i_!
lo.,.,iog,. .ood
MakingtheeJectricalconnections • ,fnotaireadydone, ,nsta,,1/2"eonduiteonneetor
inj-bo×.
WARNING /A Meta eectrca
ElectricaIShockHazard _ _condut
Warning: Turn off power at the service panel before /_ _'_
wiringthisunit. House
120 VAC 15 or 20 Amp c rcu t requ red wJnng ...._j__%___
ELECTRICAL GROUNDING INSTRUCTIONS U.L.listed
THISAPPLIANCE IS Flqq-EDWITHAN ELECTRICAL w _nu
JUNCT,ONBO×W,TH3W,RES,ONEOFWH,C
/GREEN ELLOW/ ERVE TOGROUNDTHE
APPLIANCE. TOPROTECTYOUAGAINST _ %_ I_lJ I
ELECTRICSHOCK, THEGREENANDYELLOW _ [ II_'_J_ _
WREMUSTBECONNECTEDTOTHE __H[_ Y
GROUNDING WIRE INYOUR
HOMEELECTRICALSYSTEM, ANDITMUST • Runblaek(live) white(neutral) andgreen(earth)
UNDER NOCIRCUMSTANCES BECUTOR REMO- wires (#14AWG) aeeordingtothe National
VED. Electrical CodeorCSAStandardsand local
Failuretodo socan result indeath orelectrical eodesandordinaneesin 1/2"eonduitfrom power
..... shock, supplyto -box.
..... • aemovejunctionboxcoverandknockoutonthe - Connectblack, white, andgreenwiresfrom
top leftside, powersupplyto black, white, and green/yellow
i_i!_!_i!i_ii_!i!_!_i!i_ii_!i!_!_i!i_ii_!i!_!_i!i_ii_!i!_!_i!i_ii_!i!_!_i!i_ii_!i!_!_i!i_ii_!i!_!_i!i_ii_!i!_!_i!i_ii_!i!_!_i!i_ii_!i!_!_i!i_i

installing the hood
Mounting the duct cover
= Position the duct cover over the mounted hood.
• Slide the bottom of the duct into the glass area.
Position the top of the duct over the duct
mounting bracket. Ifa telescopic duct cover is
used, grab the upper part of the telescopic duct
cover, pull it and place it in the duct cover
mounting bracket.
Secure the top of the duct with 2 assembly
screws provided.
Secure the bottom of the duct with 2 assembly
screws provided.
Instal the grease filter and turn power on at service
panel. Check operation of the hood.
IMPORTANT: If the hood doesn't switch ON, before
calling for service, check ifthe internalGeneral ON/
OFF Pushb-utton Switch is switched ON.
General ON/OFF
Push button Switch
Frontside of the hood
yi°
Back side of the hood

i_i!_!_i!i_ii_!i!_!_i!i_ii_!i!_!_i!i_ii_!i!_!_i!i_ii_!i!_!_i!i_ii_!i!_!_i!i_ii_!i!_!_i!i_ii_!i!_!_i!i_ii_!i!_!_i@!_!_i!i_i

iii_;;ii_;;ii_!!:_:_i!i!i_!_i_i_ii_i_ii_ijii_ii!_i_ii!_!_i_!_!_!i!i!i_i!i_i_!!_i!!i_ii!_!_i_i_!_!_!_!_!_!_ii!iii_i_
controlbuttons
ControJ bu ons
Thishoodisequippedwithanelectronicmotorand
2mpc°dr°!' ,............ buttonispressed, thefanwillbesettofirst
me contro_ _sable to set z_a_Treren_Tanspeeas, _urn seed
ON/OFF ght and has at merfuncton P / , , --
• • Ifthemn isatthira speea andthe V key is
Inthefollowingdrawingaredescribedthemainkey pressed, thefanw, II besettosecon, dspeed.
• Vfunctions • f the fan s at fourth speed and the
button is pressed, thefan will be settothird
speed•
1 2 3 4 5 • IfthefanisOFFandthe"V' button is
\ / ,\ / / pressed, thecontrolbacklightwill Iightup
I, Light Button
Press lamp button to turn ON the light (Lamp
state previously OFF).
Press lamp button to turn OFF the light (Lamp
state previously ON).
2. Timer Button
• The default timer setting is 10 minutes, and it
can be adjusted between 20 minutes and
1minute•
After pressing the timer button, the control
enters to a timer setup mode, and user can
adjust the timer countdown time with the
"V" and "A" buttons within 5 seconds•
The timer can be initiated immediately
pressing the timer button, after setting the
timer duration or pressing the timer button
twice (default 10 minutes setting)•
If no action occurs within 5 seconds, the
countdown will start.
During the timer setup the "V" and "A"
buttons are dedicated to the timer and no
motor action will occur•
Once the timer is initiated, it can be cancelled
by pressing the timer button again•
3. Display
Shows the hood settings•
4, "V" Button, Speed Decrease / OFF
= This button is used to decrease the fan speed,
or turn OFF the fan.
The fan will turn OFF ifthe "V" button is
pressed and the hood was inthe first speed•
Ifthe fan isat second speed and the "V"
5. "/_" Button, Speed Increase / ON
= This button is used to increasethe fan speed,
or turn ON the fan.
The fan will turn ON ifthe "A" button is
pressed and the hood was OFF.
If the fan isat first speed and the "A" button
is pressed, the fan will be set to second
speed•
If the fan isat second speed and the "A"
button ispressed, the fan will be set to third
speed•
If the fan isat third speed and the "A"
button ispressed, the fan will be set to fourth
speed•
If the fan isat fourth speed and the "A"
button ispressed, a beep will sound•
IMPORTANT: If the hood doesn't switch ON, before
calling for service, check ifthe internal General ON/
OFF Pushb-utton Switch is switched ON.
Frontside of the hood
0
General ON/OFF
Push button Switch
Back side of the hood

_!_!!i_i!i!!_!i_i_iii!_!_ii_i_!;!_i_!;!_i_!_i_ii_i!_i_i!_i!_ii!_ii!_iii:_i_i_i_ii_i!!i_i!_i_i_i!_!_i_i_i:_i_i_i:i!i_i_;!i!i!_!_
_!!1i!iii_!_i;_ilili`i_i;_:_i_ii_ii_i_i!i!_!ii!iiii!_i!i_!!_i_ii!!_i!_iii_i_!i!_i_Control buttons - Special functions
_i:!!:!i_!i_i_ii_i!_i_!i!::!_i_6!:!i_i:!i_iiiii_!_i!ii!_!i_i:i!_i_!_i:_!_i_ii_!i!ii_!!!
i iiiiiiijii!!!iii:iillSpecia_functions
Clockpro rammi.O
i_iiii:i::_iii_i!_!ii_!__ii_!_!iiii___iii___iii___iii___iii___iii_____i_!i!ii__iiii!__!__i__i_i!__!!__i!!_!_!_ii!_!_ii!_!i!i_!_!__!ii!!i!_iii_i_i_i_Thedockcan bereprogrammedatanytimeexeeptduring anactivetimedfunction.
:_iiiii:ii:i_i_i_i_!ii_i_i!_i!i_!!i_!!i_!i!_i!i!_i!i!_i!i!_i!i!_i!_!_!_!!!_!i_ii_i_ii_i_iiJ_i!i_i_!!i!!i!_!_!i_• Theclockcanbedisplayed inatwelvehourformatandvalidclocktimesarefrom l:OOto 12:59.
_:_iiiiii:iiii:iii_iiii_iiii_iiii_iiiiiii_i_______!!___ii!_i_i!i!__i_i!i_i_i!i_i_i!i_i_i!i_i_i!_i_i!i_i_!iii!____i_i!_!i_i!_!i_i!_!i_i!_i_ii__i_i!_i_i_ii_i___• Theclockcanberepro,grammedpressingthe"Time[' buttonfor5seconds, andafter, theclockcanbe
i:iiiii:iiii:iiiiiiiiiiiiiiiiiiiiiiiiii!i%:ii:ii%!iiii!!ii!;iiiii:i:iiii!ili adjusted wth the "A' and " ' buttons Coon .... w fash ndcatng cock programm ng mode
V ' ' '
i:_iiii_i:_i_i:_i_ii_iii_iii_iii_iii_i_i_ii_i_ii_i_i__:___i___i__i!ii_i_!i!:i_!i!:i_!i!:i_!i!:i_!i!:i_!i!:i_!i!iii_!_ii___i!_____i__!_!ii_!ii!i___!:i_iJ• Theusercanhaveminuteincrements/decrementsofl minute, butiftheuserkeeppressingthe"A"/
iiiiii_ii_iiiiiiiiiiiiiiiiiiiiiiiiiiiii___ii!ii_____i!i___i!i___i!i___i!i___i!ii_i!!i_ii!i_i_!_i_ii!i!iiii"V"buttonsformorethanl second, theincrements/decrementswillbeof5minutes.
_:iiii:iiii:iii_iiii_iiii_iiii_iiii_iii_i_ii_i_ii_i_ii_i_ii_ii:_i_i_i_iii_iii!_!!!_!!!_!!!_!_!i_i!_iii!_i!i_!_i_!_!_i!_During this option the control will round to the nearest 5 minutes. ,,
i:iiiii:iiii:iii_iiii_iiii_iiii_iiii_iii_i_ii__i_ii__i_ii__i_ii_i_iii_i_iii_i_iii!i_i_i_i_i!!!:!__!__!__i!__i_____i___i!i_!:!_iii_i_• The user can finish on reprogramming the clock pressing the Timer button.
:iiiii:i:iiiiiiiiiiiiiii__i__i__i__i____i_iii_ii__iii!i!_iii_!iii!_!iii!_!_i!__ii_iiiii____!_ii_!_ii_!!ii• After 1 minute of no button pressed the control will accept the programmed clock time and will add one
i:iiiii!_!_!i_!_!ii!!i!i!!i!i!!i!i!!i!i!!i!i!:!_ii_ii_ii_ii_ii_ii_ii_ii_ii_ii_ii_ii_iii!i_!:!_iX_iii!_!i_ii_!!i!_!_i!_!_!!i_!!!_i!_!i:i!i_i_i!_!:iminuteto the set clock.
i:i__!___i!_!i_i_i!!ii:i__ii_i!_ii_i!_ii_i!_ii_i!_ii_i!_ii_i!_ii_i!_i!iii!i__i_i__!_i!__i!ii__i!i_i_i!i_i_i!i_i_!i!!!_!ii_i!__i!i___!ii!___!i!_!__i!_!_i_:i:i!Greasefiltersaturationalar_ ,, ,
ii!!i_#_i!!i!_!_!_i!____!___i!__ii!i_!ii!i_iii_i__ii_i__ii_i__ii_i__ii___iii_:i_i_!i_:i_ii_:__i_ii!_i_ii!i_i!___!!i!i:_!i!i:!i!i____:_i!__i!ii__i!_!_!iii• Afterthirtyfanfunctionalhours, thedisplaywillshow GreaseFilte¢ ifthefanisactive.
ii!_i__i!_i__i!_!i!i_!ii!_i_i!__iii!___!i!_i_!i!!i_!i!!i_!i!!ii_i__ii_i__ii_!__i!!ii_!i!ii!i!Ji_!_i___!_!iii___ii!_!_ii!_!_iii!__iii!__iii!___!__!_i_i___i_ii!!_i_Whenthisiconisshown inthedisplay, thegreasefiltersinstalledarerequiredtobewashed.
• ' '
_i!_!i!_!i!_!i!_!!i!i!i!i_!i_i_!i_!i!_!i!_!i!_!i!_!i!_!_i!i:i_i!i:i_i!_!i!_i_i_!!_!!ii_!!i_iii!i_iiii!i!i_i!i!i_i!:!:i_:_!_:_!_i_i_l!To reset the grease filter saturation alarm the user must press the _ button for 5 seconds, afterths
::_iii_i!!!i!i_!!i!i_!!i!i!_!i!i!_!i!i!_!i!_!!i_!_!!i_i_!_!_i:!!!!!:!!!!!!i!i!!_i!!i_ii!!!!!i!_!!!!!ii_!!_!!_i!!i_!!i_i!i!!!ii_!!_!!_!!!!!_!_!!_!_i!!!!_i!!!ii!_!_ii_!!_!_!!I a____n_he___n``Grease_i_er__sn__d_sp_ayed_and_h_h__dhas_hen_rma_d_sp_ay_perati_n_
i_i!_!_i!i_ii_!i!_!_i!i_ii_!i!_!_i!i_ii_!i!_!_i!i_ii_!i!_!_i!i_ii_!i!_!_i!i_ii_!i!_!_i!i_ii_!i!_!_i!i_ii_!i!_!_i!i_ii_!i!_!_i!i_ii_!i!_!_i!i_;_;iCharcoal filtersaturation alarm {Recirculating accessories}
i_i!_!_i!i_ii_!i!_!_i!i_ii_!i!_!_i!i_ii_!i!_!_i!i_ii_!i!_!_i!i_ii_!i!_!_i!i_ii_!i!_!_i!i_ii_!i!_!_i!i_ii_!i!_!_i!i_ii_!i!_!_i!i_ii_!i!_!_i!i_i

For Best resuks
Continuous use of the fan system while cooking helps keep the kitchen comfortable and less humid.
Italso reduces cooking odors and soiling moisture that create a frequent need for cleaning.
• Turn the blower on before starting to cook.
Use a rear burner when browning or pan frying meat.
Open a window or inside door slightly.
Clean the filters and the wall behind the filters frequently.
The blower should be turned on for a few minutes before cooking in order to establish air currents upward
through the hood. Thus when heat, smoke, moisture, grease and cooking odors are produced, they will
be carried outside instead of drifting into other rooms.
Use the low speeds for normal use and the higher speeds for strong odors or fumes.
Drafts across the range or cooktop will cause the escape of heat, smoke, moisture, grease and cooking
odors from the hood. Such drafts should be prevented in so far as possible.
The best job of ventilation in the kitchen is done where the only air currents are those created by the
blower itself.
For Gas Cooktops, a lower blower speed should be used if:
the gas flame is being distorted by the air movement.
the burner continually sparks (clicks)
the burner flame repeatedly blows out.

careandcleaning
Care and cleaning
The efficiency of the range hood system depends on Li-hts
the cleanliness of the intake and filters. _"
The frequency of cleaning depends on the amount _ _, ,_, _,
and type of cooking. _ _U_V_
::: : : • So not use the ventilating system without the Before replacing the lamps, switch power off at
::: : filters in place or 'with grease-laden filters or service panel and lock service panel disconnecting
::: surfaces, means to prevent power from being switched on
:: :: WA _ N _N aoo denta y
G
: To avoid risk of fire and explosion do not use NOTE: -rum off the lights and fan. Allow the lights
flammable liquids or solvents, to cool before handling. If new lights do not
Always unplug or disconnect the appliance from the operate be sure lights are inserted correctly before
power supply before servicing, calling service.
WARNmNG Replace Lights
[ : Be sure the entire hood (including the filters and light Remove the inner lamp lens cover by inserting a
bulbs) has cooled and grease has solidified before small flat blade screwdriver into each of the three
attempting to clean any part of the appliance, slots and gently prying it free.
............................................................ NOTE: Do not remove the outer trim ring (lamp
..... Filters assembly).

Care and cleaning
Options| Charcoal Filters
Ifthe model isnot vented to the outside, the air will be recirculated through disposable charcoal filters that
help remove smoke and odors.
The charcoal filters cannot be cleaned.
They must be replaced.
The charcoal filters are clipped inside of each metal grease filter (mounting instructions included with charcoal
filters kit).
The charcoal filters should be replaced every 4-6 months (depending on hood usage).
NOTE: DO NOT rinse, or put charcoal filters in an automatic dishwasher.
NOTE: Charcoal filters are not included with the hood.
They must be ordered from your supplier.
Order the needed kit specifying your hood model and width size.
Charcoal filter placement (Flecircuiating accessories)
Fitthe charcoal filter mattress on the upper side of each grease filter.
Use provided springs to fix itin place.
Note: When removing for replacing for a new one do not remove Fixing Springs, simply pull out one and
rotate outwards.
Fixing
spring
Cleaning
• Always use the mildest cleaner that will do the
job. Use clean, soft cloths, sponges or paper
towels.
Rub stainless steel finishes inthe direction of the
grain. Wipe area dry to avoid water marks.
After cleaning, place all parts intheir proper
positions before using.
The cleaners recommended below indicate a type
and do not constitute an endorsement. Use all
products according to package directions.
Hood Surface
Painted Surfaces: For general care, wipe the outside
of the hood with sudsy water or household cleaners
such as Fantastic or Formula 409, rinse well and dry
with a clean soft cloth to avoid water marks.
Stainless Steel Surfaces: Wipe and dry stainless
steel inthe same direction as the grain. Avoid using
too much pressure, which may mar the surface. To
remove finger prints and give added shine, use
cleaners such as Stainless Steel Magic. Do not allow
any cleaning compounds to remain in contact with
stainless steel for extended periods.
Plastic surfaces: Wipe with a moist soapy sponge.
Rinse and dry.
Aluminum Mesh Filters: Clean filters inthe dish-
washer or by agitating in sudsy water. Ensure that
there isno soil trapped in the fine mesh. Dry the
filters before reinstalling them.
Anodized Aluminum surfaces: Top cap is not remov-
able. Wash top and underside with hot sudsy water.
Rinse and wipe dry or apply Fantastic® or Formula
409® first to a clean sponge or paper towel and
wipe clean. DO NOT USE powdered cleansers or
steel wool pads.

¸ii!!i iill
RANGEWARRANTYYourrangeisprotectedbythiswarranty
In the U.S.A. your appliance is warranted by Electrolux Home Products North America a division of White
Consolidated Industries, Inc. We authorize no person to change or add to any of our obligations under this
warranty. Our obligations for service and parts under this warranty must be performed by us or authorized
Electrolux Home Products North America servicer. In Canada, our appliance is warranted by Electrolux
Canada Corp.
WARRANTY THROUGH OUR AUTHORIZED THE CONSUMER W LL BE
PERIOD ISERVIOERS, WE WILL: RESPONSIBLE FOR:
FULLONE-YEAR Oneyearfrom |1Payallcosts for repairingor replacingany Costsof servicecallsthat arelisted
WARRANTY originalpurchaseI parts ofthsapp ancewhch proveto be under NORMAL RESPONSIBILITIES
date _ defectiveinmaterialsorworkmanship. OF THE CONSUMER.*
L MTED | Costsofthe techncan'strave to the
................. WARRANTY T me per odD | homeandanycosts forp ck up and
A oftheprevsonsofthefu and mted
.. ! warrantiesaboveandtheexclusions .....
(App cab eto Ilstea above / .... aellvery OTIRe appliancerequlrea
theStateof Aaska) ilsteabelowapply, becauseof servce
I ! / I
*NORMAL This warranty applies only to products in ordinary household use and the consumer is
RESPONSIBILITIESresponsiblefor the item8 listed below.
OF THE 1. Proper use of the appliance in accordance with instructions provided with the product.
CONSUMER 2. Proper installation by an authorized servicer in accordance with instructions provided with
the appliance and in accordance with all local plumbing, electrical and/or gas codes.
3. Proper connection to grounded power supply of sufficient voltage, replacement of blown
fuses, repair of loose connections or defects in house wiring.
4. ExpenDesfor making the appliance acc essible for servicing, such as removal of trim,
..... cupboards, shelves, etc., which are not a part of the appliance when it was shipped from
..... the factory.
5. Damages to finish after installat ion.
6. Replacement of light bulbs and/or fluorescent tubes (on models with these features).
/