Page is loading ...

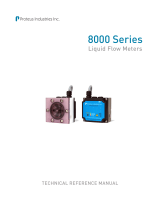
8000 Series
Liquid Flow Meters
SETUP GUIDE
This document provides the basic steps
necessary to install and make operational
your 8000 Series flow meter.
For complete installation and operating
instructions, including important CAUTION
and WARNING statements, please see the
8000 Series Technical Reference Manual,
available on the Proteus Industries website
at www.proteusind.com/8000.
MODEL NUMBER FLOW RANGE
*
CONNECTIONS
POLYPROPYLENE BRASS STAINLESS STEEL LPM GPM
08004BN03 08004SN03 0.2–1.1 0.05–0.3 1/4” FNPT
08004PN06 08004BN06 08004SN06 0.2–2.2 0.06–0.6 1/4” FNPT
08004PN1 08004BN1 08004SN1 0.4–5.3 0.1–1.4 1/4” FNPT
08004PN2 08004BN2 08004SN2 0.95–9.5 0.25–2.5 1/4” FNPT
08006SA2 0.95–9.5 0.25–2.5 9/16-18 SAE
08004PN4 08004BN4 08004SN4 1.1–17 0.3–4.5 1/4” FNPT
08006SA4 1.1–17 0.3–4.5 9/16-18 SAE
08006BN9 08006SN9 2.2–34 0.6–9.0 3/8” FNPT
08006PN10 2.2–38 0.6–10 3/8” FNPT
08008SA10 3.0–38 0.8–10 3/4-16 SAE
08008PN14 08008BN14 08008SN14 5.3–53 1.4–14 1/2” FNPT
08012SA16 4.5–60 1.2–16 1 1/16-12 SAE
08012BN16 08012SN16 4.5–60 1.2–16 3/4” FNPT
08012PN19 5.7–72 1.5–19 3/4” FNPT
08012BN40 08012SN40 11–151 3.0–40 3/4” FNPT
08016SA40 15–151 4.0–40 1 5/16-12 SAE
08016BN40 08016SN40 15–151 4.0–40 1” FNPT
08016PN50 15–189 4.0–50 1” FNPT
08016BN60 08016SN60 19–227 5.0–60 1” FNPT
Flow Ranges, Materials and Connections
*Listed flow ranges are for water at 25°C / 77°F.
*The fluid temperature that can be sustained with the unit cooled by ambient air up to 30°C / 86°F.
Temperature and Pressure Operating Limits
FLOW BODY
MATERIAL
FACEPLATE
MATERIAL
TEMPERATURE LIMIT
*
PRESSURE LIMIT
°C °F kPA PSI
Polypropylene Clear Polysulfone 70 158 517 75
Brass
Clear Polysulfone 90 194 689 100
Brass 90 194 1723 250
Stainless Steel
Clear Polysulfone 90 194 689 100
Stainless Steel 90 194 1723 250

1. Plumbing Connections
a. Identify the connection type and size of your 8000 Series instrument from the
table on the preceding page.
b. Make connections to pipe or other fittings as required. It is recommended that
you use a non-hardening pipe sealant, such as Teflon
®
(PTFE) tape or paste, on
pipe threads to create leak-tight and lubricated junctions at all connections.
c. Turn on the liquid flow slowly and check for leaks at the connections. Tighten
connections as required to eliminate leaks.
a. Locate the 24 VDC power source and turn it OFF.
b. Make all wire connections following the wiring
assignments shown in the table to the right.
c. Confirm that all connections are secure.
d. Turn the 24 VDC power source ON.
e. The flow status LED will turn on. The color
of the LED is determined by the relationship
between the actual flow rate and the selected
alarm trip point value. See below.
COLOR FUNCTION
(Bare) Shield
Red +24 VDC
Black Ground
Brown Voltage Output
Orange Current Output
Yellow Relay Common
Blue Relay N.O.
White Relay N.C.
Green Analog Ground
FLOW
STATUS
FLOW RATE CONDITION
LED
COLOR
RELAY STATE
N.O. N.C.
Flow OK
Flow Rate
>
Warning Limit
Green Closed Open
Warning
Warning Limit
≥
Flow Rate
>
Alarm Trip Point
Amber Closed Open
Alarm
Alarm Trip Point
≥
Flow Rate
Red Open Closed
Flow Status, LED Color and Relay State
> If liquid is NOT flowing, the LED will be RED, indicating that power is on and
liquid flow is below the selected alarm trip point value.
> If liquid is flowing, the LED may be GREEN, AMBER or RED depending on the
actual rate of flow and the selected alarm trip point value.
2. Electrical Connections
Flow status is determined by the relationship between the actual Flow Rate, the
Alarm Trip Point value and the Warning Limit, which is a calculated value equal
to the trip point value plus a specified percentage of the instrument’s upper flow
limit. (The default percentage for standard products is 10%.)
NOTE
Instruments with upper flow limits below 1.0 GPM / 3.8 LPM
(model nos. ending in N03 or N06) are sensitive to flow direction.
Liquid should only be introduced from the orifice labeled “IN”.
CAUTION!
» Do NOT install metal fittings into units with polypropylene bodies.
» Do NOT use anaerobic pipe sealants with instruments fitted with
polysulfone faceplates. Anaerobic sealants will crack the faceplate.
» Do NOT exceed the maximum flow, temperature, or pressure limits
of your instrument.

The alarm trip point value of an 8000 Series flow meter is user-selectable by
means of a 16-position rotary switch housed under the screw closure labeled SET
located on the top of the instrument.
a. Remove the screw closure labeled
SET using a flat-head screwdriver.
Retain the closure and the O-ring.
b. Turn the switch to the position that
best matches the desired trip point
according to the table below. The new
trip point will take effect immediately
when the switch position is changed.
c. Replace the screw closure and O-ring
and tighten sufficiently to ensure that
a leak-tight seal is created.
POSITION PERCENTAGE OF UPPER LIMIT OF FLOW RANGE
0 AutoAlarm
™
» Sets alarm trip point value based on reference flow rate
1 10%
2 15%
3 20%
4 25% (Default setting for standard 8000 Series products)
5 30%
6 35%
7 40%
8 45%
9 50%
A 55%
B 60%
C 65%
D 70%
E 75%
F Factory-programmed custom trip point value -OR- 80%
Switch Position and Alarm Trip Point Value
AutoAlarm
™
Automatic Alarm Trip Point Setting Feature
3. Alarm Trip Point Selection
AutoAlarm allows the operator to set the alarm trip point to a calculated value
equal to the current flow rate minus 20% of the instrument’s upper flow limit. It
is activated by moving the rotary switch to the 0 (zero) position.
> When activated, the LED will turn GREEN and flash for five (5) seconds to
indicate that the calculated trip point value has been successfully stored.
> The calculated alarm value is stored in the device’s memory and will NOT
be lost if input power is removed from the unit. The stored value is cleared
automatically when the switch is moved from zero to a non-zero position.
NOTE
While AutoAlarm is activated, an error condition—indicated by the LED
status indicator flashing AMBER continuously—will occur if:
» there is no liquid flowing through the device, or
» the calculated trip point value is outside the instrument’s flow range.
The error can be cleared by moving the switch to a non-zero position.
Refer to the 8000 Series Technical Reference Manual for information.

Information in this document was correct at the time of
printing; however, specifications are subject to change as
Proteus Industries’ continuous improvement processes
establish new capabilities.
© Proteus Industries Inc. All rights reserved. All other
company and product names may be trademarks of their
respective companies.
8000SG Rev 005 10/2012
4. Output Selection
Standard 8000 Series instruments provide both current and voltage outputs.
Refer to the Electrical Connections section for output wiring assignments.
For voltage output, user-selectable 0–5 VDC and 0–10 VDC options are available.
a. Remove the screw closure beside
the power cable using a flat-head
screwdriver. Retain the closure and
the O-ring.
b. Slide the switch to the position
corresponding to the desired output
voltage, as shown to the right. The
change will take effect immediately.
c. Replace the screw closure and O-ring
and tighten sufficiently to ensure that
a leak-tight seal is created.
5. Flow Measurement
a. Connect the COM or negative (–) terminal of a digital multimeter or equivalent
device to the GREEN analog ground wire.
b. Connect the positive (+) terminal of the multimeter to the ORANGE wire for
current output -OR- the BROWN wire for voltage output.
c. Measure the current or voltage output.
d. Estimate the flow rate according to the flow response curves for your specific
model number as shown in the 8000 Series Technical Reference Manual.
NEED MORE INFORMATION?
A comprehensive 8000 Series Technical Reference Manual containing detailed
product information, including technical descriptions, performance specifications,
flow response and pressure drop curves, installation and mounting instructions,
and maintenance guidelines is available on the Proteus Industries website at:
www.proteusind.com/8000
The slide switch for changing the voltage output setting is housed under the
screw closure located beside the power cable on the top of the instrument.
The analog output of an 8000 Series instrument is directly proportional to the flow
rate of the liquid passing through the device. Flow response curves for standard
products are available in the 8000 Series Technical Reference Manual.
NOTE
Unless otherwise specified on your purchase order, all 8000 Series flow
meters are shipped with a default voltage output setting of 0–10 VDC.
/