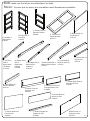
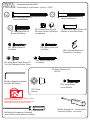
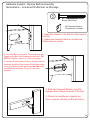
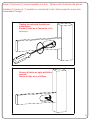
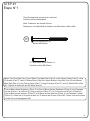
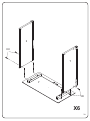
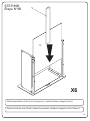
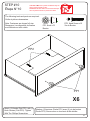
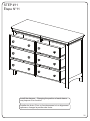
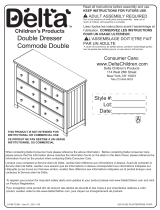
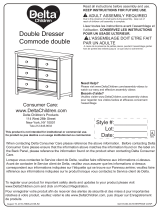
Delta Children 6 Drawer Dresser Assembly Instructions
- Type
- Assembly Instructions
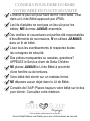
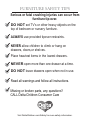
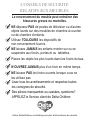
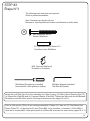
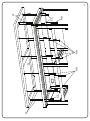
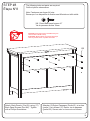
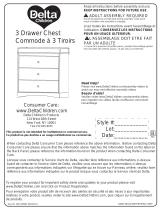
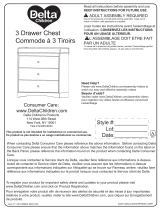
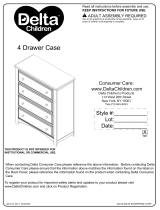
Delta Children 6 Drawer Dresser is a versatile and durable piece of furniture designed to provide ample storage space for your child's belongings. With its sturdy construction and spacious drawers, this dresser offers a practical solution for organizing clothes, toys, and other items. The dresser features a classic design that complements various décor styles, making it a suitable addition to any child's room.
Delta Children 6 Drawer Dresser is a versatile and durable piece of furniture designed to provide ample storage space for your child's belongings. With its sturdy construction and spacious drawers, this dresser offers a practical solution for organizing clothes, toys, and other items. The dresser features a classic design that complements various décor styles, making it a suitable addition to any child's room.


-
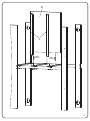
 1
1
-
 2
2
-
 3
3
-
 4
4
-
 5
5
-
 6
6
-
 7
7
-
 8
8
-
 9
9
-
 10
10
-
 11
11
-
 12
12
-
 13
13
-
 14
14
-
 15
15
-
 16
16
-
 17
17
-
 18
18
-
 19
19
-
 20
20
-
 21
21
-
 22
22
-
 23
23
-
 24
24
-
 25
25
-
 26
26
-
 27
27
-
 28
28
-
 29
29
-
 30
30
-
 31
31
-
 32
32
-
 33
33


Delta Children 6 Drawer Dresser Assembly Instructions
- Type
- Assembly Instructions
Delta Children 6 Drawer Dresser is a versatile and durable piece of furniture designed to provide ample storage space for your child's belongings. With its sturdy construction and spacious drawers, this dresser offers a practical solution for organizing clothes, toys, and other items. The dresser features a classic design that complements various décor styles, making it a suitable addition to any child's room.
Ask a question and I''ll find the answer in the document
Finding information in a document is now easier with AI
in other languages
- français: Delta Children 6 Drawer Dresser
Related papers
-
 Delta Children Chalet 4 Drawer Chest User manual
-
 Delta Children Chalet 6 Drawer Dresser Assembly Instructions
-
 Delta Children Disney Princess Magical Dreams Nightstand Assembly Instructions
-
 Delta Children Bennington Sleigh 6 Drawer Dresser Assembly Instructions
-
 Delta Children Solutions Changing Table Assembly Instructions
-
 Delta Children Sutton 3 Drawer Dresser Assembly Instructions
-
 Delta Children Sutton 3 Drawer Dresser Assembly Instructions
-
 Delta Children Rowen 4 Drawer Dresser Assembly Instructions
-
 Delta Children Tribeca Bookcase Assembly Instructions
-
 Delta Children Summit 4 Drawer Chest Assembly Instructions


Other documents
-
GYMAX GYM10275 User manual
-
WELLFOR HW-HGY-61409WH User manual
-
Unbranded 2048900210 Operating instructions
-
-
-
Fourstar Group 11213618V User manual
-
 Manhattan Comfort Eiffel Garage Work Station Set of 3 Assembly Manual
-
Titan Everwood Hilltop Adirondack Chair User manual
-
Argos Home Monk’s Bench Style Linen Bin 832/5299 User manual
-
 popstrukt Breve Assembly Instructions Manual

