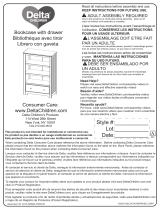
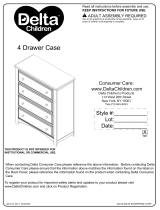
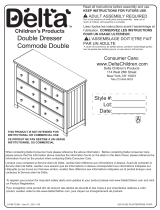
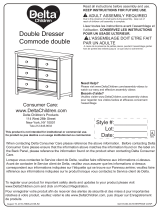
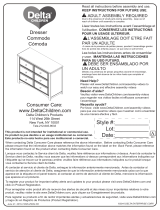
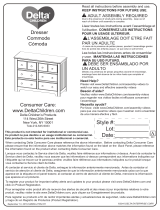
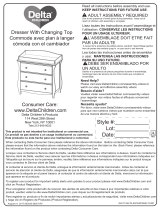
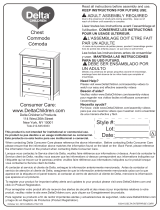
Delta Children Tribeca Bookcase Assembly Instructions
- Type
- Assembly Instructions

24715-67920-R0, JANUARY 15,2014
Book Case
©2014 DELTA ENTERPRISE CORP.
Style #:
Lot:
Date:
___________
___________
___________
Name of Item
Consumer Care:
www.DeltaChildren.com
Delta Children’s Products
114 West 26th Street
New York, NY 10001
Tele.212-645-9033
REV
THIS PRODUCT IS NOT INTENDED FOR INSTITUTIONAL OR COMMERCIAL USE.
To register your product for important safety alerts and updates to your product please
visit www.DeltaChildren.com and click on Product Registration.
When contacting Delta Consumer Care please reference
the above information. Before contacting Delta Consumer
Care please ensure that the information above matches the
information found on the label on the Back Panel, please
reference the information found on the product when
contacting Delta Consumer Care.
Read all instructions before assembly and use.
KEEP INSTRUCTIONS FOR FUTURE USE.
ADULT ASSEMBLY REQUIRED
Due to the presence of small parts during assembly, keep out of
reach of children until assembly is complete.
A

WARNING:
Serious or fatal crushing injuries can occur from furniture tip-over. To help prevent tip-over:
.
Place heaviest items in the lowest drawers.
.
Unless specifically designed to accommodate, do not set TV’s or other heavy objects on the top of this
product.
.
Never allow children to climb or hang on drawers, doors,or shelves.
.
Never open more than one drawer at a time.
Use of tip-over restraints may only reduce, but not eliminate, the risk of tip-over.
.
Always monitor your child’s activity when in the nursery.
.
Do not allow standing in drawers.
.
Do not allow standing on top of this product.
.
Accessory Items must be securely fastened to this product according to the instructions provided with
those items.
.
To avoid head injury, do not allow children to play underneath open drawers.
.
Do not leave drawers open when not in use.
NOTES ON ASSEMBLY:
-During the assembly process whenever using screws or bolts, check each by placing the screw/bolt on
the diagram of the item which is drawn actual size and design. Be sure to use the proper size and
shape specified in the instructions.
-To assemble this unit you may be required to place the unit on it’s side and face. It is strongly
recommended that assembly is done on a soft, non-abrasive surface to avoid damaging the finish.
NOTES ON CARE AND MAINTENANCE:
- Do not scratch or chip the finish.
- Inspect the product periodically, contact delta children's products for replacement parts or questions.
- Do not store the product or any parts in extreme temperatures and conditions such as a hot attic or a
damp, cold basement. These extremes can cause a loss of structural integrity.
-To preserve the luster of the high quality finish on your product, it is recommended to place a doily or
felt pad under any items you place on the finish.
-Clean with a damp cloth, then a dry cloth to preserve the original luster and beauty of this fine finish.
-Do not use abrasive chemicals.
-Do not spray cleaners directly onto furniture.
-Lift slightly when moving on carpeting to prevent leg breakage.
-Use of a vaporizer near furniture will cause wood to swell and finish to peel.
PARTS: HARDWARE KIT PART # 24716
EE. Barrel Nut x4
FF. Plastic Crescent Washer X 14
PP. Metal Knob with Screw x2
M4 Ball Hex Allen Wrench
AA. 35mm Bolt x8
BB. 50mm Bolt x42
GG. 25mm Screw
X5
DD. 15mm Back Panel Screw x44
JJ. Wire Plug x1
CC. 25mm Screw
X5
HH. 10mm Screw
X12
KK. 30mm Wood Dowel x 8
LL. Shelf Support x8
PP 1. Metal Knob
PP 2. Knob Screw
MM. 12mm screw x8
NN. 45mm Bolt x8
(GOLD)
XX.Metal Washer
x14

3
A. Left Side x1
Part#24692
B. Right Side x1
Part# 24693
C. Top x1
Part# 24694
D. Bottom x1
Part#24657
E. Adjustable Shelf x2
Part# 24695
F. Fixed Shelf x1
Part# 24696
G. Back Rail x3
Part# 24702
J. Back Panel Divider x1
Part# 24700
N. Base Side x2
Part # 24711
P. Base Rail x2
Part# 24713
R. Drawer Back x1
Part# 24708
S. Drawer Left Side x1
Part# 24707
T. Drawer Right Side x1
Part#24791
X. Drawer bottom x1
Part# 24709
W. Drawer Support x1
Part#24710
PARTS: MAKE SURE THAT ALL PRE-ASSEMBLED PARTS ARE TIGHT.
H. Front Rail x2
Part# 24701
U. Drawer Front x1
Part# 24706
K. Lower Back Panel x1
Part# 24699
L. Right Upper Back Panel x1
Part# 24790
M. Left Upper Back Panel x1
Part# 24698

HARDWARE SYSTEM - REVIEW BEFORE ASSEMBLY
2. Align the bolt and washer with the hole in the end of the
rail, align the dowels in the end of the rail with the with the
holes in the post. Slide together until tight.
3. Slide the Plastic Crescent Washer over the exposed bolt
behind the washer. Tighten the bolt with the Allen Wrench
provided.
Ensure all bolts are tightened.
FF.Plastic Crescent Washer
Install (1) bolt and (1) crescent washer at a time.
Tighten until it looks like the picture.
1. Insert the Dowels in the Rail into the holes in the Post.
BB. 50mm BOLT
4
XX.Metal Washer

5
STEP #1
FF. Plastic Crescent Washer X 4
BB. 50mm Bolt x4`
Align dowels in the (2) Base Rails (Part P) with the holes in the (2) Base Ends (Part N). Follow
the instructions on page 4 for installing the (4) 50mm Bolts (Part BB) (4) Metal Washers (Part
#XX) and (4) Plastic Crescent Washers (Part FF).
P
P
N
N
FF
FF
BB
XX
XX.Metal Washer
XX.Metal Washer x4

6
STEP #2
Attach (2) Front Rails (Part H) and (3) Back Rails (Part G). Ensure that the slots in the rails
are facing to the back of the case. Align the dowels with holes in the Left Side (Part A).
Following the instructions on page 4 install (5) 50mm Bolts (Part BB) (5) Metal Washers (Part #XX)
and (5) Crescent Washers (Part FF).
Tighten with the M4 Allen wrench.
FF. Plastic Crescent Washer X 5
BB. 50mm Bolt x5
FF
FF
FF
FF
FF
A
BB
XX
BB
XX
BB
XX
BB
XX
BB
XX
BB
XX
FF
H
H
G
G
G
Double hole Down
Single hole Down
Double hole Down
Double hole Down
XX.Metal Washer x5
XX.Metal Washer x4

7
STEP #3
AA. 35mm Bolt x2
F
NN
NN
AA
Install the Fixed Shelf (Part F) using (8) Gold 45mm Bolts (Part NN) and
(2) 35mm Bolts (Part AA).
Tighten with M4 Allen wrench.
NN. 45mm Bolt x8
(GOLD)

8
STEP #4
Repeat step 2 using the right side (part B). Refer to page 4 to install the 50mm bolt Metal Washer
and PlasticCrescent Washer. Use (2) 35mm Bolts (Part AA) finish attaching the Fixed Shelf.
FF. Plastic Crescent Washer X 5
BB. 50mm Bolt x5
AA. 35mm Bolt x2
AA
AA
FF
BB
FF
BB
FF
BB
FF
BB
FF
BB
XX.Metal Washer x5

9
STEP # 5
EE. Barrel Nut x4
BB. 50mm Bolt x8
KK. 30mm Wood Dowel x 4
BB
EE
KK
KK
KK
KK
KK
KK
BB
BB
EE
Attach the Bottom (Part D) with (8) 50mm Bolts (Part BB), (4) Barrel Nuts (Part EE) and
(4) Dowels (Part KK).
Tighten with M4 Allen wrench.
BB
BB
BB
BB

10
STEP #6
BB. 50mm Bolt x8
AA. 35mm Bolt x4
KK. 30mm Wood Dowel x 4
AA
AA
BB
BB
BB
BB
BB
BB
BB
BB
C
KK
KK
KK
Attach the Top (Part C) using (4) 35mm Bolts (Part AA), (8) 50mm Bolts (Part BB) and
(4) Dowels (Part KK).
Tighten with M4 Allen wrench.
KK
KK
KK
BB
BB
BB
BB
AA
AA

BB. 50mm Bolt x12
STEP #7
Attach the base from step #1 using (12) 50mm bolts (part BB).
Tighten using M4 Allen wrench.
BB
BB
BB
BB
BB
BB
BB
BB
BB
BB
BB
BB
11

DD. 15mm Back
Panel Screw x31
STEP #8A
L
K
12
Attach the Lower Back Panel (Part K) using (18) 15mm Screws (Part DD) and the Upper Back
Right Panel (Part L) using (13) 15mm Screws (Part DD). Tighten with Phillips screwdriver.

DD. 15mm Back
Panel Screw x13
STEP #8B
M
J
Attach the Upper Left Back Panel (Part M) and the Panel Divider using (18) 15mm Screws (Part DD).
Tighten with a Phillips screwdriver.
13

LL. Shelf Support x8
STEP #9
Shelf Support Rests in Notch on Shelf Bottom
Screw is Optional.
LL
LL
LL
LL
LL
LL
E
E
14
MM. 12mm screw x8
optional
MM
Insert (8) Shelf Supports (Part LL) at desired height, set Shelves (Part E) on the supports,
shelves are notched for the supports , a screw can also be used if desired.

JJ. Wire Plug x1
STEP #10
Insert Wire Plug (Part JJ) into the hole in the back upper panel
15

GG. 25mm SCREW x5
16
STEP #11A
Attach the Drawer Sides (Parts S and T) to the Drawer Front (Part U) with (4) 25mm Screws (Part
GG) Note: Grooves In Bottom Must Align. Tighten With Phillips Screwdriver
CC. 25mm Screw
X5
GG
S
T
U
Warning Label

17
STEP #11B
X
W
R
CC
CC
CC
Slide Drawer Bottom (Part X) into the grooves. Install the Drawer Support (Part W) and
Drawer Back (Part R), using (5) 40mm Screws (Part CC) and (1) 25mm Screw (Part GG).
Note: grooves in bottom must align. Tighten with Phillips screwdriver
GG

Remove the out piece on each drawer guide (attached to the left side and right side), (2) total, by
pressing the lever to release (see illustration).
18
STEP #12
Press lever on right glide down
2
Lift lever on left glide up

Attach (2) drawer guide outer pieces to each assembled drawer. There are pre-drilled holes in each
drawer side.
i) place the end of the drawer guide with the tab against the drawer front, then align the holes in the
guide to the holes in the side, tab should remain very close to the drawer front.
ii) attach the drawer guide with (6) 10mm woodscrews (part hh), tighten with a Phillips screwdriver.
iii) repeat with the other drawer side.
19
STEP #13
HH
HH
Right Side
Left Side
Note Position Of Lever For Each Side
HH. 10mm Screw
X12

STEP #13
Attach (2) Knobs (Part PP1) with (2) Knob Screws (Part PP2) tighten with the Phillips screwdriver.
PP. Metal Knob with Screw x2
PP 1. Metal Knob
PP 2. Knob Screw
PP1
PP1
PP2
PP2
20
Page is loading ...
Page is loading ...
Page is loading ...
-
 1
1
-
 2
2
-
 3
3
-
 4
4
-
 5
5
-
 6
6
-
 7
7
-
 8
8
-
 9
9
-
 10
10
-
 11
11
-
 12
12
-
 13
13
-
 14
14
-
 15
15
-
 16
16
-
 17
17
-
 18
18
-
 19
19
-
 20
20
-
 21
21
-
 22
22
-
 23
23


Delta Children Tribeca Bookcase Assembly Instructions
- Type
- Assembly Instructions
Ask a question and I''ll find the answer in the document
Finding information in a document is now easier with AI
Related papers
-
 Delta Children Providence Bookcase Assembly Instructions
-
 Delta Children Bennington Elite Bookcase Assembly Instructions
-
 Delta Children Summit 4 Drawer Chest Assembly Instructions
-
 Delta Children Chalet 6 Drawer Dresser Assembly Instructions
-
 Delta Children Bennington Sleigh 6 Drawer Dresser Assembly Instructions
-
 Delta Children Summit 6 Drawer Dresser Assembly Instructions
-
 Delta Children Providence 6 Drawer Dresser Assembly Instructions
-
 Delta Children Chalet 4 Drawer Chest User manual
-
 Delta Children Lancaster 3 Drawer Dresser Assembly Instructions
-
 Delta Children Providence 4 Drawer Chest Assembly Instructions


Other documents
-
 Furniture of America IDF-AC521 Installation guide
-
 Streamline K1803-161-48-512S Installation guide
-
GYMAX GYM06904 User manual
-
 GYMAX GYM07433 User manual
-
 Walker Edison Furniture Company HD42ALPGY Operating instructions
-
WELLFOR HW-HGY-61409WH User manual
-
 RiverRidge Home 06-095 Installation guide
-
Home Decorators Collection 9484700410 Operating instructions
-
 Noble House 296624 Operating instructions
-
Unbranded 2048500410 Operating instructions


