La Crosse Technology WS6304 User manual
- Category
- Alarm clocks
- Type
- User manual
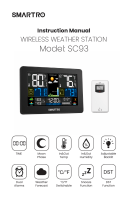
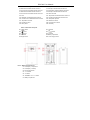
La Crosse Technology WS6304 is a versatile weather station that provides accurate indoor and outdoor temperature and humidity readings, along with a variety of other useful features. It can display the time in 12 or 24-hour format, and includes two daily alarms with a snooze function. The WS6304 also features a moon phase display, a weather forecast function, and a remote sensor that can be placed up to 60 meters away from the main unit.
La Crosse Technology WS6304 is a versatile weather station that provides accurate indoor and outdoor temperature and humidity readings, along with a variety of other useful features. It can display the time in 12 or 24-hour format, and includes two daily alarms with a snooze function. The WS6304 also features a moon phase display, a weather forecast function, and a remote sensor that can be placed up to 60 meters away from the main unit.


-
 1
1
-
 2
2
-
 3
3
-
 4
4
-
 5
5
-
 6
6
-
 7
7
-
 8
8
-
 9
9
-
 10
10
-
 11
11
-
 12
12
-
 13
13
-
 14
14
-
 15
15
-
 16
16
-
 17
17


La Crosse Technology WS6304 User manual
- Category
- Alarm clocks
- Type
- User manual
La Crosse Technology WS6304 is a versatile weather station that provides accurate indoor and outdoor temperature and humidity readings, along with a variety of other useful features. It can display the time in 12 or 24-hour format, and includes two daily alarms with a snooze function. The WS6304 also features a moon phase display, a weather forecast function, and a remote sensor that can be placed up to 60 meters away from the main unit.
Ask a question and I''ll find the answer in the document
Finding information in a document is now easier with AI
Related papers
-
La Crosse Technology WS6282 User manual
-
La Crosse Technology WS6206 User manual
-
La Crosse Technology WS6204 User manual
-
La Crosse Technology wireless weather station User manual
-
 La Crosse Technology WS9611 User manual
-
La Crosse Technology WS-1517 User manual
-
-
-
La Crosse Technology WS-9611U-IT User manual