Page is loading ...

BEDIENUNGSANLEITUNG / INSTRUCTIONS MANUAL
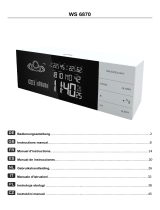
Wetterstation / Weather station
WS 6760
Sprachen / Languages Seite/Page
1. Deutsch / German 2
2. Englisch / English 15
3. Städteliste / City list 28
~1~

~15~
WS 6760 weather station user manual
CONTENTS
Scope of delivery Page 16
General safety Page 16
Battery instructions Page 16
Disposal. Page 16
Technical Details Page 17
Structure: weather station Page 18
Structure: outdoor sensor Page 20
Mounting options Page 20
Operating conditions Page 20
Initial Operation Page 21
Reception of radio controlled signal Page 21
Manual time set-up Page 22
Daily alarm set-up Page 22
Snooze function Page 23
12/24 hours mode Page 23
°C/°F temperature display Page 23
Max./ Min. for the indoor/outdoor temperature and humidity Page 23
Temperature alert Page 23
Sunrise /Sunset and Moonrise /Moonset Page 24
Weather forecast symbols Page 24
Barometer and bar and data of history of air pressure Page 24
Backlight Page 24
Moon phase display Page 25
Living space humidity Page 25
Low battery condition display Page 25
Wireless connection to the outdoor sensor Page 25
Trouble shooting Page 25
Protection and care of this item Page 26
Declaration of Conformity Page 26

~16~
Please read the operating instructions carefully to familiarize yourself with the features and
modes of operation before using the instrument.
Keep the manual for future reference and pass it on with the device, if you pass on the device to
other users.
This manual can be downloaded as a PDF file from the website www.technoline-berlin.de.
Scope of delivery:
1 base station
1 outdoor transmitter
2 LR06 batteries, 1.5 V for base station
2 LR03 batteries, 1.5 V for the transmitter
1 instruction manual with warranty card
General safety
This unit can be used by children of 8 years and above and persons with reduced
physical, sensory or mental capabilities or lack of experience and knowledge if
they are supervised or have been instructed concerning the safe use of the
device and understand the resulting risks. Do not let children play with the
device. Cleaning and user maintenance must not be carried out by children
without supervision.
Battery instructions
• Never recharge batteries! Risk of explosion!
• Keep batteries away from children, do not throw into fire, short-circuit or disassemble them.
• Always insert batteries according to the polarity regulations.
• Clean the battery and device contacts before inserting, if necessary.
• Remove exhausted batteries immediately from the device! Increased risk of leakage!
• Remove the batteries from the device, if you intent on not using them for a while.
• Never subject batteries to extreme conditions such as on radiators, direct sunlight! Increased
risk of leakage
• Avoid contact of the battery fluid with skin, eyes and mucous membranes. In case of contact,
rinse the affected area instantly with clean water and consult a doctor immediately.
• Always replace all batteries at the same time.
• Only use batteries of the same type, do not use different types or new and used batteries
together.
Disposal
Packaging
The product packaging is made of recyclable materials. Dispose of it in an environmentally
friendly and varietally pure manner in the provided collection containers.

Products and batteries
Products and batteries should not be disposed of with normal household waste.
According to Directive 2012/19/EU, the device is to be supplied at the end of its useful life
to a proper disposal. The valuable materials contained in the device are supplied to
recycling and avoid the burden of the environment. Enter the old device to a collection
point for electronic waste or a recycling center.
Remove the batteries from the unit before disposing of it and dispose of them separately. Every
consumer is legally obliged to dispose of used batteries at a collection point for used batteries,
at a local recycling center or in the battery point of sale. For further information, contact your
local waste disposal company or local government.
Technical Details
• Six keys: MODE, +, - , HISTORY,CHANNEL,SNOOZE/ LIGHT.
• Radio controlled clock
• Automatic receiving of time signal DCF77 to display exactest time
• Automatically switches to/from daylight saving time (summer/winter time)
• Time display in 12/24 format
• +/-12 total 24 adjustable time zones
• Continuous perpetual calendar up to 2099
• Display of Date, Month and Day of week
• Day of week display available in 7 languages, i.e. German, English, Italian, French, Dutch
Spanish, Danish.
• Calendar week display
• 2 alarms with snooze function (1x for week days / Mo-Fr; 1x for week end / Sa-Su)
• 5 weather forecast: sunny, partly sunny, cloudy, rainy, stormy (Weather icons can be
selected manually for the start setting.)
• Barometer and bar and data of 12 hours history for air pressure
• Altitude-setting for calculation of relative air pressure
• Indoor /outdoor temperature and humidity with trend
• Max./min. of temperature and humidity
• Temperature display in °C or °F
• Temperature alert
• Moon phase
• Sun rise and sun set / moon rise and moon set for 150 cities.
• Frost indicator (displayed below +3°C indoor temperature)
• Low battery indicator
• Blue background light LED
• Power: 3 V , 12.8 mA (2 x batterie LR06/AA/Mignon, 1,5 V)
• Thermometer measuring range inside: 0°C to 50 °C
• Thermometer measuring range outside: -20°C to ~60 °C
• Outdoor Humidity Range: 20%-95%
• Indoor Humidity Range: 20%-95%
• Temperature Tolerance: +/- 1 C in 0~40C
• Humidity Tolerance: +/- 5 % in 30~80%
Outdoor sensor:
• Frequency: 433 MHz
• Power: : 3 V , 10 mA (2 x Batterie LR03/AAA/Micro, 1,5 V)
• Transmission range: 50m in open area
~17~

Structure: weather station
~18~

~19~
1. History of air pressure (selectable by pressing the "HISTORY", displayed between 0 to -
12 hours)
2. Air pressure
3. Frost indicator (displayed below +3°C indoor temperature)
4. Weather Forecast symbol
5. Bar graph for air pressure (Display updated continuously from right to left)
6. Air pressure trend
7. Low battery indicator indoor
8. Low battery indicator outdoor
9. Outdoor sensor channel
10. RF symbol
11. Temperature alert symbol
12. Outdoor temperature and outdoor temperature trend
13. Indoor temperature and indoor temperature trend
14. Outdoor humidity and outdoor humidity trend
15. Comfort indicator
16. indoor humidity and indoor humidity trend
17. Calendar week
18. Day of week
19. Alarm symbol
20. Month
21. Time
22. Day light savings time indicator (DST)
23. Date
24. Moonset time
25. Moonrise time
26. Moon phase
27. City abbreviation
28. Sunset time
29. Sunrise time
A "MODE" button
• Press the button for 3 seconds to enter the manual setting, to advance and to select the
following settings: date (year, month, day), time zone setting, language setting of the week
indicator, 12/24h display, time setting (hour, minute) city setting
• change to the alarm setting for Alarm 1 (A1) or Alarm 2 (A2)
• Press the button for about 2 seconds to enter the alarm setting while alarm 1 (A1) or alarm
(A2) is displayed
• To stop the alarm
B "+" button
• Increase, change the values in manual setting mode, the height setting mode, weather icon
selection
• Switch between display the current, minimum, maximum indoor, outdoor temperature and
indoor, outdoor humidity
• Press the button for about 3 seconds to reset the MIN / MAX values
• To stop the alarm
C "-" button
• reduction, of values in the manual setting mode, the height setting mode, weather icon
selection
• Switching between temperature display in ° C or ° F

• Press the button for 3 seconds to enter the temperature alert setting mode
• To stop the alarm
D "HISTORY" button
• Press the button for 3 seconds to enter the altitude setting mode, to advance and to select
the following settings: height adjustment, weather forecast icon, choose between air
pressure unit hPa or inHg
• To stop the alarm
E "CHANNEL" button
• Press the button for about 3 seconds to search for an external transmitter on channel 1,2 or
3
• change of external temperature channels and continuous switching display of the outside
temperature channels
• To stop the alarm
F "SNOOZE / LIGHT" button
• Press to activate the snooze function while wake up alarm rings
• activation of the backlight
Structure: outdoor sensor
1. RF radiation
2. selected channel
3. temperature
4. humidity
A. channel choose switch
B. temperature unit selection
Mounting options
The weather station is intended to be located on flat surfaces, such as on tables or in cabinets.
Through the loop on the rear of the transmitter, the transmitter is suitable for mounting on walls.
Operating conditions
Set the weather station on in a dry interior and away from sources of interference, such as
televisions or metal plates. The transmitter should be mounted protected from rain and direct
sunlight.
~20~

~21~
Initial Operation
• Open the battery compartment located on the rear side of the outdoor sensor and weather
station. Place the batteries in the battery compartment. Please pay attention to the polarity.
• The altitude flashes , please use “+ “, “-“to set the altitude of your position (in meters), then
press “HISTORY”, weather symbol flashes, press the "+", "-" button to select the weather
symbol that fits the current weather, press “HISTORY”, hPa flashes, pls use “+ “, “-“ to select
between the air pressure units hPa and inHG, press “HISTORY”.
• The station is now connecting to the outdoor sensor. This process takes about 3 minutes.
Then the display shows the outdoor temperature and humidity, in case of failure of reception
please press “CHANNEL“ for more than 3 seconds to restart the search process again.
• The automatic reception of the DCF radio signal starts after 3 minutes of outdoor reception
• While the RCC reception process is going on, the flashing symbol “radio tower“ appears in
the time display area
• Once radio signal reception was successful, the display shows a static “radio tower“ symbol
If, due to bad reception, or no RCC automatic time reception is possible, follow the steps below
for manual time setting, as described in the section "Manual Settings".
Reception of radio controlled signal
• DCF radio signal search starts automatically about 3 minutes after battery exchange. The
“radio tower” signal is flashing.
• Press“+“ and “-“ together for more than 3 seconds to enter or quit the radio controlled signal
reception
• The clock synchronizes with the DCF radio signal automatically and daily from AM 1:00 to
3:00 to correct time deviations each hour. If the synchronization is unsuccessful (“radio tower“
symbol disappears), a further synchronization attempt is made from 4:00 and 5:00 until
success. This process is repeated up until 5:00 AM. If still not successful, the daily reception
stops.
Information
• Flashing “radio tower” symbol is displayed, while DCF radio signal reception is running.
• A static “radio tower” symbol is displayed after the DCF radio signal reception was
successful.
• Please keep a minimal distance of 2.5m to sources of interference such as televisions or
computer screens.
• The radio signal reception is weaker in rooms with concrete walls (e.g. in the basement) and
in office buildings. For extreme cases, please put the clock near a window.
• There are less atmospheric disturbances at night. A radio time signal reception is usually
possible at that time. One synchronisation per day is sufficient to keep the time display
accuracy at 1 second.
Tip
You can adjust the time manually in case the clock cannot receive the DCF radio signal (due to
interferences, large distance to the sender, obstructions like mountains, etc.) As soon as the radio
signal can be received, the clock will be adjusted automatically.
Radio signal sender coverage up to 1500km distance to Frankfurt/Main.

~22~
Manual time set-up (the most important is to quit the reception of radio
controlled signal by holding together “+ “and“-” for 3 seconds in case of
the “radio tower”symbol flashing before set-up )
• Press and hold key “MODE“ for 3 seconds.
• The display for the year is flashing. Use “+ “ and “-“ to select the year.
• Press “MODE “ to confirm.
• The display for the month is flashing. Use “+ “ and “-“ to select the month.
• Press “MODE “ to confirm.
• The display for the date is flashing. Use “+ “ and “-“ to select the date.
• Press “MODE “ to confirm.
• The display for the time zone is flashing. Use “+ “and“-“ to select the time zone
(-12 to +12).
• Press “MODE “ to confirm.
• The language selection for the display of the weekdays is flashing. Use “+ “ and “- “ to select
the language. (GE = German, EN = English, IT = Italian, FR = French, DU = Dutch, SP =
Spanish, DA = Danish)
• Press “MODE “ to confirm.
• The 12/24 hour flashing. Use “+ “ and “- “ to select
• Press “MODE “ to confirm
• The display for the hour is flashing. Use “+ “ and “-“ to select the hour.
• Press “MODE “ to confirm.
• The display for the minutes is flashing. Use “+ “ and “-“ to select the minutes.
• Press “MODE “ to confirm.
• The country /city flashing. Use “+ “ and “-“ to select the city of Sunrise/Sunset and Moonrise
/Moonset. You can find a list of all cities and their abbreviations at the end of this manual.
• Press “MODE “ to confirm.
Information:
• While the Sunrise / sunset or the moon rise / sunset times be sought (Displaying dashes), the
station does not respond to keystrokes. Please wait for about 1 minute.
• The clock automatically changes from set-up mode to time display mode if no keys are
pressed for 20 seconds.
• Explanation for the time zone display:
You can manually adjust the clock to the time zone of a country (up to 1500km distance to
Frankfurt/Main) where the clock receives the DCF signal but where the actual time differs
from the time received.
If, e.g. the time in a given country is 1 hour ahead of the German time, set the time zone
display to 01. The clock is now DCF controlled but the time is one hour ahead.
Daily alarm set-up
• Press “MODE” to switch from time display to A1 display
• Press and hold the key “MODE” for 3 seconds ,the flashing alarm time is shown
• The hour display of the alarm time is flashing. Use “+“ and “-“ to select the hour.
• Press “MODE” to confirm.
• The minute display of the alarm time is flashing. Use “+“ and “-“ to select the minute.
• Press “MODE” to confirm.
• Then press “MODE” to switch from A1 display to A2 display
• The setting sequence for A2 is the same as for A1.

~23~
Daily alarm on/off
• Press “MODE” to switch from time display to A1 display
• When showing A1 alarm time, press “-“ to activate the alarm 1 with alarm symbol showing.
• Press “MODE” again cancel the alarm
• When showing A2 alarm time, press “-“ to activate the alarm 2 with alarm symbol showing.
• Press “MODE” again to cancel the alarm
• A1 for alarm from Monday to Friday, A2 for alarm from Saturday to Sunday.
Information:
• The clock automatically changes from set-up mode to time mode if no keys are pressed for
20 seconds.
• The alarm sounds for 2 minutes if no key is pressed to stop it.
Snooze function
To activate the snooze function, follow the steps below
• Press the key “SNOOZE/LIGHT“, while the alarm sounds, to activate the snooze function.
• If the snooze function is activated, alarm symbol is flashing.
• The alarm repeat after 5 minutes.
• The snooze function can be stopped by pressing any other key.
12/24 hours mode
• The time can be displayed in 12(AM/PM)or 24 hours mode. The switchover is described
in the section "Manual Settings".
°C/°F temperature display
• The temperature can be displayed in °C or °F. Press the key “-“ to switch between °C and
°F.
Max./ Min. for the indoor/outdoor temperature and humidity
• Press “+” for displaying of indoor/outdoor max./min. of temperature and humidity.
Temperature alert set-up
• Press “Channel” to select the channel (CH1, CH2, CH3) if more than one outdoor sensor is
used
• Press and hold the key “-” then select between ON/OFF.
• Press “MODE” , the upper limit temperature is flashing, use “+” , “-“ to set the maximum alert
temperature.
• Press “MODE “, the lower limit temperature is flashing, use “+” , “-“ to set the minimum alert
temperature.
• When the alert is activated, the alert symbol will be shown on the left of the outdoor
temperature display

Temperature alert on/off
Press and hold the key “-“ to set the temperature alert on or off.
• Alert on: Temperature alert symbol shown in display
• Alert off: Temperature alert symbol is not displayed
Information
• A temperature alert can be set-up for each channel.
• The set-up process cannot be completed if the maximum temperature selected is lower than
the minimum selected temperature.
• The minimum temperature selected must at least be 1°C below the maximum selected
temperature.
• An alarm sounds and the temperature display flashes, when the temperature from the signal
of the transmitter exceeds the set limits.
Sunrise /Sunset and Moonrise /Moonset
A nearby city of your location must be set to correctly display the time of your area.
• 150 cities are selectable for Sunrise /Sunset and Moonrise /Moonset times, a list of cities can
be found in the end of the manual
5 Weather forecast symbols
Sunny Slightly cloudy Cloudy Rainy Storm
Remarks:The weather forecast is determined by temperature, humidity and air
pressure. The forecast symbol may not match with the current weather.
Barometer and bar and data of history for the past 12 hour of air pressure
• Air pressure history can be displayed in hPa and inHg , for the past 12 hours, press the history
button repeatedly to change between -1,-2,-3…
• The bar graph indicates the air pressure history trend over the last 12 hours in 6 intervals: 0h, -
1h, -2h, -3h, -6h, and -12h. The “0h” represents the current full hour air pressure recording. The
columns represent the “hPa” (0, ±2, ±4, ±6) or inHg (0, ±0,06, ±0,12, ±0,18)
at specific time. The
“0” in the middle of this scale is equal to the current pressure and each change (±2, ±4, ±6 or
±0,06, ±0,12, ±0,18) represents how high or low in “hPa“ or “inHg” the past pressure was
compared to the current pressure.
~24~
• For accurate barometric pressure trends, the weather station should operate at the same altitude
for recordings (i.e. it should not be moved from the ground to the second floor of the house).
When the unit is moved to a new location, discard readings for the next 12 hours and correct the
height adjustment (see "Start-up") if needed.
Backlight
Press the key “SNOOZE/LIGHT“ to activate the display illumination for 5 seconds.

Moon phase display
1: New moon 2: increasing crescent 3: increasing 1/3 4: First half
5: increasing 2/3 6.increasing 5/6 7: Full moon 8: decreasing 5/6
9: decreasing 2/3 10: last half 11: decreasing crescent 12: decreasing crescent
Living space humidity
The weather station uses saved data to determine the humidity in the living space and shows the
respective symbols.
Comfortable, dry, humid
Low battery condition display
The weather station displays the low battery condition symbol to remind the batteries of the
weather station or the outdoor sensor need to be exchanged.
• Weather station low battery condition display: within indoor area of the display
• Outdoor sensor low battery condition display: in the outdoor area of the display
Wireless connection to the outdoor sensor
•
Press the key “CHANNEL“ to select a channel. You can read the data of up to 3 sensors at
one weather station.
• Press and hold the key “CHANNEL“ for 3 seconds to search for outdoor sensor .
Informations
• The channel of a transmitter can be changed with the channel selection switch on the back of
the transmitter, eg to avoid that two outdoor transmitters occupy the same channel and block
each other.
• Outdoor transmitters must be distributed to different channels.
~25~
Trouble shooting
The weather station obtains the accurate time with wireless technology. Same as all wireless
devices, the reception is maybe affected by the following circumstances:

~26~
• Long transmitting distance
• Nearby mountains and valleys
• Among tall buildings
• Near freeway, railway, airports, high voltage cable etc.
• Near construction site
• Inside concrete buildings
• Near electrical appliances (computers, TV’s, etc)
• Inside moving vehicles
• Near metallic structures
Place the station at a location with optimal signal, i.e. close to a window and away from metal
surfaces or electrical appliances.
Keep in mind that the outdoor transmitter only has the optimal transmission range in open area
with no obstructions. Each obstruction between the transmitter and the station (roof, walls, floors,
ceilings, thick trees, etc.) will effectively cut the transmission range in half.
Protection and care of this item
• Do not expose the unit to extreme temperature, water or direct sunlight.
• Avoid contact with any corrosive materials.
• Do not subject the unit to excessive force, dust or humidity.
• Do not open the inner back case or tamper with any components of this unit.
Consideration of duty according to the battery law
Old batteries do not belong to domestic waste because they could cause
damages of health and environment. You can return used batteries free of
charge to your dealer and collection points. As end-user you are committed by
law to bring back needed batteries to distributors and other collecting points!
Declaration of Conformity:
Hereby, the Techno Trade Import-Export GmbH declares, that this weather station is in
compliance with the essential requirements and other relevant provisions of Directive
1999/5/EC.
Please see the warranty card at the end of this manual for information on the importer, as
well as for service and contact information.

~28~
CITIES OR STATE DESIGNATION
No.
Country/Cities
Abb.
No. Country/Cities Abb.
1
Germany
Aachen
AC 39
Spain
Las Palmas LPA
2
Berlin
B 40
Madrid MAD
3
Düsseldorf
D 41
Malaga MAL
4
Dresden
DD 42
Palma de Mallorca
LPM
5
Erfurt
EF 43
Salamanca SAL
6
Frankfurt
F 44
Sevilla SEV
7
Flensburg
FL 45
Valencia VAL
8
Freiburg
FR 46
Zaragoza ZAR
9
Hannover
H 47
French
Besancon BES
10
Bremen
HB 48
Biarritz
BIA
11
Hamburg
HH 49
Bordeaux
BOR
12
Rostock
HRO 50
Brest BRE
13
Stralsund
HST 51
Cherbourg CHE
14
Köln
K 52
Clermont Ferrand CMF
15
Kiel
KI 53
Lyon LYO
16
Kassel
KS 54
Marseille MAR
17
Leipzig
L 55
Monaco
MCO
18
München
M 56
Metz MET
19
Magdeburg
MD 57
Nantes NAN
20
Nürnberg
N 58
Nice NIC
21
Regensburg
R 59
Orleans ORL
22
Stuttgart
S 60
Paris PAR
23
Saarbrücken
SB 61
Perpignan PER
24
Schwerin
SN 62
Lille LIL
25
Danmark
Alborg
ALB 63
Rouen ROU
26
Arhus
ARH 64
Strasbourg STR
27
Copenhagen
CPH 65
Toulouse TOU
28
Odense
ODE 66
Finland
Helsinki HEL
29
Spain
Alicante
ALI 67
England
Aberdeen ABD
30
Andorra
AND 68
Belfast BEL
31
Badajoz
BAD 69
Birmingham BIR
32
Barcelona
BAR 70
Bristol BRI
33
Bilbao
BIL 71
Edinburgh EDH
34
Cadiz
CAD 72
Glasgow GLW
35
Cordoba
COR 73
London LON
36
Ibiza
IBZ 74
Manchester MAN
37
La Coruna
LCO 75
Plymouth PLY
38
Leon
LEO 76
Hungary
Budapest BUD
/