Wampler Pantheon Dual User guide

Category
Guitar accessories
Type
User guide

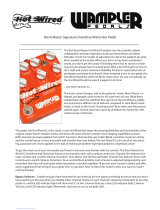
Wampler Pantheon Dual is a highly configurable dual overdrive pedal with two stackable independent MIDI switchable channels. Channel 1 delivers a classic Blues Breaker tone, while Channel 2 is a modern boutique-style overdrive. Each channel has its own Volume, Gain, Bass, Treble, and Presence controls, allowing for a wide range of overdrive tones. Additionally, the pedal features a global Presence control, a channel stacking order switch, and side-mounted switches for gain level and voicing.

Wampler Pantheon Dual is a highly configurable dual overdrive pedal with two stackable independent MIDI switchable channels. Channel 1 delivers a classic Blues Breaker tone, while Channel 2 is a modern boutique-style overdrive. Each channel has its own Volume, Gain, Bass, Treble, and Presence controls, allowing for a wide range of overdrive tones. Additionally, the pedal features a global Presence control, a channel stacking order switch, and side-mounted switches for gain level and voicing.

PANTHEON DELUXE
Quick Reference Guide
WAMPLER Pedals Limited Warranty. WAMPLER offers a 5 year warranty to the
original purchaser that this WAMPLER product will be free from defects in material
and workmanship. A dated sales receipt will establish coverage under this warranty.
This warranty does not cover service or parts to repair damage caused by accident, ne-
glect,normal cosmetic wear, disaster, misuse, abuse, negligence, inadequate packing or
shipping procedures and service, repair or modications to the product, which have not
been authorized by WAMPLER. If this product is defective in materials or workmanship
as warranted above, your sole remedy shall be repair replacement as provided below.
RETURN PROCEDURES In the unlikely event that a defect should occur, follow the pro-
cedure outlined below. Defective products must be shipped, together with a dated sales
receipt, freight pre-paid and insured directly to WAMPLER SERVICE DEPT – 5300 Harbor
Street, Commerce, CA 90040, USA. A Return Authorization Number must be obtained
from our Customer Service Department prior to shipping the product. Products must
be shipped in their original packaging or its equivalent; in any case, the risk of loss or
damage in transit is to be borne by the purchaser. The Returns Authorization Number
must appear in large print directly below the shipping address. Always include a brief
description of the defect, along with your correct return address and telephone number.
When emailing to enquire about a returned product, always refer to the Return
Authorization Number. If WAMPLER determines that the unit was defective in materials
or workmanship at any time during the warranty period, WAMPLER has the option or
repairing or replacing the product at no additional charge, except as set forth below. All
replaced parts become a property of WAMPLER. Products replaced or repaired under
this warranty will be returned via ground shipping within the United States freight
prepaid. WAMPLER is not responsible for costs associated with expedited shipping,
either to WAMPLER or the return of the product to the customer.
INCIDENTAL OR CONSEQUENTIAL DAMAGE In no event is WAMPLER liable for any
incident or consequential damages arising out of the use or inability of the possibility
of such damages, or any other claim by any other party. Some states do not allow the
seclusion or limitation of consequential damages, so the above limitation and exclusion
may not apply to you.
This warranty gives you specic legal rights and you may also have other rights which
may vary from state to state.
FOR YOUR PROTECTION Please complete the online warranty registration within (10)
ten days of the date of purchase so that we may contact you directly in the event of a
safety notication issued in accordance with the 1972 Consumer Product Safety Act.
This equipment has been tested and found to comply with the limits for a Class B digital
device, pursuant to part 15 of the FCC Rules. These limits are designed to provide
reasonable protection against harmful interference in a residential installation. This
equipment generates, uses and can radiate radio frequency energy and, if not installed
and used in accordance with the instructions, may cause harmful interference to radio
communications. However, there is no guarantees that interference will not occur in
a particular installation. If this equipment does cause harmful interference to radio or
television reception, which can be determined by turning the equipment off and on,
the user is encouraged to try to correct the interference by one or more of the following
measures:
• Reorient or relocate the receiving antenna. • Increase the separation between the
equipment and the receiver. • Connect the equipment into an outlet on a circuit different
from that to which the receiver is connected.• Consult the dealer or an experience radio/
TV technician for help.Changes or modications not expressly approved by the party
responsible for compliance could void the user’s warranty to operate the equipment.
CUSTOMER SUPPORT Our dedicated staff are ready
to help you with any warranty or product questions –
please email us at [email protected] or call
us on (765) 352-8626 Please remember to register
your pedal as soon as possible after purchase at the
following web page to ensure quicker service if you
should ever need to make a warranty claim:
wamplerpedals.com/warranty-registration
MIDI: Use either the included 3.5mm to MIDI 5-pin DIN adapter to connect a standard MIDI cable, or if connecting
from another pedal that uses 3.5mm TRS audio connectors, use a standard TRS 3.5mm audio cable. To set the MIDI
Channel the device will receive commands on (by default the pedal is in omni channel mode):
1. Power off the device, press and hold the Left Footswitch (Channel 2 switch), and power the device on.
2. After power up, releases the switch. Both LEDs will blink.
3. Send a MIDI CC message CC32 with value set to the desired MIDI channel: val=0 is Channel 1, up to val=15 is
Channel 16, val=16 is omni. The LEDs will blink in success. NOTE: This CC message may be sent on any channel.
Basic MIDI Commands:
CC Function CC no. Value (0-127) Description
Channel 1 on/off State 00=off, 1-127=on Sets the on/off state of Channel 1 (Ch1)
Channel 2 on/off State 10=off, 1-127=on Sets the on/off state of Channel 2 (Ch2)
Ch1 off, Ch2 off 2any value Sets Ch1 off and Ch2 off when this command is received
Ch1 on, Ch2 off 3any value Sets Ch1 on and Ch2 off when this command is received
Ch1 off, Ch2 on 4any value Sets Ch1 off and Ch2 on when this command is received
Ch1 on, Ch2 on 5any value Sets Ch1 on and Ch2 on when this command is received
Power: This pedal was designed around the usage of a 9-18V DC power source only. To avoid damage to the
pedal, do not exceed 18V DC, do not use center pin positive adapters, and do not use AC power. Use only a 9-18V
DC power source that is intended for guitar pedals. This pedal requires 55mA.
NOTE: We recommend disconnecting the battery if this pedal is used with a power supply. If the power supplied
is insufcient LEDS may icker when a foot switch is pressed to indicate this.
Volume: Controls the total output volume of each channel.
Gain: Turning this control clockwise will increase the amount of gain applied to the signal path of each channel.
Bass / Treble: Adjust the amount of low-end / high-end frequencies, turning clockwise will increase the levels,
counter clockwise to decrease.
Presence: Global Presence control to add sparkle and top end to both channels, start off with this turned all the way
counter-clockwise and adjust to suit.
Order: Change the channel stacking order with this switch if you are using only one input and output cable.
Gain Level (Side switches L and R): Set the switch at the top for maximum, middle for medium, and bottom
positions for lower gain level settings.
Voicing (Side switches L and R): Set the switch at the top for Hard clipping (Crunchy), bottom for soft clipping
(Smooth), and in the middle position to blend both clipping styles.
Connections: This pedal has 2 pairs of input and output jacks: if you are using only one set connect to the jacks
marked with solid triangles; if you are using both sets, the outline triangles indicate the separate output for Channel
1 and input for Channel 2. This allows you to connect both channels independently (e.g to a loop switcher), insert a
pedal between the channels, or run in stereo.
A highly congurable dual overdrive pedal with two
stackable independent MIDI switchable channels:
Channel 1 delivers a classic Blues Breaker tone; Channel 2
is a recreation of the original Pantheon, a similar circuit to
the Blues Breaker but with a modern boutique feel.
@WamplerPedals
@WamplerPedals /WamplerPedalsYouTube.com/user/WampCat visit wamplerpedals.com for full manual and product videos
  • Page 1 1
  • Page 2 2

Wampler Pantheon Dual User guide

Category
Guitar accessories
Type
User guide

Wampler Pantheon Dual is a highly configurable dual overdrive pedal with two stackable independent MIDI switchable channels. Channel 1 delivers a classic Blues Breaker tone, while Channel 2 is a modern boutique-style overdrive. Each channel has its own Volume, Gain, Bass, Treble, and Presence controls, allowing for a wide range of overdrive tones. Additionally, the pedal features a global Presence control, a channel stacking order switch, and side-mounted switches for gain level and voicing.

Ask a question and I''ll find the answer in the document

Finding information in a document is now easier with AI