hybrid hit
dvCompTools
13 14
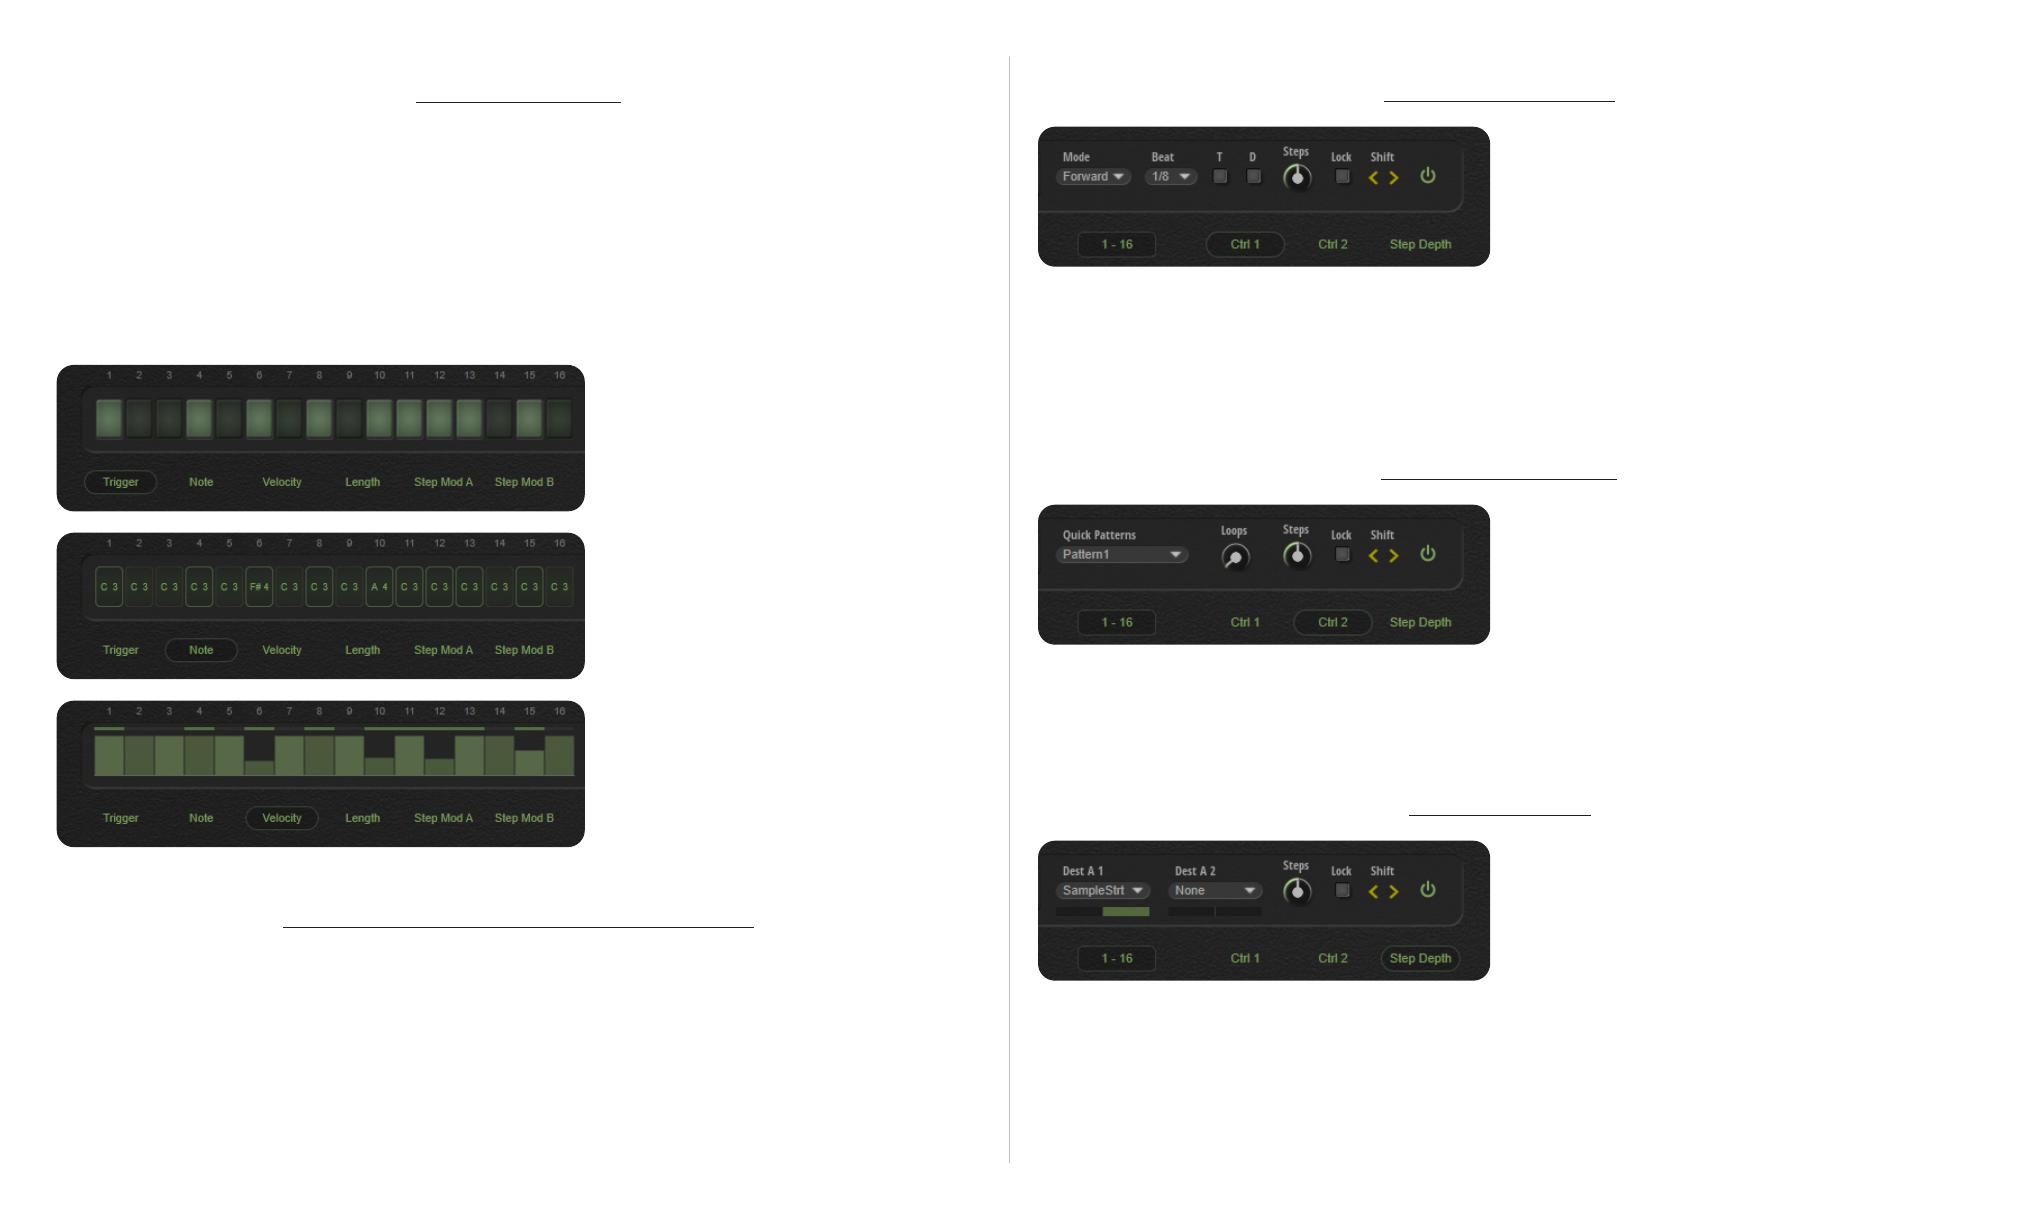
6. Sequencer
Hybrid Hit provides a 32 step sequencer with various modes and sync options for beat and pattern
creation. Only 16 steps are displayed at a time. The 1 - 16 selector can be used to display the rst or
second bank of triggers, notes and modulation editors.
When a sequencer lane is active, note and velocity data is only determined by the sequencer. The
pressed MIDI note merely acts as a trigger for the sequencer lanes, and all it’s data is ignored.
The sequencer has 3 main control types: Trigger, note and slider.
Trigger is reserved for note on events
Note sets the pitch of the step. The value
can be changed by dragging up or down,
using the scroll wheel, or double clikcing
and typing a note name or number. Frames
indicate active steps.
All parameters from velocity onward, use
slider to set values. The solid bars above
the sliders indicate active steps.
For Length to be audible, the layer needs
“Gated” or “Sustain” to be active.
6.1 Common Sequencer Lane Controls
• On Switch : Turns lane sequence on or o.
• Shift : Moves the lane steps to the left or right.
• Lock : Only the currently selected edit target (Trigger, Note or Step Mod A). Other targets are kept
in place. This can be used to create interesting or unexpected variations on a pattern.
• Steps : Sets the number of steps for a given lane.
6.2 Lane Controls 1
• Mode : Sequencer direction controls. Alt goes in both directions. Alt1 repeats the rst and last steps
to maintain the sequence phase, whereas Alt2 only plays them once. This will shift the phase by one
step on each pass.
• Beat : Sets the step duration.
• T / D : Adjusts the step duration to a triplet or dotted version of the currently selected sync value.
6.3 Lane Controls 2
• Quick Patterns : A collection of quick pattern sets covering a few basic needs to assist pattern
building.
• Loops : Sets the amount of times a lane will loop. A zero value will have innite loops. This is useful
for sequenced hits that need a pickup or a tail, but no loop.
• Dest A , Dest B : Whether destination A or B is displayed is dependant on which Step Mod target is
selected. Selecting Step Mod A will show the corresponding controls.
• Depth Slider : Controls the depth of step modulation 1 or 2. As with the destinations, depth is also
displayed based on the target selection.
6.4 Step Depth


