Page is loading ...


Important Satety Information
Icomponents
Key Definitions
Features
How the Dog Training System Works
Operating Guide
Step1 Prepare the Remote Transmitter and Receiver Collar
Step2 Pairing Collar Receiver to Transmitter
Step3 Test the Training System Functions
Step4 Fit the collar-receiver
Step5 Re-thread the collar(as diagram)
Frequently Asked Questions
Froubleshooting
General Training Tips
Addendum and Upgrading Notes
2
3
4
6
7
7
7
10
9
11
12
13
14
15
16

617
617
Transmits signal from Remote Transmitter to the Collar Receiver
Indicator Light
Flashes green or solid green when any of the stimulation
buttons are pressed and solid red when charging the battery or no power.
LCD Screen
Indicates the intensity level of stimulation currently selected
and battery life. When pressing stimulation buttons, the LCD screen will notify is
which receiver receiving stimulation.
Intensity Dial
Rotate the dial to adjust the level of stimulation from 0 to 100.
Toggle Switch
Toggle switch swaps between continuous and momentary
mode. If the toggle switch is to the left, all stimulation buttons are now continuous
and if to the right, all stimulation buttons are now momentary.
Toggle Switch
Vibration Button 2
Static Button 2
Indicator Light
Intensity Dial
Power Button
Vibration Button 1
Static Button 1
Pairing Symbol
Charging Jack
Belt Clip
Antenna
Rubber Cover

Power Button
Powers the Remote Transmitter on and off and has another function
that enables a mode that will vibrate the Remote Transmitter when pressing
stimulation buttons
Vibration Button 1
Delivers continuous or momentary vibration to the first
receiver, depending on the position of the Toggle Switch
Static Button 1
Delivers continuous or momentary static shock to the first
receiver, depending on the position of the Toggle Switch
Vibration Button 2
Delivers continuous or momentary vibration to the second
receiver, depending on the position of the Toggle Switch.
Static Button 2
Delivers continuous or momentary static shock to the second
receiver, depending on the position of the Toggle Switch.
Charging Jack
Charges the battery of the Remote Transmitter when connected
to a power source
Belt Clip Allows for the possibility of hands free training
Pairing Symbol
Pairs the Remote Transmitter to the Collar Receiver(s) or
powers off the Collar Receiver when properly aligned.
Rubber Cover
Protects the internal components of the Remote Transmitter
from dust and water. Always remember to replace after charging is complete
Contact Points
Contact points cover the metal screws, and through them
vibration or static shock stimulation is delivered
Charging Jack
Charges the battery of the Collar Receiver when connected
to a power source
Pairing Symbol
Pairs the Collar Receiver to the Remote Transmitter or
powers off the Collar Receiver.
Rubber Cover
Protects the internal components of the Collar Receiver from
dust and water. Always remember to replace after charging is complete.
Light
Stimulation Buttons pressed on the Remote Transmitter will cause a green
light to appear on the Collar Receiver.
Pairing the Remote Transmitter and Collar Receiver will produce a solid green
light.

Ipets products are reliable, effective, and comfortable for large or small dogs.
The system assists in controlling your dog without a leash in a range up to 650
yards away! Instantly send a signal from the Remote Transmitter, which activates
your dog's Collar Receiver. The dog will receive an annoying but safe, harmless
stimulation. With correct, consistent use of this product, the dog will associate
his misbehavior with your corrections, and soon enough, you will have a well-trained
dog. This particular model features adjustable levels of stimulation, enabling the
user to tweak accordingly to the dog's temperament, removing the risk of over
stimulation.
Power Saving
R T
and Receiver Collar
R T and Receiver Collar
A solid red light will appear on the Indicator Light, indicating
Insert the charging connector into the Charging Jack
Uncover the Charging Jack by lifting the Rubber Cover
Plug the charger into a standard wall outlet
Once charging is complete, the solid red light will turn to a solid green light
charging is occurring
The collar-receiver,if left unused for 5 minutes,will enter into “DEEP SLEEP”
status,yet it can be activated by any movement.
The remote transmitter,if left unused for 2 minutes,will enter into”STANDBY”
status;if unused for 5 minutes,it will enter into”DEEP SLEEP”STATUS.To activate
the transmitter in separate cases,you can simply press any button (except the
LED LIGHT button) and the”MODE”button(for 1 sec)separately.
Note: Before first use, charge the Remote Transmitter and receiver
Collar until completion.
Powering on and off the Remote Transmitter
Press and hold the Power Button for several seconds, the LCD display will
and the Transmitter Indicator Light will turn to solid green
appear
To power off the Remote Transmitter, press and hold the Right Side Button for a
few seconds,and Indicator Light will turn to red
Powering on and off the Collar Receiver
To power on the Remote Collar Receiver, align the Remote Transmitter Pairing
Symbol with the corresponding Collar Receiver Pairing Symbol, once the
Receiver Indicator Light is green separate the two Pairing Symbol. The Collar
Receiver is now on
To power off the Remote Collar Receiver, realign the Remote Transmitter
Pairing Symbol Transmitter with the corresponding Collar Receiver Pairing
Symbol, once the Receiver Indicator Light goes red separate the two Pairing
Receptacles. The Collar Receiver is now off
NB:The indicator light of collar-receiver will flash red if it needs recharging.
Replace the Rubber Cover to protect the Charging Jack

Press and hold the Power Button for a few seconds to power on the Remote
Pairing Collar Receiver to Transmitter
Transmitter
Rotate the Intensity Dial to 0
Ensure the Collar Receiver is off
Align and the Remote Transmitter Pairing Symbol with the corresponding
Collar Receiver Pairing Symbol, hold until the Receiver Indicator Light is a
steady green, once the steady green light begins to flash, press the Vibration
Button 1 immediately. Pairing is now complete.
the Vibration Button 2 immediately.
Vibration
2
Put the test light over the Screws of the Collar Receiver
Turn on the Remote Transmitter and adjust the Intensity Dial off 100
There is an option for continuous stimulation or momentary if desiring
continuous push the Toggle Switch to the left position and if desiring
Toggle Switch to the right position
After deciding the type of stimulation, press either Static Button or 1 or Static
Button 2 depending on which receiver is undergoing the test the test bulb will
flash indicating the Static Shock function is operating correctly
Power on the Remote Transmitter and adjust the Intensity Dial off 100
There is an option for continuous stimulation or momentary, if desiring continuous
push the Toggle Switch to the left position and if desiring momentary move the
Toggle Switch to the right position
Testing the Vibration Functions
momentary move the
Test the Training System Functions
The testing methods will help determine whether the training system is functioning
as intended. Please ensure that the pairing process is complete before attempting
to test the functionality
3

Important The proper fit and placement of the Collar Receiver is essential for
your dog's neck making direct contact with the dog's skin If direct contact is not
possible shaving some fur away ensuring good contact is recommended
Fasten the collar strap The fit should be snug but not taut A finger should be
able to be placed beneath the collar strap when around the dog's neck
Allow the dog to wear the Collar Receiver for several minutes and check the
strap again The dog will soon become more familiar with the Collar Receiver so it
is crucial to ensure the fit comfortable and flattering
To fit the Collar Receiver attach the Collar Strap to the Receiver
With the dog standing in front of you place the Collar Receiver around the
dog's neck so the receiver box and Contact Points are on the underside of
effective training. The contact points must have direct contact with the dog's skin
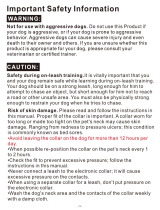
CAUTION: RISK OF SKIN DAMAGE
For comfort, safety and effectiveness of this product please check the fit of the
dog's collar frequently. If observing any skin irritation, immediately discontinue
use of the collar for a few days. If the skin condition persists beyond 48 hours,
consult a veterinarian.
Do not attach a leash to the collar, which can result in squeezing the Contact
Points too tightly against your dog's neck.
The design of the Collar Receiver discourages constantly wearing the device.
Petrainer recommends the collar not wearing for more than 12 hours out of
every 24-hour period.
After deciding the type of stimulation press either Vibration Button 1 or Vibration
Button 2 depending on which receiver is undergoing the test the Collar Receiver
Collar Receiver will vibrate
4
Petrainer suggests giving the dog, the vibration stimulation before following it
with a static shock. After training for a while using this method, the dog will be
aware that after vibration comes a static shock. Vibration will act as a warning,
and static shock only acts as a menace that might be necessary sometimes.
Ensure Contact Points are not too tighton a weekly basis
Rinse the Contact Points with alcohol on a weekly basis.
Check the dog's neck for irritation and wash the dog's neck on a weekly basis.
Most dogs feel uncomfortable when wearing the collar for the very first time.
Do not use any functions until the dog is accustomed to the collar.
5
Step5 Re-thread the collar(as diagram)

Is the Collar Receiver waterproof?
Yes, but always ensure that the Rubber Cover seals the Charging Jack
Can I replace the Collar receiver with another kind of collar?
No.
Can I attach a leash to the Collar Receiver?
No, this can result in pulling the Contact Points too tightly against the dog's
neck. Attach a leash to a separate, nonmetallic collar or a harness. Ensure the
extra collar does not put pressure on the Contact Points.
How long can I leave the Collar Receiver on my dog?
The design of the collar discourages constant wearing. We recommend not
having the dog wear the collar for more than 12 hours out of every 24-hour
period.
Is the training system suitable for all dogs?
The collar Is adjustable from length 5.9”(15cm) to 19.6”(50cm), if the dog's neck
circumference is smaller than 5.9”, you will be forced to rethread the collar, if
the dog's neck circumference is larger than 22”, this collar may not be suitable
for the dog. This collar is not suitable for dogs under 15lbs.
How old does the dog have to be before using the system?
Your dog should have learned basic obedience commands such as, “sit” or
“stay.” The Collar Receiver might be too large for dogs under 15lbs.
Once my dog completes training and is been obeying my commands, will he
have to wear the collar?
Probably not, but you may try to reinforce training with the collar.
Can I use the Ipets rechargeable training collar with more than one dog?
Yes, you just need to purchase another Collar Receiver for the system.
My dog is not responding after the training system installed
successfully.
Charge the Remote Transmitter and Collar Receiver for 2 hours, separately
before first use.
Ensure if the Remote Transmitter and Collar Receiver power is on.
Check the intensity levels of vibration and static shock, making sure it is not
set to 0.
Ensure the Collar Receiver has sufficient power to operate.
Check the collar to ensure it fits snugly against your dog's neck.
If tested for all of the above and the dog is still not responding, please try re-
pairing the Remote Transmitter and Receiver Collar.
The Remote Transmitter does not work.
Check the battery status of the Remote Transmitter.
Press and hold the Power Button for a few seconds to power on the Remote
Transmitter.

The following tips on how to get the best out of your Petrainer
Training Collar.
(1) Make training sessions short and positive (between 10-15 minutes long for
each session.) This will enable the dog to keep its attention focused on the
trainer.
(2) Train one dog at a time.
(3) During the first initial training sessions, keep the dog in a familiar outdoor
environment. Training in new locations may cause the dog to become
distracted, causing you to reinforce commands with the Collar Receiver more
than necessary.
/