Smartpet VS2 User guide

Category
Pet care
Type
User guide

Smartpet VS2 is a versatile and reliable dog training collar, designed to assist you in effectively communicating with your pet. With its range of adjustable training modes, including warning tone, vibration, and shock, you can customize the training to suit your dog's unique temperament and needs. The easy-to-read display screen provides clear feedback on the selected stimulation level and battery status. Additionally, the collar features a sleep mode to conserve battery power when not in use.

Smartpet VS2 is a versatile and reliable dog training collar, designed to assist you in effectively communicating with your pet. With its range of adjustable training modes, including warning tone, vibration, and shock, you can customize the training to suit your dog's unique temperament and needs. The easy-to-read display screen provides clear feedback on the selected stimulation level and battery status. Additionally, the collar features a sleep mode to conserve battery power when not in use.

DOG
TRAINING
COLLAR
Model: VS2
Not for use with aggressive dogs. Do not use this product if your dog is aggressive, or if
your dog is prone to aggressive behavior. Aggressive dogs can cause severe injury and
even death to their owner and others. If you are unsure whether this product is appropriate
for your dog, please consult your veterinarian or a certified trainer.
For use with dogs over 6 months of age and over 8 lbs.
DO NOT use when the dog or the collar is wet.
Your dog when receiving stimulation. If this SHOULD NOT VOCALIZE OR PANIC
happens, the stimulation level is too high and you need to go back to the previous
level and repeat the process.
DO NOT charge the device near any flammable substances.
DO NOT press and hold the Shock and the Vibration Buttons too often for more than
10 seconds to avoid physical or psychological damage to your dog.
For dog use Not for use on children.ONLY.
This is not a toy, and should only be operated by a responsible adult.
WARNING
CAUTION
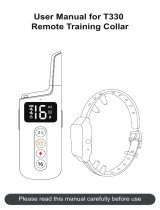
Before your first training, please read and follow the instructions in this manual carefully.
The cautions below will help keep your dog safe and comfortable. Millions of dogs are
comfortable when they wear stainless steel contacts, while some dogs are sensitive to
contact pressure.
It is vitally important that you and your dog remain safe while learning during on
-leash training. Your dog should be on a strong leash (do not attach the leash to the
Training Collar), long enough for him to attempt to chase an object, but short enough for
him not to reach a road or other hazard. You must also be physically strong enough to
restrain your dog when he tries to chase.
DO NOT leave the collar on the dog for more than 12 hours per day.
When possible re-position the collar on the dog's neck every 1 to 2 hours.
Check the fit to prevent excessive pressure; follow the instructions in this manual.
Examine the contact area daily for signs of a rash or a sore.
If a rash or sore is found, discontinue the use of the collar until the skin has healed.
If the condition persists beyond 48 hours, see your veterinarian.
Receiver collar meets IP67 waterproof rating, it can be submerged in water up to 1
meter for up to 30 minutes. If submerged and wet, please do not use it.
The Receiver comes with conductive silicone covers, please ensure they are worn
on the contact points before putting it on your dog, and check for the presence of the
silicone covers every hour.
Risk of skin damage. Proper collar fitment is important. A collar worn for too long or
made too tight on the dog's neck may cause skin damage. Ranging from redness to
pressure ulcers; this condition is commonly known as bed sores.
Never connect an extra leash to the collar; it will cause excessive pressure on the
contacts.
Clean the dog's neck area and the contact probes of the collar weekly with a damp
cloth.
I. Important Safety Information:
01
Charge the Receiver and the Remote Transmitter for 2-3 hours with the double-headed
Micro-USB cable from the package box.
Note: The charger, power bank and other charging devices shown in the above
picture are not included in the box.
1
2
Let your dog stand on four feet or lay down fully. Fit the Receiver to your dog by leaving one
finger space between the collar and your dog's neck. Center the contact points underneath
your dog's neck, touching the skin.
II. Quick Start Guide
02
Turn on the Receiver by pressing and holding the Power Button for 2 seconds with a
vibration to indicate that the Receiver turns on. The green Indicator now continues to
blink regularly.
3
4
Turn on the Remote Transmitter by pressing and holding the On/Off (Channel) Button for
2 seconds.
03
Warning Tone Command: Press the Warning Tone Button, and the Receiver will deliver
a warning tone (both the green Indicator on the Remote and the Receiver light up
simultaneously). The Beep level is 1-8 adjustable. Adjust the Warning Tone Level by
pressing the Level Up/Down Button.
6
Vibration Command: Press the Vibration Button, and the Receiver will deliver vibration
(both the green Indicator on the Remote and the Receiver light up simultaneously). The
Vibration level is 1-16 adjustable. Adjust the Vibration Level by pressing the Level Up/
Down Button.
5
The green
Indicator lights up
The green
Indicator lights up
04
Shock Command: Press the Shock Button, and the Receiver will deliver a shock (the red
lndicator on the Remote and the green lndicator on the Receiver light up simultaneously).
7
8
Switch the channel by pressing the On/Off (Channel) Button. This Training Collar can train
up to 2 dogs.
The red Indicator
lights up
Dog 1 Dog 2
05
Button.
The Shock level is 1-18 adjustable. Adjust the Shock Level by pressing the Level Up/Down
06
1.Press and hold the Power Button on the Receiver for 2 seconds to turn it on. Turn on the
Remote Transmitter by pressing and holding the On/Off (Channel) Button for 2 seconds;
2.Press the Power Button on the Receiver 3 times to enter the Pairing Mode. You will hear a
beeping tone and the Indicator becomes solid green. You will now have 10 seconds to finish
3.Press the Beep Button, Vibration Button, or Shock Button on the Remote Transmitter, and
Receiver will respond correspondingly indicating that the pairing process is completed.
9
the pairing;
Please refer to “VI. Paring Up” on page 15 for more details.
Steps to pair the Remote Transmitter to the Receiver:
07
10
Test the Receiver with the Test Bulb:
1. Turn the Receiver on.
2. Hold the Test Bulb to the Contact Points on the Receiver. Make sure the metal wire in the
Test Bulb has direct contact with both of the top of the Contact Points.
3. Press the Shock Button on the Remote Transmitter.
4. The yellow Test Light will flash if the Receiver works normally. At higher shock levels, the
Test Bulb will flash brighter.
Note:
(1)While you test the Receiver with your fingers, please put your two fingers on the
top of the Contact Points separately to form a closed loop circle.
(2)Please always start from the lowest Shock level to avoid accident hurt.
Remote Transmitter Receiver
Charging Cable
User Manual
Test Bulb
Metal Prongs Silicone Caps
Wrist Strap
III. Package Content
DOGDOGDOG
TRAININGTRAININGTRAINING
COLLARCOLLARCOLLAR
Mod el : VS 2Mode l: V S2Mode l: V S2
08
(1)The icons “red lock” and “battery bar” will be displayed when the Remote
Transmitter is set to the locked state.
(2)The Remote Transmitter will go into sleep mode if there is no operation in
30 seconds.
IV.Product Overview
Warning Tone Mode
Vibration Mode Shock Mode
Remote Transmitter Battery
The Locked State Vibration/Warning Tone
/Shock Level
Channel 1 Channel 2
Remote Transmitter
Keypad Lock
Level Up/Down Button
On/Off (Channel) Button
Warning Tone Button
Shock Button
Vibration Button
Indicator
Flashlight
The Lanyard Hole
Flashlight Toggle
Charging Port
Display Screen
Display Screen
09
Contact Points
Charging Jack
Speaker
Power Button
Indicator
The Remote Training Collar is easy to use with an advanced digital display that
tells you the exact stimulation level you are using.
How the System Works
Receiver
10
The Remote Training Collar assists you in controlling your dog without a leash.
At the push of a button, your Remote Transmitter sends a signal activating your
dog's Receiver. He receives a safe but annoying stimulation. He'll quickly learn
the association between his behavior and your correction, and soon you'll have
a better-behaved dog.
The Remote Training Collar has been proven safe, comfortable, and effective
for both small and large dog breeds.
If using the Remote Training Collar consistently and correctly, any basic obedience
commands can be taught and will help correct any misbehavior that your dog
exhibits.
V. Setting Up
1.Charge the Product
Charge both the Receiver and the Remote Transmitter with the charging cable
in the package box until their Indicator becomes solid green which will take
around 2-3 hours.
Note:
(1)The charger, power bank and other charging devices shown in the above picture are not
included in the box.
(2)Use the charging cable in the package when charging. Other charging cables may not be
suitable for this Bark Collar, which may cause electric damage.
(3)The Remote Training Collar supports If charged with an ONLY a 5V-rated power source.
improper charger:
Receiverdeliver a rapid warning tone and stop charging automatically
Remote Transmitterstop charging automatically with the Indicator rapidly blinking in red
11
2.Turn On/Off the Product
Turn on/off the Remote Transmitter by pressing and holding the On/Off
(Channel) Button for 2/3 seconds.
Turn on the Receiver by pressing and holding the Power Button for 3 seconds
with vibration, as the green LED Indicator light blinks regularly.
Turn off the Receiver by pressing and holding the Power Button for 3 seconds
with a long beeping, as the green LED Indicator light stops blinking.
12
VI. Training Modes
1.Warning Tone Mode
Press the Warning Tone Button and the Receiver will deliver a warning tone.
It will cut off automatically if you pres
There is a total of 8 levels o f Warning Tone for training which you
can adjust by pressing the Level Up/Down Button.
2.Vibration Mode
There is a total of 16 levels of Vibration for training which you can adjust by
pressing the Level Up/Down Button.
3.Shock Mode
There
is a total of 18 levels of Shock for training which you can adjust by
pressing the
Level Up/Down Button.
13
s
4.Switching Channels
Press the On/Off (Channel) Button to choose the Receiver you want to control
if you have paired up two Receivers.
5.Sleep Mode
The Remote Transmitter will enter sleep mode to save battery power if there
is no operation for 30 seconds.
VII. Fitting the Receiver
IMPORTANT:
The proper fit and placement of your Receiver are important for effective training.
The Contact Points with Conductive Silicone Cover must have direct contact with
your dog's skin on the underside of his neck. To assure a proper fit, please follow
these steps:
1.Make sure that the Receiver is turned off.
2.Let your dog stand on four feet or lay down fully (A).
3.Place the Receiver on your dog's neck close to the ears. Center the Contact
Points underneath your dog's neck, touching the skin (B).
Note: It is sometimes necessary to trim the hair around the Contact Points to
make sure that contact is consistent.
4.The Receiver should fit snugly, yet loose enough to allow one finger to fit
the strap and your dog's neck (C).
5.Allow your dog to wear the collar for several minutes then recheck the fit.
Check the fit again as your dog becomes more comfortable with the Receiver.
C
AB
6. To attach the collar to the Receiver, please follow the following steps as
instructed to thread the strap.
14
CAUTION
Risk of Skin Damage. Wearing the collar too long or fitting the collar too tight
may cause pressure necroses, which are often misidentified as burns. Please
follow the below instructions to avoid pressure necroses:
DO NOT shave the dog's neck as this may increase the risk of skin irritation.
DO NOT leave the Receiver on your dog's neck for continuous 12 hours.
NEVER attach an extra leash to the collar.
NEVER fit the Receiver too tight to your dog's neck.
VIII.Pairing Up
1.Press and hold the Power Button on the Receiver for 3 seconds to turn it on.
Turn on the Remote Transmitter by pressing the On/Off (Channel) Button for 2
seconds.
2.Press the Power Button on the Receiver 3 times to enter the Pairing Mode.
You will hear a Beeping tone and the LED Indicator light becomes solid green.
You will now have 10 seconds to finish the pairing.
15
3.Press the Warning Tone Button, Vibration Button or Shock Button on the Remote
Transmitter, and the Receiver will respond correspondingly indicating that the
pairing process is completed.
The Receiver is paired to the Remote Transmitter by the factory default setting.
If you find the Receiver does not respond to the Remote Transmitter when you
get the product or during use, please follow the above steps below to pair the
Receiver to the Remote Transmitter again.
Tips:
16
Remote Transmitter Indicator:
Fully Charged
Receiver Indicator
Slowly blinking indicates the Receiver is on
Fast blinking indicates the Receiver is on charge
Faster blinking indicates the Receiver battery is low
A Red Indicator light comes up when the
Shock function is activated
X. Training Tip
Find the best stimulation for your dog
Important: Always start at the lowest level and work your way up.
The Remote Training Collar has 8 types of Warning Tones, 16 levels of Vibration,
and 18 levels of Shock. For Warning Tones, there are 8 types of Tones, with only
frequency differences between the different types. For Vibration and Shock,
level 1 is the lowest; the highest level for Vibration is level 16, and level 18 for
Shock. This allows you to choose the Stimulation level that is best for your dog.
Once you have placed the Receiver on your dog, it is time to find the Stimulation
Level that is best for him. This is called the Recognition Level.
A sl ight change i n y our dog' s b ehavior, such as looking arou nd in curi osi ty,
scratching at his collar, or flicking his ears, indicates the Recognition Level that
is best for your dog.
Follow the steps below to find your dog's Recognition
Level:
1.Starting at Level 1, press the Warning Tone/Vibration/Shock Button continuously
for 1 to 2 seconds.
Note: When the Warning Tone/Vibration/Shock Button is held down for 0.4consecutive
seconds, the Remote Transmitter will "time out", and you must release and press
the button again before additional stimulation can be delivered.
2. If your dog shows no reaction, repeat the Stimulation Level several times
before moving up to the next level.
IX. Indicator Definitions
Charging The Green Indicator light blinks fast
The Green Indicator light becomes solid
Press A Green Indicator light comes up
A Green Indicator light comes up
Press
A Red Indicator light comes up
Press
17
3. YOUR D O G S H O U L D NOT V O C A L I Z E O R PA N I C W H E N RECE I V I N G
STIMUL ATION. I F T H I S H A P P E N S , T H E S TIMULAT ION L E V E L I S TO O
HIGH AND YOU NEED TO GO BACK TO THE PREVIOUS LEVEL AND REPEAT
THE PROCESS.
4. Move up through the Stimulation Levels until your dog reliably responds to
the stimulation.
5. If your dog continues to show no response at the highest level of Vibration or
Static Shock, check the fit of the Receiver. If your dog has long or thick hair,
contact our Customer Care Center to obtain a longer set of Contact Points. Then
go back to #1 and repeat the process. If this still does not yield any results, your
dog's hair will need to be trimmed around the Contact Points.
If, after completing all of these steps, your dog still does not indicate he is feeling
the stimulation, please contact our customer service.
How to Maximize the distance?
Terrain, weather, vegetation, transmission from other radio devices, and other
factors will affect the maximum range.
Hold the Remote Transmitter in a horizontal position away from your body to
achieve optimum range. For maximum signal strength, keep the device properly
charged.
*Avoid touching the antenna or the range may decrease substantially.
XI. Frequently Asked Questions
Q: Is the Stimulation safe for my dog?
A: While the Stimulation is unpleasant, it is harmless to your dog. Electronic
trai ning device s require inte raction and training from the o wner to ac hieve
desi red results.
Q: How old do es m y dog h av e to b e befor e us in g the R em ote Training
Colla r?
A: Your dog should be able to recognize basic obedience commands such as
Sit'' or “Stay''. Dogs should be at least 6 months old before using the Remote
Training Collar.
Q: Once my dog is trained and has been obeying my commands, will he
have to continue to wear the Receiver?
A: Probably not. You may need to reinforce training with the Receiver from time
to time.
Q: Is the Receiver waterproof?
A: Yes. The Receiver meets the IP67 waterproof rating, but make sure to keep
the area dry when charging.
Note: Remote Transmitter is not waterproof.
18
2.The Receiver will not turn on.
Make sure the Receiver has been charged. For the initial charge, be sure to
charge it for 4 hours. Subsequent charges only take 2-3 hours.
If the indicator is blinking rapidly, fully charge the Receiver.
If the first two solutions did not resolve your problems, please check the “How
to pair the Remote Transmitter & Receiver” section.
3.The Receiver is not responding to the Remote Transmitter.
Verify the Receiver is on.
XIII. FCC Statement
USA
This device complies with part 15 of the FCC Rules.
Operation is subject to the following two conditions: (1) This device may not cause
harmful interference, and (2) this device must accept any interference received,
including interference that may cause undesired operation.
Make sure the Receiver's Contact Points are placed snugly against your dog's
skin. Refer to "Fitting the Receiver" on page 13 for more information.
XII.Trouble Shooting
1.My dog does not respond when I press a button.
Make sure the Receiver has been turned on.
If your range has reduced from the first time you used the Remote Training Collar,
the battery(-ies) may be low in either the Remote Transmitter or Receiver.
Many factors can impact the amount of range you have with the Remote Training
Collar. For a list of these factors, see "How to Maximize the Distance" on page
18.
Test the Receiver with the Test Bulb. Refer to "Testing the Receiver with the
Test Bulb" on page 7 for detailed steps.
NOTE: If the Test Bulb does not flash, recharge the Receiver and re-test.
If the Test Bulb Tool still does not flash, please contact our customer service.
Increase the Stimulation Level. Refer to "Find the best stimulation for your dog"
on page 17 for more information.
Make sure the Receiver's Contact Points are placed snugly against your dog's
skin. Refer to "Fitting the Receiver" on page 14 for more information.
Q: Will I get a maximum range with the Remote Training Collar?
A: The range of the Remote Training Collar will vary according to terrain, weather,
19
vegetation, as well as transmission from other radio devices. See "How to Maximize
the Distance" on page 18 for tips on maximizing your range.
  • Page 1 1
  • Page 2 2
  • Page 3 3
  • Page 4 4
  • Page 5 5
  • Page 6 6
  • Page 7 7
  • Page 8 8
  • Page 9 9
  • Page 10 10
  • Page 11 11
  • Page 12 12
  • Page 13 13
  • Page 14 14
  • Page 15 15
  • Page 16 16
  • Page 17 17
  • Page 18 18
  • Page 19 19
  • Page 20 20
  • Page 21 21

Smartpet VS2 User guide

Category
Pet care
Type
User guide

Smartpet VS2 is a versatile and reliable dog training collar, designed to assist you in effectively communicating with your pet. With its range of adjustable training modes, including warning tone, vibration, and shock, you can customize the training to suit your dog's unique temperament and needs. The easy-to-read display screen provides clear feedback on the selected stimulation level and battery status. Additionally, the collar features a sleep mode to conserve battery power when not in use.

Ask a question and I''ll find the answer in the document

Finding information in a document is now easier with AI