6. Hose hook goes into one of
the pre-drilled holes.
5. Non Corrosive Screen Guard
goes into the open area.
7. Attach the Nozzle with Shut-off Valve
to the brass coupling end of the Hose.
8. Attach the other end of the hose to the base
of the Castilla using a clamp and a flat head
screwdriver turning until tight.
Castilla Rain Barrel Instruction and Care Manual
The Castilla is an excellent way to conserve water. The water kept in the Castilla Rain Barrel is
for gardening purposes only and should not be consumed by humans or animals.
TO START
Start by choosing a location for the Castilla Rain Barrel where there is a downspout near by.
1. Place the Downspout Elbow on the Castilla and hold it up to the Downspout and mark
a line with a pencil.
2. Using the Hacksaw cut a straight line at the mark you just made.
3. Place the Screen Guard in the open area on the top of the Castilla Rain Barrel.
4. Attach a downspout elbow (optional) to the downspout and rest downspout above screen.
5. Using the Level ensure your Castilla Rain Barrel is level to avoid tipping when full.
6. Attach the Hook for the Hose to the Castilla Rain Barrel by putting it into the pre-drilled
hole on the top of the Rain Barrel.
7. Attach the Nozzle with Shut-off Valve to the threaded end of the hose.
8. Screw in the hose to the outlet at the bottom of the rain barrel.
9. Attach the spigot by screwing it into the fitting on the front of the Castilla until snug.
YOU WILL NEED
Flat Head Screwdriver
Drill with ¼" Drill Bit
Downspout Elbow
(optional)
Hacksaw
Safety Gloves
Level
Downspout
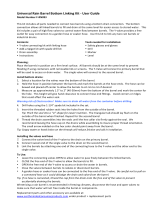
Congratulations on the purchase of your new Castilla Rain Barrel.
The Castilla Rain Barrel system is an easy way to collect and store natural rainwater.
•Helps to save you money by reducing your water consumption
•Stores water for use during time of drought and water restrictions
•Rainwater is good for plants because it is naturally low in salt and chlorine
•Great for watering indoor and outdoor plants and washing cars and windows
HOW MUCH CAN YOU HARVEST
To find out how much water your roof will collect you first need to calculate the catchment area.
L= total length of your house
W= total width of your house
(L + eaves) x (W + eaves) = Catchment
Example: (36 + 4) x (46 + 4) = 2000 sq ft.
1 inch of rainfall can provide an average of 600 gallons per 1000 sq ft. catchment area
(Catchment area / 1000) x 600 gallons = total gallons of water collected per 1 inch of rainfall
Example: (2000/1000) x 600 gallons = 1200 gallons
To find out how much you will collect in a year:
Total gallons of rainwater per sq. inch x average rainfall per year in inches = total gallons per year
Example: 1200 gallons of water per sq. inch x 20 inches of rainfall a year = 24 000 gallons
To find out rainfall in your area visit:
http://countrystudies.us/united-states/weather/
Downspout
Overflow
Downspout Connected
Gutter
Built in Planter
Rainwater
Brass Spigot


