Page is loading ...

www.homewerksww.com
Questions, problems, missing parts? Before returning to your retailer, call our customer
service department at 1-877-319-3757, 8 a.m. - 5 p.m., CST, Monday - Friday.
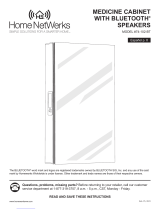
LED DIMMABLE
MIRROR WITH
BLUETOOTH
®
SPEAKERS
MODEL #75-101-BT
Español p. 6
Nov. 14, 2017
Home
NetWerks
SIMPLE SOLUTIONS FOR A SMARTER HOME
The BLUETOOTH
®
word mark and logos are registered trademarks owned by BLUETOOTH SIG, Inc. and any use of the said
mark by Homewerks Worldwide is under license. Other trademark and trade names are those of their respective owners.
READ AND SAVE THESE INSTRUCTIONS

2
www.homewerksww.com
TABLE OF CONTENTS
Preparation .........................................................................................................................................................................2
Safety Information ..............................................................................................................................................................2
FCC Compliance ................................................................................................................................................................2
Package and Hardware Contents.......................................................................................................................................3
Recommended Tools ..........................................................................................................................................................3
Wiring Diagram ...................................................................................................................................................................3
Installation Instructions .......................................................................................................................................................4
Operating Instructions ........................................................................................................................................................5
Care and Maintenance .......................................................................................................................................................5
Troubleshooting ..................................................................................................................................................................5
Warranty .............................................................................................................................................................................5
This equipment complies with FCC RF radiation exposure limits set forth
for an uncontrolled environment.
This device complies with part 15 of the FCC rules. Operation is subject
to the following two conditions: (1) this device may not cause harmful
interference, and (2) this device must accept any interference received,
including interference that may cause undesired operation.
NOTE: The manufacturer is not responsible for any radio or TV interference
caused by unauthorized modications or changes to this equipment. Such
modications or changes could void the user’s authority to operate the
equipment.
NOTE: This equipment has been tested and found to comply with the limits
for a Class B digital device, pursuant to part 15 of the FCC Rules. These
limits are designed to provide reasonable protection against harmful
interference in a residential installation. This equipment generates uses
and can radiate radio frequency energy and, if not installed and used in
accordance with the instructions, may cause harmful interference to radio
communications. However, there is no guarantee that interference will not
occur in a particular installation. If this equipment does cause harmful
interference to radio or television reception, which can be determined by
turning the equipment off and on, the user is encouraged to try to correct
the interference by one or more of the following measures:
– Reorient or relocate the receiving antenna.
– Increase the separation between the equipment and receiver.
– Connect the equipment into an outlet on a circuit different from that
to which the receiver is connected.
– Consult the dealer or an experienced radio/TV technician for help.
PREPARATION
Before beginning assembly of product, make sure all parts are present. Compare parts with package contents list and
hardware contents. If any part is missing or damaged, do not attempt to assemble the product. Contact customer service
for replacement parts.
SAFETY INFORMATION
Please read and understand this entire manual before attempting to assemble, operate or install the product.
1. Always disconnect the power supply prior to installing, servicing or removing the LED mirror.
2. Installation work must be carried out by a qualied person(s) in accordance to all local and safety codes including the
rules for re-rated construction.
3. Follow all local building, safety and electrical codes as well as NEC (National Electrical Code) and OSHA (Occupational
Safety and Health Act).
4. Electric service supply must be 120 volts, 60 hertz.
5. This unit must be properly grounded.
6. Do not bend or kink the power wires.
7. Exercise care to not damage existing wiring when cutting or drilling into walls or ceilings.
8. Avoid putting sharp or hard objects against mirror surface. Damage and/or electrical injury may occur if punctured.
9. Turn product off during storms or power surge scenarios as power surges may damage internal components.
10. If installed with a power plug, never forcibly pull the plug from the wall. Remove gently to avoid unnecessary stress to the
wires.
11. If not being used for extended periods of time, ensure power is disconnected.
FCC Compliance

3
www.homewerksww.com
PACKAGE AND HARDWARE CONTENTS
PART DESCRIPTION QTY
A LED mirror 1
B Wall anchors 4
C Z-bar screws 3
PART DESCRIPTION QTY
D Z-bar 1
E Lower locking screw 1
F Wire connectors 3
A
B
C
D
E
F
RECOMMENDED TOOLS (NOT INCLUDED)
Safety
goggles
Tape
measure
Phillips
Screwdriver
Electric drill
and drill bits
Level Pencil Hammer Electrical
tape
WIRING DIAGRAM
Mirror
House
black
black
white neutral
ground
live
white
green green
Installations may vary depending on how the previous mirror was installed and the presence of a power source. Supplies necessary for installation of
your new mirror are not all included; however, most are available at your local home improvement or hardware store.

4
www.homewerksww.com
MIRROR WIRING
3. Locate the White (neutral), Black (live) and Green
(ground) wires are extended from the cord in the back of
the mirror. With the power turned off, connect the wires
on the mirror with the neutral, live and ground house
wires with wire connectors (included).
FIGURE 2
D
E
HANG AND SECURE THE MIRROR
4. Hang mirror on the Z-bar (D), centering it and ensuring
that it is securely hanging (see FIGURE 2). The lower
locking screw (E) will align with the key-hole bracket on
the lower back of mirror. Once the lower locking screw
(E) is aligned through the key-hole slot, move the
mirror slightly to either side to lock it in place
(see FIGURE 2.)
IMPORTANT NOTE: Follow all local electrical and building
codes when wiring your device and consult an electrician.
INSTALLATION INSTRUCTIONS
INSTALLING THE Z-BAR FOR HANGING MIRROR
1. Place the Z-bar (D) at the desired location on the wall,
using a level for nal positioning. Mark the location of
the three holes in the Z-bar (D) on the wall. Drill 1/4 in.
holes at the marked locations and insert included
wall anchors (B). Secure Z-bar (D) to the
wall with three included screws (C).
Vertical mount
D
FIGURE 1
1/2"
22-3/4"
D
C
B
E
INSTALL LOWER LOCKING SCREW
2. Using a level, mark down from the center of the Z-bar
(D) 22-3/4 in. for vertical mirror orientation (see
FIGURE 1). Drill a 1/4 in. hole at this location and
insert an included wall anchor (B). Drive the lower
locking screw (E) into the anchor (B), leaving 1/2 in.
exposed (see FIGURE 1).
Mirror
House
black
black
white neutral
ground
live
white
green green

5
www.homewerksww.com
OPERATING INSTRUCTIONS
OPERATING THE DIMMABLE LED LIGHT
Press the power touch sensor button and light will turn on at its brightest setting. Continue touching the sensor button again and
the light will dim to the next level. There are three light brightness levels and on the fourth touch the light will turn off.
OPERATING THE BLUETOOTH
®
SPEAKERS
Press and hold the Bluetooth
®
touch button for 4 seconds, a chime will indicate that the Bluetooth
®
is activated and the touch
button will change color to white.
To pair your device for the rst time, turn on the device's Bluetooth connection and look for the mirror, which will be labeled
HW MIRROR and connect to it.
Once paired, play music or make calls from your device and the audio will play through the mirror's dual speakers. To answer
an incoming call when Bluetooth
®
speakers are on and paired, touch the button with the Bluetooth
®
icon sensor on the the
mirror and start talking, the call will come through the mirror. If you want to talk from your phone only, answer the incoming call
on your phone instead.
Speakers can be muted during play by tapping the Bluetooth touch button and can be unmuted by tapping the button again.
CARE AND MAINTENANCE
When cleaning your LED mirror, a mild non-abrasive glass cleaner is recommended. Apply to a soft cloth or paper towel.
CAUTION: Do not spray cleanser directly onto the mirror or frame.
TROUBLESHOOTING
PROBLEM POSSIBLE CAUSE CORRECTIVE ACTION
Device will not pair Another device is already paired
Make sure BLUETOOTH
®
signal is turned off
on other devices.
BLUETOOTH
®
SPEAKER
– LIMITED 1-YEAR WARRANTY
If the BLUETOOTH
®
speaker fails due to a defect in materials or workmanship at any time during the rst year of ownership,
the manufacturer will replace it free of charge, postage-paid at their option. This warranty does not cover products that have
been abused, altered, damaged, misused, cut or worn. This warranty does not cover use in commercial applications. Use
only manufacturer-supplied genuine warranty repair replacement parts to repair the BLUETOOTH
®
speakers. Use of non-
genuine repair parts will void your warranty. The manufacturer DISCLAIMS all other implied or express warranties including
all warranties of merchantability and/or tness for a particular purpose. As some states do not allow exclusions or limitations
on an implied warranty, the above exclusions and limitations may not apply. This warranty gives you specic legal rights,
and you may have other rights that vary from state to state.
This warranty is limited to the replacement of defective parts only. Labor charges and/or damage incurred during installation,
repair, replacement as well as incidental and consequential damages connected with the above are excluded. Any damage
to this product as a result of neglect, misuse, accident, improper installation or use other than the purpose SHALL VOID
THIS WARRANTY.
Shipping costs for return product as part of a claim on the warranty must be paid for by the customer. Inquiries regarding
warranty claims can be directed to 1-877-319-3757, 8 a.m. - 5 p.m., CST, Monday - Friday.

6
Preguntas, problemas, partes faltantes? Antes de volver a su tienda minorista, llame
a nuestro departamento de servicio al cliente al 1-877-319-3757, de 8 a.m. a 5 p.m.,
CST, de lunes a viernes.
REGULABLE LED
ESPEJO CON
BLUETOOTH
®
ALTAVOCES
MODEL #75-101-BT
Español p. 6
Home
NetWerks
SIMPLE SOLUTIONS FOR A SMARTER HOME
La marca y los logotipos de BLUETOOTH® son marcas registradas propiedad de BLUETOOTH SIG, Inc. y cualquier uso de
dicha marca por parte de Homewerks Worldwide se realiza bajo licencia. Otras marcas y nombres comerciales son los de sus
respectivos dueños.
LEA Y GUARDE ESTAS INSTRUCCIONES

7
www.homewerksww.com
TABLA DE CONTENIDO
Preparación .......................................................................................................................................................................7
Información de seguridad ..................................................................................................................................................7
Conformidad con la FCC ...................................................................................................................................................7
Paquete y contenido de hardware .....................................................................................................................................8
Herramientas recomendadas ............................................................................................................................................8
Diagrama de cableado ......................................................................................................................................................8
Instrucciones de instalación ..............................................................................................................................................9
Instrucciones de operación ..............................................................................................................................................10
Cuidado y mantenimiento ................................................................................................................................................10
Solución de problemas ....................................................................................................................................................10
Garantía............................................................................................................................................................................10
Este equipo cumple con los límites de exposición a la radiación de radiofre-
cuencia de la FCC establecidos para un entorno no controlado.
Este dispositivo cumple con la parte 15 de las reglas de la FCC. La
operación está sujeta
a las dos condiciones siguientes: (1) este dispositivo no puede causar
interferencia dañina, y (2) este dispositivo debe aceptar cualquier interferen-
cia recibida, incluida la interferencia que pueda causar un funcionamiento no
deseado.
NOTA: El fabricante no es responsable de ninguna interferencia de radio o
TV causada por modicaciones o cambios no autorizados en este equipo.
Tales modicaciones o cambios podrían anular la autoridad del usuario para
operar el equipo.
NOTA: Este equipo ha sido probado y cumple con los límites para un
dispositivo digital de Clase B, de conformidad con la parte 15 de las Reglas
de la FCC. Estos límites están diseñados para proporcionar una protección
razonable contra interferencias dañinas en una instalación residencial. Este
equipo genera usos y puede irradiar energía de radiofrecuencia y, si no se
instala y utiliza de acuerdo con las instrucciones, puede causar interferen-
cias perjudiciales a las comunicaciones de radio. Sin embargo, no hay
garantía de que la interferencia no ocurra en una instalación en particular. Si
este equipo causa interferencia perjudicial a la recepción de radio o
televisión, lo cual puede determinarse apagando y encendiendo el equipo,
se recomienda al usuario que intente corregirlo. La interferencia por una o
más de las siguientes medidas:
- Reorientar o reubicar la antena receptora.
- Aumente la separación entre el equipo y el receptor.
- Conecte el equipo a una toma de corriente en un circuito diferente de ese a
lo que el receptor está conectado.
- Consulte con el distribuidor o un técnico experimentado en radio / TV para
obtener ayuda.
PREPARACIÓN
Antes de comenzar el ensamblaje del producto, asegúrese de que todas las piezas estén presentes. Compare las partes
con la lista de contenido del paquete y el contenido del hardware. Si alguna parte falta o está dañada, no intente ensamblar
el producto. Contactar Servicio al Clientepara piezas de repuesto.
INFORMACIÓN DE SEGURIDAD
Lea y comprenda todo este manual antes de intentar ensamblar, operar o instalar el producto.
1. Desconecte siempre la fuente de alimentación antes de instalar, reparar o quitar el espejo LED.
2. El trabajo de instalación debe ser llevado a cabo por una persona calicada de acuerdo con todos los códigos lo-
cales y de seguridad, incluidas las normas para la construcción con clasicación de resistencia al fuego.
3. Siga todos los códigos locales de construcción, seguridad y electricidad, así como NEC (Código Eléctrico Nacional)
y OSHA (Ley de Seguridad y Salud Ocupacional).
4. El suministro del servicio eléctrico debe ser de 120 voltios, 60 hertzios.
5. Esta unidad debe estar correctamente conectada a tierra.
6. No doble ni doble los cables de alimentación.
7. Tenga cuidado de no dañar el cableado existente al cortar o taladrar paredes o techos.
8. Evite colocar objetos losos o duros contra la supercie del espejo. Daños y / o lesiones eléctricas pueden ocurrir si
se perforan.
9. Apague el producto durante tormentas o situaciones de sobrevoltaje ya que las sobretensiones pueden dañar los
componentes internos.
10. Si está instalado con un enchufe de alimentación, nunca jale el enchufe a la fuerza de la pared. Retire suavemente
para evitar tensión innecesaria a los cables.
11. Si no se usa durante largos períodos de tiempo, asegúrese de que la energía esté desconectada.
Cumplimiento con la FCC

8
www.homewerksww.com
PAQUETE Y CONTENIDO DEL HARDWARE
A
B
C
D
E
F
PARTE DESCRIPCIÓN QTY
A Espejo LED 1
B Anclajes de pared 4
C Tornillos Z-bar 3
PARTE DESCRIPCIÓN QTY
D Z-bar 1
E Tornillo de bloqueo inferior 1
F Conectores de cable 3
HERRAMIENTAS RECOMENDADAS (NO INCLUIDAS)
Gafas
protectoras
Cinta
medida
Destornillador
Phillips
Taladro eléctrico
y brocas
Nivel Lápiz Martillo Eléctrico
cinta
DIAGRAMA DE CABLEADO
Las instalaciones pueden variar dependiendo de cómo se instaló el espejo anterior y la presencia de una fuente de alimentación. Los suministros
necesarios para la instalación de su nuevo espejo no están incluidos; sin embargo, la mayoría están disponibles en su tienda local de mejoras para
el hogar o ferretería.
Espejo
Casa
negro
blanco neutral
suelo
vivir
verde verde
blanco
negro

9
www.homewerksww.com
INSTRUCCIONES DE INSTALACIÓN
INSTALACIÓN DE LA Z-BAR PARA COLGAR ESPEJO
1. Coloque la barra en Z (D) en la ubicación deseada en la
pared, usando un nivel para el posicionamiento nal.
Marque la ubicación de los tres agujeros en la barra Z (D)
en la pared. Perfore oricios de 1/4 pulg. En las ubicacio-
nes marcadas e inserte los anclajes de pared incluidos
(B). Asegure la barra en Z (D) a la pared con tres tornillos
incluidos (C).
Vertical mount
D
FIGURE 1
1/2"
22-3/4"
D
C
B
E
INSTALE EL TORNILLO DE BLOQUEO
INFERIOR
2. Usando un nivel, marque desde el centro de la barra
en Z (D) 22-3 / 4 in para la orientación del espejo
vertical (vea la FIGURA 1). Taladre un oricio de 1/4
pulg. En esta ubicación e inserte un anclaje de pared
incluido (B). Coloque el tornillo de bloqueo inferior (E)
en el anclaje (B), dejando 1/2 pulgada expuesta (vea
la FIGURA 1).
CABLEADO DE ESPEJO
3. Ubique los cables blanco (neutro), negro (vivo) y
verde (tierra) que se extienden desde el cable en la
parte posterior del espejo. Con la alimentación
desconectada, conecte los cables en el espejo con los
cables de la casa neutros, en vivo y tierra con conec-
tores de cables (incluidos).
Espejo
Casa
negro
blanco neutral
suelo
vivir
verde verde
blanco
negro
CUELGUE Y ASEGURE EL ESPEJO
4. Cuelgue el espejo en la barra en Z (D), centrándolo y
asegurarse de que esté colgando de forma segura
(consulte la FIGURA 2). El tornillo de bloqueo inferior
(E) se alineará con el soporte del oricio de la llave en
la parte posterior inferior del espejo. Una vez que el
tornillo de bloqueo inferior (E) esté alineado a través
de la ranura del oricio de la llave, mueva el espejo
ligeramente hacia cualquier lado para jarlo en su
lugar (vea la FIGURA 2).
FIGURE 2
D
E
NOTA IMPORTANTE: Siga todos los circuitos eléctricos
locales y código de construcción cuando conecte su
dispositivo y consulte a un electricista.
Montaje vertical
Figura 1

10
www.homewerksww.com
INSTRUCCIONES DE OPERACIÓN
FUNCIONAMIENTO DE LA LUZ LED DIMMABLE
Presione el botón del sensor táctil de encendido y la luz se encenderá en su conguración más brillante. Continúe tocando el
botón del sensor nuevamente y la luz se atenuará al siguiente nivel. Hay tres niveles de brillo ligero y en el cuarto toque la luz
se apagará.
FUNCIONAMIENTO DE LOS ALTAVOCES BLUETOOTH®
Mantenga presionado el botón táctil Bluetooth® durante 4 segundos, un timbre indicará que Bluetooth® está activado y el
botón táctil cambiará de color a blanco.
Para vincular su dispositivo por primera vez, encienda la conexión Bluetooth del dispositivo y busque el espejo, que se
etiquetará HW MIRROR y se conectará a él.
Una vez emparejado, reproduzca música o realice llamadas desde su dispositivo y el audio se reproducirá a través de los
parlantes duales del espejo. Para contestar una llamada entrante cuando las bocinas Bluetooth® están encendidas y sincroni-
zadas, toque el botón con el sensor de icono de Bluetooth® en el espejo y comience a hablar, la llamada pasará por el espejo.
Si solo desea hablar desde su teléfono, responda la llamada entrante en su teléfono.
Los altavoces se pueden silenciar durante la reproducción tocando el botón táctil Bluetooth y se pueden silenciar pulsando
nuevamente el botón.
CUIDADO Y MANTENIMIENTO
Al limpiar su botiquín nuevo, se recomienda un limpiador de vidrio suave no abrasivo. Aplicar a un paño suave o toalla
de papel.
PRECAUCIÓN: No rocíe el limpiador directamente sobre el espejo o el marco.
SOLUCIÓN DE PROBLEMAS
PROBLEMA CAUSA POSIBLE ACCIÓN CORRECTIVA
El dispositivo no se
emparejará
Otro dispositivo ya está sincronizado
Asegúrese de que la señal BLUETOOTH®
esté apagada en otros dispositivos.
ALTAVOZ BLUETOOTH® - GARANTÍA LIMITADA DE 1 AÑO
Si el altavoz BLUETOOTH® falla debido a un defecto en los materiales o la mano de obra en cualquier momento durante el primer año de
propiedad, el fabricante lo reemplazará de forma gratuita, con franqueo pagado a su elección. Esta garantía no cubre productos que han sido
maltratados, alterados, dañados, mal utilizados, cortados o desgastados. Esta garantía no cubre el uso en aplicaciones comerciales. Utilice
únicamente repuestos originales de reparación de garantía suministrados por el fabricante para reparar los parlantes BLUETOOTH®. El uso
de piezas de repuesto no originales anulará la garantía. El fabricante RENUNCIA a todas las demás garantías implícitas o expresas,
incluidas todas las garantías de comerciabilidad y / o idoneidad para un n determinado. Como algunos estados no permiten exclusiones o
limitaciones en una garantía implícita, es posible que las exclusiones y limitaciones anteriores no se apliquen. Esta garantía le otorga
derechos legales especícos, y usted puede tener otros derechos que varían de estado a estado.
Esta garantía está limitada a la sustitución de piezas defectuosas solamente. Se excluyen los costos de mano de obra y / o daños incurridos
durante la instalación, reparación, reemplazo así como los daños incidentales y consecuentes relacionados con lo anterior. Cualquier daño a
este producto
como resultado de negligencia, uso indebido, accidente, instalación incorrecta o uso que no sea el propósito DEBERÁ ANULAR ESTA
GARANTÍA.
Los costos de envío para el producto devuelto como parte de un reclamo sobre la garantía deben ser pagados por el cliente. Las consultas
sobre reclamaciones de garantía pueden dirigirse al 1-877-319-3757, de 8 a.m. a 5 p.m., CST, de lunes a viernes.
/