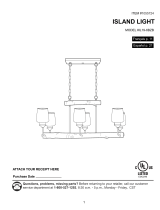
Golden Lighting 2360-6 RBZ, a versatile and stylish chandelier, offers a radiant glow to your living space. With its adjustable height, you can customize its placement to suit your needs. The fixture accommodates six bulbs, allowing you to control the brightness and ambiance of your room. Assembly is straightforward, and the detailed instructions provided guide you through the process. Enjoy the warm and inviting atmosphere created by this elegant chandelier.
Golden Lighting 2360-6 RBZ, a versatile and stylish chandelier, offers a radiant glow to your living space. With its adjustable height, you can customize its placement to suit your needs. The fixture accommodates six bulbs, allowing you to control the brightness and ambiance of your room. Assembly is straightforward, and the detailed instructions provided guide you through the process. Enjoy the warm and inviting atmosphere created by this elegant chandelier.

-
 1
1

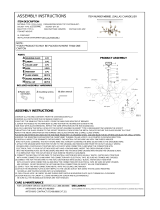
Golden Lighting 2360-6 RBZ Installation guide
- Type
- Installation guide
Golden Lighting 2360-6 RBZ, a versatile and stylish chandelier, offers a radiant glow to your living space. With its adjustable height, you can customize its placement to suit your needs. The fixture accommodates six bulbs, allowing you to control the brightness and ambiance of your room. Assembly is straightforward, and the detailed instructions provided guide you through the process. Enjoy the warm and inviting atmosphere created by this elegant chandelier.
Ask a question and I''ll find the answer in the document
Finding information in a document is now easier with AI
Related papers
-
Golden Lighting 0736MPGMT Installation guide
-
-
-
-
-
-
-
-
-
Other documents
-
Minka Group 4443-582 User manual
-
Minka Group 2332-77 User manual
-
Design House 579441 Installation guide
-
Y Decor L48-AB Installation guide
-
Portfolio CP199MBK Installation guide
-
 Litex IL19-6BZB Installation guide
-
 Yosemite Home Decor 480-4D-ORB Operating instructions
-
 urban ambiance UHP3970 Installation guide
-
 Arteriors 89981 User guide


