Mitel mitel 5000 communication platform User manual
- Category
- Telephones
- Type
- User manual
This manual is also suitable for
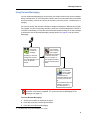
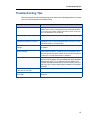
The Mitel 5000 communication platform is a versatile and powerful tool that can enhance your business communications. With voicemail, remote messaging, and personalizable greetings, you can manage your calls efficiently. Easily set up your mailbox, record your directory name and personalized greetings, and access your voicemail from any phone. The call screening feature allows you to take control of incoming calls and the message envelope feature lets you customize how your messages are delivered.
The Mitel 5000 communication platform is a versatile and powerful tool that can enhance your business communications. With voicemail, remote messaging, and personalizable greetings, you can manage your calls efficiently. Easily set up your mailbox, record your directory name and personalized greetings, and access your voicemail from any phone. The call screening feature allows you to take control of incoming calls and the message envelope feature lets you customize how your messages are delivered.


-
 1
1
-
 2
2
-
 3
3
-
 4
4
-
 5
5
-
 6
6
-
 7
7
-
 8
8
-
 9
9
-
 10
10
-
 11
11
-
 12
12
-
 13
13
-
 14
14
-
 15
15
-
 16
16
-
 17
17
-
 18
18
-
 19
19
-
 20
20
-
 21
21
-
 22
22
-
 23
23


Mitel mitel 5000 communication platform User manual
- Category
- Telephones
- Type
- User manual
- This manual is also suitable for
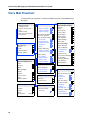
The Mitel 5000 communication platform is a versatile and powerful tool that can enhance your business communications. With voicemail, remote messaging, and personalizable greetings, you can manage your calls efficiently. Easily set up your mailbox, record your directory name and personalized greetings, and access your voicemail from any phone. The call screening feature allows you to take control of incoming calls and the message envelope feature lets you customize how your messages are delivered.
Ask a question and I''ll find the answer in the document
Finding information in a document is now easier with AI
Related papers
Other documents
-
Inter-Tel 8601 User manual
-
-
Net Optics 3300 User manual
-
Netcomm 6510 User manual
-
Lucent Technologies Messaging 2000 Quick Reference Manual
-
-
-
Frontier Enhanced User guide
-
-
 Denwa Communications Mitel 8662 User manual
