Page is loading ...

User Manual
TeraStation iSCSI
TS-RITGL/R5
www.buffalotech.com
v1.4

2
Introduction
Congratulations on your new TeraStation! Your TeraStation iSCSI is a huge block of iSCSI
storage, ready to add to your server or PC via ordinary wired Ethernet connections. This
guide will help you congure it.
There are many ways to congure and use iSCSI storage products like the TeraStation. In
this guide we give one example of conguring a simple iSCSI volume on a single workstation.
Many other congurations are usable.
Because we’re constantly updating our product, the images and text in this manual may vary
slightly from the images and text displayed by your TeraStation. These changes are minor
and should not affect the ease of setup adversely. As time passes, future user interfaces,
updated software, and later versions of this manual may be available for download at our
web site: www.buffalotech.com.
If you run into difculties or need additional help, feel free to contact our technical support.
Contact information for Buffalo Technology and our technical support is available on pages
48 and 49.

3
Table of Contents
TeraStation Layout............................................................4
Installation .......................................................................7
Conguration GUI ..........................................................16
Login ....................................................................... 17
IP Address ...............................................................21
RAID Settings .......................................................... 23
UPS ......................................................................... 28
Alerts .......................................................................30
Troubleshooting ..............................................................40
Replacing a Hard Drive ................................................... 42
Technical Specications ..................................................47
Technical Support ...........................................................48
GPL Information .............................................................50

4
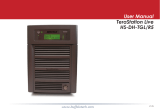
Layout
Power
Switch
Display Mode
Switch
Front Panel lock
(Turn counter-clockwise to release)

5
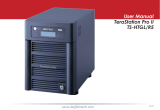
Layout
Hard Drives
(Squeeze tabs to release)
Init Button
(Hold down to reset all settings)

6
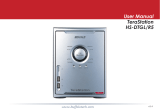
USB in
Layout
Power Cable
Ethernet
(to router)
UPS

7
Insert the TeraNavigator CD into your computer’s CD-ROM drive.
On a PC, setup should automatically launch. If it does not, manually
launch setup.exe by pressing Start and selecting the Run... option.
When the Run dialog opens, type d:\TSnavi.exe (where d is the drive
letter of your CD-ROM drive). Press OK to continue.
Begin by connecting your TeraStation’s power and Ethernet cables. The Ethernet cable should be
connected to an extra NIC on your server or to a router, hub, or switch on your network.
For best performance, all network equipment should be gigabit or better. Use a NIC with enough
RJ-45 ports for all your iSCSI devices, or separate NICs for each iSCSI device. Assign static IP
addresses for each iSCSI device. Bridge the ports for all the NICs in the server (including the LAN
connection). Statically assign the IP address for the LAN to the “Bridged” connection, not on the
actual NIC for the LAN. Provided uninterruptable power supplies for all iSCSI devices, as well
as the server itself. Simpler congurations may work, but this kind of uncompromising setup is
recommended for best performance and reliability.
After all connections are made, turn the TeraStation on by pushing the power button on the front
panel. It will take about a minute to boot.
Installation

8
Press the Begin Installation button to begin.
Easy Setup will step you through physically connecting your
TeraStation. It will then install software.
Advanced Setup skips the connection tutorial and goes
directly to installing software.
Installation

9
If your TeraStation is connected correctly when you get
to this window, it will be highlighted in the drop-down
list. If you have multiple units to set up, select the correct
TeraStation from the list.
Select First Setup for the initial installation.
To install the software on additional computers, chose
Additional Setup.
Installation

10
Once the TeraStation is installed, you’ll need to install
the iSCSI connection tool. Click Next, then continue to
click Next, stepping through the menues until the iSCSI
connection tool is installed.
Click Yes to launch the iSCSI connection tool.
Installation

11
Make sure that your ISCSI TeraStation is selected in the
Target product window. Click Register the iSCSI Hard Disk,
and then OK.
Installation (iSCSI Connection Tool)
If the TeraStation has more than one volume, choose
the volume you want to connect to from the drop
down list. Check Resume connection at start up.
Click Connect. Repeat to add additional volumes if
desired.

12
Installation (Disk Management)
If Disk Management does not open automatically, you may launch
it manually. From the Setup menu at the top of the window,
choose Launch Disk Management.
Each connected volume from your ISCSI TeraStation now
appears as a hard drive in Disk Management.

13
Installation
The Initialize and Convert Disk Wizard will
open. Use it to convert your new volumes
to dynamic volumes. Put a checkmark next
to each of your disks and click Next to step
through the menu.
Right-click on the volume in Disk Management
and click New Volume to start the New Volume
Wizard. Click Next.

14
Choose your desired volume type. Use Simple if
you have only one volume to mount. Spanned and
Striped volumes require multiple disk volumes to
create. Click Next when ready.
Add all dynamic disks that will be included in the
volume to the Selected column by highlighting them
and then clicking the Add button.
Installation

15
Installation
Choose your desired drive letter. Click Next.
Choose your desired format and volume label. Click Next.
Your new volume is installed and ready to use!

16
The Conguration GUI is where most of the
TeraStation’s settings can be changed.
To access it, type the IP address of your TeraStation
into the URL bar of a browser running on a
computer connected to the same network as the
TeraStation.
Conguration GUI

17
The login prompt will appear. Enter admin for the user name. Until you change it, the password
for the admin account will be password. Press the OK button when nished.
User name: admin
Password: password
Advanced Settings

18
Welcome to the conguration GUI for the TeraStation!
You are now at Home. Notice that the Home button is lit up in yellow. You can navigate this menu
by clicking on the buttons at the left of the screen. Here at “Home”, you can see basic information
about your TeraStation’s current conguration. You may close this screen by clicking Logout at the
bottom left, or just by closing the browser window. If you have lost your TeraStation, clicking I’m
here! at the bottom left will cause it to beep, making it easier to nd.
Note that many settings cannot be changed while the iSCSI service is running. Click the button
in the top left corner of the page to disable the iSCSI service if settings need to be changed.
Conguration GUI

19
You may modify your TeraStation’s hostname
and description under Hostname Setup.
A friendly, easy-to-remember name (e.g.
“TeraStation”) is recommended.
Make sure that the date and time are correct
in Date and Time Setup. To synchronize time
settings with those in your computer, press
Use Local Time. To have your system time
automatically set by an NTP server, enable NTP
Server and enter an IP Address for the NTP
server (e.g. 192.43.244.18) or use the supplied
default NTP server.
Ensure that both the Display Language and the
Windows Client Language are set to languages
that you’re comfortable with.
Once desired elds have been completed, press
the Apply button.
Basic
Conguration GUI

20
By default, the admin password is “password”.
Change it to something more secure here.
Admin Password
Conguration GUI
/