Page is loading ...

1 1www.mastercool.com
OPERATING INSTRUCTIONS
COMBUSTIBLE GAS LEAK DETECTOR
III
MODEL#–55975
BEDIENUNGSANLEITUNG
MODELL#–55975
MANUEL D’OPÉRATION
MODÈLE#–55975
INSTRUCCIONES DE OPERACION
MODELO#–55975
ISTRUZIONI PER L’USO
MODEL#–55975
INSTRUCTIES
MODEL#–55975
MANUAL DE OPERAÇÃO
MODELO#–55975
Deutsch
Français
Español
Italiano
Nederlands
English
Portuguese

2 3www.mastercool.com
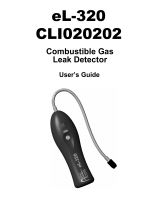
You have purchased an intelligent combustible gas leak detector model 55975. At the heart of
this leak detector is a new low power metal oxide gas sensor with superior performance prop-
erties such as lower current consumption and sensor longevity. The new sensor is characterized
by high sensitivity and a fast response in detecting the presence of extremely small levels of
chlorofluorocarbon gases. For this reason, this sensor was selected and integrated into the
55975 Leak Detector.
A powerful microprocessor automatically selects the best operating condition for the sensor to
ensure optimum performance throughout the life of the product. Upon turn on, the unit momen-
tarily displays the option(s) that were in use when the unit was turned off. This information is
displayed by one or more of the six (6) LEDS. Following this, the sensor is prepared for readiness
in a warm up sequence that lasts a minute or less. The warm up sequence is displayed by six
green vertical LEDs that are extinguished sequentially down until only one green (READY) LED is
lighted. This indicates the end of the warm-up sequence is reached and the unit is ready for use.
The color of the LED indicators indicate the sensitivity range that is selected by the user; green is
for the least sensitive level, yellow for medium sensitivity level and red is for the most sensitive
level. The default sensitivity level of the unit is GREEN upon initial turn-on.
Additional features are detailed and discussed in more detail in this manual.
WARNING This symbol is intended to alert the user of the presence of important
operating and maintenance or servicing instructions in the literature accompanying this
product.
SPECIFICATIONS
Sensing Element: Tin Oxide Element
Sensor Life: 2000 hours
Ultimate Sensitivity: 50 - 1000 ppm
Detects: Combustible gases (Acetone, Acetylene, Ammonia, Benzene,
Butane, Butanol, Chlorine, Ethane, Ethanol, Gasoline, Hexane,
Hydrogen, Hydrogen Sulfide, Isobutane, Methane (natural gas),
Methanol, Methyl Acetate, Methyl Chloride, Methyl Ether, Naptha,
N-Butane, Pentane, Propane, Propanol, Sulfer Dioxide and
Trichloroethane)
Response Time: Less than 1 second
Battery: 2 C Alkaline 6000 mAh batteries
Battery Life: 30 Hours
Operating Temperature Range: 0˚F to 120˚F
Weight : 1.08 Lbs
“Super Sensitive Function” allows the unit further sensitizing beyond the standard settings for
locating small leaks
Probe Properties
• Intelligent tip, with environment sensing
• Flexible 15.5 inch probe length
Display Properties
• Status Indicators: Three (3) vertical LED indicators display the condition
and state of the unit immediately after the unit is turned ON. Status
display duration is approximately 3 seconds.
• LED #6: Identifies a LOW BATTERY condition
• LED #5: Identifies HIGH RANGE (HR) setting is enabled
• LED #4: Identifies LOW RANGE (LR) setting is enabled
• Warm-Up Status: Initially, all (6) vertical LED indicators are ON during the
warm-up stage and gradually sequence down to one GREEN LED. The
warm-up sequence takes less than 1 minute.
LED Indicators
SENSITIVITY:
L M H
H R
L R
INT/WT
C A
READY
LOW
HIGH
6
5
4
3
2
1
DEFINITION OF DISPLAY LEGENDS
• BATTERY SYMBOL: The battery symbol LED #6 is illuminated when the battery reaches a
near end of life condition
• HR: The High Range (HR) should be selected for the detection of hard to
detect gases
• LR: The Low Range (LR) should be selected for the detection of easy to
detect gases
• INT/WT: Conditions such as excessive air turbulence, or the accidental touching
of the probe or by blowing one’s breath at the probe, trigger the
interference (INT/WT) detector
• CA: The Contaminated Atmosphere (CA) LED will turn on when the
presence of contamination is detected for a period of time.
• READY: Indicates that the unit is ready for use.
KEYPAD FUNCTIONS
• ON/OFF: Turns the unit ON and OFF in a push on and push-off sequence.
• PEAK/HR/LR: The PEAK/HR/LR key serves a dual purpose:
(1) To assist the user in locating the “largest leak” in a system with
multiple leaks present.
(2) To enable the user to switch between HR (high range) and LR (low
range) modes.
Keypad
VOLUME
MUTE
H M L
PEAK
HR/LR
• VOLUME/MUTE: The VOLUME/MUTE key sequentially selects the audible “beep”
level for the unit. The choices are: normal, low or mute. All alarms are heard at the maximum
level, even in mute.
• HML (HIGH/MEDIUM/LOW SENSITIVITY): The HML key selects the sensitivity range of the unit.
The color of the LED and the tone of the “beep” change for each sensitivity selected.
English

2 3www.mastercool.com
(High=Red, Medium=Orange, Low=Green)
BATTERY PRESERVATION FEATURE
An automatic timer shuts off the unit after 3 minutes of inactivity. The timer is reset whenever the
unit alarms or when any key is depressed.
DISPLAYING THE STATUS SETTINGS
• Depress the ON/OFF key, upon initial turn-on, the unit will momentarily display the status
conditions of the unit. This information will be displayed for approximately 3 seconds. One or
more LED’s will be ON during this brief time to display the following information:
1. If LED #6 is ON, the battery is reaching end-of life and should be replaced before the unit’s
operation is affected.
2. If LED #5 is ON, the unit is in the High Range setting which enables the
unit to detect gases that are difficult to detect.
3. If LED #4 is ON, the unit is in the Low Range setting which enables the
unit to detect easy to detect gases.
DISPLAYING THE WARM-UP STATUS
• All six (6) LEDS turn ON and sequentially become extinguished until only one GREEN LED
remains. At this point, the audible “beep” begins (unless the unit is muted), which is an
indication that the unit is ready for use. This process takes less than 1 minute.
• The unit always defaults to LOW sensitivity upon initial turn-on, as indicated by the GREEN LED.
CHANGING THE AUDIBLE LEVEL
• The Volume/Mute key enables the user to change the audible “beep” level in a sequential
manner. Successive depression alters the audible level from Normal, Low and Mute. Upon
each depression, the unit visually displays (for less than 1 second) the selected audible level
as follows:
1. In Normal, six LED’s are flashed briefly and the “beep” resumes at the maximum
audible level
2. In Low, three LED’s are flashed briefly and the “beep” resumes at a lower audible level
3. In Mute, only the READY LED stays ON and the audible is muted.
4. The selected audible level will remain stored in the unit unless changed.
CHANGING THE SENSITIVITY
• Depressing the HML key alters the sensitivity of the unit sequentially in the following manner:
1. When in High Sensitivity, the LED #1 (READY) changes to RED
2. When in Medium Sensitivity, LED #1 changes to YELLOW
3. When in Low Sensitivity, LED #1 changes to GREEN
4. During the detection of a leak, all the LED’S follow the color of the READY light.
CHANGING THE OPERATING RANGE FROM HR TO LR
• After the unit has warmed up and the READY indicator is ON, press and hold down the PEAK/
HR/LR key all LED’s are off. Release the key. The unit will perform a new warm-up sequence
with the new operating range.
REDUCING FALSE LEAK DETECTION
Under Adverse Conditions
To discriminate between false alarms and actual leak detection that may occur in the presence of
excessive air turbulence or accidental touching of the probe tip, the interference detector creates
a momentary interruption in the leak detector for several seconds, resulting in the following:
• When interference is detected, the audible beep stops and the INT/WT light LED #3 and the
READY LED #1 begin to flash briefly. When the unit is ready to resume operation, LED #3
extinguishes, the READY LED #1 turns ON and the audible resumes
In a Contaminated Environment
When a contaminated area is detected by the unit lasting for a duration of time during a leak
search, the sensor detects the change and will respond in the following manner:
• The READY indicator LED #1 will extinguish, the audible will stop (unless muted) and the INT/
WT indicator LED #3 will turn ON.
• The unit performs a re-calibration for the contaminated environment. When done, the CA
indicator LED #2 turns ON, the READY indicator LED #1 turns ON and the audible returns,
indicating that the unit is ready for use to detect leaks in a contaminated environment.
QUICK START TIPS ON HOW TO FIND LEAKS
A sudden whipping action of the probe or blowing into the sensor may cause the leak detector
to false alarm. Electronic sensors are incorporated into the product to detect such activity and
to reduce and minimize such false alarm. In the event such interference is detected, the LED #3
will begin to flash indicating interference then normal operation can resume after the READY LED
appears.
1. When starting the search for leaks, without a general knowledge of the magnitude of the leak,
set the instrument sensitivity to LOW. The LOW sensitivity will enable the unit to locate
medium as well as large size leaks.
2. Slowly move the probe approximately 3/8 inch (9 mm) above the area of suspected leaks.
Move the probe past the leak to allow the probe to clear if a leak is detected. Do not hold the
probe at the site of a leak. For verification, return the probe to the same area where a leak was
detected.
3. In the event no leaks were found with a LOW sensitivity setting, increase the sensitivity to
MEDIUM and repeat step (2) above.
4. For locating extremely small leaks; 0.1 oz/yr (2.8 grams) or less, the HIGH sensitivity scale
should be used. Due to the extremely small leak size, the tip of the probe should be moved as
close to the surface as possible (without physically touching any object). Physical touching
of an object will be detected by the probe sensors resulting in a brief interruption in the leak
detector. When probing for a leak in an contaminated environment, the sensor will detect the
contaminated area and will automatically adjust for the new conditions.
MAINTENANCE
To Install or Replace the Alkaline Batteries

4 5www.mastercool.com
Remove the battery cover as shown in Figure 1 and remove the existing batteries. It may be
beneficial to turn the unit vertically and shake out both batteries. Install two C size alkaline
batteries with the polarities shown in Figure 1. Re-install the battery cover and secure with the
cover screw.
- +
Cover
Screw for
removing
or securing
the battery
cover
Figure 1
Replacing the Sensor
To replace the sensor, firmly grasp the flexible probe near the end with one hand and use the
other hand to unscrew the nozzle portion from the threaded probe tip in a counter-clockwise di-
rection. Next, remove the metal washer, the rubber washer and the sensor in that order. Observe
the orientation of the key on the sensor being removed. It would be advisable to replace the
filter inside the nozzle at the same time. To remove the microfiltration membrane from inside the
nozzle, the assistance of a long thin object such as an o-ring pick or equivalent will be required.
Probe
Key Sensor
Rubber
Washer
Metal
Washer Filter Nozzle
Figure 2
When installing a new sensor, orient the tab key on the sensor with the keys slot on the probe,
making certain that the 3 pins of the sensor are inserted into the appropriate pins inside the
probe end. Verify that the sensor has been properly inserted into the probe. Next install the
rubber washer as shown in Figure 2, followed by the metal washer. Insert new filter and screw
on the nozzle while firmly holding the probe end with the other hand. DO NOT USE ANY TOOLS in
tightening the tip assembly, firmly hand tighten only.
LEAK TEST VIAL
A Leak Test Vial is supplied with your leak detector to verify that the
leak detector is operating correctly.
1. Turn the leak detector ON and wait until the unit completes its
warm-up sequence. The READY LED will be displayed and the
audible “beep” will begin, unless muted. Set the sensitivity level
to MEDIUM.
2. Remove the vinyl cap from the vial to expose the small leak hole as
shown in Figure 3A below. DO NOT UNTWIST THE BLACK CAP
Figure 3A
Figure 3B
FROM THE BOTTLE.
3. Briefly place the probe tip close to the small hole, as shown in Figure 3B until an audible
alarm is generated. This will be an indication that the unit is operating properly. Reseal the
vial with the previously removed vinyl cap and return to the case.
PRECAUTION!
If the test vial is held in close proximity of the probe tip for an extended period of time, the
probe sensor can saturate. The leak detector will interpret this as a contaminated atmosphere
associated with a large leak.
This precaution also applies when locating leaks. Refer to Quick Start Tips On How To Find
Leaks, step #2 for further clarification.
If the above precaution is not followed, the CA (contaminated atmosphere) LED may appear on
the display, after a self-calibration process. The unit can be used to detect leaks provided the
READY LED appears on the display. The CA LED indication will eventually disappear when the unit
returns to a non-contaminated environment and undergoes a self-calibration process.
REPLACEMENT PARTS
Replacement parts and accessories for the 55975 Leak Detector are available through the same
dealer from whom you purchased the instrument.
REF. # DESCRIPTION MC PART #
1. Blow Molded Plastic Box 55800-PB
2. Leak Test Vial 55800-VL
3. Battery Cover 55900-BATCOV
4. Sensor 55800-SEN
5. 2 “C” Batteries BATTERY “C”
6. Sensor Protector 55100-10042
7. Replacement Filters (3) 55800-FILTER
1
7
2
3
4
5
6
WARNING: This product can expose you to chemicals including lead and Di (2-ethylhexyl)
phthalate, which are known to the State of California to cause cancer and birth defects or other
reproductive harm. For more information go to www.P65Warnings.ca.gov
/