Page is loading ...

eL
-320
CLI020202
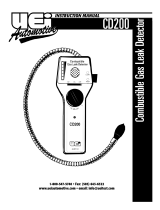
Combustible Gas
Leak Detector
User’s Guide

eL-320 User’s Guide
2
Congratulations on the purchase of the AccuTools™ eL-320
Combustible Gas Leak Detector, the most technologically
advanced of its kind. The eL-320’s low power requirements,
small size and high sensitivity combine to create a tool which is
easy to handle and ultra effective at locating even the most
difficult-to-find leaks.
The eL-320’s long life sensor will detect concentrations of
combustible gases as low as 5 ppm. It is sensitive to all
combustible gases.
The eL-320 also features a low sensitivity mode, enabling quick
and easy location of large combustible gas leaks.
TECHNICAL DATA
Dimensions 7.25” x 2.25” x 1.5” (19 cm x 5.7 cm x 3.8 cm)
Weight 7 oz. (190 grams)
Batteries 2 x 1.5V 'AA' Alkaline Batteries (3 VDC)
Battery Life 11 hours
Sensitivity
Less than 50 ppm (Propane, Iso-Butane,
Methane)
Sensor lifetime > 1 year normal use
Operating temperature 32 – 122°F (0 – 50°C)
Warm up time 25 seconds to 1.5 minutes
Calibration Auto
Response time 5 seconds
Reset time
5 seconds or more depending on gas
concentration
Probe length 12” (30 cm)
Gases Detected
Propane, Methane, Natural Gas, Iso-Butane, Acetone, Hexane, Acetylene,
Benzene, Butane, Ethanol, Ethylene Oxide, Gasoline, Hy
drogen, Industrial
Solvents, Methanol, Paint Thinners, Naptha etc.

eL-320 User’s Guide
3
INSTRUCTIONS
1. Move the eL-320 to a fresh-air environment. Press the
button to turn the unit on.
2. The LED will flash rapidly for a period of time (see WARM-
UP TIME, below) to indicate warm-up and auto-calibration,
afterwards the unit will begin beeping and flashing green.
3. Unit turns on in the high sensitivity level, which is preferred
for most small leaks. To operate the unit in the low
sensitivity level, press the button twice (double-click like a
computer mouse). The LED will fade from green to red and
a sweeping sound effect of high to low pitch will be heard.
This low sensitivity mode is useful for pinpointing very large
gas leaks.
4. Double click again to change back to high sensitivity.
5. Move the probe towards a suspected gas leak at a rate of
less than 1 inches (25 mm) per second, no more than ¼
inch (5 mm) away from the suspected source.
6. If a leak exists, the sound will increase in rate and pitch and
the LED will start flashing rapidly.
7. Alarms caused by very large leaks may take a long time to
clear. If this is the case, switch to the low sensitivity mode
as detailed in (3) above.
8. To turn the eL-320 off, press and hold the button for 3
seconds.

eL-320 User’s Guide
4
WARM-UP TIME
The warm-up time for the eL-320 will range between 25 seconds
and 1.5 minutes. Each sensor has different warm-up
characteristics that change with use over the life of the sensor.
The eL-320 has built-in intelligence that recognizes sensor
differences and adjusts the warm-up time automatically for
maximum sensitivity and stability.
MISSING/DAMAGED SENSOR ALARM
If the sensor is damaged, a sweeping alarm and a red-green
flash will indicate the problem.
BATTERY INDICATOR/LOW BATTERY
SHUTDOWN
A flashing LED during normal operation also reflects the battery
level:
• Green: Batteries are fresh.
• Orange: Batteries are low and should be changed.
• If the batteries are nearly empty, the LED will turn solid red
and a two-tone alarm will be noted for 5 seconds, before eL-
320 will power itself off.
• If the unit is left on unattended, it will automatically turn off
after about 5 minutes to conserve batteries.

eL-320 User’s Guide
5
RECALIBRATION
When the eL-320 is turned on, the unit automatically calibrates
the sensor for maximum sensitivity. Occasionally, the signal
from the sensor may drift (especially if moving from one location
to another where the ambient humidity changes), causing a
continuous alarm that will not clear. In this case, simply power
the unit off and on again, or use the following recalibration
procedure:
To recalibrate the unit:
1. Move the unit away from any suspected leaks and into fresh
air.
2. Quickly press the button four (4) times. This must be done
within one second.
3. The LED will flash rapidly for about 10 seconds, indicating
recalibration.
4. The unit will return to normal operation in the high sensitivity
mode.
BATTERY INSTALLATION AND REPLACEMENT
1. Turn the power off.
2. Remove the battery cover from the back of the instrument by
loosening the battery cover screw and lifting the battery
cover off.
3. Insert 2 size ‘AA’ alkaline batteries, observing proper battery
polarity.
4. Replace battery cover and tighten battery cover screw.

eL-320 User’s Guide
6
SENSOR
A eL-320 sensor should last many hundreds of hours of
continuous operation. A failed or failing sensor will be indicated
by a continuous “siren” sound. In addition, it is recommended
that the sensor be replaced yearly for optimum performance.
SENSOR REPLACEMENT
In either case, occasional replacement of the sensor is
necessary:
1. Turn the power off.
2. Remove the sensor cap by pulling it from the end of the
probe.
3. Pull the old sensor from the socket.
4. Install the new sensor. Note that the sensor package has a
tab that needs to be aligned with a slot on the sensor socket.
5. Install the sensor cap by pushing it fully over the sensor.
Replacement sensor
Part Number ELS-3
MAINTENANCE
The EL-320 should provide years of service with little
maintenance aside from changing batteries and sensors. The
case may be cleaned with a shop towel moistened with water
and a mild detergent. Do not use solvent of any kind.
/