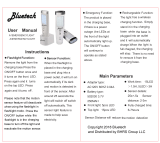
Page is loading ...

I> Structure

1.2 Remote Control Key
Note:
The remote controller is 1 to 1 match the camera, if you buy more than
1 piece of the camera, the remote controllers maybe mixed. If this
happens, you have to match them a pair first to use the remote
controller, the way is: after start the camera, short press the power
button together while press the photo key on remote controller. You
only need to do this when the first time you use them.
II> The Sign on LCD Screen
Remote indicator
Audio button
Photo button
Video button

III> Operations
Getting Started:
Press and hold the Power button (located on the bottom of the right side of
the device ) for about 3 seconds, the unit will vibrate with sound and a green
indicator on top of the unit will turn on. The camera and LCD display will turn
on and enter into standby mode. The video preview mode is displayed on the
LCD.
Tip: The LCD screen will be off automatically in about 3minutes if there is no
operation on the device.

Video Recording:
A. To record a video, press the Video Recording button located on the top of
the left side of the device. The unit will vibrate once briefly. The red dot
symbol on the LCD display will indicate the camera is currently recording.
B. To mark the video, short press OK button in video recording mode, the
lock icon will be shown on LCD.
C. To record videos at night or in the dark, press Up/Night Vision button
once. Videos recorded in night-vision will be black and white.
D. Press the Video Recording button again to stop recording. The camera
will vibrate once and the red dot symbol will disappear. The camera will stop
recording and save the video.
Taking Photos:
A. To take a photo, press the Camera button located on the top of the right
side of the device.
B. To take photos at night or in the dark, press Up/Night Vision button once.
Photos taken in night-vision will be black and white.
Audio Only Recording:

To record only audio, press the Audio Recording button located below the
Video Recording button. The unit will vibrate once briefly and a microphone
icon will appear on the LCD display. Press the Audio Recording button again
to stop recording. The audio recording will be saved as an audio file.
LED Indicators:
Charging:
1. You can charge the camera using the included USB cable and wall
charger via any power outlet.
2. You can also charge the camera by plugging the camera into your
computer via the USB cable.
Video:
Blinking Red = recording
Audio:
Blinking Yellow = recording
Photo:
Blinking Red once = taking
Power:
Green = on/standby mode
Battery:
Red = charging

Video , Photo, and Audio Playback:
A. Press the Playback/OK Function button to enter into the Playback Menu.
B. Use the Up/Down button to select the desired icon, and then press the OK
button to display all saved recording files of that type.
C. Select the file to view by using the Up/Down buttons. Press the OK button
button on the desired file to view in full screen.
D. To return to the Playback Menu, press the OK button.
E. To return to the preview display, press the Power button.
Tip: While viewing video, press the Up button to rewind and the Down button
to fast forward, both at 2X to 64X speed.
Menu Settings:
To enter into the menu from video preview mode, long press the Audio

button.
There are 3 sub-menus: Video Setup, Camera Setup, and System Settings.
Short press the Audio button to move from one tap to the next. And then
press the Menu button to enter into the sub-menu. Press the Audio button
when it is at the System Settings, it will return to the video preview mode.
Video resolution:
A. In the Video Setup Menu, select the option that displays the current
resolution and press the OK button.
B. There are seven resolution options to select from:
a.2560×1080 30fps 21:9
b.2304×1296 30fps 16:9
c.1920×1080 30fps 16:9
d.1920×1080 45fps 16:9
e.1280×720 60fps 16:9
f.1280×720 30fps 16:9
g.848×480 30fps 16:9
C. Select the resolution you prefer and press the OK button.
D. Press the OK button again to return to the previous menu.

Video Quality:
A. In the Video Setup Menu, select “Quality” and press the OK button.
B. There are three options to select from:
a.S.Fine
b.Fine
c.Normal
C. Select the option you prefer and press the OK button.
Tip: This refers to the video bit rate. The higher the setting, the better the
video quality and the larger the video size. To achieve the most battery life,
please set to Normal.
Pre-recording:
A. In the Video Setup Menu, select “Pre-record” and press the OK button.
B. There are two options to select from:
a.On = camera will re-record up to 1min(length
depends on the video resolution)
b.Off = pre-recording will be disabled

C. Select the option you prefer and press the OK button.
Tip: When Pre-recording is on, press the Video Recording button to enable
pre-recording, press Video Recording button again to start normal recording.
Delay-recording:
A. In the Video Setup menu, select “Delay-Record” and press the OK button.
B. There are two options to select from:
a.On = camera will continue recording up to 10sec
after stopping recording(time depends on the video
resolution)
b.Off = delay-recording will be disabled
C. Select the “Delay-Record” option you prefer and press the OK button.
Stamp:
A. In the Video Setup menu, select “Stamp” and press the OK button.
B. There are two options to select from:
a.On = camera will record videos with date, time, ID

numbers watermark on.
b.Off = stamp will be disabled
Motion Detection:
A. In the Video Setup Menu, select “Motion Detection” and press the Menu
button.
B. There are two options to select from:
a.On = device will automatically begin recording
when it senses motion.
b.Off = motion detection will be disabled.
C. Select the Motion Detection option you prefer and press the Menu button.
Photo Resolution:
A. In the Camera Setup Menu, select the option that shows the current
resolution and press the OK button.
B. There are seven options to select from:
a.4M( 2688×1512 16:9 )
b.16M( 5376×3024 16:9 )
c.18.5M( 4976×3732 4:3 )

d.20M( 5120×3840 4:3 )
e.23M( 6400×3600 16:9 )
f.30M( 6400×4800 4:3 )
g.32M( 7552×4248 16:9 )
Camera Quality:
A. In the Camera Setup Menu, select “Quality” and press the OK button.
B. There are three options to select from:
a.S.Fine
b.Fine
c.Normal
C. Select the Camera Quality you prefer and press the OK button.
Multi Capture:
A. In the Camera Setup Menu, select “Multi Capture” and press the OK
button.
B. There are four options to select from.
a.Multi Capture 1
b.Multi Capture 5

c.Multi Capture 10
d.Multi Capture 20
C. Select the Multi Capture setting you prefer and press the OK button.
Stamp:
A. In the Photo Setup menu, select “Stamp” and press the OK button.
B. There are two options to select from:
a.On = camera will take photos with date, time, ID
numbers watermark on.
b.Off = stamp will be disabled
Language Setting:
A. In the System Setting Menu, select “Language Setting” and press OK
button.
B. There are four options to select from:
a.English
b.简体中文
c.繁体中文
d.Русский

C. Select the language option you prefer and press the OK button.
Card Volume:
A. In the System Setting Menu, select “Language Setting” and press OK
button. Camera will show the SD card status. For example as below:
Card Volume
Total: 61471MB
Used: 1302MB
Reserved: 60169MB
B. Press OK button or Audio Recording button to return to System Setting
Menu.
Record Mode Setting:
A. In the System Setting Menu, select “Record Mode Setting” and press OK
button.
B. There are two options to select from:
a.Auto Record(camera will start recording
automatically the moment camera is turned on )
b.Manual Record
C. Select the Record Mode Setting option you prefer and press the OK

button.
Loop Video:
A. In the System Setting Menu, select “Loop Video” and press OK button.
B. There are two options to select from:
a.on = once the memory is full the device will
begin overwriting the oldest files
b.off
C. Select the Loop Video option you prefer and press the OK button.
Date and Time:
A. In the System Setting Menu, select the current date and time and press
OK button.
B. Press OK button to select the Year/Month/Date/Hour/Minute options.
C. Press Up/Down button to set the time.
D. Press OK button to get to next item and back to previous menu.
Display Setting:

A. In the System Setting Menu, select the “Display Setting” and press OK
button.
B. Press OK button to select the LCD Brightness.
C. There is a brightness selecting slide(slide from 0 to 15), press Up/Down
button to set the LCD Brightness you prefer.
D. Press OK button to get back to previous menu, press Audio Recording
button to return to System Menu Setting.
Auto Power Off:
A. In the System Setting Menu, select the “Auto Power Off” and press OK
button.
B. There are three options to choose from:
a.Off = device only powers off manually
b.3min
c.5min
C. Select the Auto Power Off option you prefer and press the OK button.
Power saver-setting:

A. In the System Setting Menu, select the “Power saver” and press OK
button.
B. There are two options to choose from:
a.Off
B.on( camera will enter low power consumption
mode, but when turn on camera again, camera will
delay 1-2seconds to be power on.)
C. Select the Power saving-set option you prefer and press the OK button.
Police ID Setting:
A. In the System Setting Menu, select the “Police ID Setting” and press OK
button.
B. There is a keyboard for you to choose numbers and letters:

C. Select the Police ID number you prefer and press the OK button to move
to next number.
D. Press the Audio Recording button to return to System Setting Menu.
Version Info:
A. In the System Setting Menu, select “Version Info” and press OK button.
Camera will show the camera firmware version edition. For example as
below:
Version Info
Z07.20151216.01
B. Press OK button or Audio Recording button to return to System Setting
Menu.

Low power display:
when the battery voltage is too low, the battery icon in the upper right corner
of the screen will turn red and flashing make voice like “di"...... Tone, in 5
minutes the camera will automatic shutdown. In low power state, please
charge, so as not to affect your use.
Laser light, white light and alarm flashlight introduction
In boot status, press “Power/Laser key” to turn on/off laser light, device emits
red laser beam for positioning the imaging direction.
In boot status, press “DOWN/white light” to turn on white light, device emits
white light which can be used as torch light.
When the white light is on, press “DOWN/white light” again to turn on the
alarm flashlight, and again turn off them all.
Connect to a computer
The software is divided into the following two versions of the product:
1. USB flash drive version of the software: connected to computer directly,
without having to install any drivers, direct use the USB cable to connect with
the computer;

2. Police version of the software: need to install drivers, the use instruction
of driver installation and background management os operation, please refer
to the CD-ROM software instructions.
IV> Specification
specification
Sensor
5MP CMOS
Chip
Ambarella A7LA50
Photo resolution
32 M(7552×4248 16
:
9)(30M/23M/20M/18.5M16M/4M)
Video Resolution
Multiple video resolution:
2304*1296 30fps 2305*1296 15fps 1920*1080 30fps
1920×1080 30fps/ 1280×720 60fps/ 1280×720 30fps /
848×480 60fps at 16:9
Video Format
H.264 .AVI/ MPEG4(.mp4)
Photo Format
JPEG
Fast Forward
2X
,
4X
,
8X,16X
,
32X
,
64X
Rewind
2X
,
4X
,
8X,16X
,
32X
,
64X
Audio
High quality dual microphone

Audio Format
AAC2./MP3
Mark
Camera ID, User ID ,Time, Date could printed directly
on the video
Snapshots
Able to capture during recording
Recording time
Continuous recording time:
9-12hours (battery full grid, without infrared,
resolution ratio 1296P-480p);
Storage
16GB or 32GB option in a camera
Storage class
Visual indicator
Video light
Red
One-touch
recording
Support
Activate Tips
Start and stop recording with hearing, visual with
tactile vibrating alert
Pre-record function
≥10 seconds pre-record
Extension record
≥10 seconds extend
Video Quality
HD, Good, General
Video section
5 minutes / 10 minutes / 15 minutes / 30 minutes / 45
minutes
Burst
1/5/10/20 shooting pictures
Red infrared switch
Auto / hand Control
/