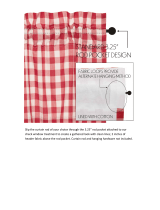
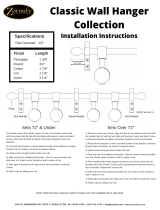
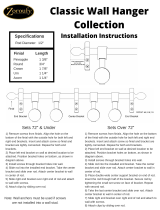
Installation Instruction for Custom Cut Rod Set
STEP 1: ROD ASSEMBLY (Omit this step if rod is 8 feet or less)
1. Gather the two rod pieces and the splice unit.
2. Slightly pry the u shaped splice unit out into a wider shape by hand until the splice is flared out to a
degree larger than the diameter of the rod.
3. Compress the splice while sliding it into one of the ends of a rod segment.
4. Compress the splice again and slide the other rod piece over it until the two halves are flush together.
5. Ensure that a bracket is mounted at the point where the two rods are spliced.
STEP 2: MOUNTING THE BRACKETS
1. Place brackets against wall above window in desired location. Spot the bracket holes on the wall using a
pencil. Ensure that the brackets are leveled and even.
2. For wood installations, drill the holes directly using a bit smaller than the supplied screws. For drywall,
use a drill bit slightly larger than the blue anchors. If using anchors, next push them in and lightly
hammer them fully into the holes till they are flush against the wall.
3. Mount the brackets next by screwing them into the drilled holes with the supplied screws.
STEP 3: ATTCHING FINIAL ADAPTERS
Slide the finial adapters into the adjacent ands of the rod using a twisting motion, Push each insert into the end
of the pole with the fins of the insert going into the pole (they will be tight). If needed, lightly tap the finals into
place using a hammer or the ground, they should sit flush with the end of the rod.
STEP 4: HANGING THE DRAPES
1. Loosen the front tension screw on the installed end bracket and drop one end into the u- pocket.
2. Depending on method of attachment, either slide the rings onto the rod, or begin to slide the curtain onto
the rod through it’s pockets. Once all the rings or pockets are on, loosen the other end brackets’ front
tension screw and drop the rod in. Tighten both tension screws.
STEP 5: ATTACH THE FINIALS
Screw the base of the finials into the center hole of the adapters until flush with the base of the rod. The end of
the finial should fit snugly and slightly extend over the edge of the rod for a tight seal.
For Technical Support Call: 866-326-1989