Page is loading ...

General:
Review and become familiar with all Walkercell components. Be careful of sharp edges or burrs when
handling any sheet metal parts. All interior surfaces that can be touched by a wire shall be smooth.
Compare and coordinate the architectural and electrical drawings with the Wiremold installation drawings.
Contact your local Wiremold field sales representative immediately if any dimensions or details are incorrect.
Install Walkercell and related components in accordance with Article 356 of the latest issue of the National
Electrical Code. Keep material and cartons dry. Advise all trades that Walkercell is not to be used as a walkway
or crosswalk.
Provide a vapor barrier when duct is installed directly on grade. This barrier prevents ground moisture from
reaching the underside of the concrete slab through capillary action.
Laying Out the System:
Refer to the installation drawings to locate the position of the Headerducts and Junction Boxes. Strike a base line
to correspond with the center of all runs.
Use either bench marks on walls or columns or a laser type system to level the system.
The complete header systems (including risers) should be installed before installation of the Walkercell is begun.
Installing the Headerduct:
The Headerduct is furnished with a coupling strap that creates a male/female relationship. At the electrical or
communications room the Headerduct will have the male end exiting the room. Position the next piece of Headerduct
by sliding the female end of the piece to be positioned onto the male end of the Headerduct exiting the room. Using
the adjusting feet, secure the Headerduct to the form with nails, screws, or other suitable fasteners. Adjust to level.
Secure the coupling support across the top of the Headerduct with the screws provided.
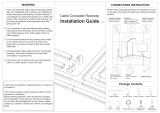
IMPORTANT - PLEASE READ ALL INSTRUCTIONS BEFORE BEGINNING.
SAVE THESE INSTRUCTIONS FOR REFERENCE AND ADDITIONAL WORK REQUIRED
AFTER CONCRETE POUR.
Walkercell
®
Systems
I N S T A L L A T I O N I N S T R U C T I O N S
Installation Instruction No.: PDD-880R1 – Updated March 2010
Wiremold electrical systems conform to and should be properly
grounded in compliance with requirements of the current National
Electrical Code or codes administered by local authorities.
All electrical products may present a possible shock or fire
hazard if improperly installed or used. Wiremold electrical products
may bear the mark as UL Listed and/or Classified and should
be installed in conformance with current local and/or the National
Electrical Code.
IMPORTANT: Please read all instructions
before beginning.

CBR-HT (Cell Boot Riser – Power):
The cell boot riser can be used for either Headerduct or Walkercell. Position the cell boot directly below the future
l
ocation of the power panel. Field drill a 2 1/2" x 6" [64mm x 153mm] oval hole to fit within the cell boot. Install an
H14-PSR-1.4 grommet. Pop rivet or weld the cell boot to the raceway. Install the riser sleeve and terminal bushing
at the same time as installing the power panel.
CBR-LT (Cell Boot Riser – Communications):
The Cell Boot Riser for communications, installs similar to the CBR-HT with the exception that power terminates
approximately 3" [76mm] to 4" [102mm] above the finished floor. When used on Walkercell, void closures must
be installed to prevent entry of wet concrete during pours.
45° Vertical Elbow:
Position the 45° vertical elbow directly below the future cabinet or panel location. Attach the vertical elbow to the
Headerduct, using the coupling channel centered across the top of the Headerduct and 45° vertical elbow. Use the
screws provided with the coupling channel.
NOTE: The Headerduct has male and female ends. Attach the vertical elbow at the female end. Use the adjusting feet to adjust the Headerduct
to its proper height. Secure the Headerduct to the form with the proper fasteners.
CBR-LHT (Cell Boot – Power and Communications):
The CBR-LHT can be used when all three services must enter from one opening. It terminates approximately 3" [76mm]
to 4" [102mm] above the finished floor. The riser sleeve and terminal bushing should be installed during the installation
of the power panel.
Installing Header Junction Boxes:
Junction Boxes have openings for Headerduct and may have one opening for Walkercell raceway. Adjust the
Headerduct Junction Box to the correct level. The Headerduct that attaches to the junction box should be resting on
the support ledge. Secure the adjusting feet to the form. Adjust the Headerduct adapters so that the adapters rest on
top of the Headerduct. Secure the set screws in the side of the adapters to complete coupling the Headerduct to the
Headerduct Junction Box.
Installing Junction Boxes:
Walkercell Junction Box Headers are very similar to the Header Junction Boxes except they will always have one or
two openings for the Walkercell Raceway. Each Junction Box has a male and female end. Position the Junction Box
by sliding the male or female end into the correct mating end of the Header Junction box or another Junction box.
Secure the Junction box adjusting feet to the form. Secure the coupling channel across the top of the Headerduct
with the screws provided.
Installing Junction Box End Closures: The end closure is a U–Channel that fits over the open end of the Junction
box. Slide the U–Channel in place. Secure with pop rivets or welds.
2

Installation of Walkercell Distribution Raceway (WCR11/2, WCR2, or WCR3) to Junction Box:
At each Junction box that has an opening for Walkercell Raceway strike a baseline to correspond with the center
of the Walkercell Raceway distribution run. Each raceway has a piece mark number that must correspond with the
l
ocation shown on the installation drawings.
Position the first support bracket 6" [152mm] from the edge of the Junction box and a maximum of 5'-0" [1.5m]
on center thereafter as you proceed away from the junction box.
The raceway access opening of the junction box is provided with a support ledge and an adapter to couple the
raceway to the junction box. Adjust the adapter on the junction box so that the profile of the adapter rests on top
of the raceway.
Slide the raceway in along the brackets and onto the support ledge located on the Junction box. Adjust all brackets
vertically until the raceway is level.
Complete the coupling of the raceway to the junction box by securing the adapter and the set screws on each side
of the adapter.
Secure the brackets to the form with suitable fasteners.
Installation of Walkercell Raceway to Walkercell Raceway:
Place a Wiremold raceway support at the center of abutting sections and a maximum of 5'-0" [1.5m] on center along
the distribution run. Center the raceway sections together on the supports. Attach to the forms with suitable fasteners.
Fasten the raceway sections to the support brackets with self drilling screws to secure the raceway and insure ground
continuity. If grounding plates (RGP) are used, fillet weld or use suitable fasteners into subslab to electrically and
mechanically tie the raceways together. Use grounding plates only at the joints. Use duct tape to seal raceway joints.
Installation of Walkercell Raceway End Closures:
Place the L–Shaped end closure over the end of the Walkercell raceway. Secure the end plate in position with pop
rivets or welds.
Installation of PK Series Preset Inserts:
Orient the preset with the prepunched openings in the Walkercell raceway so that the rivet hole in the preset aligns
with the rivet hole in the center channel of the Walkercell raceway. Hook the preset under the end of the prepunched
holes in the raceway utilizing the two offset flanges on the preset. Slide the preset toward the hooked end until the
preset rivet hole is aligned with the rivet hole in the raceway. Secure the preset to the raceway with a 3/16" [4.8mm]
diameter pop rivet. Caulking around the preset is recommended if a plasticizer is used in the concrete.
22JB2510 Junction Box:
This box can be used when Walkercell is required to exit in more than two directions.
Concrete Placement and Curing:
Before concrete placement, make a final inspection of the entire Walkercell system. Any gaps in the system should be
sealed to prevent mortar or concrete from entering the system. Chloride salts such as calcium chloride shall not be
used in the concrete mix.
3

N
OTES:
Reinforced concrete design shall be in accordance with American Concrete Institute Specifications for Structural Concrete
for Buildings (ACI301-72) and ACI Building Code Requirements of Reinforced Concrete (ACI301-72) and ACI Building Code
Requirements for Reinforced Concrete (ACI318-83). Concrete placement shall follow proper and accepted industry practice
and be in accordance with ACI Recommended Practice for Measuring, Mixing, Transporting and Placing Concrete (ACI304-73).
Concrete must be vibrated at all headers, junction boxes, and raceways to insure that the concrete completely fills underneath the
Walkercell System. It is imperative that the concrete not be over vibrated. Over vibration causes segregation of materials in the
c
oncrete mix which in turn leads to weakening of the concrete strength.
Wiremold strongly recommends the use of shrinkage and temperature reinforcement as a minimum reinforcement in slabs above the
Walkercell system. Design of shrinkage and temperature reinforcement should be in accordance with ACI318-83. Care should be
taken during concrete placement and, in particular, during concrete vibration, to prevent rising of top reinforcement in the slab.
Use of reinforcement in the top of the slab should greatly reduce cracking of the slab at the edges of the Walkercell System.
Hand troweled concrete finishing is required at all Walkercell System access openings.
Hand troweling is required 12 to 18 inches around the openings to provide a level finish with the cover plate. Concrete curing shall
follow proper and accepted industry practice and be in accordance with ACI301-72. Remove the Junction Box Cover Plates and
remove any moisture or condensation inside the raceway within 48 hours after the concrete pour. Severe damage can result to
the galvanized coating on the raceway if water is present and the inside of the raceway is deprived of freely moving air. The inside
of the raceway must remain dry at all times. Cover plates shall be cleaned of any excess moisture and concrete and reinstalled.
4

Figure 1
5
3
1
9
4
8
7
7
2
2
The upper element of the junction box and
the top of the cellular deck panel is to be
protected by at least 1" [25mm] of concrete.
18
I
TEM CATALOG NO. DESCRIPTION
1 PKCAP MUDCAP FOR PRESET
2 WCHD3625-60 HEADERDUCT – 36" [915MM] WIDE, 2 1/2" [64MM]DEEP, 5'- 0" [1525MM] LONG
3
CBR-HT CELL BOOT RISER 4" [102MM] X 4" [102MM] H X 6" [152MM] HIGH WITH 36" [915MM] HIGH EXTENSION AND TERMINAL BUSHING
4
CBR-LT CELL BOOT RISER 4" [102MM] X 12" [305MM] X 6" [152MM] HIGH, SINGLE COMPARTMENT, EXTENSION SLEEVE TERMINAL BUSHING
5 WCVL3625 VERTICAL ELBOW 36" [915MM] WIDE X 2 1/2" [64MM] DEEP – STANDARD HEIGHT 36" [915MM]
6 CBR-LHT CELL BOOT 4" [102MM] X 12" [305MM] X 6" [152MM] HIGH, THREE COMPARTMENTS, WITH 4" [102MM] X 4" [102MM] X 36" [915MM] EXTENSION
AND TERMINAL BUSHING
7 2HJB362515-60 HEADER JUNCTION BOX 36" [915MM] WIDE, 2 1/2" [64MM] DEEP WITH 1 1/2" [38MM] DEEP ACCESS RING, ONE OPENING FOR 36" [915MM]
X 2" [51MM] DEEP CELL
8 2JBH362515-60 JUNCTION BOX HEADER 36" [915MM] WIDE, 2 1/2" [64MM] DEEP W/1 1/2" [38MM] DEEP ACCESS RING, TWO OPENINGS FOR 2" [51MM]
DEEP CELL
9 JBHEC3625 END CLOSURE FOR JUNCTION BOX HEADER 36" [915MM] WIDE X 2 1/2" [64MM] DEEP
10 WCR2-10/24 WALKERCELL RACEWAY 2" [51MM] DEEP, 10'-0" [3.05M] LONG WITH PRESET HOLES 24" [610MM] O.C.
11 RSCB-28 RACEWAY SUPPORT 1 1/2" [38MM] TO 2 7/8" [73MM] BELOW CELL
12 REC RACEWAY END CLOSURE
13 PK250 PRESET INSERT 2 1/2" [64MM] DEEP
14 22JB2525 WALKERCELL JUNCTION BOX 24" [610MM] WIDE X 30" [762MM] LONG WITH 1 1/2 [38MM] HIGH ACCESS OPENING
1
6 JBHCC36 COUPLING CHANNEL FOR JUNCTION BOX HEADER 36" [915MM] WIDE
1
7 RGP RACEWAY GROUND PLATE 3" [76MM] X 24" [610MM] WIDE – NOT USED IN CONJUNCTION WITH RSCB2N)
18 WCR2-10/B WALKERCELL RACEWAY 2" [51MM] DEEP, 10'-0" [3.05M] LONG – BLANK
19 22JBC REPLACES WALKERCELL ADAPTER WHEN THE OPENING IS NOT IN USE
Typical System Components
5

Figure 2
6
1
6
13
1
19
18
10
1
0
1
1
1
4
11
17
12
The upper element of the junction box and the top of the cellular
deck panel is to be protected by at least 1" [25mm] of concrete.
Wiremold
U.S. and International:
60 Woodlawn Street • West Hartford, CT 06110
1-800-621-0049 • FAX 860-232-2062 • Outside U.S.: 860-233-6251
Canada:
570 Applewood Crescent • Vaughan, Ontario L4K 4B4
1-800-723-5175 • FAX 905-738-9721
PDD-880R1 0310
© Copyright 2010 Legrand/Wiremold All Rights Reserved
/