Sunstech EB-706 User manual
- Category
- E-book readers
- Type
- User manual
This manual is also suitable for

E-book reader
EB706
USER MANUAL-EN
1

Content
1.Cautions ...................................................................................................... .......3
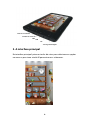
2.Outlook and Keys......................................................................................... ...6
3.The main interface ..........................................................................................7
4.Browsing History .............................................................................................8
5.E-Book ............................................................................................................ ....8
6.Music...................................................................................................................10
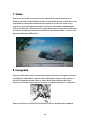
7.Video ..................................................................................................................11
8.Picture ...............................................................................................................11
9.Record ...............................................................................................................12
10.Explorer...........................................................................................................13
11.Settings...........................................................................................................13
12. Data transmission & Charging ..............................................................15
13.Common Problems and Solutions........................................................16
14. Legal information.......................................................................................17
2

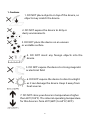
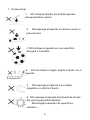
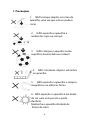
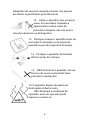
1. Cautions
1. DO NOT place objects on top of the device, as
objects may scratch the device.
2. DO NOT expose the device to dirty or
dusty environments.
3. DO NOT place the device on an uneven
or unstable surface.
4. DO NOT insert any foreign objects into the
device.
5. DO NOT expose the device to strong magnetic
or electrical field.
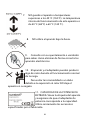
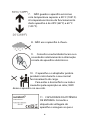
6. DO NOT expose the device to direct sunlight
as it can damage the device. Keep it away from
heat sources.
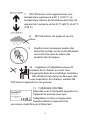
7. DO NOT store your device in temperatures higher
than 40°C(104°F). The internal operating temperature
for this device is from 20°C(68°F) to 60°C(140°F).
3

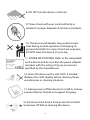
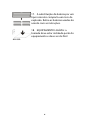
8. DO NOT use the device in the rain.
9. Please check with your Local Authority or
retailer for proper disposal of electronic products.
10. The device and adaptor may product some
heat during normal operation of charging. To
prevent discomfort or injury from heat exposure,
DO NOT leave the device on your lap.
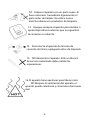
11. POWER INPUT RATING: Refer to the rating label
on the device and be sure that the power adaptor
complies with the rating. Only use accessories
specified by the manufacturer.
12. Clean the device with a soft cloth. If needed,
dampen the cloth slightly before cleaning. Never
use abrasives or cleaning solutions.
13. Always power off the device to install or remove
external devices that do not support hot-plug.
14. Disconnect the device from an electrical outlet
and power off before cleaning the device.
4

15. DO NOT disassemble the device. Only a certified
service technician should perform repair.
16. The device has apertures to disperse heat. DO
NOT block the device ventilation, the device may
become hot and malfunction as a result.
17. Risk of explosion if battery replaced by an
incorrect type. Dispose of used batteries
according to the instruction.
18. PLUGGABLE EQUIPMENT: the socket-outlet
shall be installed near the equipment and shall be
easily accessible.
Special Note:
For the convenience of reading, you can store the
most-frequently read books in "My Library" loose-leaf
folder, to facilitate rapid usage.
Model Instructions:
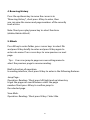
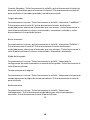
Start the reader
Turn ON switch , then long press the power
button 3-5 seconds to start the reader.
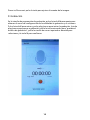
5
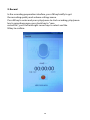
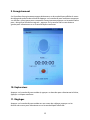
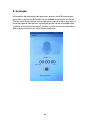
Page is loading ...

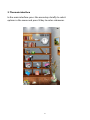
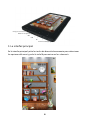
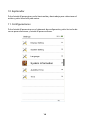
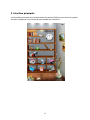
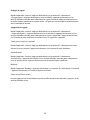
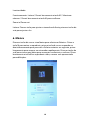
3. The main interface
In the main interface: press the arrow keys briefly to select
options in the menu and press M key to enter submenus.
7

4. Browsing History
Press the up/down key to move the cursor in to
"Browsing History", short press M key to enter, then
you can view the names and page numbers of the recently
read articles.
Note: Short press play/pause key to select functions
(delete/delete all/exit).
5. EBook
Press M key to enter folder, press cursor keys to select file
and press M key briefly to enter and press M key again to
enter sub-menu. Press cursor keys to view previous or next
page.
Tips:Users can jump to page run over setting menu to
select the previous page to resume reading.
Brief instruction of operation:
In reading interface, short press M key to enter in the following features:
Jump Page :
Operation: Reading / Short press left/right and up/down key
to get the page run over Windows-select the page
number-Short press M key to confirm-jump to
the selected page
Save Mark:
Operation: Reading / Short press M key / Select the
8

SaveMark / Short press M key-short press up/down
arrow key to select number / Short press M key to
confirm-bookmark stored and name displayed
Load Mark:
Operation: Reading / Short press M key-select
“LoadMark” / Short press M key / Short press
up/down arrow key to select the bookmark to
extract-short press M key to confirm the selected
number-bookmarks extracted and enter reading
interface directly.
Del Mark:
Operation: Redding / short press M key / Select
“DelMark” / Short press M key / Short press up/down
arrow key to select the bookmark to delete / Short
press M key to confirm the selected
number / Bookmarks deleted
Browse Mode:
Operation: Reading / Short press M key / Select automatic or
manual browse mode settings / Short press M key to
confirm
Filp Time:
Operation: Reading / Short press M key / Select time span for
auto slip / Short press M key to confirm
Re-alignment:
Operation: Reading / Shortpress M key / Select
re-alignment / Short press up/down to select turn off
or turn on / Short press M key to confirm
9

Brightness:
Operation: Reading / Short press M key / Select number / Short
press M key to confirm.
Zoom in/Zoom out
Reading: Press the key to adjust font size, press arrow keys
to adjust and read.
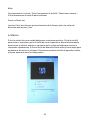
6. Music
Press up and down cursor keys to select files. Press M key
to enter and play; press left or right cursor key briefly for
browse previous or next file, long press to fast-forward or
rewind. Press up and down arrow keys to increase or
decrease the volume. Press M key briefly
when playing video, menu will pop up for settings.
10

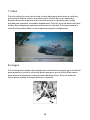
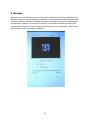
7. Video
Press up and down cursor keys to select files, Press M key
to enter and play; press left or right cursor key briefly for
browse previous or next file, long press to fast-forward or
rewind. Press up and down cursor keys to increase or
decrease the volume. Press M key briefly
when playing video, menu will pop up for settings.
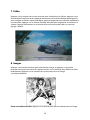
8. Picture
Press up or down key to select picture, press M key to play
and press play/pause key to rotate, press M key again to get
the menu for slide show. Press cursor keys to view previous
or next picture.
Zoom in/Zoom out: press the key to adjust picture size.
11

9. Record
In the recording preparation interface, press M key briefly to get
the recording quality and volume settings menu.
Press M key to enter and press play/pause to start recording, play/pause
key to recording pause; press back key to "save
record file", press left and right cursor keys to select and the
M key to confirm.
12

10. Explorer
Press M key to enter, press up and down to select file,
press M key to enter.
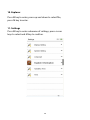
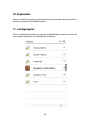
11. Settings
Press M key to enter submenu of settings, press cursor
keys to select and M key to confirm.
13

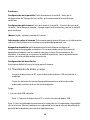
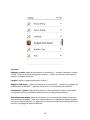
Functions.
Display settings:Short press M key—Enter Light time
and Brightness adjustment settings—short press M key to
confirm.
System settings: Short press M key—Enter system
Restore / Key Lock time—Erase activation record and
press M key to confirm
Language: English, Spanish, Portugues , French…
System information: Short press M key to check the
information about the E-book: manufacturer, product name
and product capacity etc.
Auto power off:Short press M key to set the auto-off
timer. User can start auto-off time under
the condition of no operation. However,
if the machine This in working condition,
such as playing music, this action would
not be possible to perform.
Time/Date settings:
Adjust to set up time and date for the system.
14

12. Data transmission & Charging
Connect the device to PC through the USB data cable
provided in the package.
Copy the music/image/document files in the computer's
hard drive, switch to the disk of reader and paste.
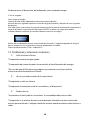
Charging
1. Use standard USB cable
Step One: Connect the device to PC through USB data
cable.
Step Two: After connecting properly with the computer,
Double click the icon "Safely Remove Hardware" on the right bottom of
the computer screen to remove equipment.
Do not unplug the device of the connection with the computer, then
charging starts.
2. Use charger
How charge the unit.
Please connect the USB cable to the external adaptor to battery charge.
After a few seconds appears the icon battery charge and after a few
seconds disappears.
To know how this the battery charge, please push the power key and
displayed the battery charge. The position of the switch ON/OFF don't
affect the battery charge.
When the battery is full,the battery icon show follow this picture .
Only use a external adaptor supplied by Sunstech. Any power adaptor that
does not meet with the technical characteristics can damage the unit.
Power supply:DC5.0 / 1500mA(DC)
15

13. Common Problems and Solutions
Failure ① in starting reader
*Check the remain power
*Check again after connection to power transformer
*If failure remains, please contact our customer service
personnel.
No ② sound in the headphone
*Please check whether it is muted
*Please check the connection between headphone and the
Device
Severe ③ noise
* Please check the headset plug, dirt can cause noise.
* Checks whether the music file is damaged. Try other
music file to confirm. Any damage of the file can lead to
severe noise or skips.
16

14. Legal information
Disposal of old electrical appliances
THE DISPOSAL OF ELECTRICAL AND ELECTRONIC
EQUIPMENT WASTE PRODUCTS ON THE PART OF FINAL
USERS IN THE EUROPEAN UNION
This symbol on the product or on the container indicates that this
product cannot be eliminated with the general waste. The user is
responsible for eliminating this kind of waste by throwing them
away at a “recycling point” specifically for electrical and electronic
waste. Selective collection and electrical equipment recycling
contribute to preserve natural resources and warrant waste
recycling to protect environment and health. In order to receive
further information about electrical and electronic waste collecting
and recycling, contact your Local Council, the service of
household waste or the establishment where the product was
acquired.
At full volume, prolonged listening to the portable audio
device may damage the user’s hearing.
17

Warranty conditions
- The warranty of this product is for 2 years since the purchase date.
- The warranty will exclude breakdowns caused by bad use of the product,
wrong installation or installation in not desirable places for a proper
maintenance of the product, rips, updates of the products
that are not the supplied by the brand, pieces wore away for its use or for
not domestic or inappropriate use. Also are excluded breakdowns caused
for manipulations of the products by people or companies alien to our
company.
- For any request regarding the warranty terms, the purchase receipt must
be attached.
Correct disposal of this Product
(Waste Electrical & Electronic Equipment(WEEE)
Your product is designed and manufactured with high
quality materials and components which can be recycled
and reused.
This symbol means that electrical and electronic
equipment, at their endof-life should be disposed of
separately from your household waste.
Please dispose of this equipment at your local community
waste collection/recycling centre.
In the European Union there are separate collection
systems for used electrical and electronic products.
Please help us to conserve the environment we live in!
Made in China
18

E-book reader
EB706
USER MANUAL-ES
1
Page is loading ...
Page is loading ...
Page is loading ...
Page is loading ...
Page is loading ...

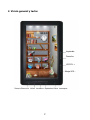
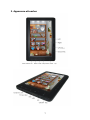
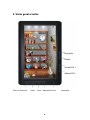
2. Visión general y teclas
Izquierda
Derecha
UP/VOL +
Abajo/VOL -
Zoom in/Zoom out Volver Introducir Reproducir/Pausa Interruptor
7
Page is loading ...
Page is loading ...
Page is loading ...
Page is loading ...
Page is loading ...
Page is loading ...
Page is loading ...
Page is loading ...
Page is loading ...
Page is loading ...
Page is loading ...

1
E-book reader
EB706
USER MANUAL-FR
Page is loading ...
Page is loading ...
Page is loading ...
Page is loading ...
Page is loading ...
Page is loading ...
Page is loading ...
Page is loading ...
Page is loading ...
Page is loading ...
Page is loading ...
Page is loading ...
Page is loading ...
Page is loading ...
Page is loading ...
Page is loading ...
Page is loading ...
Page is loading ...
Page is loading ...
Page is loading ...
Page is loading ...
Page is loading ...
Page is loading ...
Page is loading ...
Page is loading ...
Page is loading ...
Page is loading ...
Page is loading ...
Page is loading ...
Page is loading ...
Page is loading ...
Page is loading ...
Page is loading ...
Page is loading ...
Page is loading ...
Page is loading ...
Page is loading ...
Page is loading ...
-
 1
1
-
 2
2
-
 3
3
-
 4
4
-
 5
5
-
 6
6
-
 7
7
-
 8
8
-
 9
9
-
 10
10
-
 11
11
-
 12
12
-
 13
13
-
 14
14
-
 15
15
-
 16
16
-
 17
17
-
 18
18
-
 19
19
-
 20
20
-
 21
21
-
 22
22
-
 23
23
-
 24
24
-
 25
25
-
 26
26
-
 27
27
-
 28
28
-
 29
29
-
 30
30
-
 31
31
-
 32
32
-
 33
33
-
 34
34
-
 35
35
-
 36
36
-
 37
37
-
 38
38
-
 39
39
-
 40
40
-
 41
41
-
 42
42
-
 43
43
-
 44
44
-
 45
45
-
 46
46
-
 47
47
-
 48
48
-
 49
49
-
 50
50
-
 51
51
-
 52
52
-
 53
53
-
 54
54
-
 55
55
-
 56
56
-
 57
57
-
 58
58
-
 59
59
-
 60
60
-
 61
61
-
 62
62
-
 63
63
-
 64
64
-
 65
65
-
 66
66
-
 67
67
-
 68
68
-
 69
69
-
 70
70
-
 71
71
-
 72
72
-
 73
73
-
 74
74
-
 75
75


Sunstech EB-706 User manual
- Category
- E-book readers
- Type
- User manual
- This manual is also suitable for
Ask a question and I''ll find the answer in the document
Finding information in a document is now easier with AI
in other languages
- français: Sunstech EB-706 Manuel utilisateur
- español: Sunstech EB-706 Manual de usuario
- português: Sunstech EB-706 Manual do usuário

