Page is loading ...

Detective WN8
www.evolveo.com

Statement
Thankyouforpurchasingourproduct!Thisquickuserguidewilltalkaboutmainusagesofthe
product.Moreinformationcanbefoundonourwebsiteandthehelpcenter.Thisuserguidemay
contain inaccurate content due to hardware and software upgrade. It is subject to change
withoutpreviousnotice.
SafetyCaution
1.Pleasedonotputanyfluidcontainerontheproduct.
2.Pleaseusetheproductinventilatedenvironmentandpreventblockingthevents.
3.Pleaseuseincludedpowersupplywiththeproducttopreventdamagetotheproduct.
4.Pleaseusethe productunder its standardworkingtemperatureandhumidity.(advisedinthis
manualordistributor’swebsite)
5.DustonPCBmaycauseshortcircuit.ItissuggestedtocleanthedustonPCBtimelytomakethe
productworkproperly.
6.Pleaseobeytheregulationandpolicyinyourcountryandareaduringtheinstallationofthis.
OutOfBoxAudit
Afterreceivingtheproduct,pleasecheckallproductsandaccessordingtodistributor’sPackage
Includesinformation.Ifanyismissedordamaged,pleasecontactthedistributor.
Packinglist
S/N Item Quantity
1 WIRELESSNVR 1pcs
2 Screwbag(4screwsforHDD) 1pcs
3 DC12V2Apowersupply(forNVR) 1pcs
4 Usermanual 1pcs
5 WIRELESSIPCamera 4/8pcs
6 DC12V1Apowersupply(forIPC) 4/8pcs
7
Screwbag(forIPC)
4/8pcs
8 AntennaExtensionCord 1/2(4CH/8CH)pcs
BeforeInstallation
Thisproductmayrequirecabling, we suggest totestall products&parts before installation and
cabling.

NVR
1. WIRELESSAntennaPorts:DoubleantennastoWIRELESSrange
2. WANPort:ConnectyourNVRtoInternet
3. VGAPort:ForviewingonVGAmonitor
4. HDMIPort:ForviewingonHDTV
5. USBPorts:Formouseandbackup
6. PowerInput
IPC
1. WIRELESSantenna:WirelessconnectionwithNVR;
2. DCPort:inputpower12V1A;
3.RJ45Port:FormatchingcodeandwiredconnectionbetweenIPCandNVR.
Anyway,thereisrangelimitationforthewirelesssignalfromNVR.Whencameras
areoutofthisrange,theycan'tbeconnectedtoNVRwirelessly.Thenuserscan
usenetworkcabletoconnectcamerasandNVR.
4.Resetbutton:Pressresetbuttonfor5secondstorestorefactorysettingandenter
intomatching‐codemode.
5.Statuslight:
Unbright:IPCsystemisnotreadyorabnormal
Flash:IPCisinthecode‐matchingstate
Longtimebright:IPCandNVRhavebeencoded,theconnectionstatusisnormal
SlowFlash:IPCiscodedwiththeNVR,buttheconnectionisdisconnected
Note:Innightvisionmode,thedeviceisnormalandtheindicatorlightwillbe
IPCwithoutRJ45connector
IPCwithRJ45connector

turnedofftopreventlightinterference.
InstallationInstructionOfWIRELESSNVRKIT
SetupTheSystem
This system is standalone with embedded Linux Operating System intheNVR.
JustlikeadesktopPC,needtohookascreentotheNVRtoentertheOS.AnyTV,
monitorwithVGAorHDMIinputshouldworkforit.
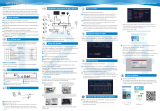
1.InstallantennasforcamerasandtheNVR;
2.ConnectascreentotheNVRviaitsHDMIorVGAport(HDMIandVGAcablenotincluded);
3.PlugtheNVRtopower(usebigger12V2Apoweradapter);
4.Plugcamerastopower(usesmaller12V1Apoweradapters);
5.Withinseconds,youshouldseecamera’simagesonthescreen;
6.Plugthemouse(included)toanUSBportonbackofNVR.Youshallthenbeabletooperateon
thesystem.
IntheOSyoucanfindfullestfunctionalitiesincludingliveview,record,playback,videobackup
andallsettings.
DefaultID:adminPassword:none(meansleavingthepasswordempty,justclicklogin)
Tips:Toprotectyourprivacy,pleasesetyourpasswordatearliestconvenience.Rightclickthe
mouse→GotoSystemSetup→SystemAdmin →UserManagementtosetpassword.
CONNECTTOROUTER
Power
IPCamera
Displaydevice
VGA
Output
NVR
Power
USBinterface
Mouse

HDInstall
Thesystemmaynotincludeharddiskdependingonthekityouselected.TheNVRworksmost
3.5"SATAHDDor2.5"SATAHDD
1. UnplugyourNVRfrompower,unscrewandremovethetopcover.
2. ConnecttheSATApoweranddatacablesfromtheNVRtothecorrespondingportson
yourHDD(asshown).
3. HoldingtheharddriveandtheDVR,gentlyturnitoverandlineuptheholesonthehard
drivewiththeholesontheNVR.Usingascrewdriver,screwtheprovidedscrewsintothe
holesandassemblethecover.
Note:NewHDDhavetobeformattedbeforerecording.

TogetbetterWIRELESSsignal,ithadbetterplacetheNVRinopenareaandhighposition.
RecordVideo
Recordvideoisveryeasyoncamerasystem.
1. TimeRecording:SetupperiodoftimeofrecordingonNVRGUI.Right click mouse→
SystemSetup→Record setup→RecordPlan. Click“time”andput mouseicon on the
upperleftcorner(forexample“1”aspictureshows),pressanddragthemousetothe
righttochoosethetime.Thelistwillturntored.
2. Motion Recording: Only detect motion and then start recording. Right click mouse→
SystemSetup→Recordsetup→RecordPlan.Click“motion”andputmouseicononthe
upperleftcorner(for example“1”as pictureshows),pressanddragthemouseto the
righttochoosethetime.Thelistwillturntogreen.
3. Alarm recording: Right click mouse→System Setup→Record setup→Record Plan. Click
“Alarm”and put mouse icon on the upper left corner(for example “1”as picture
shows),press anddrag themouse to the rightto choosethe time.The listwill turnto
yellow.
Note:Users cansetupany period oftime theywant, for example0:00:00‐23:59:59,That’s24
hours*7daysrecording.WhenNVRdetectsharddisk,thedefaultsettingwillbe24hours*7days
recording.
VideoPlayback
Steps:rightclickmouseinmainmenu→Videoplayback→choosedate,channel,recordmode→
clicksearch→thencanviewplaybackfile.
Warmprompt:
1. IIustrationforplaybackbutton:
play, pause: fastforward*2,*4,*8;
2. Playfile:Choosetherecordingfileinfilelist,asnumber“1”showninpicture.Chooseone

oftherecording,click“play”toplaytorecordingfile;
3. Videobackup:Choosetherecordingfileinfilelist,asnumber“1”showninpicture.Insert
theUflashdisk,click“videobackup”tobackupthefile;
4. Timeline:Click “date”and“time”atleftbottomtocheckthetimelineofrecording,as
number“2”showninpicture;
5. Onthetimelinewithrecordingfile,leftclickthemouse,thecanplaybackthefile.
VideoBackup
UseUdisktocopyvideo,soeasyandconvenient!
1.2USBports:PlugUflashdiskintotheUSBportofNVR.Rightclickonmainmenu→Video
backup→choosebackupchannel→choosevideomode→setupsearchingtime→search→choose
recordingfileonthelist→videobackup(support32GUflashdiskatmax.Recordingfileis
packedonehourpertime.)
2.1USBport:Rightclickonmainmenu→videobackup→choosebackupchannel→choosevideo
mode→setupsearchingtime→search→chooserecordingfileonthelist→videobackup,insertU
flashdiskwithinreminding1minute,thenthesystemwillbackuprecordingfiletoUflashdisk.

ViewOnMobile
1.DownloadtheAPP“IPPRO”
UserscanusecellphonetoscantheQRcodebelowtoinstalltheAPPfreeofcharge,oruserscan
search“IPPro”onAPPstoreorGooglePlaytheninstalltheAPP.
Note:ForIOSsystem,itrequiresIOS8.0versionorabove.Forandroid,android4.4orabove.
2.AddtheNVRsystemtoyourAPPdevicelist
RuntheAPP“IPPRO”,loginwithyouraccountorchooseTrial→Click“+”to “AdddevicebyID”
(find it the NVR’s Network setup, or right bottom corner on screen), Description (e.g. Home
Camera),Username(defaultusernameis“admin”)andpassword(defaultisempty)→Submitto
getbacktoyourdevicelist→Clickthedevicetoviewthecameras.
Tips:ifyou’vesetapasswordonyourNVRsystem,pleaseupdateyourpasswordonAPPtoview.

PlaybackOnMobiles
IntheIPPROAPP,while viewing live video of the system, click Playback, you will enter the
remoteplaybackmenu.TheAPPautomaticallyplaybackcamera1,youcanswitchchannelsthe
CH.
Tips:VideosinplaybackareHD@realtimewhichrequiresverygoodtransmissioncondition.We
suggesttoplaybackinLAN.RemoteplaybackoutofLANmaynot100%workduetoconnection
&networkcondition.

MENU‐DOWhat
Menubar
Clickrightbuttonyoucanenterthemainmenu;clickrightbuttonagainyoucanexitthecurrent
menuorreturn.
Splitscreen:Changestatusofliveview.Youcanchoosetoviewmultiplecamerasoranysingle
camera.
VideoManage:ManageIPcamerasandNVRchannels.
Systemsetup:Allsystemsettings.
Videoplayback:Playbackrecordedvideos.
Videobackup:Backuprecordedvideos.
Coloradjust:Adjusttheimagesettingofeachcamera.
PTZControl:Controlorsetupcamera(PTZcameraonly).
Volume:Adjustvolumeofaudiocameras(worksonlyforaudiocameras).
SetupWizard:Stepbystepguideof1sttimegeneralsettings.
FastNetwork:Shortcuttonetworksettings.
Wifiadd:AddIPcamerasintoNVRchannelswirelessly.
ExitSystem:Logout,reboot,closescreenoutputandshutdownthesystem.
SystemSetup
Clickrightbutton→ChooseSystemsetup;youthenshallenterthemenuthatenablesyoutodo
allsettingsrelatedtothissystem.
Generalsetup(Thisenablesyoutoset)
Language
Time
Displayresolution
HDDinformation
Systemadmin(Thisenablesyoutoset)
Systemversion
Systemmaintenanceincludingsystemupgrade
Userandpasswordmanagement
Restoretodefaultsettings

Systemlog
Recordsetup(Thisenablesyoutoset)
Recordplanforeachchannelvideodetection
Networksetup(Thisenablesyoutoset)
Allnetworkrelatedsettings
Channelsetup(Thisenablesyoutoset)
Managechannelsandcameras
Addwirelesscamera
Step1:plugNVRandcamerastopower,afterNVRstart,rightclickmouse→Wireless
add→match‐code interface, NVR will search camera under matching code model
automatically.
Step2:wirelesscamerahastwokinds,includingcamerawithRJ45 connector and
camerawithoutRJ45connector,theirwaytomatchcodeasbelow:
① forcamerawithRJ45connector,afterstart,usenetworkcabletoconnectwith
NVR,matchcodeautomatically,noneedtorestore.
② forcamerawithoutRJ45connector,afterstar,holdthebottomlineofcamerafor
10 seconds to getin match code model, it will match code automatically, no need
networkcable.
Step3:whenyoucanfindIPaddressofcameraonscreen,matchingcodecomplete,
click“Exit”tofinish.
Notes:forcamerawithoutRJ45connector,itsprocessofgettingintomatchingcode
will last 10 minuets. After 10 minuets, pleaserestore camera to get into matching
codemodelagain.
ExtendWIRELESSRange
Wirelessconnectionissimpleandconvenient,butwirelessisnotapanacea!
Becauseofthenatureofwireless,decidedinsomecomplicatedscenarios,
thereisasignalattenuationafterpassingthroughtheobstacle.FollowingSome
methodscancircumventobstaclesandincreasethesignaltransmissiondistance.

1.PositionTheAntennaCorrectly
Ascanbeseenfromthegaingraphoftherodantennabelow,thesignalcoverage
oftheantennaissimilartoanapple.Theantennaislocatedinthecenterofthe
appleandsurroundstheantenna.Thesignalisstrong,andtheupperandlower
endsoftheantennaarerecessed,andthesignalisweak.
Accordingtothetransmissioncharacteristicsoftheantennatothesignal,inorder
toensuretheoptimalimagetransmissioneffectofthewirelessset,
Claim:
NVRandIPCantennasshouldbeplacedinhighplaces,notonthewalls,metal,
Obstructionssuchasglassaffectthesignaltodivergeoutward.
TheantennaofIPCshouldbeplacedinparallelwiththeNVRantennatomaximize
therespectiveradiationdirectionangles.Incontrast,themaximumcoverageofthe
signalisformed,asshowninthefollowingfigure.
IPCamera
Rodantennagainvs.coverage

2.UseAntennaExtensionCordtoprolongWIRELESSdistance
Installationmethodofantennaextensioncord
Notes:WhenWIRELESSsignalisnotstrongenoughagainstwalls,userscantakeofftheoriginal
antennaandsubtituteantennaextensioncord.Drillaholeonthewalltolettheextensioncord
gothroughandsimplyitwhereWIRELESSsignalisstrong.
Setupcascadingconnectionina reasonablesolution,extendwireless
signaltransferdistance
Note:
1. Repeaterfunctioncan’tstrengthenWIRELESSsignalforwirelessNVRkit,butcanextendthe
distancebyrepeaters‐‐WIRELESScameras.
2. Onlywhentherepeatercamerasandrepeatedcamerasarepositionedcorrectly,WIRELESS
distancewillbeextended.
3. Repeaterfunctionand3metersantennaextensioncordaretwomethodstoextendWIRELESS
Correctmethod Faultmethod
AntennaExtensionCord
IPCamera
Wall
Window

range.Userscanchooseoneaccordingtorealsituation.
RepeaterSetup
Step1:RightclickonNVR’SGUI,leftclick“videomanagement”→ thenleftclick“repeater”
Step2:Addrepeater
Aspictureshownbelow,clickicon+besideschannel3,chooseotherchannel.
Step3:Aspictureshownbelow,itmeansIPC1isconnectedtoNVRthroughIPC2andIPC3.IPC2
isconnectedtoNVRthroughIPC3.IPC3isconnectedtoNVRdirectly.

Step4:Click“Apply”andthenclick“refresh”tocheckifthesettingissuccessful.
DeleteRepeater
Movethemousetotargetedchannels,leftclicktodelete,andthenclick “Apply” and “OK”.
ApplicationExample
Aspictureshownabove,whenIPCAM1isputsomewhereisoutofNVRWIRELESSrange,and
thereisIPCAM2betweenthemwithstrongWIRELESSsignal,userscanputIPCAM1closetoNVR

andpowerit,setupIPCAM1repeatedbyIPCAM2,andtheninstallIPCAM1tothepresupposed
place.
Warning
Notes:
Devicewillnotinguaranteeifcausedbybelowreason:
A.Accident;negligence;disaster;mis‐operation.
B. Do not conform to the environment and conditions, such as power improper, working
temperatureToohighortoolow,lightningstroke.ect.
C.Everbemaintainedbyothercenterwhichnotbelongtotherealfactory.
D.Goodsalreadysoldmorethan12months.
FCCRADIATIONNORM
FCC
ThisdevicecomplieswithPart15oftheFCCRules.Operationissubjecttothefollowingtwo
conditions:(1)thisdevicemaynotcauseharmfulinterference,and(2)thisdevicemustaccept
anyinterferencereceived,includinginterferencethatmaycauseundesiredoperation.
FCCComplianceStatement
These limits are designed to provide reasonable protection against frequency interference in
residentialinstallation.Thisequipmentgenerates,uses,andcanradiateradiofrequencyenergy,
andifnotinstalledorusedinaccordancewiththeinstructions,maycauseharmfulinterference
toradiocommunication.However,thereisnoguaranteethatinterference will not occur in
televisionreception,whichcanbedeterminedbyturningtheequipmentoffandon.Theuseris
encouragedtotryandcorrecttheinterferencebyoneormoreofthefollowingmeasures:
·Reorientorrelocatethereceivingantenna.
· Increasetheseparationbetweentheequipmentandthereceiver.
·Connecttheequipmentintoanoutletonacircuitdifferentfromthattowhichthereceiveris
connected.
·Consultthedealeroranexperiencedradio/TVtechnicianforhelp.

CAUTION!
The FederalCommunications Commission warns the user that changesormodificationstothe
unit not expressly approved by the party responsible for compliancecouldvoidtheuser’s
authoritytooperatetheequipment.
NOTE:ThisequipmenthasbeentestedandfoundtocomplywiththelimitsforaClassBdigital
device, pursuant to part 15 of the FCC Rules. These limits are designed to provide reasonable
protection against harm fulinterference in a residential installation. This equipment generates,
usesandcanradiateradiofrequencyenergyand,ifnotinstalledandusedinaccordancewiththe
instructions, may cause harmful interferenceto radio communications. However, there is no
guaranteethatinterferencewillnotoccurinaparticularinstallation.Ifthisequipmentdoescause
harmful interference to radio or television reception, which can bedetermined by turning the
equipmentoffandon,theuserisencouragedtotrytocorrecttheinterferencebyoneormoreof
thefollowingmeasures:
—Reorientorrelocatethereceivingantenna.
—Increasetheseparationbetweentheequipmentandreceiver.
—Connectthe equipmentintoan outletonacircuitdifferentfromthattowhichthereceiveris
connected.
—Consultthedealeroranexperiencedradio/TVtechnicianforhelp.
Doyoustillneedanadviceafterreadingthisguide?
Firstread“FrequentlyAskedQuestions”atwww.evolveo.comorcontacttheEVOLVEOtechnical
support.
ThewarrantyDOESN´TAPPLYto:
usingthedeviceforotherpurposesthanitwasdesignedto
installationofanotherfirmwarethentheonethatwasinstalledastheoriginalfromthefactory
orthatistobedownloadedatftp://ftp.evolveo.com
mechanicaldamageofcausedbyinappropriateusing
damagecausedbythenaturalelementsasfire,water,staticelectricity,overvoltageandsoon
damagecausedbyunauthorizedrepair
damageoftheguaranteesealorunreadableserialnumberofthedevice
Disposal:
Thesymbolofcrossedoutcontainerontheproduct,intheliteratureoronthewrappingmeans
thatintheEuropeanUnionalltheelectricandelectronicproducts,batteriesandaccumulators
mustbeplacedintotheseparatesalvageafterfinishingtheirlifetime.Donotthrowthese
productsintotheunsortedmunicipalwaste

DECLARATIONOFCONFORMITY
Hereby,thecompanyAbacusElectric,s.r.o.declaresthattheEVOLVEODetectiveWN8isin
compliancewiththerequirementsofthestandardsandregulations,relevantforthegiventype
ofdevice.
FindthecompletetextofDeclarationofConformityatftp://ftp.evolveo.com/ce
Dovozce/Dovozca/Importer/Importőr
AbacusElectric,s.r.o.
Planá2,37001,CzechRepublic
Výrobce/Výrobca/Manufacturer/Gyártó
NaxyaLimited
No.5,17/F,Strand50,50BonhamStrand,SheungWan,HongKong
MadeinChina
Copyright©AbacusElectric,s.r.o.
www.evolveo.com
www.facebook.com/EvolveoCZ
Allrightsreserved.
Designandspecificationmaybechangedwithoutpriornotice.
/

