Page is loading ...

0
Large size Fixed Frame Projection Screen
ezFrame Plus Series
User’s Guide
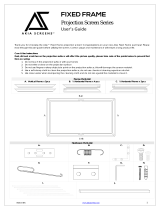
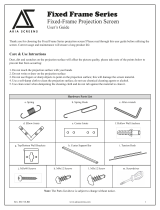
PARTS LIST_
1. Frame Parts x’s 6 pcs (4 top/bottom frame pcs. + 2 side frame pcs)
2. Tension Rods x’s 6 pcs (4 top/bottomrods + 2 side rods)
3. Screen Materialx’s 1 pc
4. Center joints x’s 2 pcs
5. Elbow Jointsx’s4pcs
6. Wall bracketsx’s2-4pcs
7. Screws x’s 16 pcs
8. User Guide x’s pc
9. Center Support Bar x’s 1 – 2 pcs (depending on model/size)
10. Support joinerx’s 2 – 4 pcs (depending on model/size)
11. Fix Plates x’s 30 – 90 pcs (depending on model/size)
Note:&Please&make&sure&all&parts&are&included&in&your&package&before&proceeding&to&assemble&your&
Elite&Screens&fixed&frame&projection&screen.&
ASSEMBLING THE FRAME
1. Insert the center joint connector to the horizontal frame pieceand then fasten it with 2screws.

Rev.040114-JA 1 www.elitescreens.com
2. Insertthe other horizontal frame piece to thecenter joint connectorand then fasten it with 2 screws.
Make sure the frame piece lines up correctly beforeyou tighten the screws completely.
3. Insert both elbowjoint connectors into the long horizontal frame (fig.1).
4.
Push
Push
Short frame
Short frame
Push
Push
Joint
Long frame
( fig.1)
1/2Long frame
Push

Rev.040114-JA 2 www.elitescreens.com
Push
Push
( fig.2)
Insert the exposed ends of the joint connectors
into the short (vertical) frame and align the four
corners so that they meet at perfect right angles
4. Join all four frame parts together following the steps showed below(fig.2).
5. After making sure that all four corners join at right angles to form a perfect rectangle,fasten the four
angles together by using the (x8) joint screws included(fig.3).
Screw
( fig.3)

Rev.040114-JA 3 www.elitescreens.com
Tension Rod (Horizontal) x 4
Tension Rod (Vertical) x 2
Tension Rod (horizontal)
Push
Tension Rod (Vertical)
ATTACHING THE SCREEN MATERIAL TO THE FRAME_
1. Lay out the screen and tension rods on a clean and dry surface. Insert the tension rods through the
sleeves according to their corresponding lengths on each edge of the screen as seen below(fig.4).
2. Place the screen material on the back of the built frame and slip the tension rods into the grooves
running along each side on the back of the frame. Clip the fix plates to the back of the frame to secure
the rods into place creating tension for a tight and flat surface(fig. 5 & fig. 6).
Steel rod
Push
( fig.4)
Steel rod
Screen
Push
Rod
Rod
Push
( fig.5)
Viewing surface
(Front of screen)
Steel rod
fix plate
Tension Rod
(fig. 5)
(fig. 6)

Rev.040114-JA 4 www.elitescreens.com
ATTACHING THE FIX PLATES_
1. Make sure that the material and frame are both lying face down on a clean, dry and non-abrasive surface.
2. Center the material inside the frame.
Please note the material will be noticeably smaller than the frame. Stretching the material is required to create a
sufficient amount of tension for perfect material flatness.
3. Start attaching the fix platesin the center of the long horizontal edge and (1) then alternate with the center short
sides (2) as shown in diagram(fig.7).
Note: Follow these instructions to make sure the material is properly fixed in the center position of the
frame. After attachingthe fix plates in sequence #2 (the center of the short sides), please remove the fix plates in
sequence #1(the center of the long horizontal edge) and reattach them again, and also remove the fix plates on
sequence# (2) and reattach them again.
4. Then continue to follow our recommended order numbers3-8 to properly distribute tension to the screen
material.
CENTER SUPPORT BAR
1. Insert the support joiner into each side of the center support bar to complete assembly.
support joiner
Center support bar
2. Insert the Center Support Barinto the upper top groove on the back of the frame (not where the fix plate
inserts are) with the bottom end near the approximate center point of the frameand place it in at an angle so that
both ends of the bar are in alignment with the groove(Fig. 8).
3. Slide the top end of the bar into the top center point
location to complete center support bar installation.This will
provide added stability to your frame and added tension
to the material.
支
撑
Center Support Bar
(fig. 7)
(fig. 8)
Screen material edge
Center&Support&Bar&
Fixed plate groove
(do not insert here)

Rev.040114-JA 5 www.elitescreens.com
INSTALLATION INSTRUCTIONS
1. Locate your desired installation location with a stud finder (recommended) and mark the drill-hole area of
where the screen is to be installed.
2. Drill a hole with the proper bit size according to the wood screws included.
3. Line up the wall brackets with the drilled holes on the installation location and screw them in using a
Philips screwdriver.
4. Position the fixed frame screen onto the top wall brackets as shown below and push down at the center of
the bottom frame to secure the installation.
5. The wall brackets allow flexibility by allowing the fixed frame screen to slide to the sides. This is an
important feature as it allows your screen to be properly centered.
6. Using&both&hands& finish& the& installatio n & b y& pushing& the&lowe r& p ortio n& of&the& fixe d & fra m e& screen& int o& the&
lower&br ac ke t. &
CAUTION_
Please follow these instructions carefully to ensure proper maintenance and safetywith your Peregrine
Screen
1. When hanging the screen, please make sure that no other objects such as power switches, outlets, furniture,
ladders, windows, etc. occupy the space designated for your Fixed-Frame screen.
2. Regardless if the screen is hung on or installed into the wall, make sure that the proper mounting anchors are
used and that the weight is supported appropriately by a strong and structurally sound surface just as any large
and heavy picture frame should.
3. Frame parts are made of high quality velour-surfaced aluminum and should be handled with care.
4. When not in use cover the screen with a furniture sheet to protect it from dirt, grime, paint or any other
impurities.
5. When cleaning, use a damp soft cloth with warm water to remove any marks on the frame or screen surface.
6. Never attempt to use any solutions, chemicals, or abrasive cleaners on the screen surface.
7. In order to avoid damaging the screen, do not touch it directly with your fingers, tools or any other sharp or
abrasive objects.
8. Spare parts should be placed out of reach of small children in accordance with household safety guidelines.
For a local Elite Screens contact or Technical Support, please visit
www.elitescreens.com
/

