Page is loading ...

1. ANCHOR INSTALLATION (FIG. 1)
Drive the anchor into the ground stopping when the top of hole in anchor
reaches ground level.
1. LA INSTALACIÓN DE ANCLA
(FIG. 1)
Martillar la ancla en el suelo parando cuando la cima de hoyo de ancla
suelo nivel.
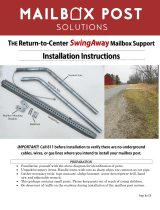
INSTALLATION INSTRUCTIONS
FOR MODELS: DPK, CCK
STREET
TOOLS REQUIRED:
HERRAMIENTAS REQUIRIERON:
WARNING: Check for underground pipes or cables
before installing anchor.
LA ADVERTENCIA: El cheque para cables o tubos
subterráneos antes de instalar la ancla.
GROUND LEVEL
GROUND LEVEL
FIG. 2
FIG. 1
Use 4 lb. or heavier sledge hammer when installing anchor.
Usar una cuatro libra o el martillo más pesado cuando instalando la ancla.
GROUND LEVEL
GROUND LEVEL
STREET
2. POST INSTALLATION (FIG. 2)
NOTE: Make sure one side of post is parallel to street. Position the post on
the anchor. Using a sledge hammer, gently drive the post to ground level
straightening the post as you hammer.
2. LA INSTALACIÓN DE POSTE
(FIG. 2)
LA NOTA: Asegurar un lado de poste es paralelo a la calle.
Ubicar el poste sobre la ancla. Usar una cuatro libra o el martillo más pesado,
suavemente martilla el poste para suelo nivel enderezando el poste
como martilla.
NOTE: Make sure
one side of post
is parallel to street.
LA NOTA: Asegurar
un lado de poste
es paralelo a
la calle.

APPROVED BY THE
POSTMASTER GENERAL
U. S.
MAIL
4. MOUNTING BOARD ASSEMBLY (FIG. 4)
Position the mounting board 2 1/2” from the front of the cross arm and center
left and right. Secure the mounting board using 4 (#6 x 1 5/8”) deck screws.
4. LA ASAMBLEA DE PLACA
(FIG. 4)
Ubicar la placa 2 1/ 2” desde la frente del brazo de cruz y centro izquierda y
derecho. Asegurar la placa que usa 4 (#6 x 1 5/8”) cubierta atornilla.
FIG. 5
FIG. 3
5. MAILBOX INSTALLATION
(FIG. 5)
NOTE: On Model #CCK, remove alignment nails before installing mailbox.
Place the mailbox over the mounting board and secure with 4 (#6 x 1 5/8”)
deck screws.
5. LA INSTALACIÓN DE BUZÓN
(FIG. 5)
LA NOTA: Sobre el Modelo# CCK, quitar clavos de alineación antes de
instalar buzón. Poner el buzón sobre la placa y adjuntar con
4 (#6 x 1 5/8”) cubierta atornilla.
FIG. 4
DPKCCK55-05
MADE IN
U.S.A.
TAYLORSVILLE, MS 39168
3. POST ASSEMBLY (FIG. 3)
Secure the cross arm to the post using the 2 (#8 x 2 1/2”) deck screws.
3. LA ASAMBLEA DE POSTE
(FIG. 3)
Adjuntar el brazo de cruz al poste que usa el 2 (#8 x 2 1/2”) cubierta atornilla.
/


