Page is loading ...

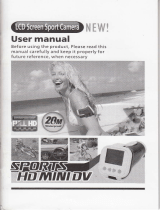
User manual
Before
using the
product,
Please read
this
manual carefully and keep it
properly
for
future reference, when necessary
:::
::r
,l:
.
.i

User manual
PrefaGe
Thank
you
for
purchasing
the
Bullet
Camera, 720p
HD
Digital
waterproof
video
camera.
This
product
is
quite
small and
delicate
with
wonderfulwaterproof
humanity
design.
With
a multipurpose
damp, it can
help
you
achieve
omni-directional
video
/
monitoring
under
all kinds of
outdoor conditions.
This manual
contains
important
safety and
operating
information.
Please read
all the information
carefully
before
you
use the
device
to
avoid accidents
and keep
it for future
reference.
Product
Features
>
Waterproof
up
to 30N4,
portable
used
>
1/
2.5 5.0Me9a
pixel
CMOS
Lens
>
HD 720P(1280*720@3ofps)
HD
resolution
for video,
AVt
format
>
HD resolution
for
photo;4032*3024
JPEG format
>
137' wide
angle, HD
Camera Lens,
low illumination
>
Easy
operation
with vibration
effect
>
Built-in high
capacity Li-battery
for 3.5h
continual video
recording
>
Support
Micro SD
card up to 32GB
>
720P
memory consumption:4GB
micro SD Card
lasting
video
recording for
35-45min
>
Photograph
memory consumption:4cB
micro SD
Card
lasting
picture-taking
about 22O0pcs
>
USB2.0 High
Speed
device
>
USB charging
-1-

Product Structure
(With
picture)
1. Power
buttor/ execute button
2. Mode Switch 3. DV
indicator
light(Red,
Blue, Purple) 4.
Charge indicator light(Yellow)
5. Reset
hole 6. MicroSD Card
slot 7. USB interface
8.
Lens
9. Base 10.
Back cover
Standard Accessories;
User Manual. UsB Cable, Mounting bracket, Adaptor Bag
Mounting
brackel
Option
Accessories
ln
view of differernt
usaqe
purpose.
such as motorbike.
airplanes,golf carts, vehicle. bicycles
and many
others round and
square
rail
applications,we
also offer the optional accessories to
user to meet their different demand.
>01 Mount bracket
>O2
Suction cup
mount
>03
Base bracket
>04
Adhesive base
(with
1
pc
3M
sticker)
>05
Upright
bracket
>06
90' bracket
>O7
Hexagonal
plastic
nut
>08
Anise
plastic
nut
>09
Silicon
strap 1 5cm
>10
Silicon strap
35cm
>1
1 Silicon strap
70cm
-3-
'lO.
Back cover
L
lnstallation
(With
picture)
This
product
could be hand-held
usage directly or
you
could
install
in the back-clip
or bracket, as below
pictures
show;
1
-
Remove
the back cover
2- lnstall the bracket
1. Power button/execute
button
I
4, Chargeindicator-\
| 71,
DVindiGtorlight.
light(Yellow)
..*Y*r
(Red,
Blue,
purpte)
-_
2, Mode
Switch
7, USB interface
5. Reset hole
6. MicroSD Card slot
otr
Rmove the back cover
ffi*q
{r,a_
Adapto(EurdUVUl(
AUsT standared charger)
-*
;)r
USB Cable
Baq
Install
the bracket
User N4anual

Option
1
Option
2
MicrosD
Card
&i
l\4ulti-Iunctional
sport
bracket
su;ker
&
-a-
Function Specification
1. Starting
up
1
)
Firstly,
please
insert Micro SD
card before use the unit, and
then
press power
button for 2 seconds,
purple
LED will be on,
the
system would enter
into initialization.
After the
initialization
finishes, the
product
vibrates once. system will
enter into
corresponding mode
according to the location of
the mode switch.
Blue indicator
is for video recording standby
mode and red indicator
for
photo
taking standby mode.
2)
Due to the difference
capacity and data
storage of the Micro
SD card,
unit initialization
will take a few seconds,
please
wait
for vibration
before operating
functions.
3) Forthe
productvideo
resolution
is HD 7208 it would be better
to
use the Class 6
MicroSD card to
qet
a better video
quality.
Notes:
ff the MicrosD
card is rct
in*rted, the
blue indiGtor would flash
quickly
when tums
on tlrc unit.
You should turn
off the unit and
insert
the MicroSD
card
2, Mode transfer
'1)
When it turns on.
press
the
mode switch to
transferto
different
mode status.
2) When the
switch button
in the
position
of the video mode,
blue indicator
lights on and
enters
into video mode; When the
switch
button in
the
position
of
photo
taking
mode, red
indicator
lights on
and enters into
photo
taking
mode.

3) When the unit is in the video or
photo
taking mode. switch to
different mode, the system would automatically save the files
for the current
progress,
and then
go
to the next mode.
Not6:
The
omera
wifi
vibrrt" o*e,;tdiilUn
irifia:Ao*:rii;itiituuy. :
3. Video Recording
ln the
video recording mode, shortly
press
the
execute button,
the unit will vibrate once. the blue indicator
flashes
slowly apd
then the unit begins to record video. Shortly
press
the button
again, the camera will vibrate once and blue indicator will be
constantly on, unit stops
recording.
Notes:
1) The unit would iltomaikally saw a
file
each
20 minutes
reording, and then
go
for
the
nert vid@ r(ording.
2) Please open
the waterproof
bick cow of the unit
for
better
sound effect
wlren not use it undeMater
3) When the
MicroSD
card
is full, battery uted up or no operation
for 3 minutes, the unit will shut down
etomatically.
4. Photo taking
ln the
photo
taking standby mode. short
press
the execute
button. then
please
keep the camera still until
it vibrates,
a
photo
has been taken after vibration stop.
Notes:
1) The red indicatorwill
go
out wtm it
is
taking
photo, pleas
kep it stillfor better
picture
quality!
,a_
Whdnlhii:Mi*clgidaii.t:iiitull;bafi
eryrtseqtqp:pli!!ai{!t,
tr,., l
rnodqlqqr:i,t!ryr$iilriidli,tirjtdt,rn:6utiolnlia!&.ellii:.:'ri.,.
',,.,,
Turn off & automatic turn off
ln
the standby
mode, long
press
execute button, the blue
indicator light flashes 3 times
and
goes
out. The camera
vibrates twice, and then the camera turns off.
When the
MicrosD card is full, battery used up or standby
mode for 3 minutes,
it will shut down automatically.
MicrosD card
memory warning & shut down automatically
When MicroSD card
was full during video recording or
photo
taking, system will sound a warning.
The
purple
LED indicator
flashes
quickly
with continuous fast rhythm vibration, and unit
will shut down
automatically after a few seconds.
Low
power
warning & automatic
shut down
Durinq the system starting,
if the battery is,used up, system
will sound
a warning. The blue
and red LED indicator will flash
slowly alternate
with continuous slow
rhythm vibration,
and
the unit would shut
down automatically after a few seconds.
Downloading
files
&
removable disk function
connect the camera with
PC UsB interface via the USB cable.
Press
power
button to turn on
the unit, and a removable disk
will appear
in
"my
computer",
you
can view the
pictures
or
videos, audio record
files in the removable disk
"DclM/1
ooDsClM", and
you
can also copy these files to
your
computer
2)
l
J
18.
[,
iJ
5.
-7-

> When connected
to computer with UsB1.1
port, please
copy
the
videos to
your
computer desktop, and
then replay it to
avoid
ragged
playback.
9. Charging
&
indicating
>
Plug
the AC adaptor
into socket,
and then connect
with the
camera
for battery
charging. The
yellow
indicator
will be
constantly on
during charging.
lndicator
goes
out after the
battery
is fully charged.
The charging
time is about
3 hours.
>
Connect
the camera to
Pc with the UsB
cable. the
yellow
LED
indicator will
constantly on during
charging,
and it would
go
out after the
battery full
charged.
10. Shooting
when charging
You can
press
power
button
to turn on
unit during
charging
and
also can operate
its functions
at the
mean time.
11. System
time setting
lf the time stamp
is wrong,
please
setting as
below:
1.
Connect with
computer by USB
cable;
2. open
removable
disk
3.
Create a new
"time.txt"
{ile.
-8-
4. Open"time.txt"
file and input relevant
words
of time&date
setting up. as followirig
mi.sffimffiloff
Please set time and date
as
per
the following
format:
Video with time watermark 2010.08.08 20:00:00 Y
Video without
time watermark
2010.08.08 20:00:00 N
Keep a space between
date and time,
and another space between
time and water mark switch.
The time character
strings in the
above-mentioned
format is
the
time value
you
want to set up and
pay
attention to type a
spacebar between date
and time, another
spacebar between time
and watermark
switch. Y and
N at the end serye as the
control
character on
the video file for adding
the time&date
watermark, Y
indicates Yes-Add
watermark and
N indicates No-Hide watermark.
5. Save
"time.txt"
file and safely
exit the
removable disk.
6. Then turns on
the
power.
the
system time will be
updated.
Notes:
tf ttEaGt.nai;,likift,riirused torrixtmded.
perigd.s,
th6, bqttery,t!!qy
conlpletllrilrdiriitWheairhii&apFlflt.the
systeii
tiiiie will.b6,
:
restored btrk to
the
fadory defauhs.
12. Reset the system
lf camera can't
work well because
of any reason, such as
EsD
etc,
please
use a
pin
to
press
the
reset hole. This will shut the
camera down
so that a fresh
start can be
made.
-9-

13. Product
protection
Please dry the water and
pla€e
in the shade after using,
change the waterproof ring if it is
aging.
Sp<ification
lmaqe
Sen5or
iMeqa CMOS SENSOR
Photo format
tPG 12M 4032*3024
Video format
AVt HD 1280*720
Frame rate
lofps
Lens Specification
F/l.8 f=3.2mm
137'wide-anole
White balance
quto
Sensitivity
Auto lSO100-400
Subiect distance
iocm
above
Operatinq
hints
Vibrate
Battery
capacity
3.7Vl 1 I 50MA
Power
consumption
<1W
batteru continue workino time
About 3.5 hours
Charoino
soecification )C5V 500mA
Charqinq
period
About 3.5 hours
USB
port
USB2.0 Hiqh Speed
Tvpe of memory card
Micro SD card fi-FLASH)
CaDa€itv of memory card
r CA-1'CR
Waterproof Grade
Operating system
,i/indows2000/xPN lSTA/WN
//macl u.4 0r above
13Zq
Dimension(mm)
100(L)
ao(H)
36(w)
(mm)
/