Page is loading ...

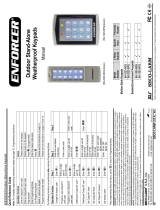
Standalone Digital Keypads
DG-130L
I. Features
◆ 50 Users, 4 digit PIN codes.
◆ 3 LED indicators and built-in buzzer for status programming feedback.
◆ Audible code entry verification.
◆ Maximum 29 digit PIN code length to avoid spying.
◆ Adjustable timer output, 1-99 seconds or latching.
Copyright All Rights Reserved.
P-MU-DG-130LSeries Published on 2019.08.01 1
(87.3mm)
(87.3mm)
(45.2mm)
(60mm)
2-3/8”
1-3/4”
3-7/16”
3-7/16”
Operation Manual

1/8”(8.5mm)
II. Specifications
Operating Voltage
DC 12~24V
Current Draw
Keypad
LED Status Indication
Input
Output
Relay Strike Time
Relay Electric Current
Memory Volume
EPROM
Casing Material
Ambient Humidity
Operating Temperature
Holding:15mA ,Pull in: 60 mA @12VDC
4X3 matrix backlit keypad, 12 buttons (0~9,*,#)
3 LED indicator display (Red/Yellow/Green)
1 contact for Request-To-Exit button(N.O.)
1 relay(Dry contacts: N.O./N.C./Com.)
01~99 seconds or Toggle Mode (00)
0.4A @ 120VAC or 2A@30 VDC
50 User codes (*01~*50)
Non-volatile memory protects programmed information in case of
power loss.
0%~95% (Non-condensing)
-20°C~+70°C
III. Status Indication
Red On
Green On
Yellow On
1 Beep
2 Beeps
3 Beeps
5 Beeps
Copyright All Rights Reserved.
P-MU-DG-130LSeries Published on 2019.08.01 2
Power on, Standby
Relay activated
Enter setting mode
Valid key press
Enter, exit setting mode
Incorrect operation
Delete all user codes
7 Beeps
Reset Master code to 1234
IV. Installation Diagram
LED
Beep
Position the template onto the wall and then
drill cable access and mounting holes.
DG-110L: Stainless steel plate, ABS back box; DG-120L/130L: ABS
2 9/16”(65mm)
2 3/8”(60mm)
2 1/8”(53.5mm)
3/8”(10mm)
3/16”
(4mm)
1/8”(8.5mm)
1/8”(8.5mm)
1/8”(8.5mm)

Copyright All Rights Reserved.
P-MU-DG-130LSeries Published on 2019.08.01 3

Copyright All Rights Reserved.
P-MU-DG-130LSeries Published on 2019.08.01 4
V. Wiring Diagram
Note:
◆ The door strike or relay must have a varistor or a diode across the door strike terminals to suppress the back
EMF of the strike – failure to do so will damage the relay contacts and electronic components, or even burns
the controller.
VI. Operation Instructions
◆ Enter the Setting Mode
Enter the master code twice (Default value “1234”) to enter setting mode (2 beeps).
Note:
◆ Exit the Setting Mode
Press “#” to exit setting mode. The keypad will sound 2 short beeps.
◆ Add a New User Code (In Setting Mode)
1. Enter the master code twice (2 beeps).
2. Press*01(slot position*01~*50).
3. Enter 4-digit user code (1 beep).
4. Repeat, or press “#” to exit setting mode.
1. After 15 seconds if no data is entered, the keypad will automatically exit setting mode.
2. The keypad will be locked out for 60 seconds upon wrong 29 digit master code entries
Note: “0000”, “1234” and master code cannot be used as user codes.
Exit Button
Electric Lock
(Fail-Safe)
NO.
NC.
NC.
NO.

Copyright All Rights Reserved.
P-MU-DG-130LSeries Published on 2019.08.01 5
◆ Set the Relay Strike Time ( In Setting Mode)
1. Enter the master code twice (2 beeps).
2. Press*60.
3. Press 05(01~99, 1 beep).
Press 05 will set the relay strike time to 5 seconds.
4. Press “#” to exit setting mode.
◆ Delete a User Code (In Setting Mode)
1. Press *06 (the slot position to be deleted).
2. Enter the master code twice (2 beeps).
3. Press *06 (slot position *01 ~*50)
4. Press 0000 (1 beep).
5. Press “#” to exit setting mode.
◆ Change the Master Code (In Setting Mode)
1. Enter the master code twice (2 beeps).
2. Press*00.
3. Enter new 4-digit master code (1 beep).
4. Press “#” to exit setting mode.
◆ Reset the Keypad
1. Reset the Master Code
Insert the jumper at RESET location 2 -3 (see wiring diagram). After the keypad sounds 7
beeps, the master code will be reset to 1234.
Warranty
The product is warranted against defects in material and workmanship while used in normal service for a period
of 1 year from the date of sale to the original customer. GEM policy is one of continual development and
improvement; therefore GEM reserves the right to change specifications without notice.
In Toggle mode, the relay will switch from NC to NO upon entering the user code once.
Enter the user code again and the relay will switch back.
2. Delete All User Codes
Insert the jumper at RESET location 2 – 3 (see wiring diagram). After the keypad sounds 7
beeps, the master code will be reset to 1234, and then after 5 beeps, the keypad will start
deleting user codes with beep sounds. The beep sounds will stop until all the user codes
are deleted.

Copyright All Rights Reserved.
P-MU-DG-130LSeries Published on 2019.08.01 6
Appendix
Slot
User Note
01
02
03
04
05
06
07
08
09
10
11
12
13
14
15
16
17
18
19
20
21
22
23
24
25
26
27
28
29
30
31
32
33
34
35
36
37
38
39
40
41
42
43
44
45
46
47
48
49
50
Number
Slot
User Note
Number
/