Page is loading ...

The harvesting specialists.
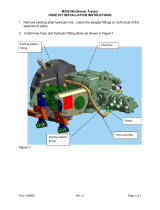
M205
Self-Propelled Windrower
Oil Cooler Bypass Kit (MD #183519) Installation Instructions
147611 Revision B
Original Instruction

Published: Ju
ly 2016

Introduction
The Oil Cooler Bypass kit (MD #183519) is used to replace the cooler bypass manifold and the hardware on the
wheel motor servo on an M205 Self-Propelled Windrower. This document explains how to install the kit.
Refer to the parts list to ensure you have all requ ire d items before installing this kit.
Installation Time
Installation time for this kit is approximately six hours.
Conventions
The following convention s a re followed in this document:
• Right-hand(RH)andleft-hand(LH) aredeterminedfromtheoperator’sposition, facingforwardwiththe windrower
in cab-forward position.
• Unless otherwise noted, use the standard torque values provided in the windrower operator’s manual and
technical manual.
NOTE:
Keep your MacDon publications up-to-date. The most current version of this instruction can be downloaded from
our Dealer-only site (https://portal.macdon.com) (login required).
NOTE:
This document is not currently available in any language except English.
147611
i
Revision B

List of Revisions
At MacDon, we’
re continuously making improvements, and occasionally these improvements affect product
documentatio
n. The following list provides an account of major changes from the previous version of this document.
Summary of Ch
ange
Location
Added hose routing information. 3.1.3 Re pla cing Cooler Bypass Manifold, page 12
Added topic
.
3.1.5 Testing Cooler Bypass Pressure, page 14
147611
ii
Revision B

TABLE OF CONTENT
S
Introduction...................................................................................................................................... i
List of Revisions ............................................................................................................................... ii
1 Safety.................................................................................................................................................... 1
1.1 Signal Words................................................................................................................................... 1
1.2 General Safety ................................................................................................................................ 2
2 Parts List............................................................................................................................................... 5
3 Installation Instructions ........................................................................................................................ 9
3.1 Cooler Bypass Manifold ................................................................................................................... 9
3.1.1 Preparing Kit Components for Installation.................................................................................. 9
3.1.2 Changing the Hydraulic Oil ....................................................................................................... 9
Removing Lift Filter......................................................................................................... 10
Installing Lift F ilter............................................................................................................11
3.1.3 Replacing Cooler Bypass Manifold.......................................................................................... 12
3.1.4 Refilling Hydraulic Reservoir ................................................................................................... 13
3.1.5 Testing Cooler Bypass Pressure .............................................................................................. 14
3.2 Wheel Drive Motor Servo Hardware (2014 and Prior Only)............................................................... 15
3.2.1 Removing Drive Wheels ......................................................................................................... 15
3.2.2 Replacing Servo Hardware .....................................................................................................16
3.2.3 Reinstalling Drive Wheels....................................................................................................... 20
147611
ii
i
Revision B


1Safety
1.1 Signal Words
Three signal words, DANGER, WARNING, and CA UTION, are used to alert you to hazardous situations. The
appropriate signal word for each situation has been selected using the following guidelines:
DANGER
Indicates an imminently hazardous situation that, if not avoided, will result in death or serious injury.
WARNING
Indicatesapo
tentially hazardous situation that, if not avoided, could result in death or serious injury. It
mayalsobeuse
d to alert against unsafe practices.
CAUTION
Indicates a potentially hazardous situation that, if not avoided, may result in minor or moderate injury. It
may be used to alert against unsafe practices.
147611
1
Revision B

SAFETY
1.2 General Safety
CAUTION
The following are general farm safety precautions
that should be part of your operating procedure for
all types of machinery.
Protect yourself.
• When assembling, operating, and servicing machinery,
wear all the protective clothing and personal safety
devices that could be necessary for the job at hand. Do
NOT take chances. You may need the following:
• Hard hat
• Protective footwear with slip resistant soles
• Protective glasses or goggles
• Heavy gloves
• Wet weather gear
• Respirator or filter mask
Figure 1.1
: S afety Equipment
• Be aware that exposure to loud noises can cause
hearing impairment or loss. Wear suitable hearing
protection devices such as ear muffs or ear plugs to
help protect against objectionable or loud noises.
Figure 1.2: Safety Equipment
•Provideafirst aid kit for use in case of emergencies.
•Keepafire extinguisher on the machine. Be sure the
fire extingu ish er is prop e rly maintained. Be familiar with
its proper use.
• Keep young children away from the machinery at
all times.
• Be aware that accidents often happen when the
Operator is tired or in a hurry. Take the time to
consider the safest way. Never ignore the warning
signs of fatigue.
Figure 1.3: Safety Equipment
147611
2
Revision B

SAFETY
•Wearclose-fitting clothing and cover long hair. Never
wear dangling items such as scarves or bracelets.
• Keep all shields in place. NEV ER alter or remove saf ety
equipment. Make sure driveline guards can rotate
independently of the shaft and can telescope freely.
• Use only service and repair parts made or approved by
the equipment manufacturer. Substituted parts may not
meet strength, design, or safety requirements.
Figure 1.4: Safety around Equipment
• Keep hands, feet, clothing, and hair away from m oving
parts. NEVER attempt to clear obstructions or objects
from a machine while the eng ine is running.
•DoNOT modify the machine. Non-authorized
modifications may im pa ir machine function and/or
safety. It may also shorten the machine’s life.
• To avoid bodily injury or death from unexpected startup
of machine, ALWAYS stop the engine and remove
the key from ignition before leaving operator’s seat for
any re ason.
Figure 1.5: Safety around Equipment
• Keep the service area clean and dry. Wet or oily floors
areslippery. Wetspots can be dangerouswhen working
with electrical equipment. Be sure all electrical outlets
and tools are properly grounded.
• Keep work area well lit.
• Keep machinery clean. Straw and chaff on a hot
engine is a fire hazard. Do NOT allow oil or grease to
accumulate on service platforms, ladders, or controls.
Clean machines before storage.
• NEVER use gasoline, naphtha, or any volatile material
for cleaning purposes. These materials may be toxic
and/or flammable.
• When storing machinery, cover sharp or extending
components to prevent injury from accidental contact.
Figure 1.6: Safety around Equipment
147611 3 Revision B


2PartsList
The following parts are included in this kit.
147611 5 Revision B


3 Installation Instructions
To install the Oil Cooler Bypass kit (MD #183519), follow these procedures in order.
IMPORTANT:
DO NOT attemp
t to install the Oil Cooler Bypas s kit in the field. Install the kit in a clean environment; the hydraulic
hose and fitti
ngs must be kept clean during installation to avoid hydraulic system damage.
IMPORTANT:
Protect the ends of hoses, fittings, and ports from contamination with clean, lint-free towels or clean plastic bags.
3.1 Cooler Bypass Manifold
3.1.1 Preparing Kit Components for Installation
To prepar
e the cooler bypass manifold components for installation, follow these steps:
1. As shown i
n the illustration at righ t, attach the two tes t
port fitti
ngs (MD #134437) (A) to ports CRG and CPG
on the new
cooler bypass manifold (MD #183494) (B).
All part
s are provided in the kit.
2. Attach t
he adapter fitting (MD #21031) (C) provided in
the kit t
o port DR on the manifold.
Figur
e 3.1: New Cooler Bypass Manifold with
Fitti
ngs
3.1.
2 Changing the Hydraulic Oil
DANGER
Toavoid bodily injuryor deathfrom unexpectedstartupof themachine, alwaysstop theengine and remove
the key from the ignition before leaving the operator’s seat for any reason.
To drain hydraulic oil, follow these steps:
147611 9 Revision B

INSTALLATION INSTRUCTIONS
1. Park the windrower on level ground, and lower the
header and reel so that the lift cylinders are fully
retracte d.
2. Stop the engine and remove the key.
3. Open the hood.
For instructions, refer to the windrower operator’s
manual or technical manual.
4. Place a clean container (at least 75 liters [20 US
gallons]) under drain at the bottom o f the hydra ulic
reservoir t o collect the oil.
5. Remove drain plu g (A) and allow oil to drain.
6. Chang e the lift filter. Refer toRemoving Lift Filter, page
10.
7. Inspect particles and clean off any metal debris that
may have a ccumulated on magnetic plug. Wipe plug
with a clean cloth. Check O-ring condition. Look for
cracking, breakage, or deformation that may impede
sealing ability and re pla c e as required.
8. Install drain plug (A), torque to 80 N·m (59 ft·lbf).
Figure 3.2: Hydraulic Oil Drain Plug
Removing Lift Filter
Chang
e the lift filter at the same time that the hydraulic oil is changed (1500 hours or every two years).
1. Stop e
ngine and remove key.
2. Open t
he hood.
3. Loca
te the lift filter (A) below the hydraulic oil reservoir.
4. Plac
e a container underneath the filter to catch any oil
that
may leak.
NOTE:
If replacing the filter between oil changes, apply
a vacuum to the supply tank to prevent the oil
from running out of the filter head when the filte r
is remove d.
5. Clean around head of the filter to prevent
contamination.
6. Unscrew the filter (A) with a filter wrench.
Figure 3.3: Hydraulic System
147611 10 Revis ion B

INSTALLATION INSTRUCTIONS
7. Remove gasket (C) from groove (B) in filter hea d (A).
Figure 3.4: Lift Filter
Installing Lift Filter
1. Clean the
gasket groove (B) in the filter head (A).
2. Apply a th
in film of clean oil to the filter gasket (C ).
3. Install n
ew gasket into the gro ov e (B) in the filter
head (A).
4. Screw the
new filter (D) onto the filter head until the
gasket co
ntacts th e filter.
Figure 3.5: Lift Filter
5. Tighte
n filter an additional 3/4 turn by hand.
IMPORTANT:
Do NOT use a filter wren ch to install oil filter.
Overtightening can damage gasket and fi lter.
Figure 3.6 : Lift Filter Installed on Hydraulic
Reservoir
147611
11
Revision B

INSTALLATION INSTRUCTIONS
3.1.3 Replaci
ng Cooler Bypass Manifold
To replace the cooler bypass manifold, follow these steps:
1. Remove plug and install new elbow fitting(MD#30970)
(A) in bo ttom of traction drive pump (B).
2. Attach hose (MD #18349 3 ) (C), provided in kit, to the
open end of elbow fitting (A).
Figure 3.7: Hose Connection at Traction Drive
Pump (View from Beneath Windrower)
3. On the left side of the windrower, in sid e the frame,
attachacabletie(notprovidedinkit)tohose(A)or
mark the hose to ensure that you remember where to
reattach it later.
4. Disconn ect the hos es (A) and (D) attache d to the
existing cooler bypass manifold (B).
5. Disconn ect the existing coole r bypass m anifold (B)
from the filter (C) next to it.
6. One at a time, transfer fittin gs from the old manifold (B )
to the new manifold (MD #183494) provided in the kit.
Fittings should be positioned as shown in Figure 3.9:
Hydraulic Ports on New Cooler Bypass Manifold, page
12. Discard the old manifo ld.
7. Install the new manifold in place of the old. Port F on
the new manifold connects to the filter head.
Figure 3.8: Inside LH Frame (View from Below)
8. Connec t the five hoses disconnected in Step 4., page
12 to the new manifold as follows:
• Port CR – the 3/4 in. I.D. cooler return hose
• PortCP– the3/4in.I.D.hosewithfromt he oilcooler
marked in Step 3., page 12
• Port A – the 1/2 in. I.D. hose from the triple
gear pump
• Port B – the 1/2 in. I.D. hose from the triple
gear pump
• Port P2 – the 1/4 in. I.D. hose from the lift manifold
9. Attach the new h ose from Step 2., page 12 to the
adapter fitting in Port DR of the new manifold.
Figure 3
.9: Hydraulic Ports on New Co ol er
Bypass M
anifold
147611
12
Revision B

INSTALLATION INSTRUCTIONS
10. Rotate hose(B), leaving1–2 mm ofclearancebetween
thehoseandthefilter (A). There should also be
1–2 mm of cle arance between hose (C) and hose (B).
Figure 3.10: Cooler Bypass Manifold Hoses
3.1.4 Refilling Hydraulic Reservoir
To refill th
e hydraulic reservoir, follow these steps:
1. Stand on l
eft-hand platform to access the fille r pipe.
2. Turn fille
r cap (A) counterclockwise to remove dipstick.
Figure 3.11: Windrower Hood
3. Add oi
l to maintain a level between the LOW and FULL
marks
, and make sure that no debris falls into the
reser
voir.
• Oil t
ype: SAE 15W-40 compliant with SAE specs
for A
PI Class S J and CH-R engine oil
• Rese
rvoir capacity: 66 liters (17.5 U.S. gallons)
4. Rein
stall filler cap/dipstick, and turn clockwise to
tig
hten/lock.
5. Clo
sethehood. Forinstructions,refertothewindrower
ope
rator’s manual or technical manual.
Figure 3.12: Hydraulic Oil Level
147611 13 Revision B

INSTALLATION INSTRUCTIONS
3.1.5 Testing
Cooler Bypass Pressure
IMPORTANT:
Make sure you check CP and CR pressure after installing the new Oil Bypass Cooler kit, and adjus t as necessary.
1. Tomeasure CR pressure, attacha 7000kPa (1000 psi)
pressure gauge to the test fitting at port CRG (A).
2. To measure CP pressure, do one of the following:
• Attach a 7000 kPa (1000 psi) pressure gauge to the
test fitting at port CPG (B); OR
•Attachaflow meter capable of reading flow as high
as 106 lpm (30 gpm) and a 7000 kPa (1000 psi)
pressure gauge between port CP and cooler. The
test equipment must attach to the #12 JIC fitting at
port CP on the cooler bypass manifold.
3. Start engine and run at high idle (wide open throttle)
until hydraulic oil temperature is between 57–63°C
(135–145°F ). If using a flow meter, the reading should
be between 83–98 lpm (22–26 gpm).
4. Record CP and CR pressures. CP pressure should be
between 3447–4171 kPa (500–605 psi).
5. If CP pressure is not between 3447–4171 kPa
(500–605 psi), adjust pressure by removing cap (C)
and increasing or decreasing cooler bypass setting by
turning adjustment screw.
NOTE:
CR pr
essure is not adjustable.
6. When
CP pressure is in the correct range, subtract the
CR pr
essure reading from t he CP pressure reading.
The d
ifferential pressure sh ou ld range between
552
–1380 kPa (80–200 psi). A differential pressure
low
er than 552 kPa (80 psi) indicates a possible
def
ective hydraulic cooler.
Figure 3
.13: Hydraulic Ports on New Cooler
Bypass M
anifold
147611
14
Revision B
/