Page is loading ...

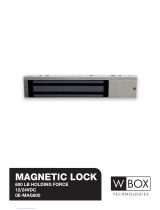
FCCW15S
Electro-Magnetic Lock
Wiring Instructions
Wiring Instruction Sheet No. 960708A
For Wiring Installation Refer to Figure 1.
The FCCW15S Electro-Magnetic Lock requires a filtered and regulated DC Power Source for optimal
performance.
12VDC or 24VDC Power Wiring to the Magnetic Lock PCB
Both FCCW15S is a single Magnetic Lock with 12 or 24 volt settings.
Check the position of the two shunts located on the PCB. A single shunt across pins 2 and 3 will set the
operating voltage to 24 volts. A shunt between pins 1 and 2 and a shunt between pins 3 and 4 sets the
operating voltage to 12 volts.
T
T
h
h
e
e
s
s
e
e
v
v
o
o
l
l
t
t
a
a
g
g
e
e
s
s
h
h
u
u
n
n
t
t
s
s
m
m
u
u
s
s
t
t
b
b
e
e
a
a
d
d
j
j
u
u
s
s
t
t
e
e
d
d
b
b
e
e
f
f
o
o
r
r
e
e
1
1
2
2
V
V
D
D
C
C
o
o
r
r
2
2
4
4
V
V
D
D
C
C
i
i
s
s
a
a
p
p
p
p
l
l
i
i
e
e
d
d
t
t
o
o
t
t
h
h
e
e
E
E
l
l
e
e
c
c
t
t
r
r
o
o
-
-
M
M
a
a
g
g
n
n
e
e
t
t
i
i
c
c
L
L
o
o
c
c
k
k
t
t
o
o
p
p
r
r
e
e
v
v
e
e
n
n
t
t
d
d
a
a
m
m
a
a
g
g
e
e
t
t
o
o
t
t
h
h
e
e
u
u
n
n
i
i
t
t
.
.
The (+) lead of the Power Source is connected to RED lead of the PCB and the (-) lead is connected to
WHITE lead of the PCB. The operating switch or controlling contacts must be installed between the power
source and the Magnetic Lock to reduce operating time of the Magnetic Lock to a minimum.
Power Input Requirements:
12VDC 0.24A
24VDC 0.12A
Installation Tips
D
D
o
o
n
n
o
o
t
t
t
t
i
i
g
g
h
h
t
t
e
e
n
n
t
t
h
h
e
e
a
a
r
r
m
m
a
a
t
t
u
u
r
r
e
e
p
p
l
l
a
a
t
t
e
e
t
t
i
i
g
g
h
h
t
t
a
a
g
g
a
a
i
i
n
n
s
s
t
t
t
t
h
h
e
e
d
d
o
o
o
o
r
r
.
.
The armature plate must be remained movable to allow surface alignment with the magnet face. The
Magnetic Lock will lose holding force without this floating alignment.
D
D
o
o
n
n
o
o
t
t
t
t
r
r
i
i
m
m
t
t
h
h
e
e
r
r
u
u
b
b
b
b
e
e
r
r
w
w
a
a
s
s
h
h
e
e
r
r
m
m
o
o
u
u
n
n
t
t
e
e
d
d
o
o
n
n
t
t
h
h
e
e
h
h
e
e
a
a
d
d
o
o
f
f
t
t
h
h
e
e
a
a
r
r
m
m
a
a
t
t
u
u
r
r
e
e
c
c
e
e
n
n
t
t
e
e
r
r
b
b
o
o
l
l
t
t
Trimming this rubber will adversely effect the operation of Magnetic Lock.

Trouble Shooting
Problem Possible Cause Solution
Door will not lock No DC voltage to lock. Check power supply and wiring to
magnetic lock.
Reduced holding force Bad physical contact between
armature plate and face of magnet.
Ensure mating surfaces are clean and
in proper alignment and the armature
plate floats freely.
Check magnetic lock for low voltage
or wrong voltage setting.
Delay in door release Circuit switch is not between magnetic
lock and power source.
Secondary diode installed across
magnetic lock.
Re-wire circuit switch between
magnetic lock and power source.
Remove this diode. Voltage spike
protection is on the PCB.
Maintenance
Contacting surface of the Electro-Magnet and Armature Plate must be kept free of contaminating materials.
Surfaces should be cleaned periodically with a non-abrasive cleaner. Do not spray the Electro-magnet or
Armature Plate surface with any chemicals such as lacquer, etc. This will cause serious problems with the
release of the magnetic Lock and its Armature Plate resulting in serious safety problems.
FIGURE 1
V1.0 2010
+ 12VDC
+ 24VDC
VOLTAGE SETTING
1
2
3
4
/